> ## Documentation Index
> Fetch the complete documentation index at: https://stytch.com/docs/llms.txt
> Use this file to discover all available pages before exploring further.
# Embeddable magic links
> Embed magic links into your own communication channels.
Be sure to check out the important usage notes [here](/api-reference/consumer/api/magic-links/embeddable/create) before using Embeddable Magic Links.
With our out-of-the-box Email Magic Links product, Stytch is able to fully handle the frustrating and complex pieces of email deliverability, latency, and inbox placement. However, we also offer a flexible way for you to embed magic links into any use case you can imagine. For example, you could send magic links from your own domain, embed them into customized templates, or leverage different communication channels, like SMS, to send them. By using our [Magic Link Create endpoint](/api-reference/consumer/api/magic-links/embeddable/create), you can embed magic links into all of your end-user communications to reduce friction and improve conversion. If needed, you can always add more authentication requirements to a user's session to improve security by using the rest of Stytch's product suite.
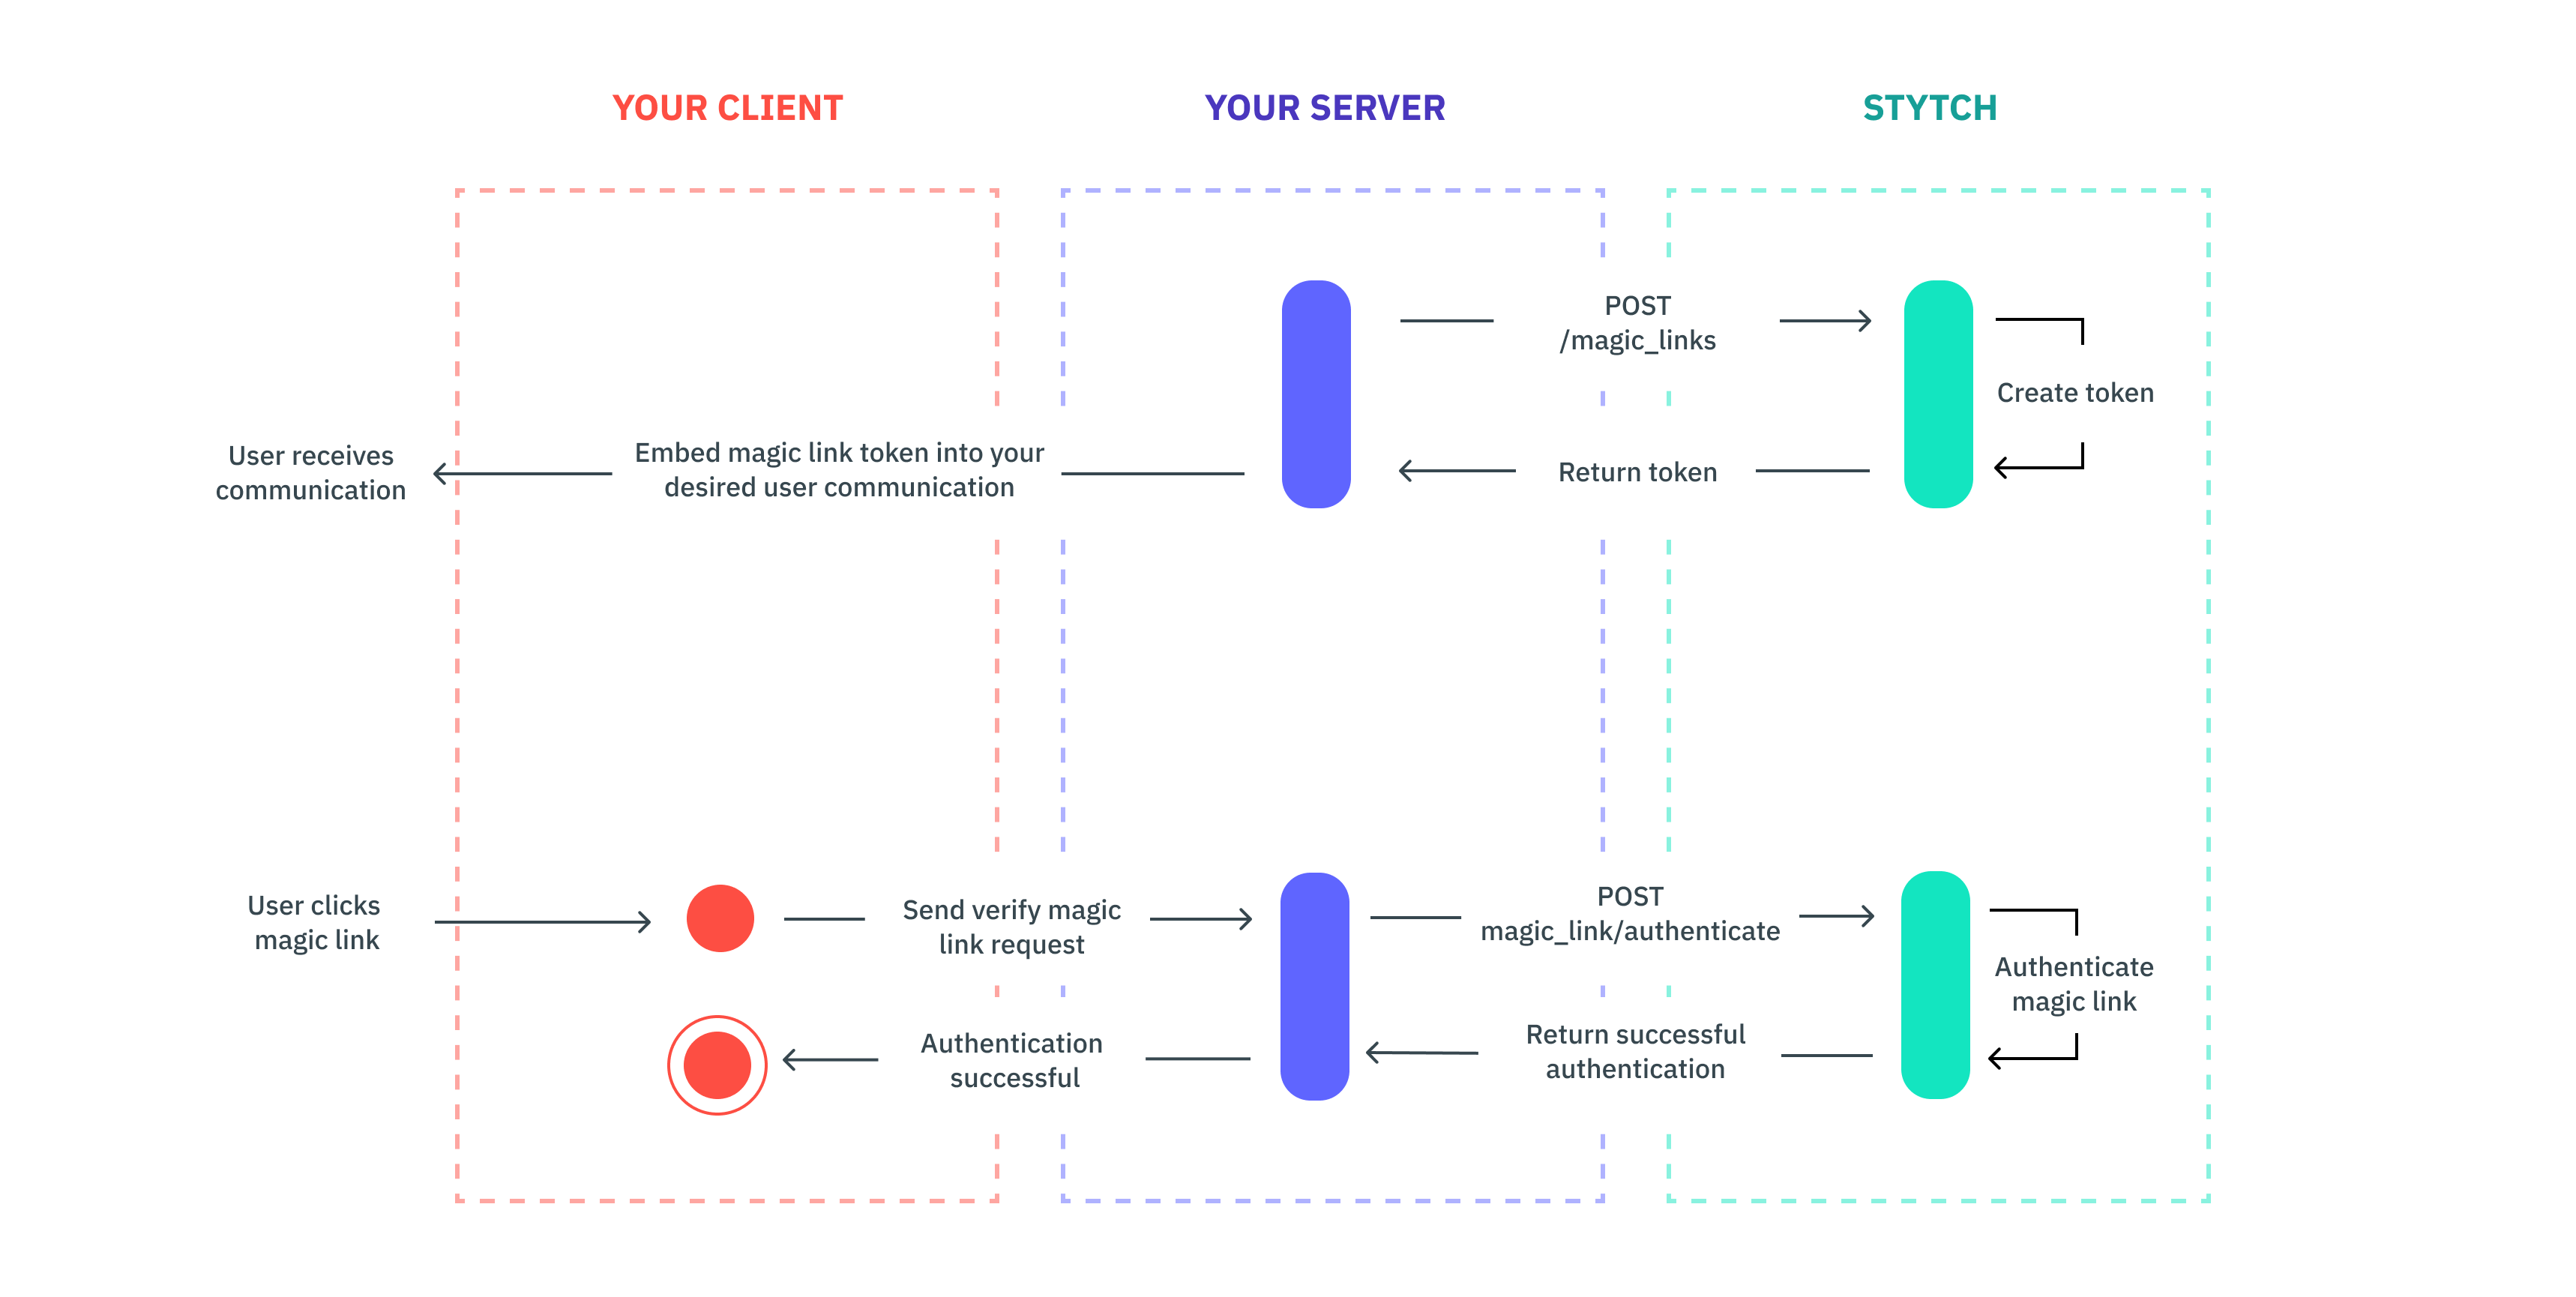 Use the magicLinkCreate endpoint to generate a token for a user to embed in your chosen communication (e.g. a promotional email).
```js theme={null}
const stytch = require("stytch")
const client = new stytch.Client({
project_id: "PROJECT_ID",
secret: "SECRET",
}
);
const params = {
user_id: "user-test-16d9ba61-97a1-4ba4-9720-b03761dc50c6"
};
client.magicLinks.create(params)
.then(resp => {
console.log(resp)
})
.catch(err => {
console.log(err)
});
```
Send your customer communication with the magic link embedded in your main call-to-action button (you'll append the magic link token to the destination URL you're sending the user to).
When the user clicks the link, redirect the user and send a request to Stytch's authenticate endpoint in order to verify the user. You can optionally set a session for the user by using the session\_duration\_minutes in the authenticate call.
```js theme={null}
const stytch = require("stytch")
const client = new stytch.Client({
project_id: "PROJECT_ID",
secret: "SECRET",
}
);
// Replace with token from request
const token = "SeiGwdj5lKkrEVgcEY3QNJXt6srxS3IK2Nwkar6mXD4="
client.magicLinks.authenticate(token)
.then(resp => {
console.log(resp)
})
.catch(err => {
console.log(err)
});
```
After this step, it's up to you on how you want to handle the user interaction. Depending on the use case, you may not need additional authentication. However, if you want to layer on step-up authentication at any point throughout the user's session for additional assurance, you can always layer on more verification methods (e.g. SMS, etc.).
```js theme={null}
const stytch = require("stytch")
const client = new stytch.Client({
project_id: "PROJECT_ID",
secret: "SECRET",
}
);
const params = {
phone_number: "+12025550162"
};
client.otps.sms.send(params)
.then(resp => {
console.log(resp)
})
.catch(err => {
console.log(err)
});
```
Use the magicLinkCreate endpoint to generate a token for a user to embed in your chosen communication (e.g. a promotional email).
```js theme={null}
const stytch = require("stytch")
const client = new stytch.Client({
project_id: "PROJECT_ID",
secret: "SECRET",
}
);
const params = {
user_id: "user-test-16d9ba61-97a1-4ba4-9720-b03761dc50c6"
};
client.magicLinks.create(params)
.then(resp => {
console.log(resp)
})
.catch(err => {
console.log(err)
});
```
Send your customer communication with the magic link embedded in your main call-to-action button (you'll append the magic link token to the destination URL you're sending the user to).
When the user clicks the link, redirect the user and send a request to Stytch's authenticate endpoint in order to verify the user. You can optionally set a session for the user by using the session\_duration\_minutes in the authenticate call.
```js theme={null}
const stytch = require("stytch")
const client = new stytch.Client({
project_id: "PROJECT_ID",
secret: "SECRET",
}
);
// Replace with token from request
const token = "SeiGwdj5lKkrEVgcEY3QNJXt6srxS3IK2Nwkar6mXD4="
client.magicLinks.authenticate(token)
.then(resp => {
console.log(resp)
})
.catch(err => {
console.log(err)
});
```
After this step, it's up to you on how you want to handle the user interaction. Depending on the use case, you may not need additional authentication. However, if you want to layer on step-up authentication at any point throughout the user's session for additional assurance, you can always layer on more verification methods (e.g. SMS, etc.).
```js theme={null}
const stytch = require("stytch")
const client = new stytch.Client({
project_id: "PROJECT_ID",
secret: "SECRET",
}
);
const params = {
phone_number: "+12025550162"
};
client.otps.sms.send(params)
.then(resp => {
console.log(resp)
})
.catch(err => {
console.log(err)
});
```