> ## Documentation Index
> Fetch the complete documentation index at: https://stytch.com/docs/llms.txt
> Use this file to discover all available pages before exploring further.
# Get started with the API
> Start collecting and analyzing fingerprints using the Device Fingerprinting API.
## Overview
This guide shows you how to set up Device Fingerprinting using the API. By the end, you'll have:
* Added Device Fingerprinting to your application.
* Wired up a JS event to call `GetTelemetryID()`.
* Called the `fingerprint.lookup()` [endpoint](/api-reference/fraud/api/fingerprint-lookup).
* Collected fingerprint data to store.
* Analyzed Stytch's verdict and recommended action.
***
## Prerequisites
* An existing Stytch B2B or Consumer project in the [Dashboard](https://www.stytch.com/dashboard).
* The `project_id`, `public_token`, and `secret` for your project's Test environment. These can be found under your project's *Project ID & API keys* section in the [Dashboard](https://www.stytch.com/dashboard).
* Device Fingerprinting [enabled for your project](https://stytch.com/dashboard/dfp-rules).
* If you don't have Device Fingerprinting enabled, you can [request access here](https://offers.stytch.com/dfp-30-day-trial?utm_source=stytch_docs\&utm_medium=direct\&utm_content=dfp_30_day_trial).
Estimated time required: **1 hour**
## Get started
1. To start, add the following script tag into the `HEAD` or `BODY` of your app's HTML file:
```html theme={null}
```
2. Once the HTML page is live in your app, every client that loads the page will fetch a copy of the Device Fingerprinting bundle.
1. Call `GetTelemetryID()` with your project's `public_token`when the client triggers a particular event or accesses a protected resource.
2. The function will return a promise that resolves to a Telemetry ID once the fingerprinting step is complete.
3. Once you've extracted the Telemetry ID, send it to your backend or middleware as an X-header or URL paramater.
For this guide, we'll wire up an `onClick()` event handler to a login endpoint:
```JavaScript theme={null}
```
1. Extract the `telemetry_id` from your backend, middleware, or wherever you sent the request from Step 2.
2. Call the `fingerprint.lookup()` [endpoint](/api-reference/fraud/api/fingerprint-lookup) and pass in the `telemetry_id` to pull the data and analyze the fingerprints:
```bash theme={null}
curl --request POST \
--url https://telemetry.stytch.com/v1/fingerprint/lookup \
-u "${PROJECT_ID}:${SECRET}" \
-H 'Content-Type: application/json' \
-d '{
"telemetry_id": "${'${TELEMETRY_ID}'}"
}'
```
This API call requires a basic auth header of `PROJECT_ID` and `SECRET`, which can be found in the [Dashboard](https://stytch.com/dashboard).
3. After a successful lookup call, the response should look like:
```json Response 200 theme={null}
{
"created_at": "2023-01-01T00:00:00Z",
"expires_at": "2033-01-01T00:00:00Z",
"fingerprints": {
"browser_fingerprint": "browser-fingerprint-0b535ab5-ecff-4bc9-b845-48bf90098945",
"browser_id": "browser-id-99cffb93-6378-48a5-aa90-d680232a7979",
"hardware_fingerprint": "hardware-fingerprint-4af7a05d-cf77-4ff7-834f-0622452bb092",
"network_fingerprint": "network-fingerprint-b5060259-40e6-3f29-8215-45ae2da3caa1",
"visitor_fingerprint": "visitor-fingerprint-6ecf5792-1157-41ad-9ad6-052d31160cee",
"visitor_id": "visitor-6139cbcc-4dda-4b1f-b1c0-13c08ec64d72"
},
"status_code": 200,
"telemetry_id": "026ac93b-8cdf-4fcb-bfa6-36a31cfecac1",
"verdict": {
"action": "ALLOW",
"detected_device_type": "...",
"is_authentic_device": true,
"reasons": [...]
}
}
```
4. You can store and log this response to collect your fingerprint data.
In the response, there is a `verdict` object with a recommended `action` for you to take against the client. There are three possible recommended actions:
* `ALLOW`: A known valid device grouping or device profile that is part of the default set of known allowed devices by Stytch. This grouping is made up of mostly verified device profiles that match the fingerprint characteristics of known or authentic origins.
* `BLOCK`: A known bad or malicious device profile that is undesirable and should be blocked from completing the privileged action in question.
* `CHALLENGE`: An unknown or potentially malicious device that should be put through increased friction such as multi-factor authentication or other forms of extended user verification before allowing the privileged action to proceed.
See [Verdicts](/fraud-risk/device-fingerprinting/verdict/overview) to learn more.
Our recommended actions are based on proprietary fingerprinting and device classification processes.
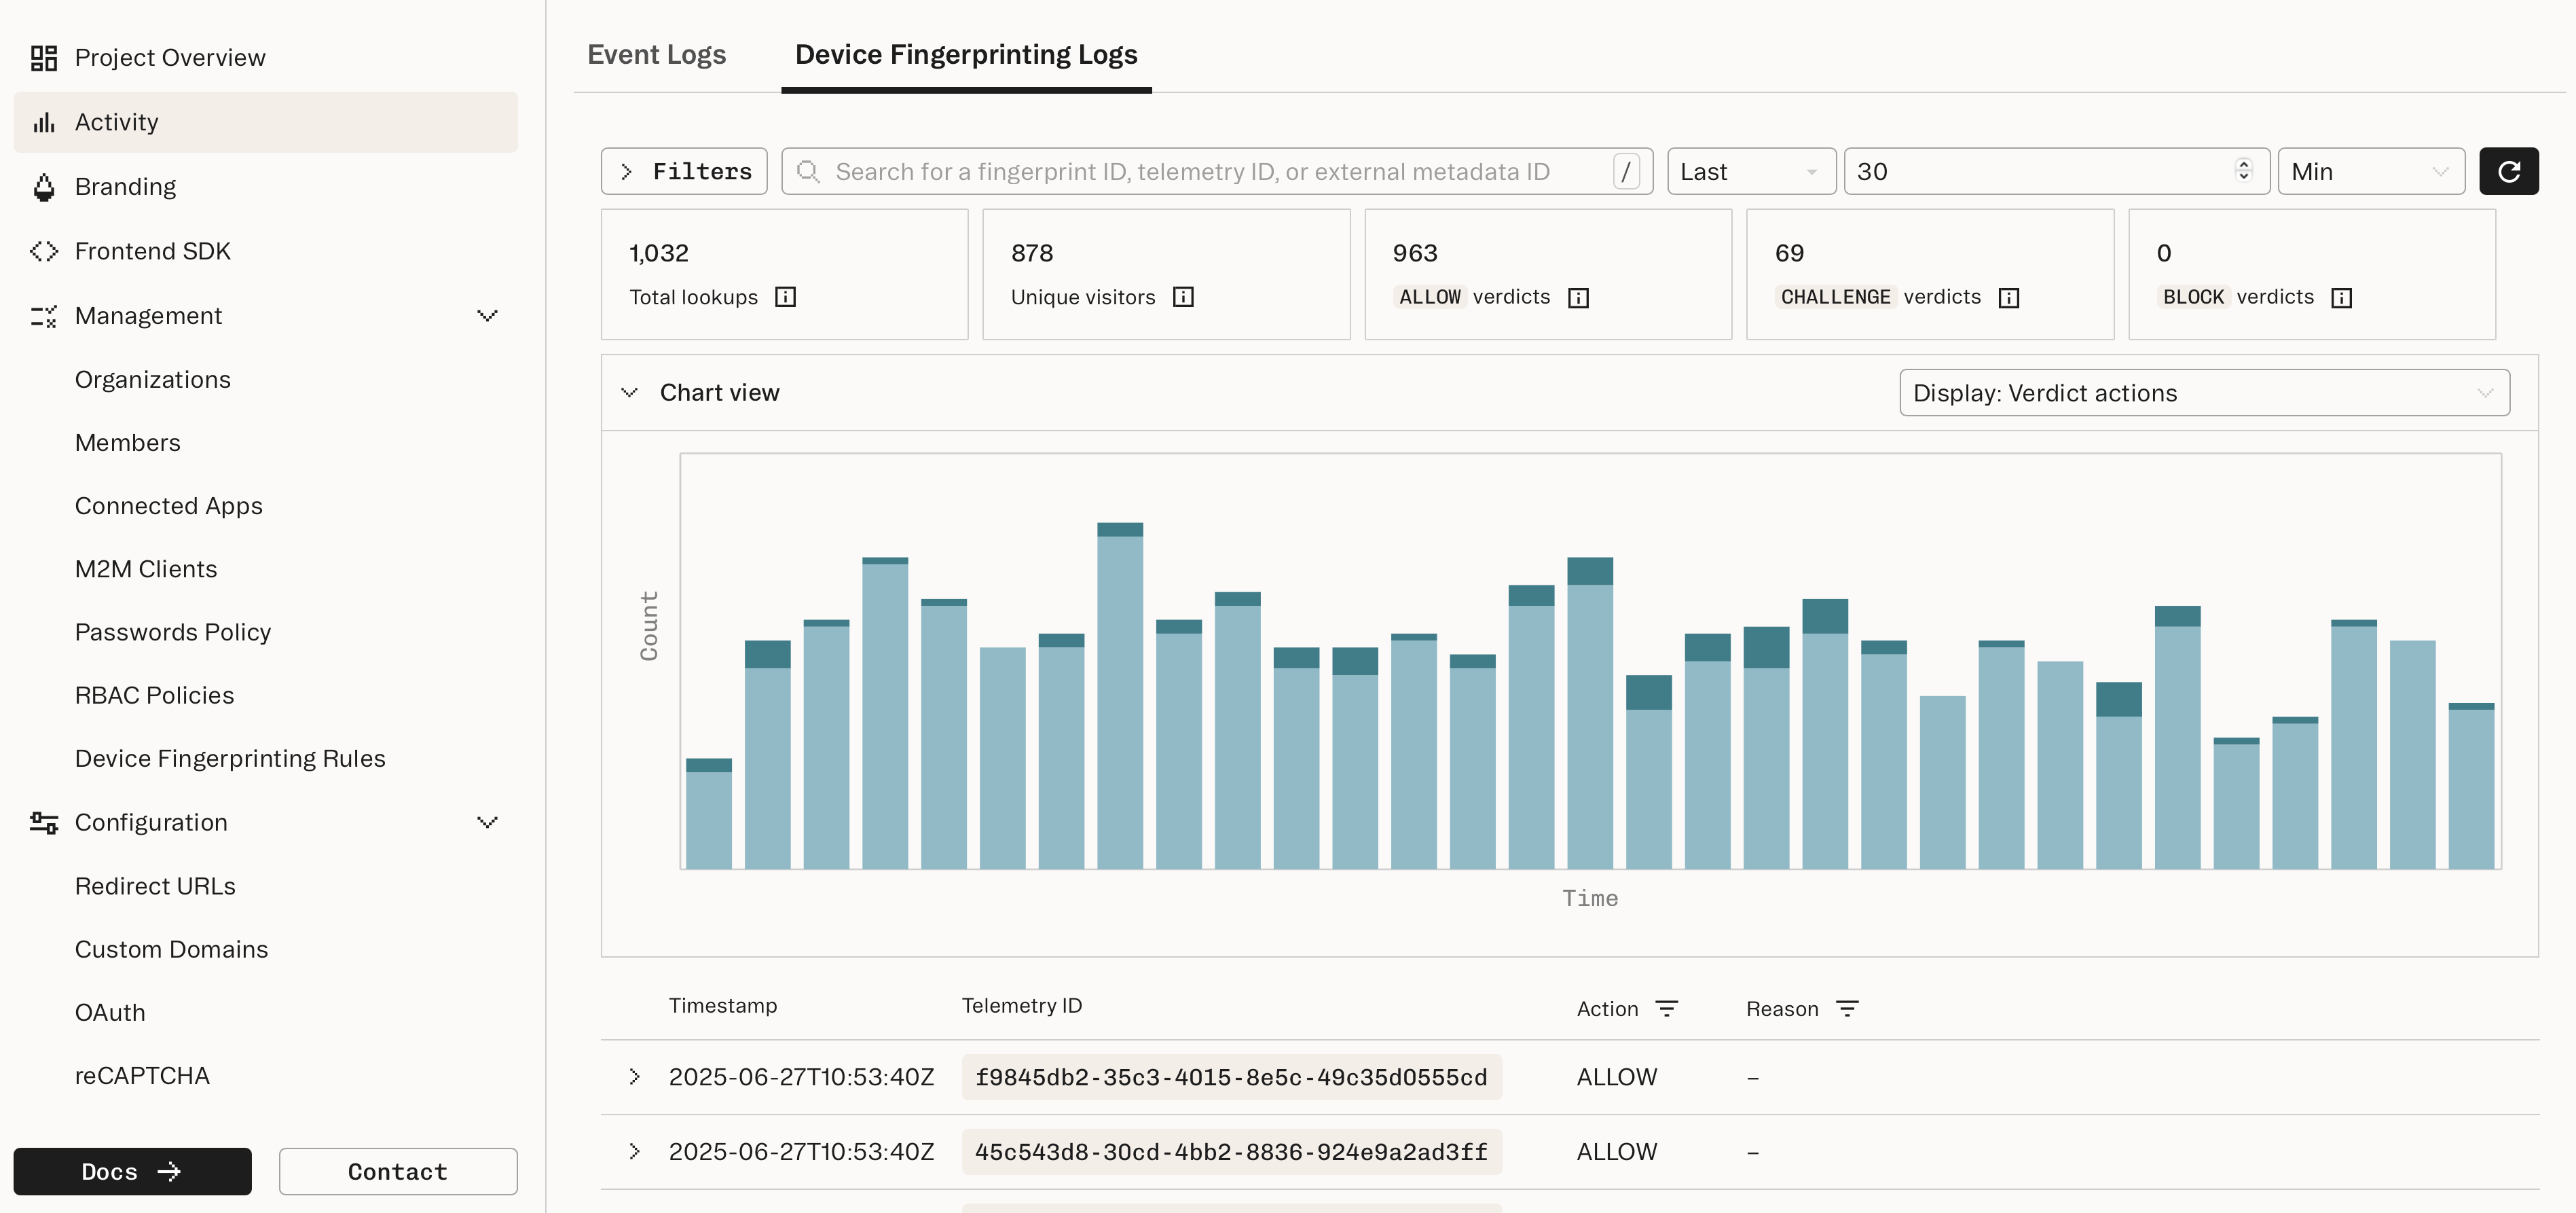
You can see the results of your lookups in the [Dashboard](https://stytch.com/dashboard/activity?tab=dfp-logs):
This provides you with a high-level view of the various fingerprints, verdicts, and verdict reasons your application is encountering.
You can also view the details of individual fingerprints to understand the various devices that are querying your service.
## Next steps
Create rules to customize your decisioning for specific fingerprints.
***
Find out why Stytch's device intelligence is trusted by Calendly, Replit, and many more.
 This provides you with a high-level view of the various fingerprints, verdicts, and verdict reasons your application is encountering.
You can also view the details of individual fingerprints to understand the various devices that are querying your service.
This provides you with a high-level view of the various fingerprints, verdicts, and verdict reasons your application is encountering.
You can also view the details of individual fingerprints to understand the various devices that are querying your service.