> ## Documentation Index
> Fetch the complete documentation index at: https://stytch.com/docs/llms.txt
> Use this file to discover all available pages before exploring further.
# Google OAuth
> Configure Google OAuth for Multi-Tenant Authentication.
## Create a new Google OAuth client
Navigate to the [Google Cloud Console](https://console.cloud.google.com/) and create a Google Cloud account and a new project if you have not already done so. For more information, see [Create a Google Cloud account and project](https://support.google.com/googleapi/answer/6251787#zippy=%2Ccreate-a-project).
Navigate to the [OAuth consent screen](https://console.cloud.google.com/apis/credentials/consent) and configure your OAuth consent screen.
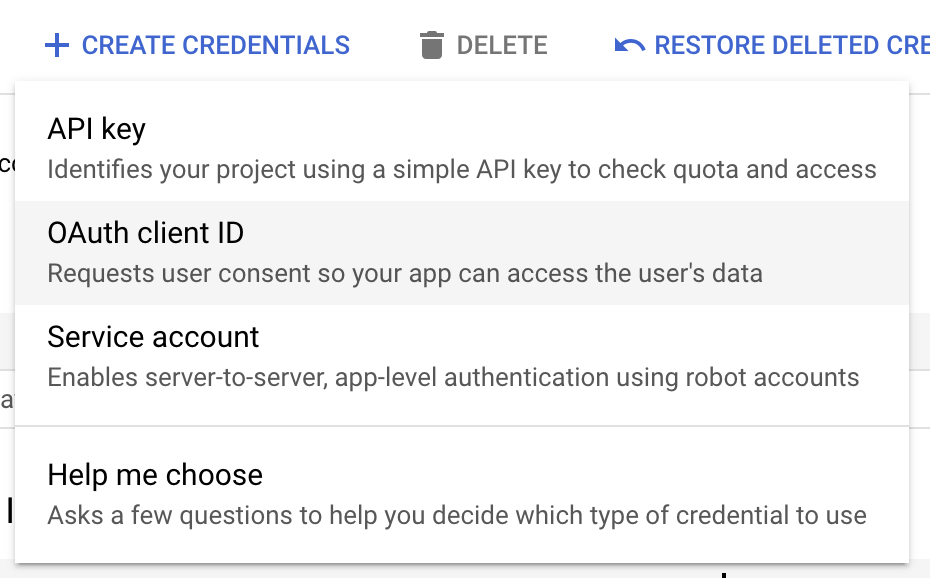
[Go to the Google Credentials page](https://console.cloud.google.com/apis/credentials) for your application. Click on **CREATE CREDENTIALS** and then select **OAuth Client ID**.
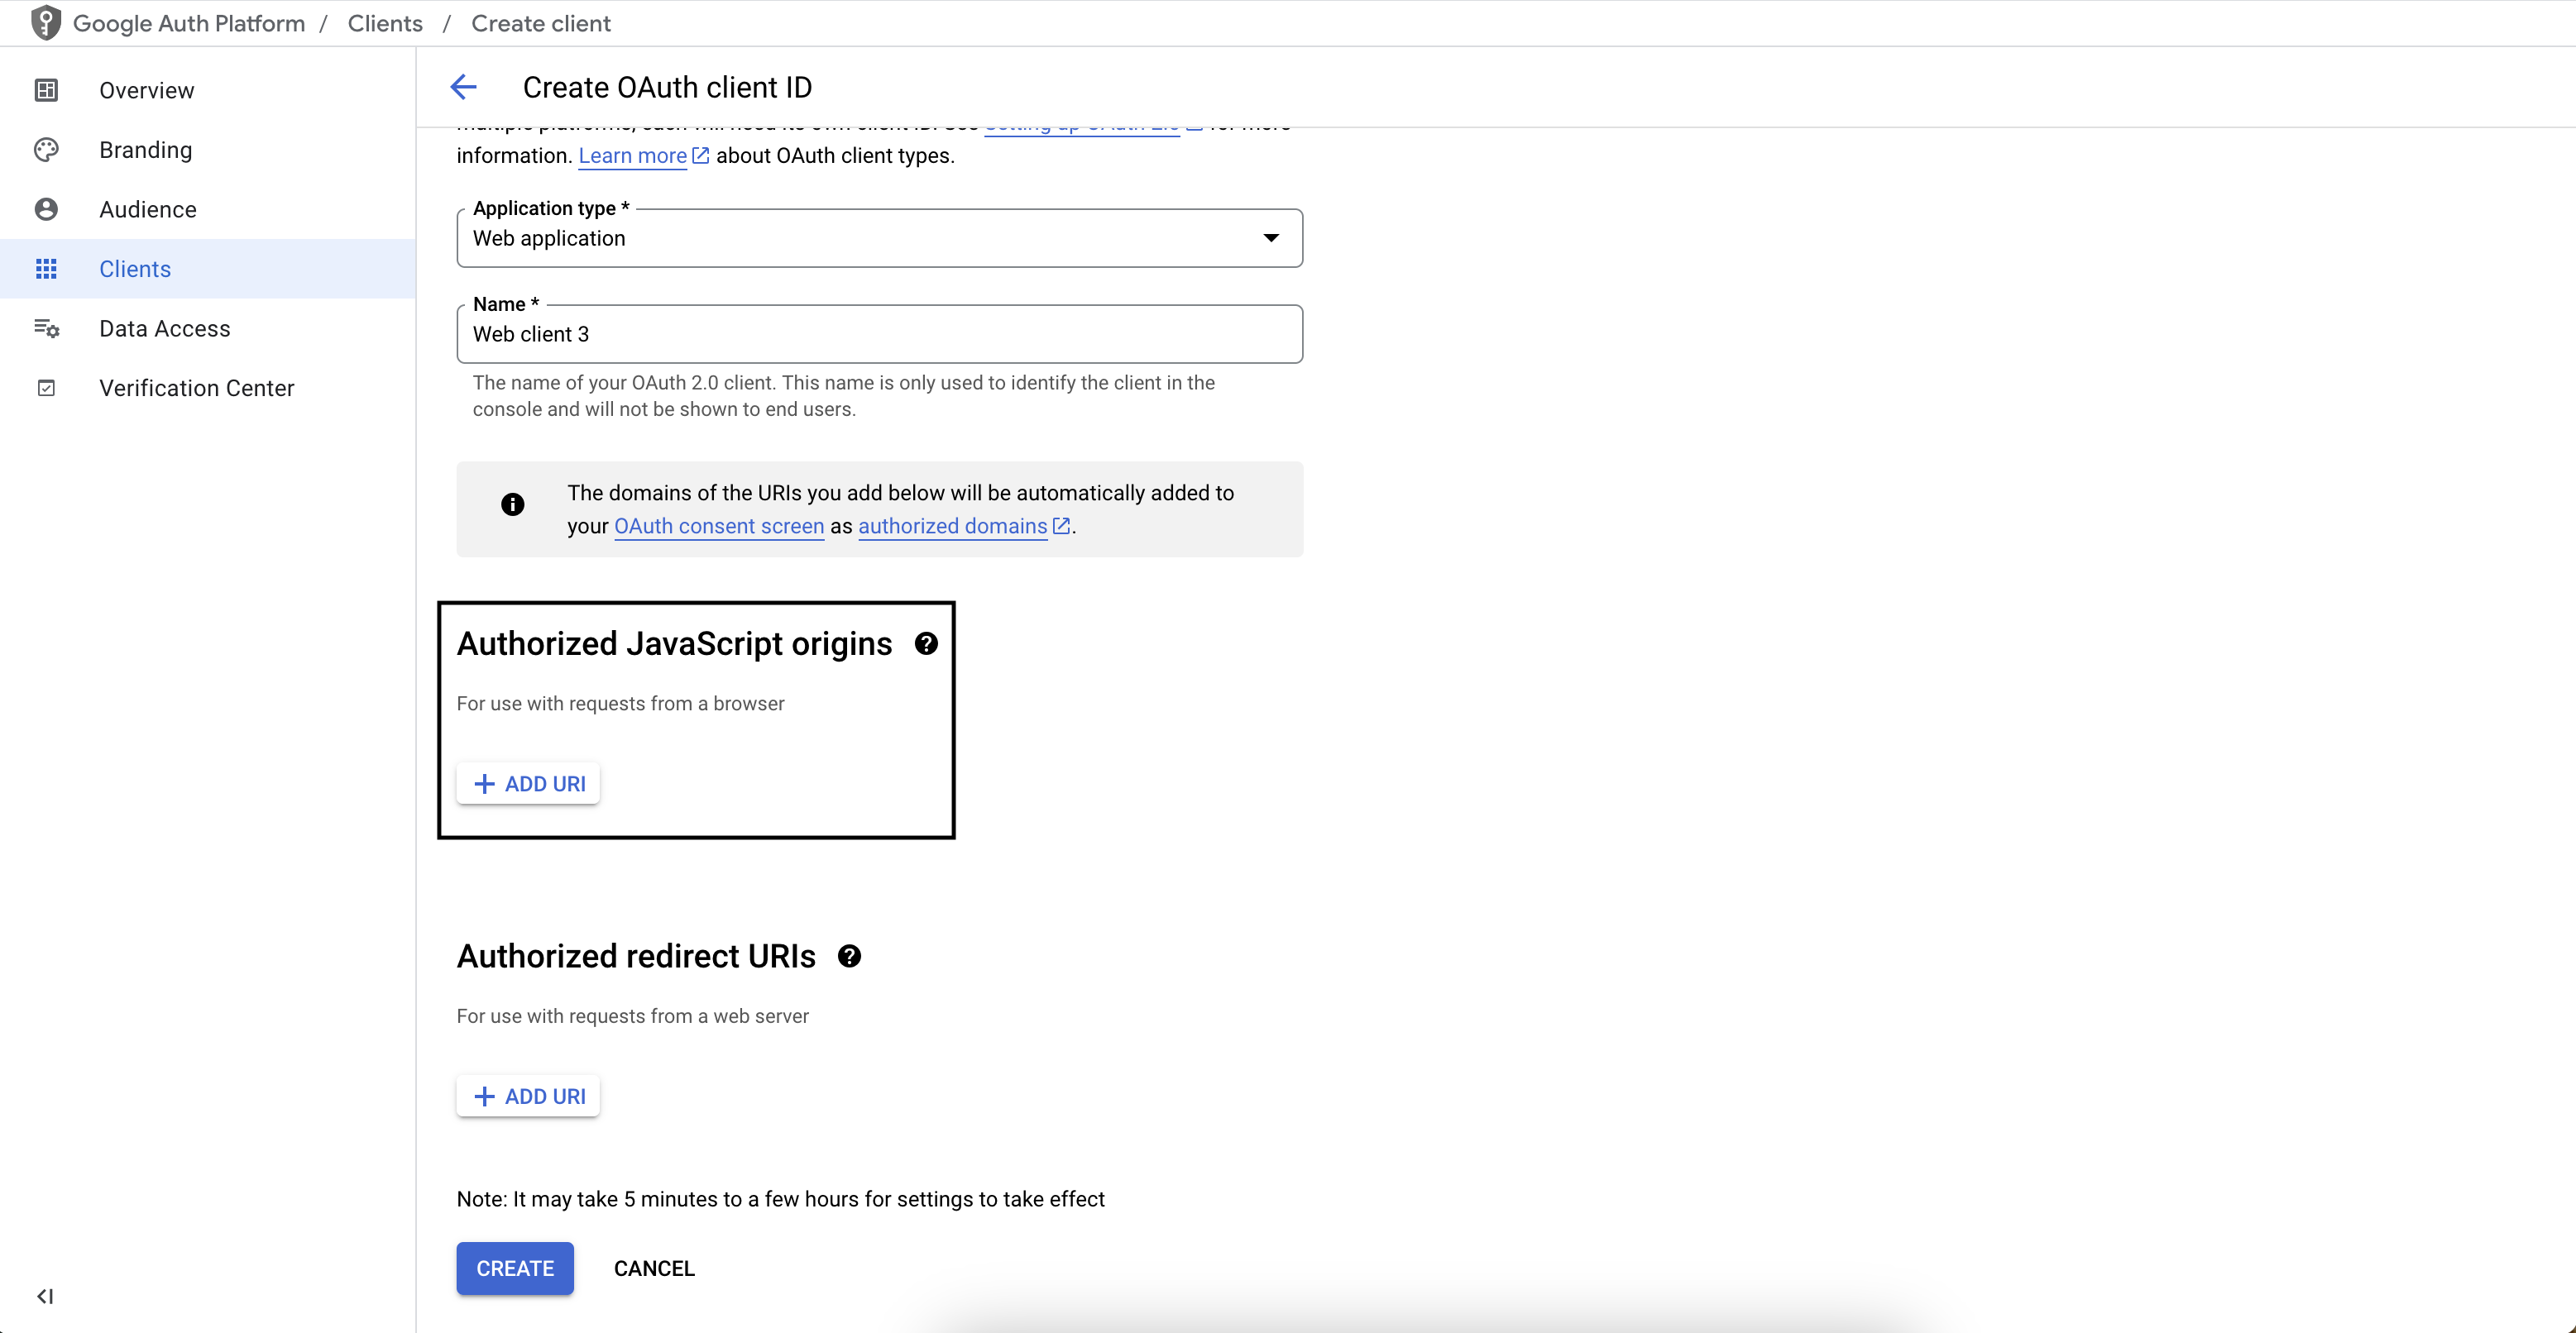
 Select **Web Application** as the application type (regardless of if it is a mobile or non-web application) and enter a name for your OAuth client.
Copy the Stytch redirect URI from the [Dashboard](https://stytch.com/dashboard/oauth) and paste it into the **Authorized redirect URIs** section.
Select **Web Application** as the application type (regardless of if it is a mobile or non-web application) and enter a name for your OAuth client.
Copy the Stytch redirect URI from the [Dashboard](https://stytch.com/dashboard/oauth) and paste it into the **Authorized redirect URIs** section.
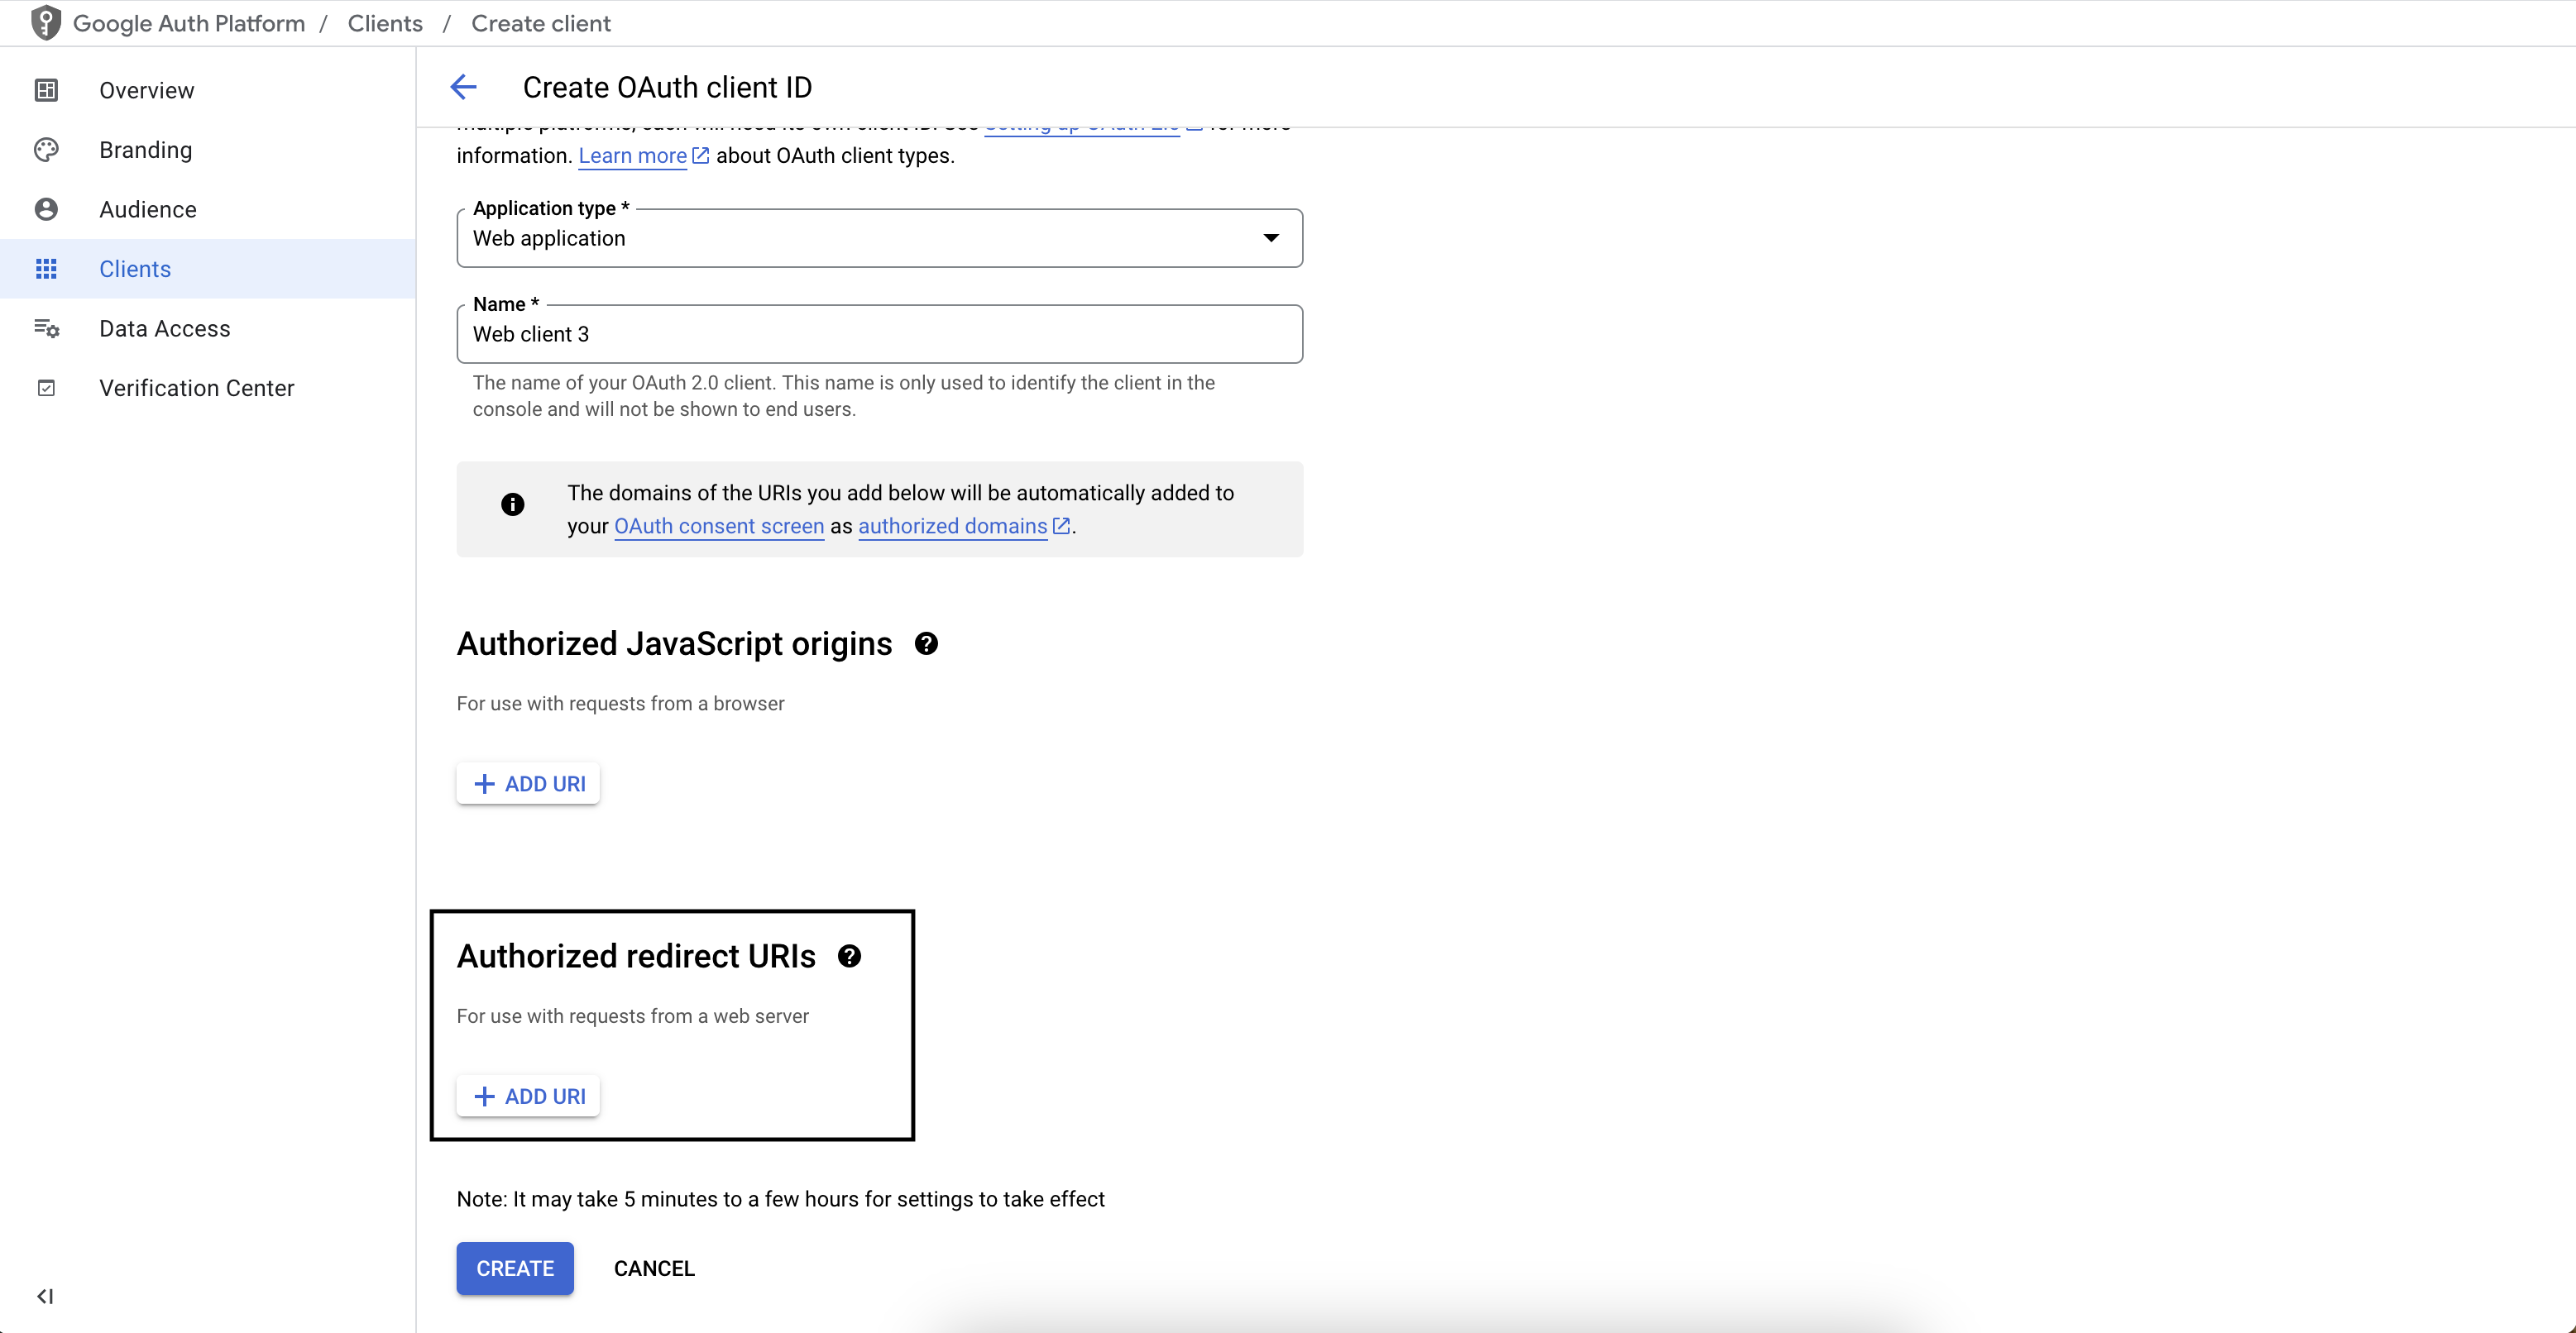 Click **create** to save the configuration.
If you want the Stytch SDK to support Google One Tap, add your application's URI as an **Authorized JavaScript Origin**.
Click **create** to save the configuration.
If you want the Stytch SDK to support Google One Tap, add your application's URI as an **Authorized JavaScript Origin**.
 ## Configure your Google OAuth client in Stytch
Go to the [Google Credentials page](https://console.cloud.google.com/apis/credentials) for your application. You should see your OAuth client under the **OAuth 2.0 Client IDs** section.
Click on the OAuth client to edit its configuration.
Copy the Stytch redirect URI from the [Dashboard](https://stytch.com/dashboard/oauth) and paste it into the **Authorized redirect URIs** section.
Click to save the configuration.
If you want the Stytch SDK to support Google One Tap, add your application's URI as an **Authorized JavaScript Origin**.
## Configure your Google OAuth client in Stytch
Go to the [Google Credentials page](https://console.cloud.google.com/apis/credentials) for your application. You should see your OAuth client under the **OAuth 2.0 Client IDs** section.
Click on the OAuth client to edit its configuration.
Copy the Stytch redirect URI from the [Dashboard](https://stytch.com/dashboard/oauth) and paste it into the **Authorized redirect URIs** section.
Click to save the configuration.
If you want the Stytch SDK to support Google One Tap, add your application's URI as an **Authorized JavaScript Origin**.