> ## Documentation Index
> Fetch the complete documentation index at: https://stytch.com/docs/llms.txt
> Use this file to discover all available pages before exploring further.
# Microsoft
> Configure Microsoft OAuth for Multi-Tenant Authentication.
The Stytch B2B Microsoft OAuth product limits access to only **verified Azure Active Directory accounts**. Personal accounts, including personal Xbox Live, Skype, or Outlook accounts, are not allowed. Accounts managed by Azure Active Directory B2C are not allowed.
By default, Stytch will deduplicate users by treating their `UserPrincipalName` as an email address.
## Create a new Microsoft OAuth client
If you don't have one already, create a [Microsoft Azure account](https://login.microsoftonline.com/).
Go to [Azure Active Directory](https://portal.azure.com/#blade/Microsoft_AAD_IAM/ActiveDirectoryMenuBlade/RegisteredApps) to create a Microsoft application.
Click **New registration**.
 Enter a name for your OAuth client.
Select **Accounts in any organizational directory (Any Azure AD directory - Multitenant)**.
Enter a name for your OAuth client.
Select **Accounts in any organizational directory (Any Azure AD directory - Multitenant)**.
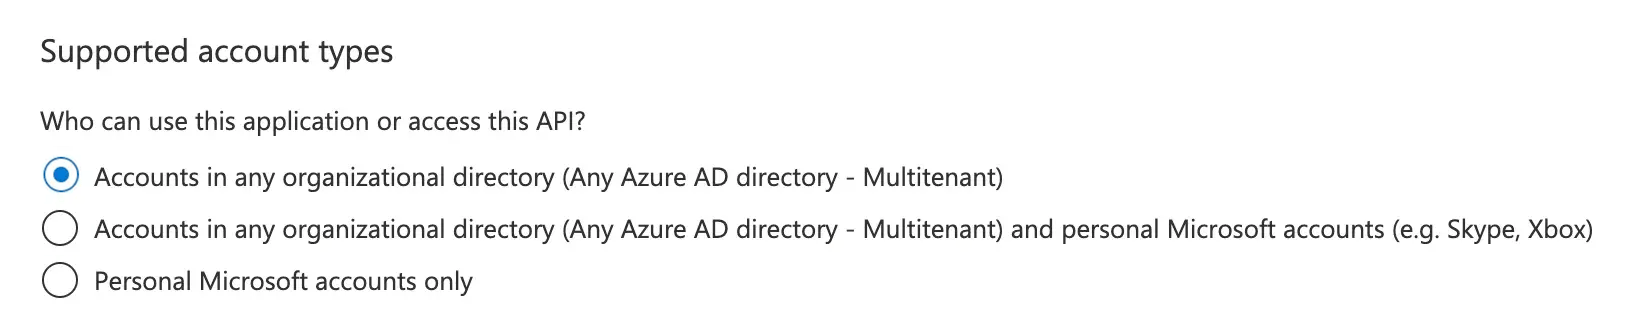 Under the **Redirect URI** section, select **Web** and then copy the Stytch redirect URI from the [OAuth page](https://stytch.com/dashboard/oauth) and paste it into the URI field.
 Click **Register** to save the configuration.
## Configure your Microsoft OAuth client in Stytch
Go to [Azure Active Directory](https://portal.azure.com/#blade/Microsoft_AAD_IAM/ActiveDirectoryMenuBlade/RegisteredApps) and select your Microsoft application.
In your OAuth client configuration, select the link next to the **Redirect URIs** section. Then select **Add a platform** and finally select **Web**.
Click **Register** to save the configuration.
## Configure your Microsoft OAuth client in Stytch
Go to [Azure Active Directory](https://portal.azure.com/#blade/Microsoft_AAD_IAM/ActiveDirectoryMenuBlade/RegisteredApps) and select your Microsoft application.
In your OAuth client configuration, select the link next to the **Redirect URIs** section. Then select **Add a platform** and finally select **Web**.
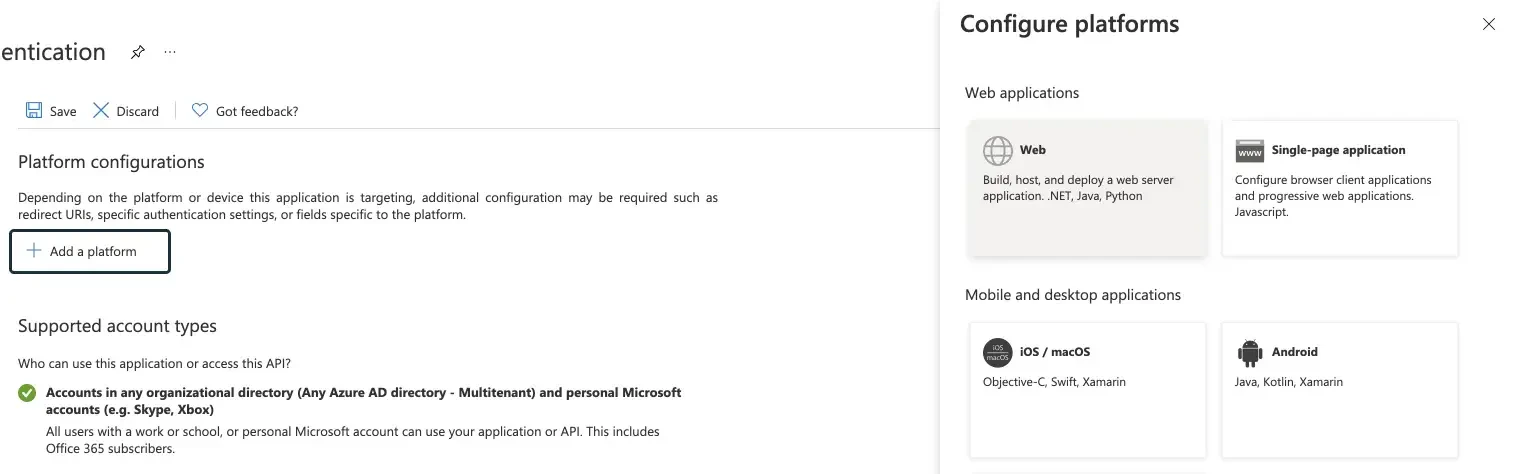 Copy the Stytch redirect URI from the [Dashboard](https://stytch.com/dashboard/oauth) and paste it into the URI field.
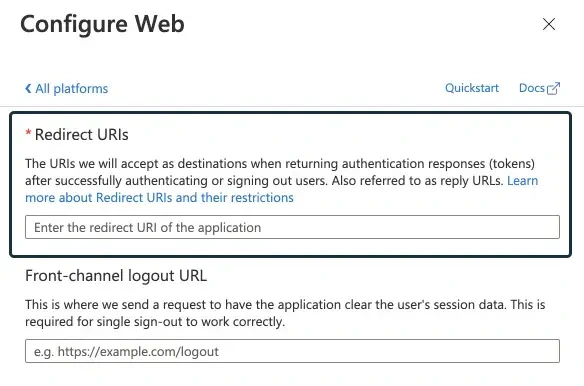 Click **Configure** to save the URI.