> ## Documentation Index
> Fetch the complete documentation index at: https://stytch.com/docs/llms.txt
> Use this file to discover all available pages before exploring further.
# SCIM with Okta
> Set up a SCIM connection with Okta
To test out SCIM, set up an [Okta developer instance](https://developer.okta.com/signup/) to use for this guide.
## Configure a SCIM connection for a specific Organization
On the [existing SSO SAML application in Okta](/multi-tenant-auth/authentication/sso/overview), enable SCIM provisioning by navigating to the General tab of the application and checking “Enable SCIM Provisioning” under "App Settings".
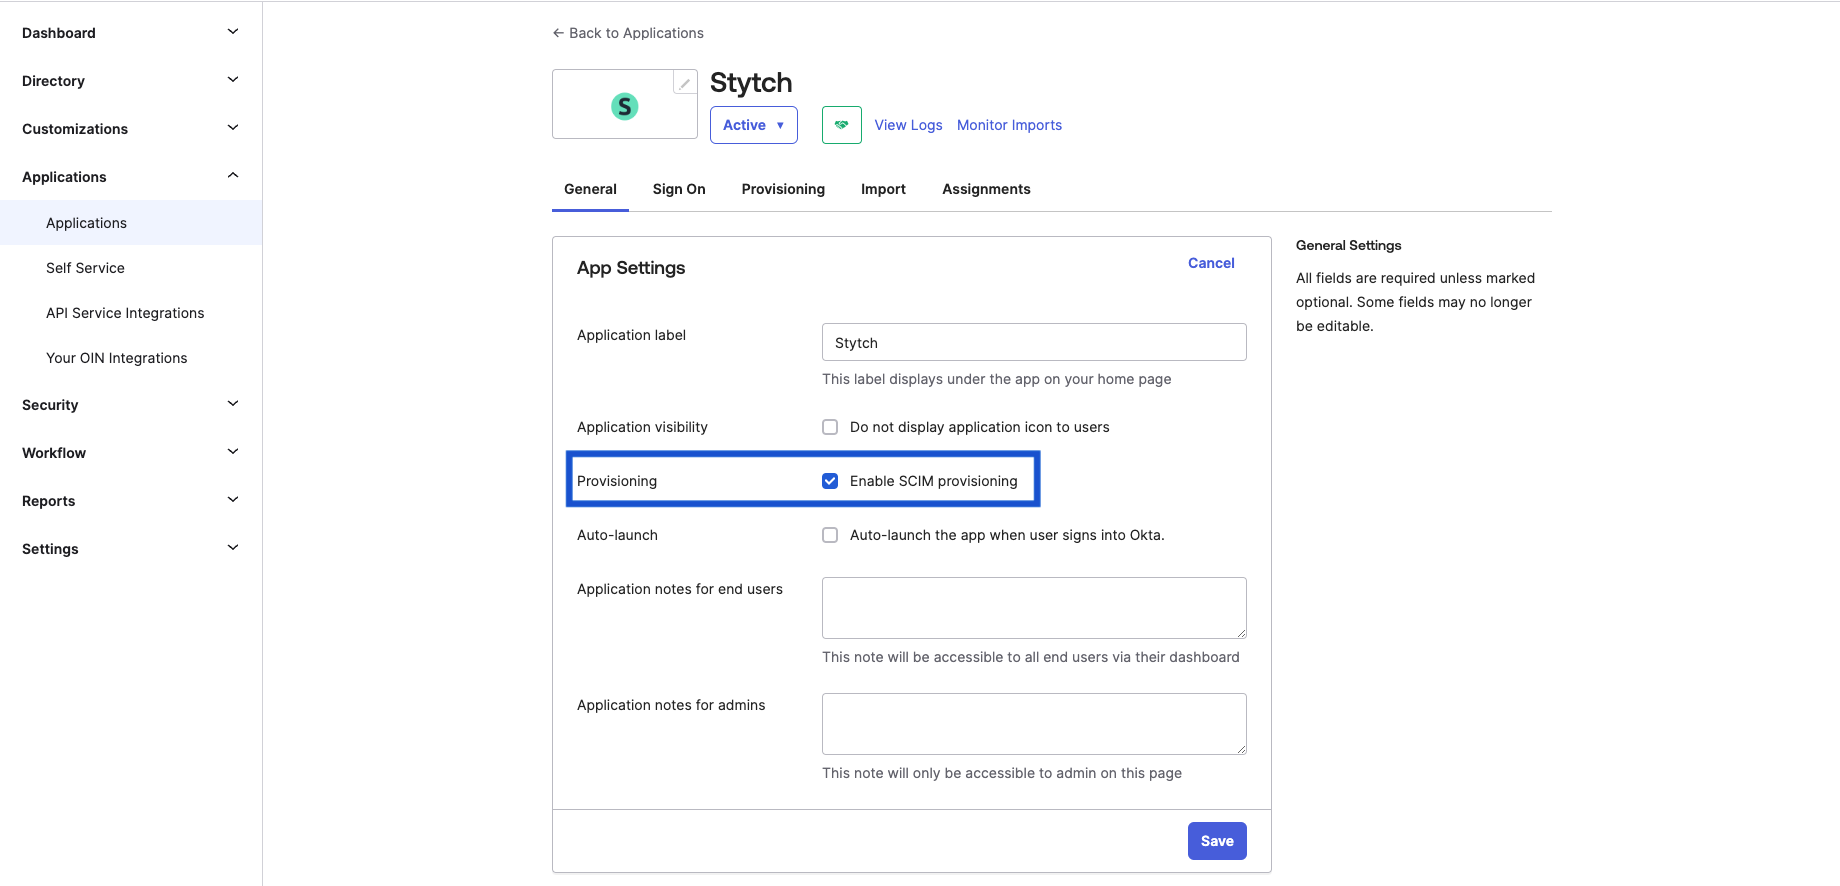 Save this change.
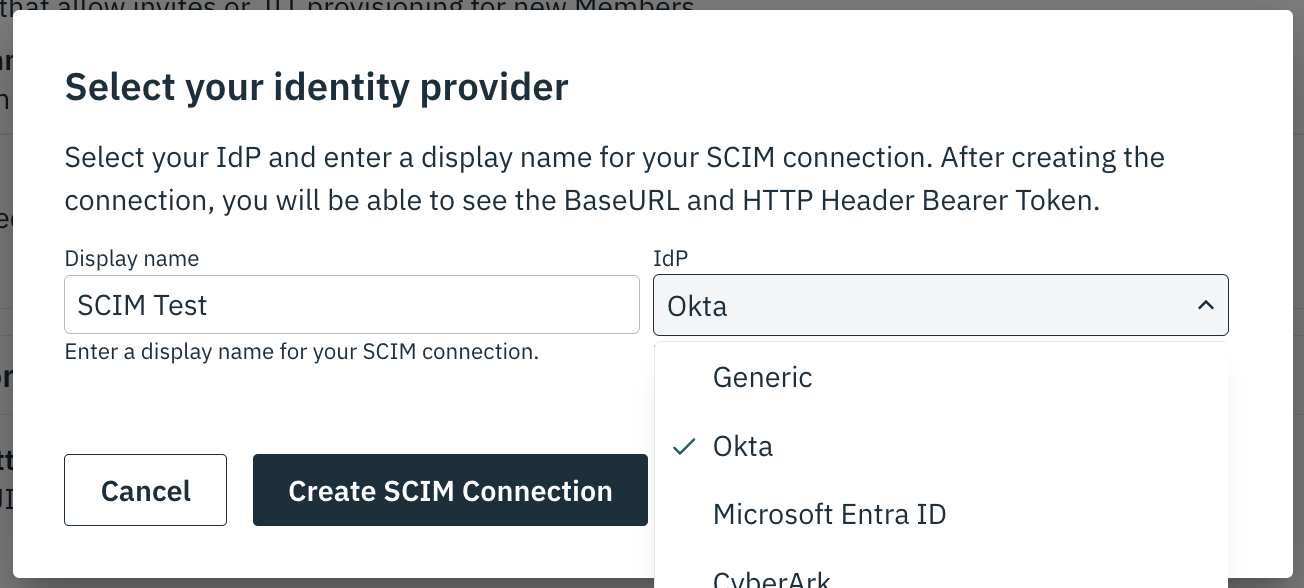
Create a SCIM Connection on the Organization in the [Stytch Dashboard](https://stytch.com/dashboard/organizations) or the [Create SCIM Connection endpoint](/api-reference/b2b/api/scim/connection-management/create-scim-connection). Select Okta as the IdP.
Save this change.
Create a SCIM Connection on the Organization in the [Stytch Dashboard](https://stytch.com/dashboard/organizations) or the [Create SCIM Connection endpoint](/api-reference/b2b/api/scim/connection-management/create-scim-connection). Select Okta as the IdP.
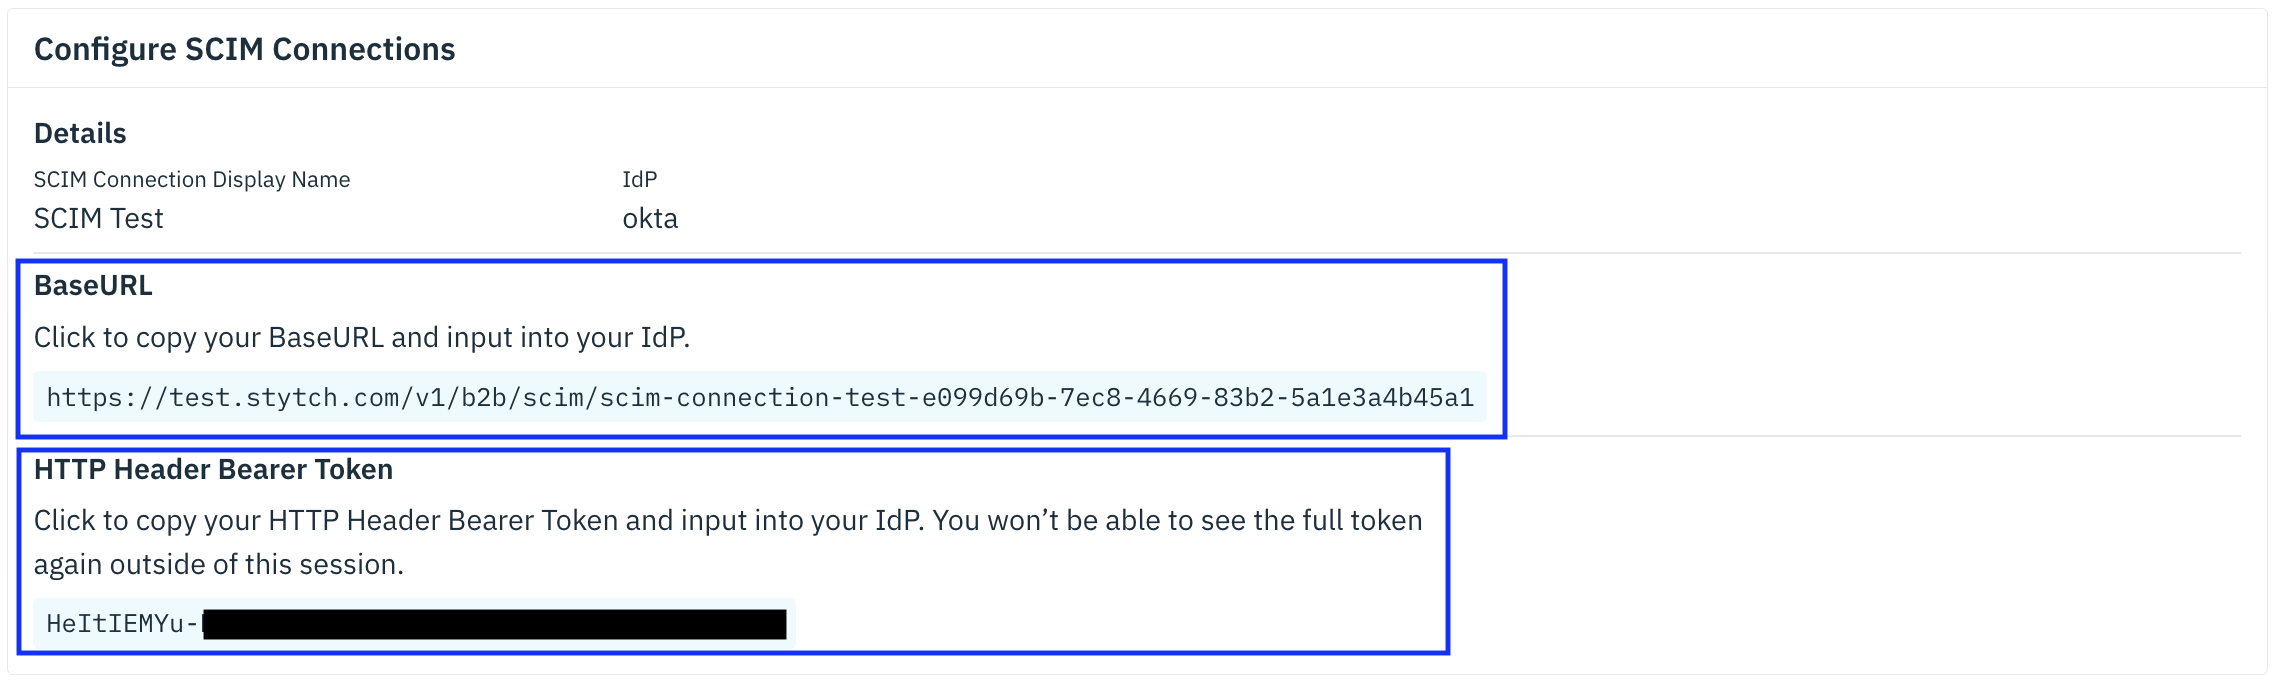
 Once you click save, you'll be provided with the base url and bearer token you'll need for the next step.
 Leave this tab open and navigate back to Okta to input the returned credentials.
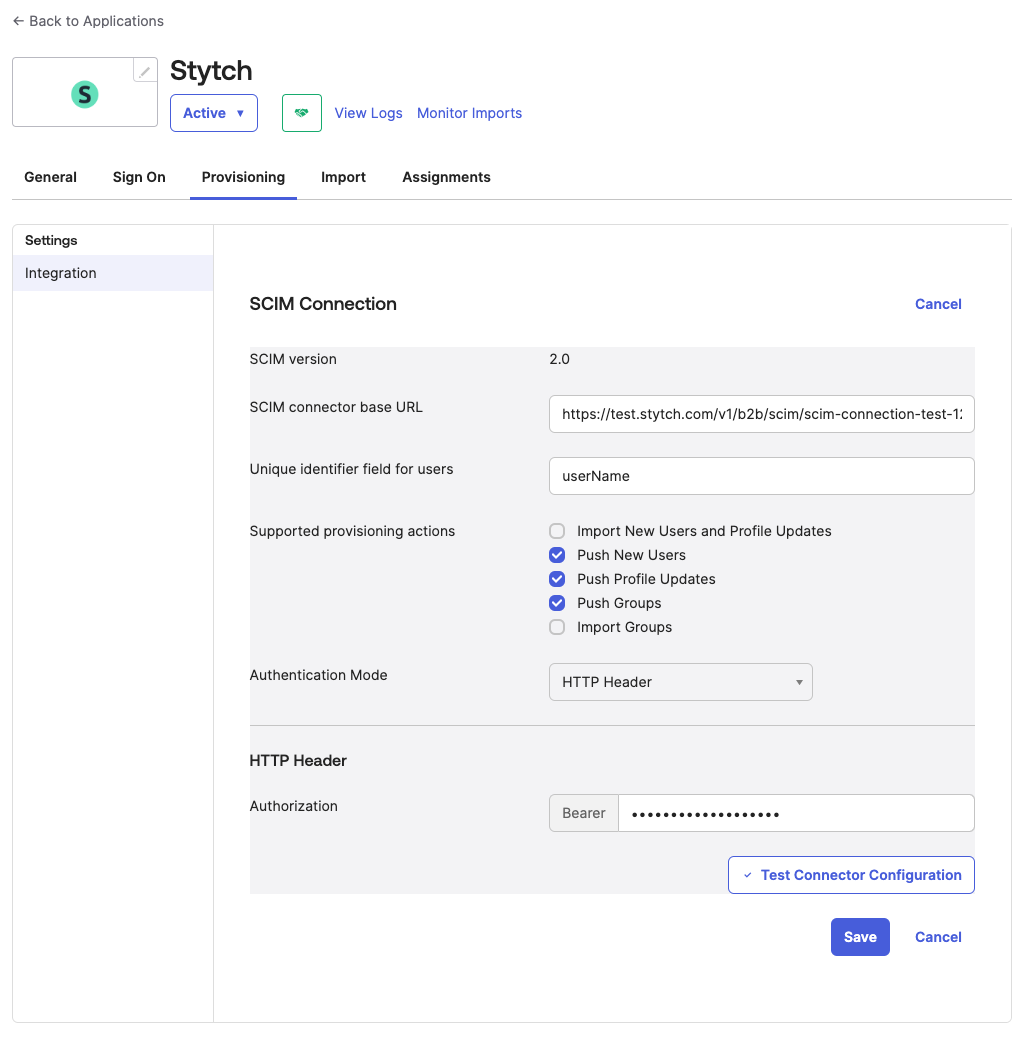
In the application view in Okta, navigate to the new "Provisioning" tab and:
1. Change the Authentication mode to HTTP Header
2. Copy the "BaseURL" from Stytch into the “SCIM connector base URL” field
3. Set the Unique identifier to `userName`
4. Under "Supported provisioning actions", select all the "Push.." options
5. Copy the "HTTP Header Bearer Token" from Stytch into the "HTTP Header → Authorization" field
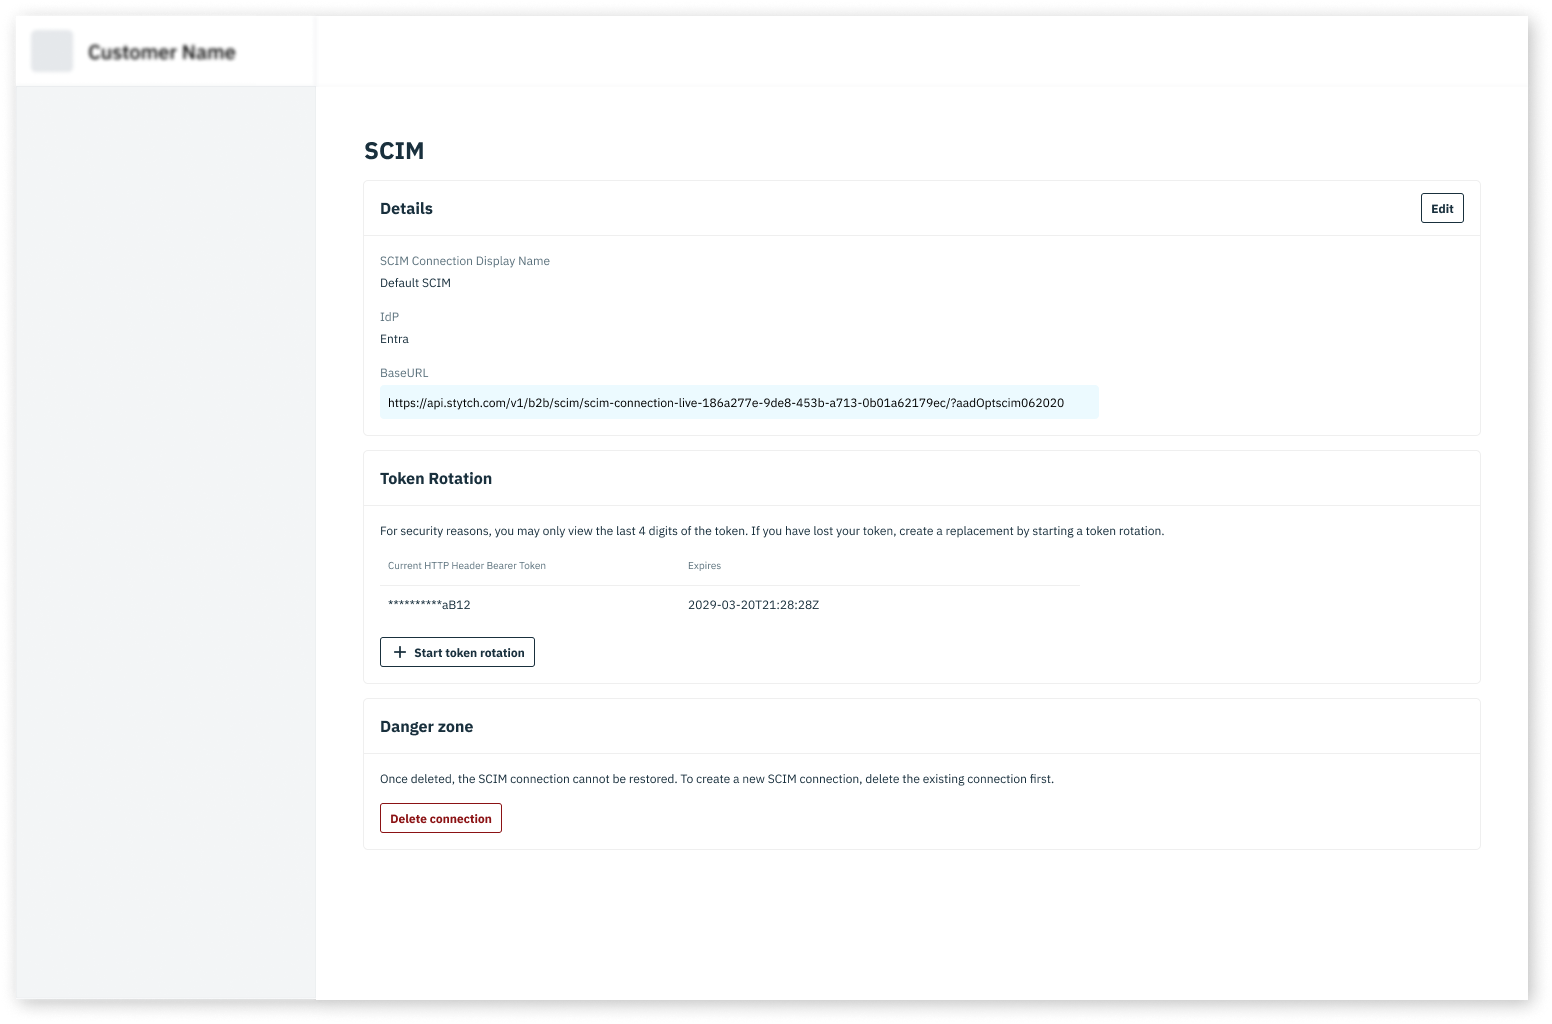
Your connection settings should look as follows:
Leave this tab open and navigate back to Okta to input the returned credentials.
In the application view in Okta, navigate to the new "Provisioning" tab and:
1. Change the Authentication mode to HTTP Header
2. Copy the "BaseURL" from Stytch into the “SCIM connector base URL” field
3. Set the Unique identifier to `userName`
4. Under "Supported provisioning actions", select all the "Push.." options
5. Copy the "HTTP Header Bearer Token" from Stytch into the "HTTP Header → Authorization" field
Your connection settings should look as follows:
 Save.
Once saved, you can test the SCIM integration by assigning people to and removing people from the application.
You should see the status of the member changing from `active` to `deactivated`.
To notify your own system of changes that occur via SCIM, [configure webhooks](/resources/workspace-management/webhooks). See the full list of relevant webhooks [here](/multi-tenant-auth/enterprise-ready/scim/overview#supported-scim-actions).
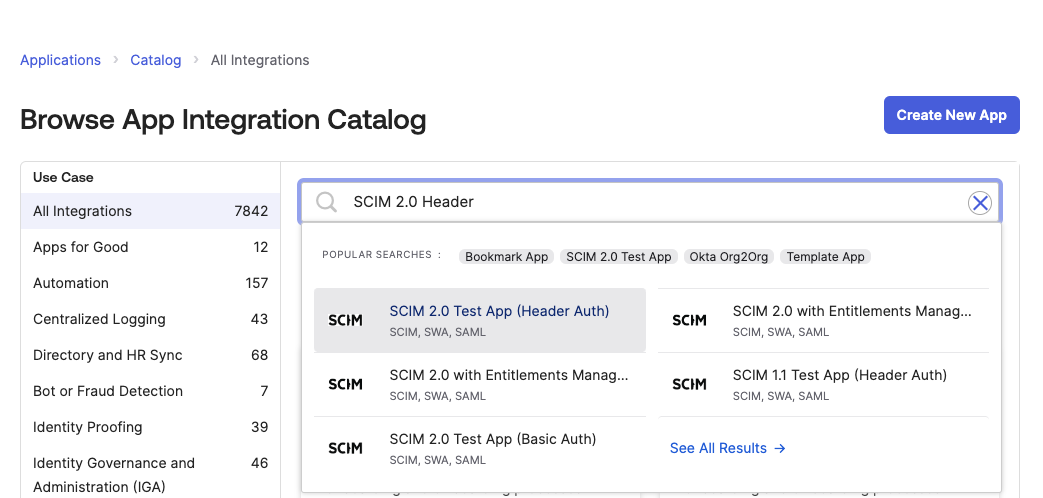
If you haven't already configured a SAML application, create a standalone SCIM Application by
1. Navigate to Applications → Browse App Catalog
2. Search for “SCIM 2.0 Header Auth”
3. Select the "SCIM 2.0 Test App (Header Auth)"
Save.
Once saved, you can test the SCIM integration by assigning people to and removing people from the application.
You should see the status of the member changing from `active` to `deactivated`.
To notify your own system of changes that occur via SCIM, [configure webhooks](/resources/workspace-management/webhooks). See the full list of relevant webhooks [here](/multi-tenant-auth/enterprise-ready/scim/overview#supported-scim-actions).
If you haven't already configured a SAML application, create a standalone SCIM Application by
1. Navigate to Applications → Browse App Catalog
2. Search for “SCIM 2.0 Header Auth”
3. Select the "SCIM 2.0 Test App (Header Auth)"
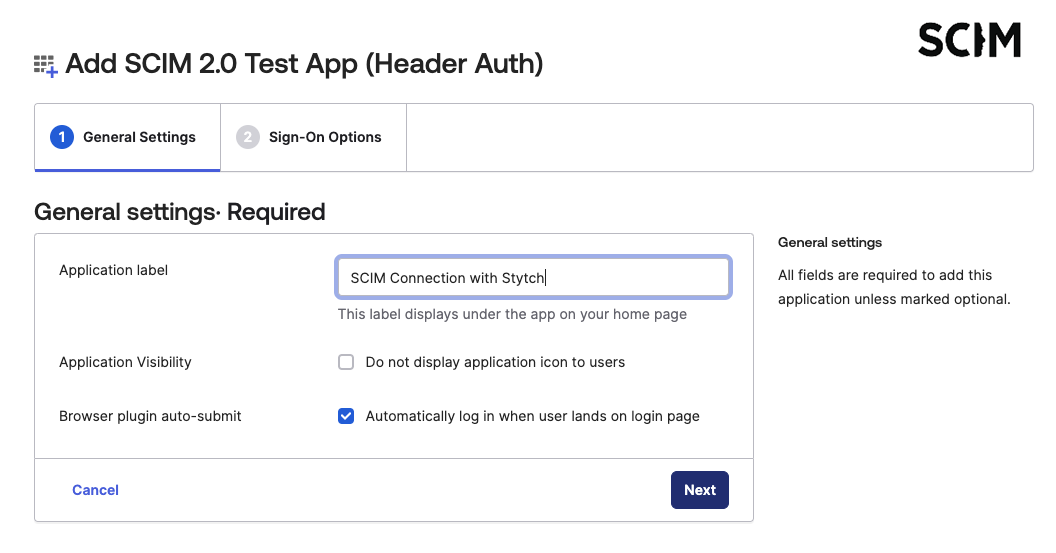
 Name your application:
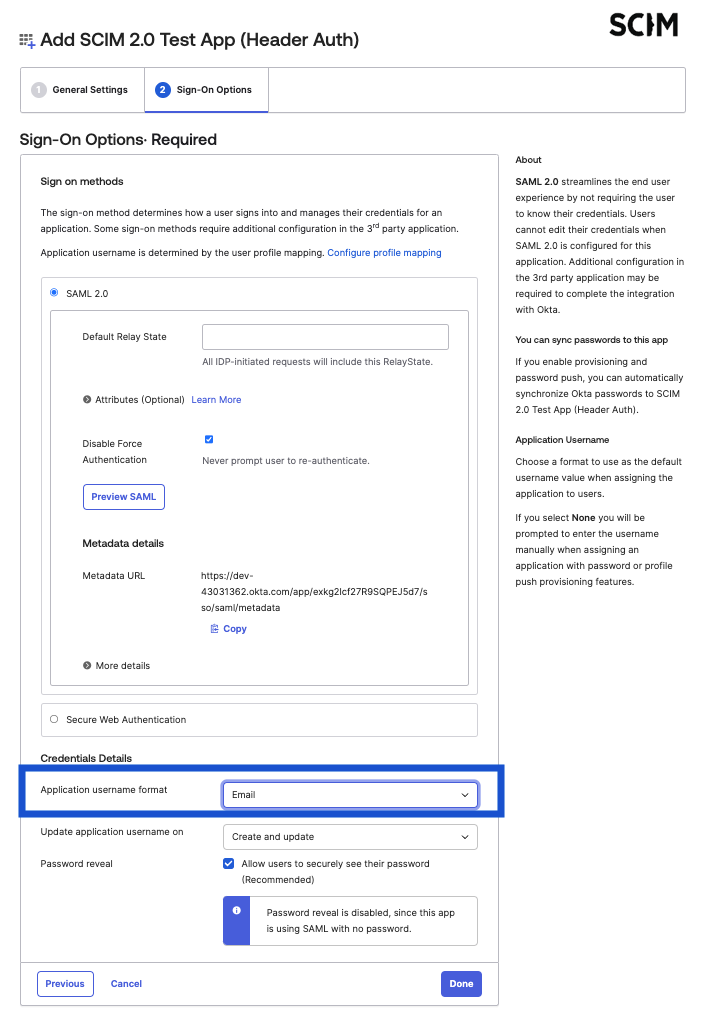
 On the "Sign-on Options" tab scroll to the bottom, and under "Credential Details" change the "Application username format" to "Email".
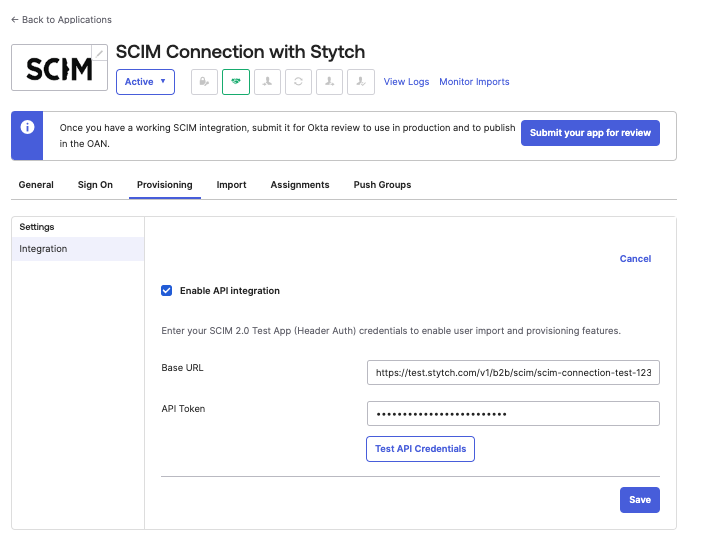
 Save the application, then navigate to the "Provisioning" tab and click "Configure API Integration".
Create a SCIM Connection on the Organization in the [Stytch Dashboard](https://stytch.com/dashboard/organizations) or the [Create SCIM Connection endpoint](/api-reference/b2b/api/scim/connection-management/create-scim-connection). Select Okta as the IdP.
Back in the Okta admin dashboard, input the returned BaseURL and set the API Token to `Bearer ${returned_bearer_token}`.
Save the application, then navigate to the "Provisioning" tab and click "Configure API Integration".
Create a SCIM Connection on the Organization in the [Stytch Dashboard](https://stytch.com/dashboard/organizations) or the [Create SCIM Connection endpoint](/api-reference/b2b/api/scim/connection-management/create-scim-connection). Select Okta as the IdP.
Back in the Okta admin dashboard, input the returned BaseURL and set the API Token to `Bearer ${returned_bearer_token}`.
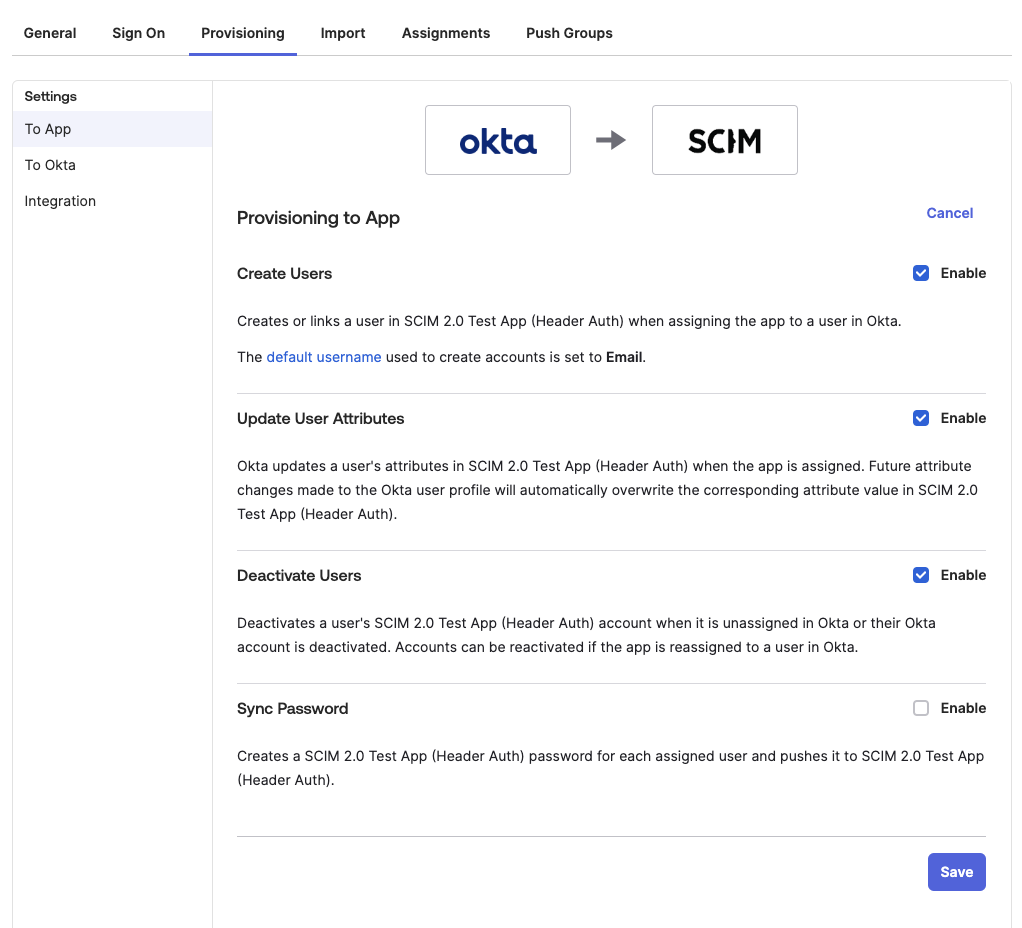
 You will then be able to select which actions to send via SCIM.
 Once saved, you can test the SCIM integration by assigning people to and removing people from the application.
You should see the status of the member changing from `active` to `deactivated`.
To notify your own system of changes that occur via SCIM, [configure webhooks](/resources/workspace-management/webhooks). See the full list of relevant webhooks [here](/multi-tenant-auth/enterprise-ready/scim/overview#supported-scim-actions).
## Next Steps
If you only have a few customers who require SCIM connections, you can manage them by hand in the [Stytch Dashboard](https://stytch.com/dashboard/organizations). However, as your enterprise customer base grows, you may want to build a UI in your application to allow admins of Organizations to self-serve creating and updating their own SCIM connections.
The simplest way to add SCIM connection management to your application is to use Stytch's pre-built [Admin Portal](/multi-tenant-auth/enterprise-ready/admin-portal) component.
Once saved, you can test the SCIM integration by assigning people to and removing people from the application.
You should see the status of the member changing from `active` to `deactivated`.
To notify your own system of changes that occur via SCIM, [configure webhooks](/resources/workspace-management/webhooks). See the full list of relevant webhooks [here](/multi-tenant-auth/enterprise-ready/scim/overview#supported-scim-actions).
## Next Steps
If you only have a few customers who require SCIM connections, you can manage them by hand in the [Stytch Dashboard](https://stytch.com/dashboard/organizations). However, as your enterprise customer base grows, you may want to build a UI in your application to allow admins of Organizations to self-serve creating and updating their own SCIM connections.
The simplest way to add SCIM connection management to your application is to use Stytch's pre-built [Admin Portal](/multi-tenant-auth/enterprise-ready/admin-portal) component.
 Read the guide on Admin Portal.
Jump straight to the React, Next.js, or Vanilla JS SDK reference.
Read the guide on Admin Portal.
Jump straight to the React, Next.js, or Vanilla JS SDK reference.