Pre-requisites
In order to complete this guide, you’ll need:- A Stytch project. If you don’t have one already, or would like to create a new one, in the Dashboard, click on your existing project name in the top left corner of the Dashboard, click Create Project, and then select Consumer Authentication.
- The MCP Inspector. This is a tool that will help us ensure that our MCP server is exposing the correct interface, is running properly, and allows us to explore the features of the MCP protocol in a web-based tool.
Create a remote MCP server
Configure Stytch for our example app
Navigate to “Project Settings” to note your “Project ID” and “Public token”. You will need these values later.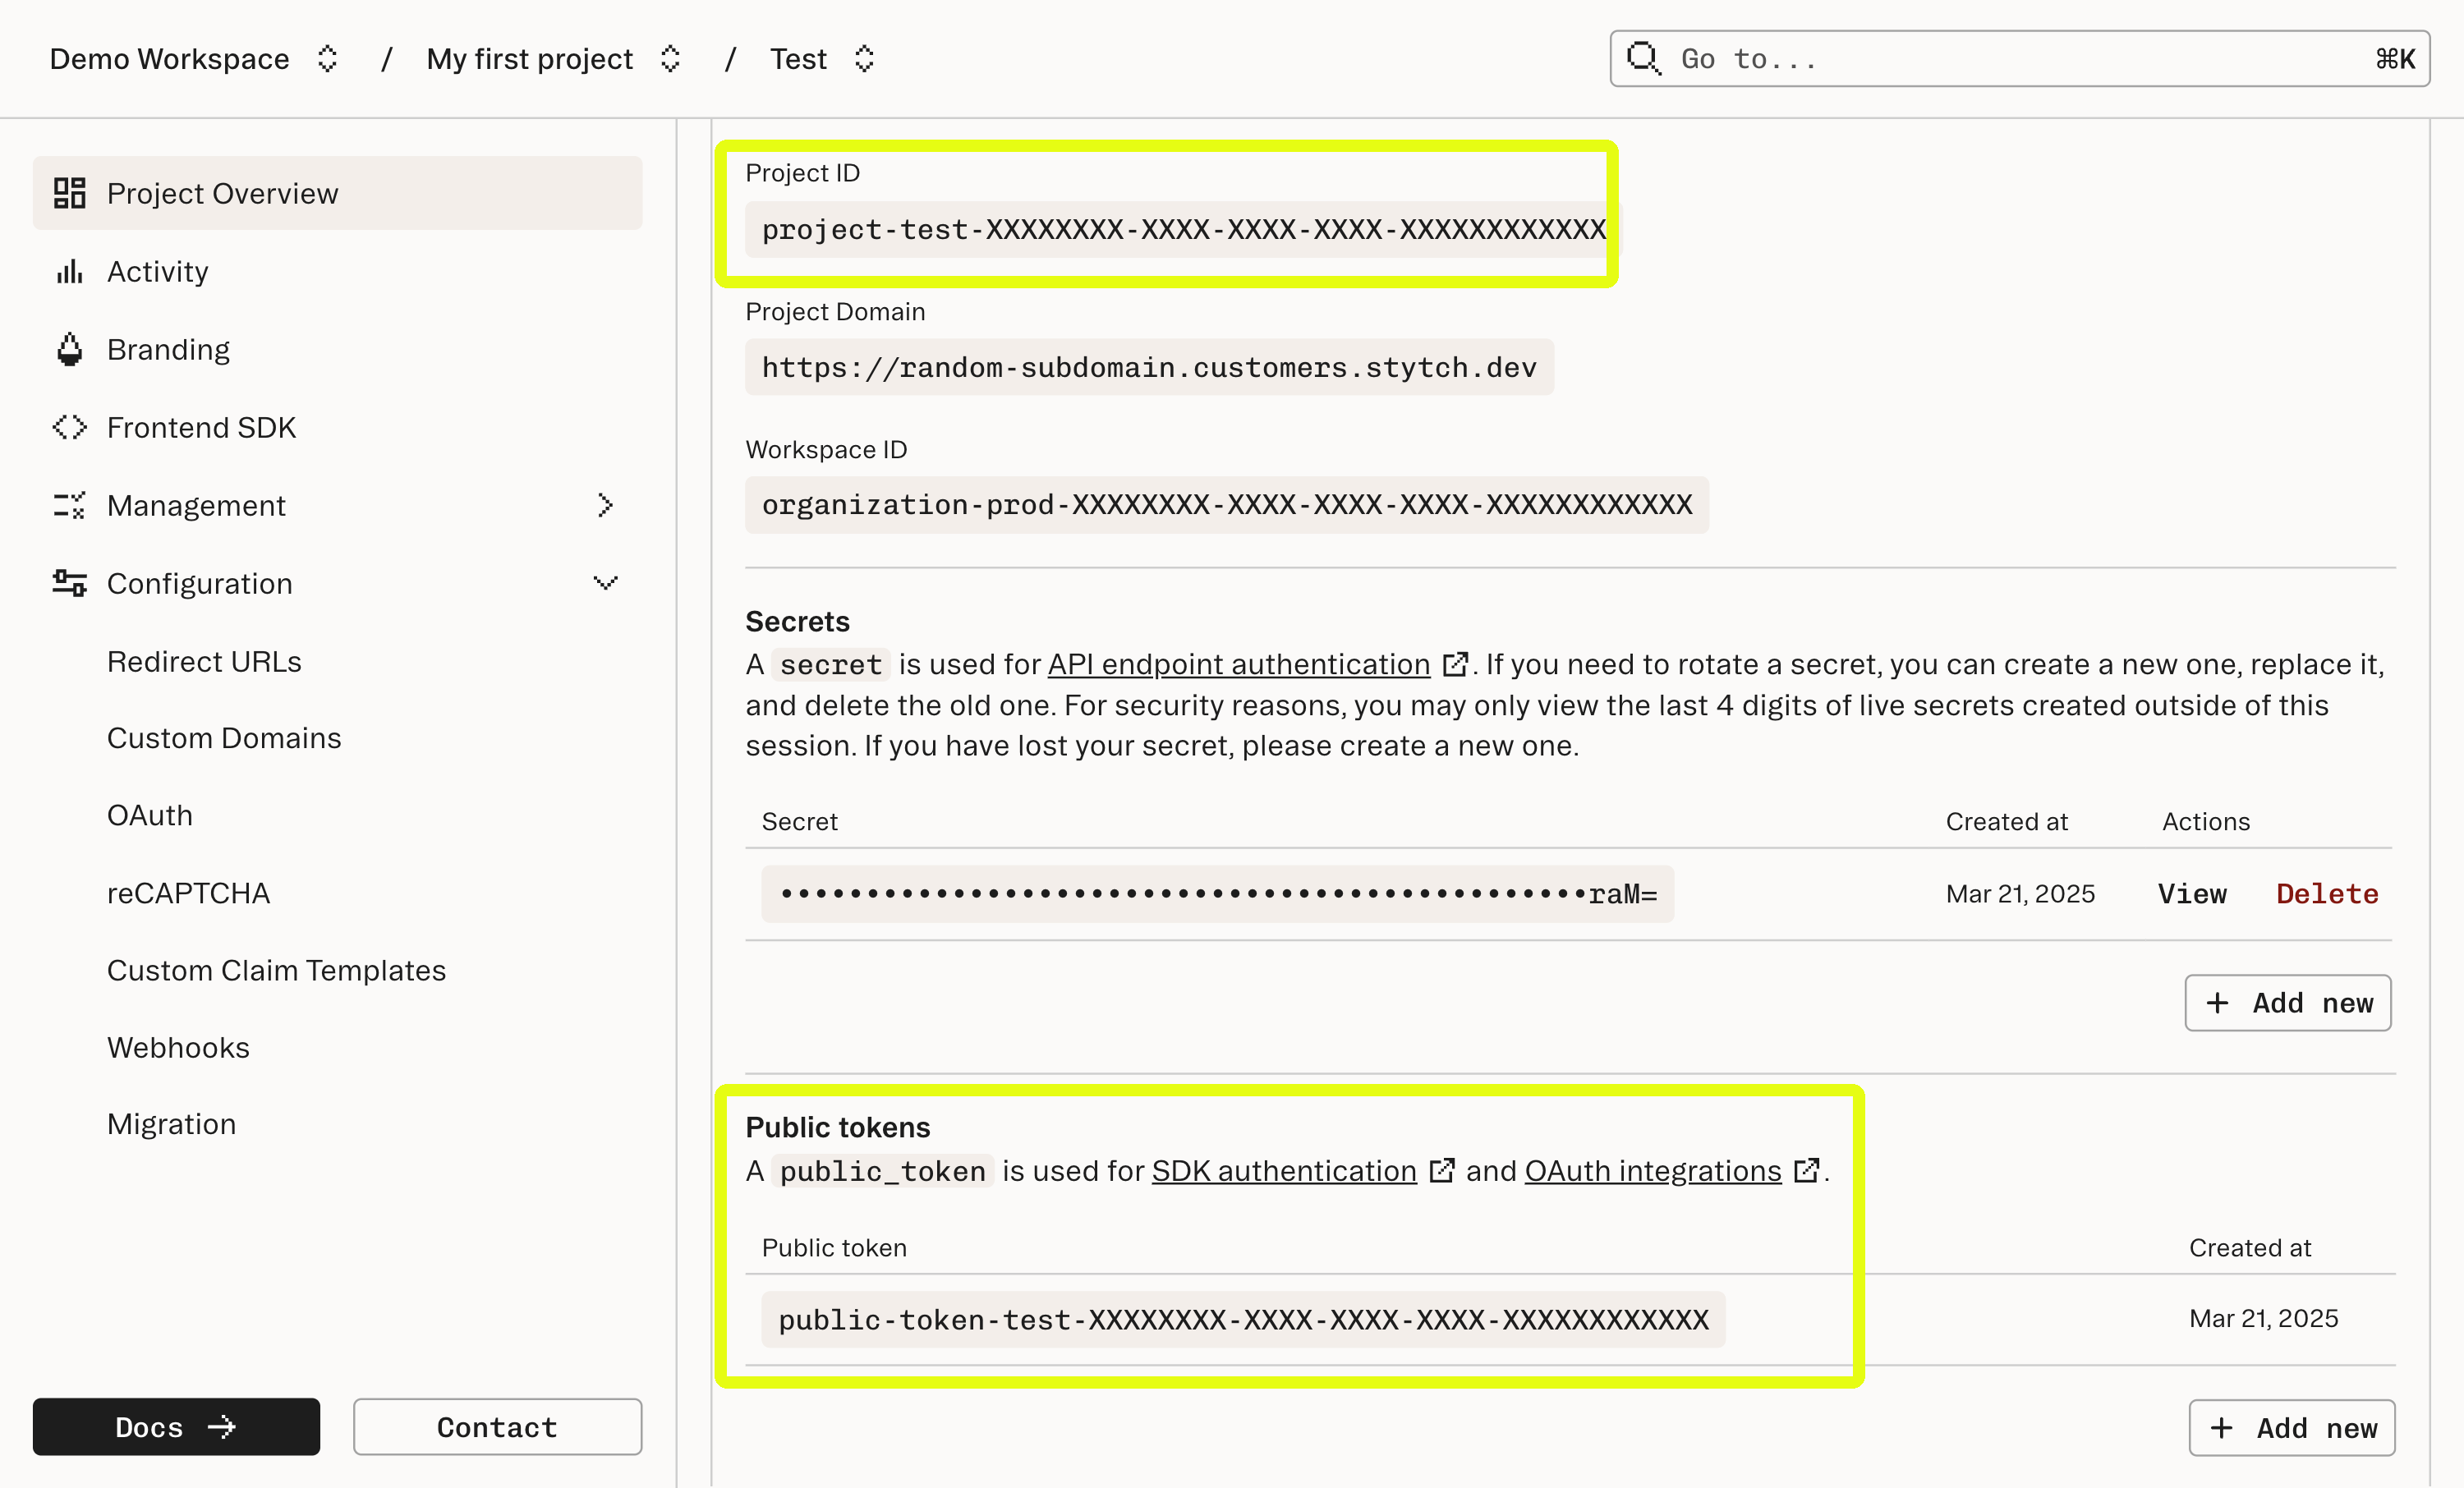
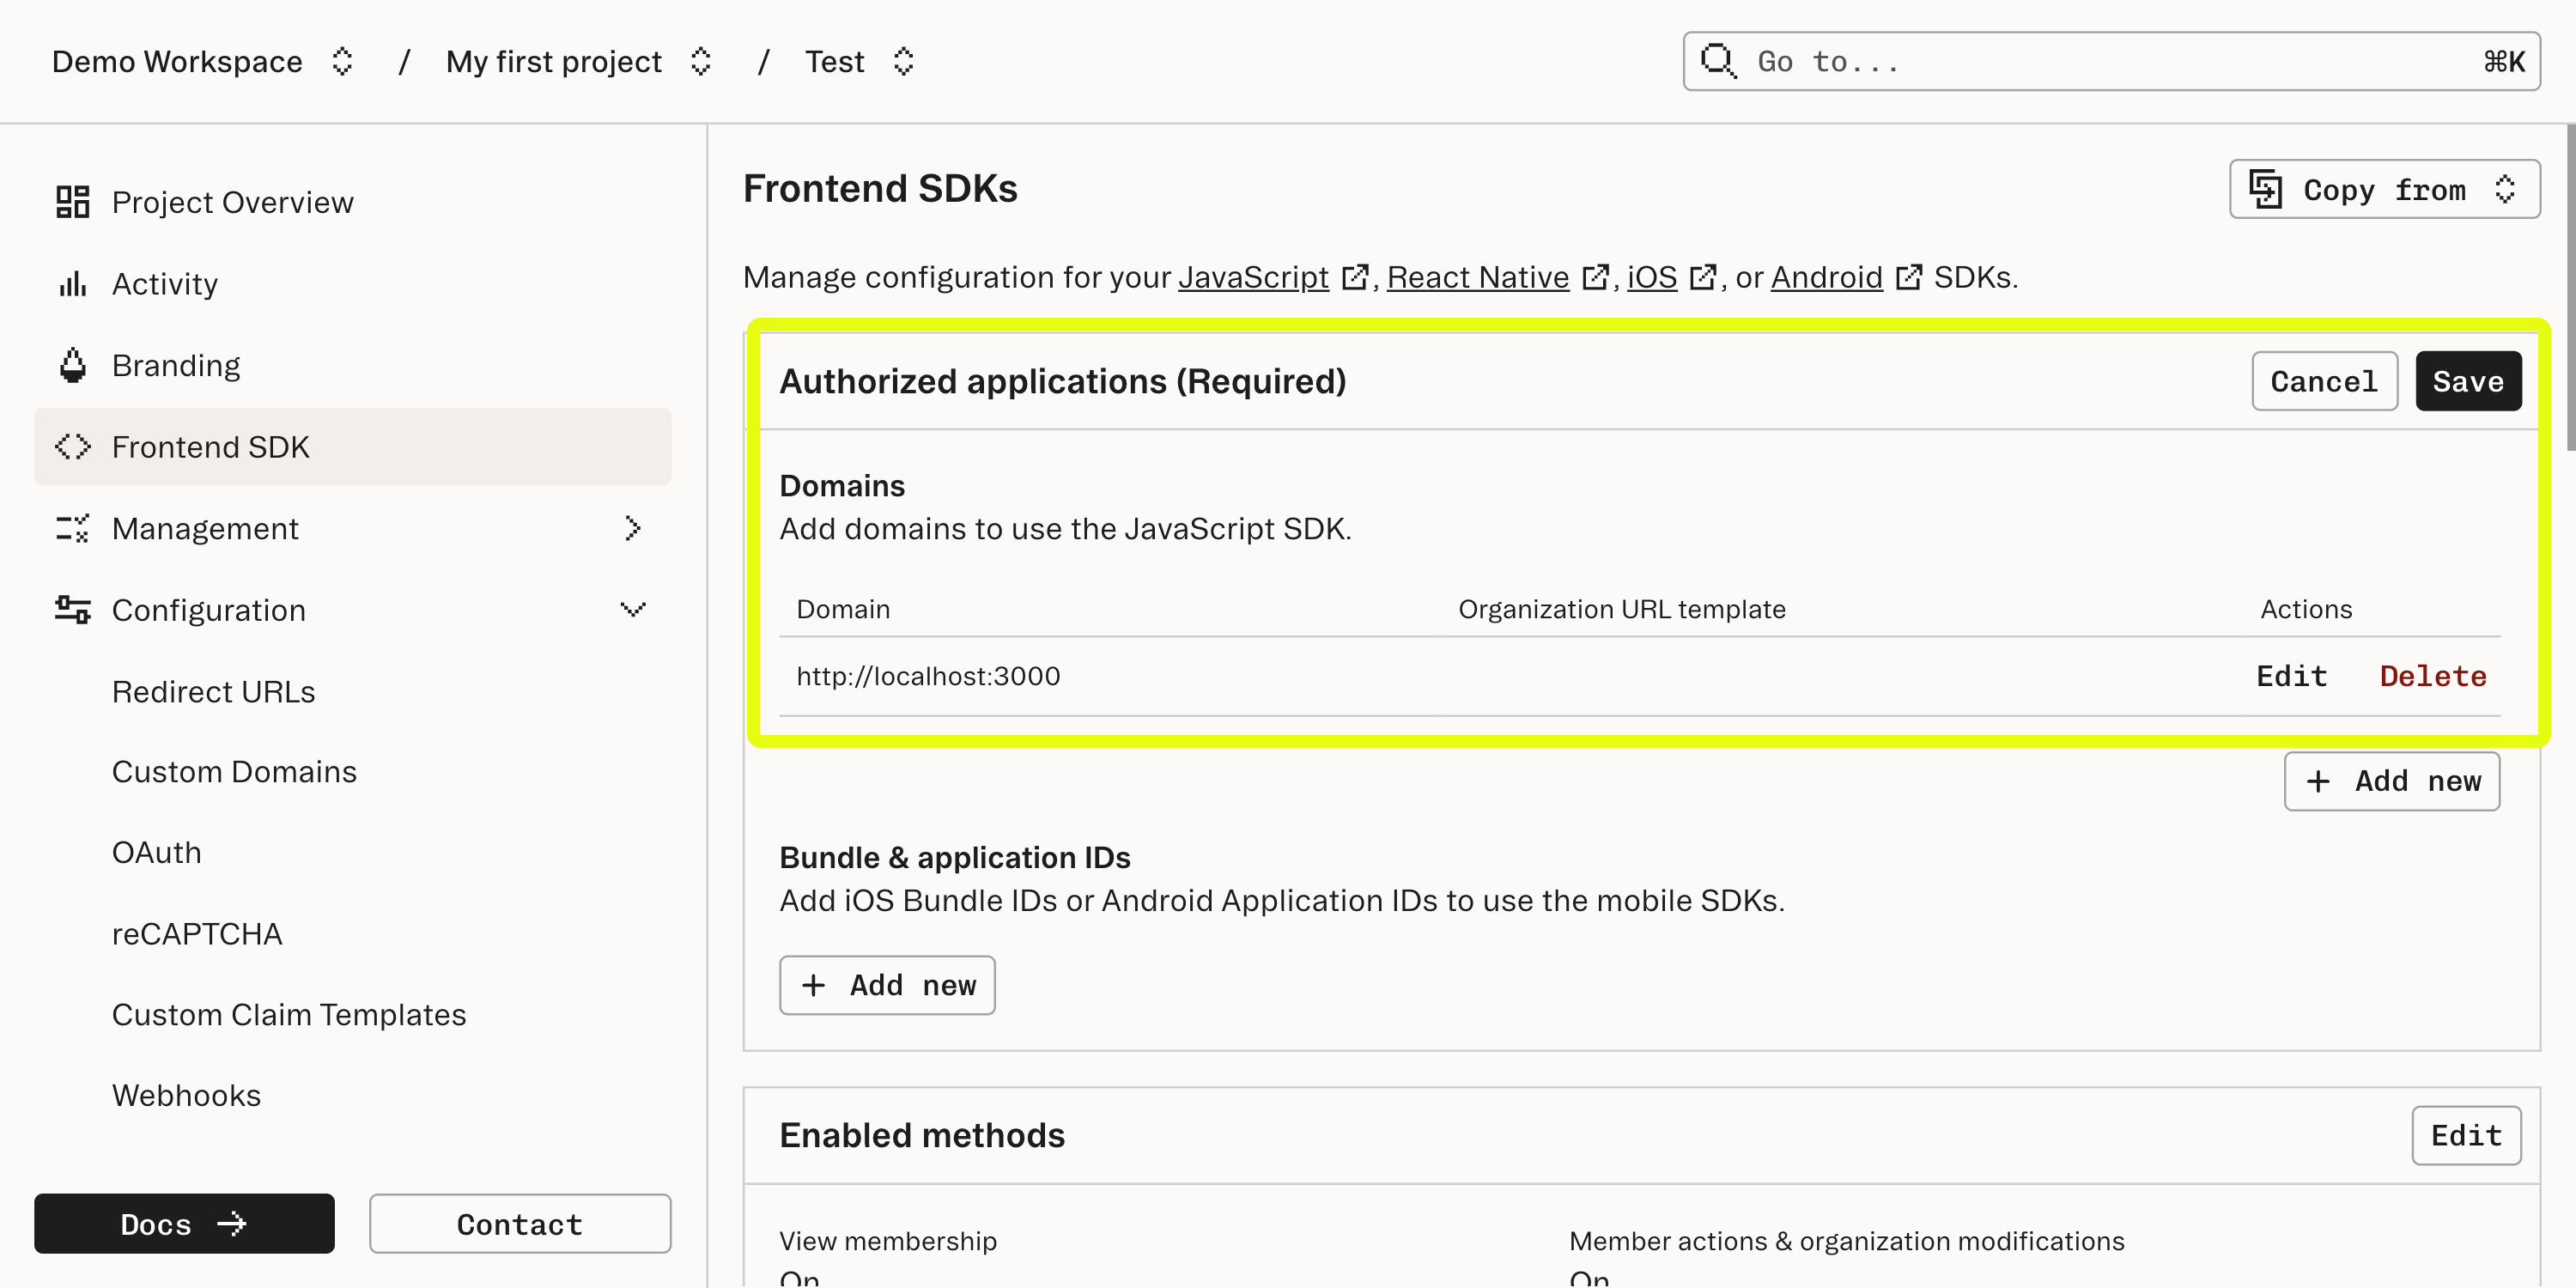
http://localhost:3000Dynamic Client Registration is a protocol that allows applications to register themselves with Stytch as a Connected App client. We will dive more into how Dynamic Client Registration works later in this guide.
Clone the GitHub repository for this guide
The companion repository for this guide is located in GitHub. Go to that repository, clone it, and follow the README to get the TODO app up and running on your local machine.Once you have the example up and running, explore its functionality and start to get a sense of how the app is structured, then return here for a tour of the app’s implementation.
Examine how the app manages data
This demo is structured as a lightweight single page app / MCP server that uses Stytch’s frontend SDKs both to manage auth and also implement the todo list functionality. This is done using Stytch’s
untrusted_metadata field on the user object to store the list data itself rather than a dedicated database—although the architecture operates in such a way that a different data layer can be used.)Learn how the MCP server is defined
The MCP Core architecture documentation is a good reference for understanding how an MCP server is implemented.
We’ll dive more deeply into how authentication is implemented in the next step.
Summary of relevant concepts
Summary of relevant concepts
MCP servers use a protocol based on JSON-RPC 2.0 for message passing between the remote MCP server (what we’re building) and the client, which is the LLM that is integrating with the server. The RPC protocol uses POST requests to the MCP server which either return a JSON payload or uses Server-Sent Events to pass messages back and forth between the server and client. There are a few core primitives (Resources, Prompts, Tools, etc…) defined by the MCP specification that describe the schema of the messages in this protocol and what behaviors can be expected.This is a structurally different protocol than vanilla HTTP requests, so implementing a Remote MCP server is more nuanced than a typical HTTP request/response flow. Thankfully there are libraries to assist in implementing MCP servers. Our example uses @modelcontextprotocol/sdk and @vercel/mcp-adapter to handle the specifics of conforming with the MCP protocol.The details of how exactly an MCP server defines its components are implementation-dependent, but for the purposes of this walkthrough the key concept is that MCP defines a protocol for our server to implement in order to establish communications with an LLM client. This protocol can coexist with an HTTP server or stand on its own, but the fundamentals of establishing authentication and access control are similar for each.The implementation for the MCP server in this example can be found in TodoMCP.ts
Learn how authentication and authorization with Stytch is implemented
Dynamic Client Registration
Dynamic Client Registration
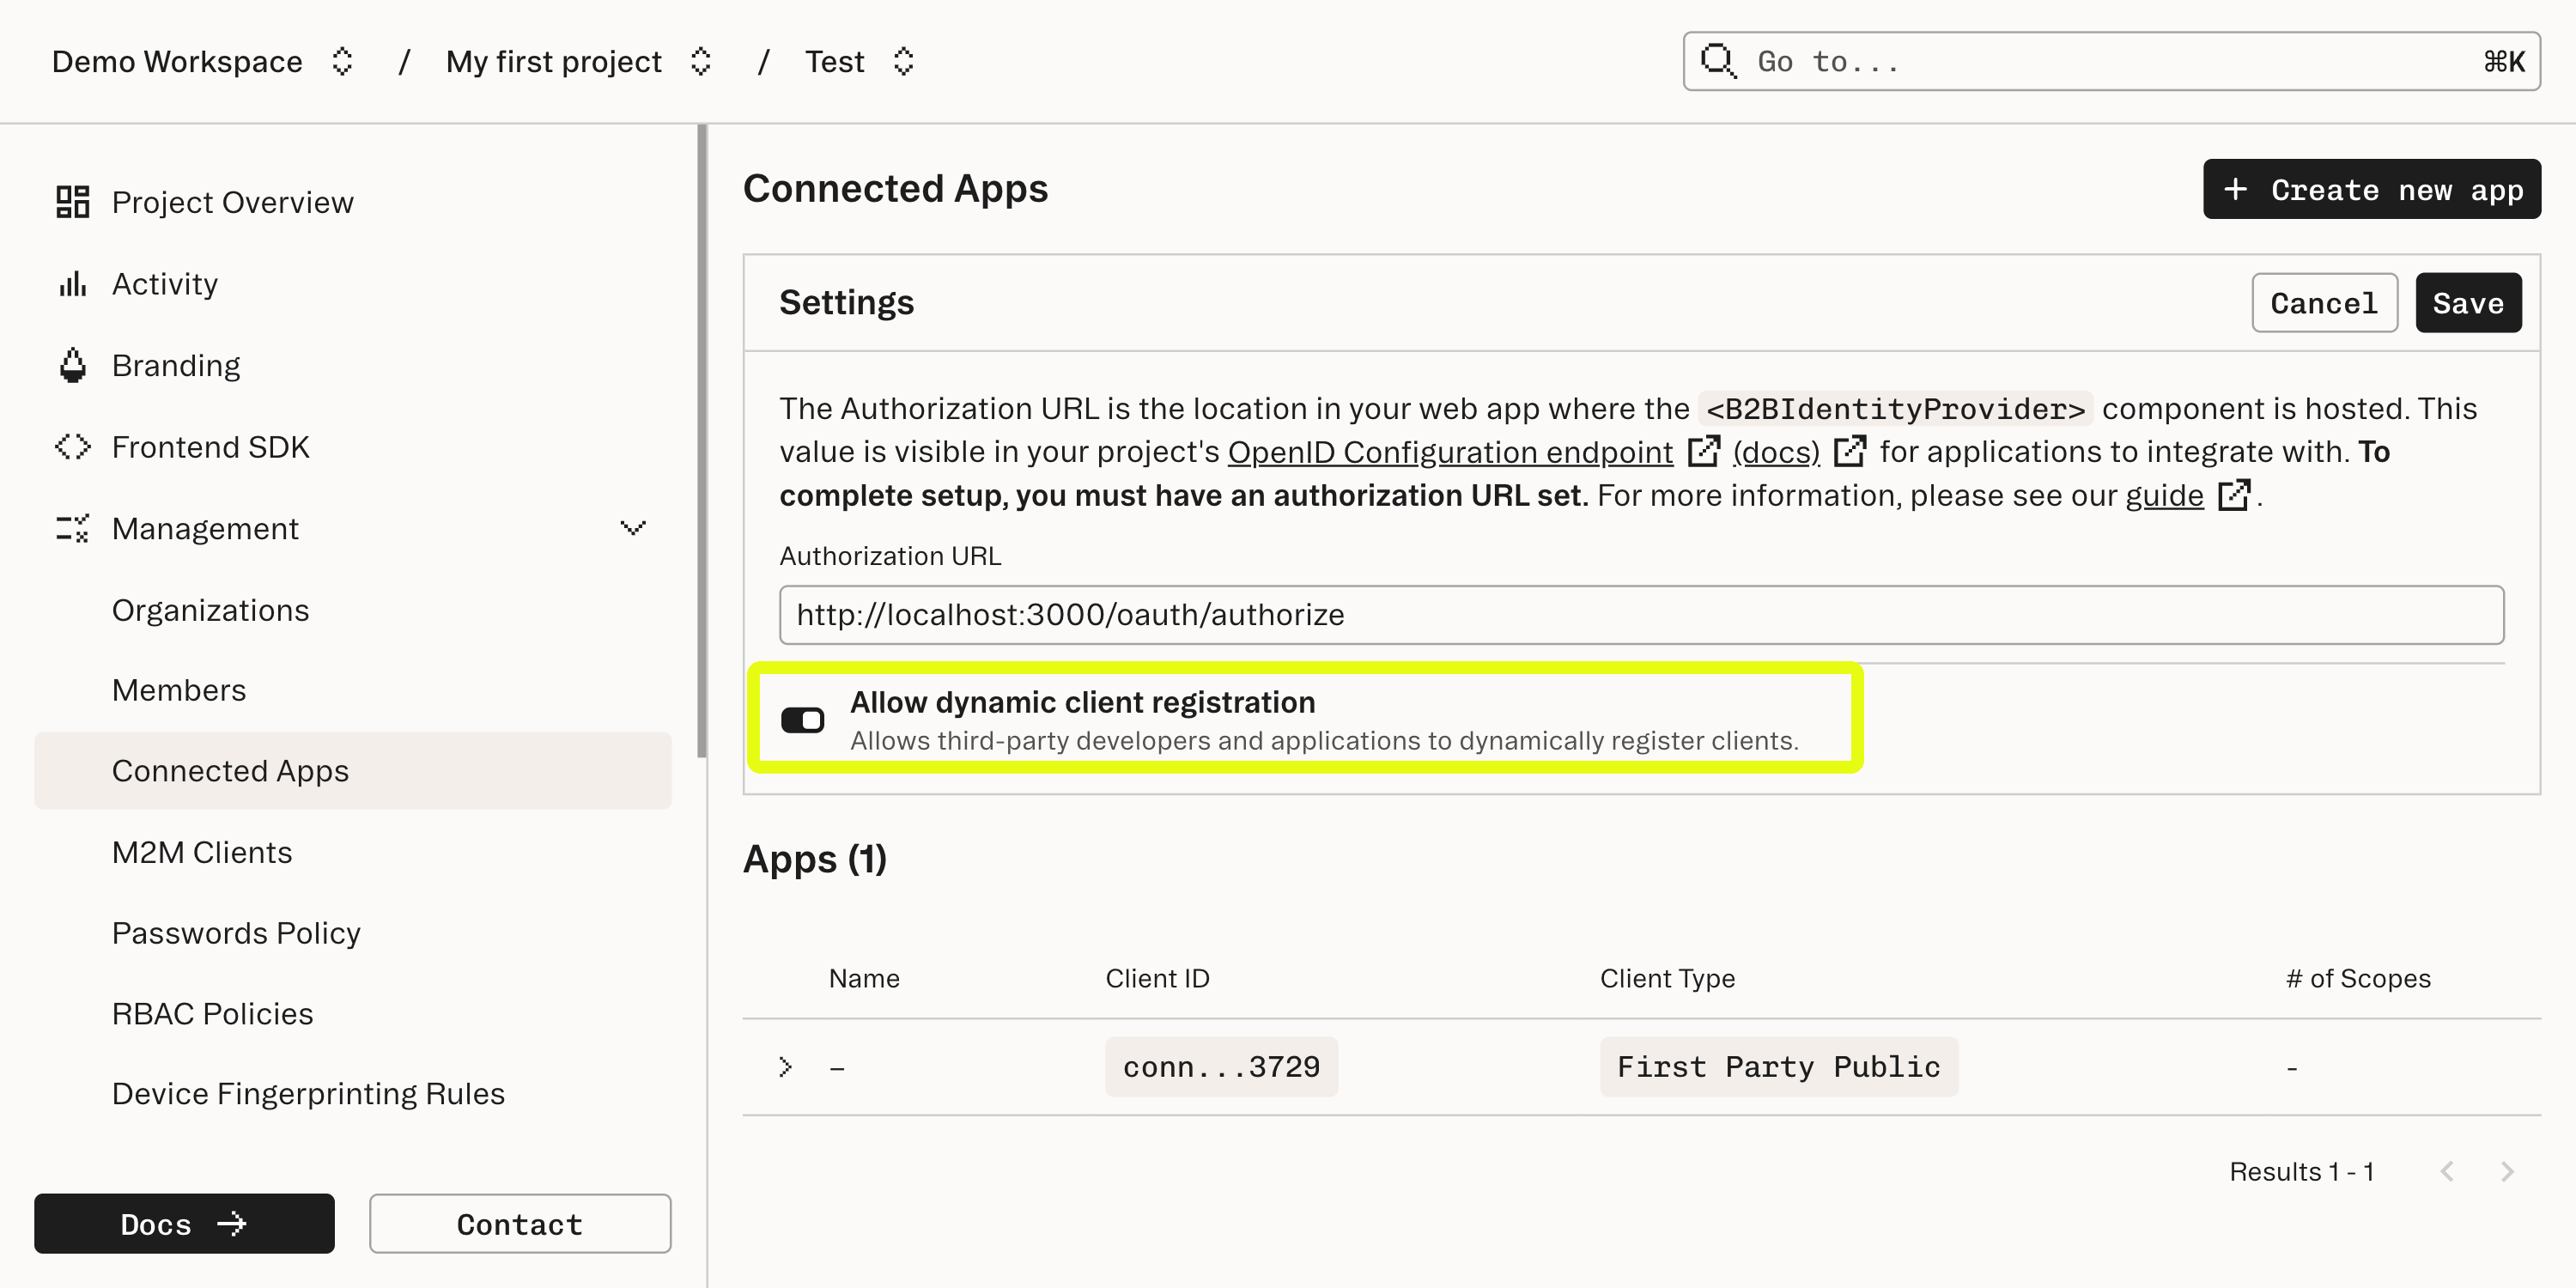
Dynamic Client Registration is an OAuth standard for allowing a client to automatically register itself with an Identity Provider (IDP) server and is included as part of the Remote MCP protocol.MCP servers should implement the Oauth 2.0 Protected Resource Metadata standard. The first time the MCP Inspector attempts to access our TODO app (the protected resource) without credentials it will receive a
401 Unauthorized response with a WWW-Authenticate header. This header points to a server which has authorization metadata, which is also this app. In the app there is a route at /.well-known/oauth-protected-resource which returns metadata about where to find its authorization server (the Stytch subdomain for your project). Once this location is known, Stytch and the MCP Inspector will handle the rest of the Dynamic Client Registration process to create a new Connected Apps client.Connected Apps authorization
Connected Apps authorization
All dynamically registered clients are Third Party Public apps and will show up in the Stytch Dashboard when registration is complete.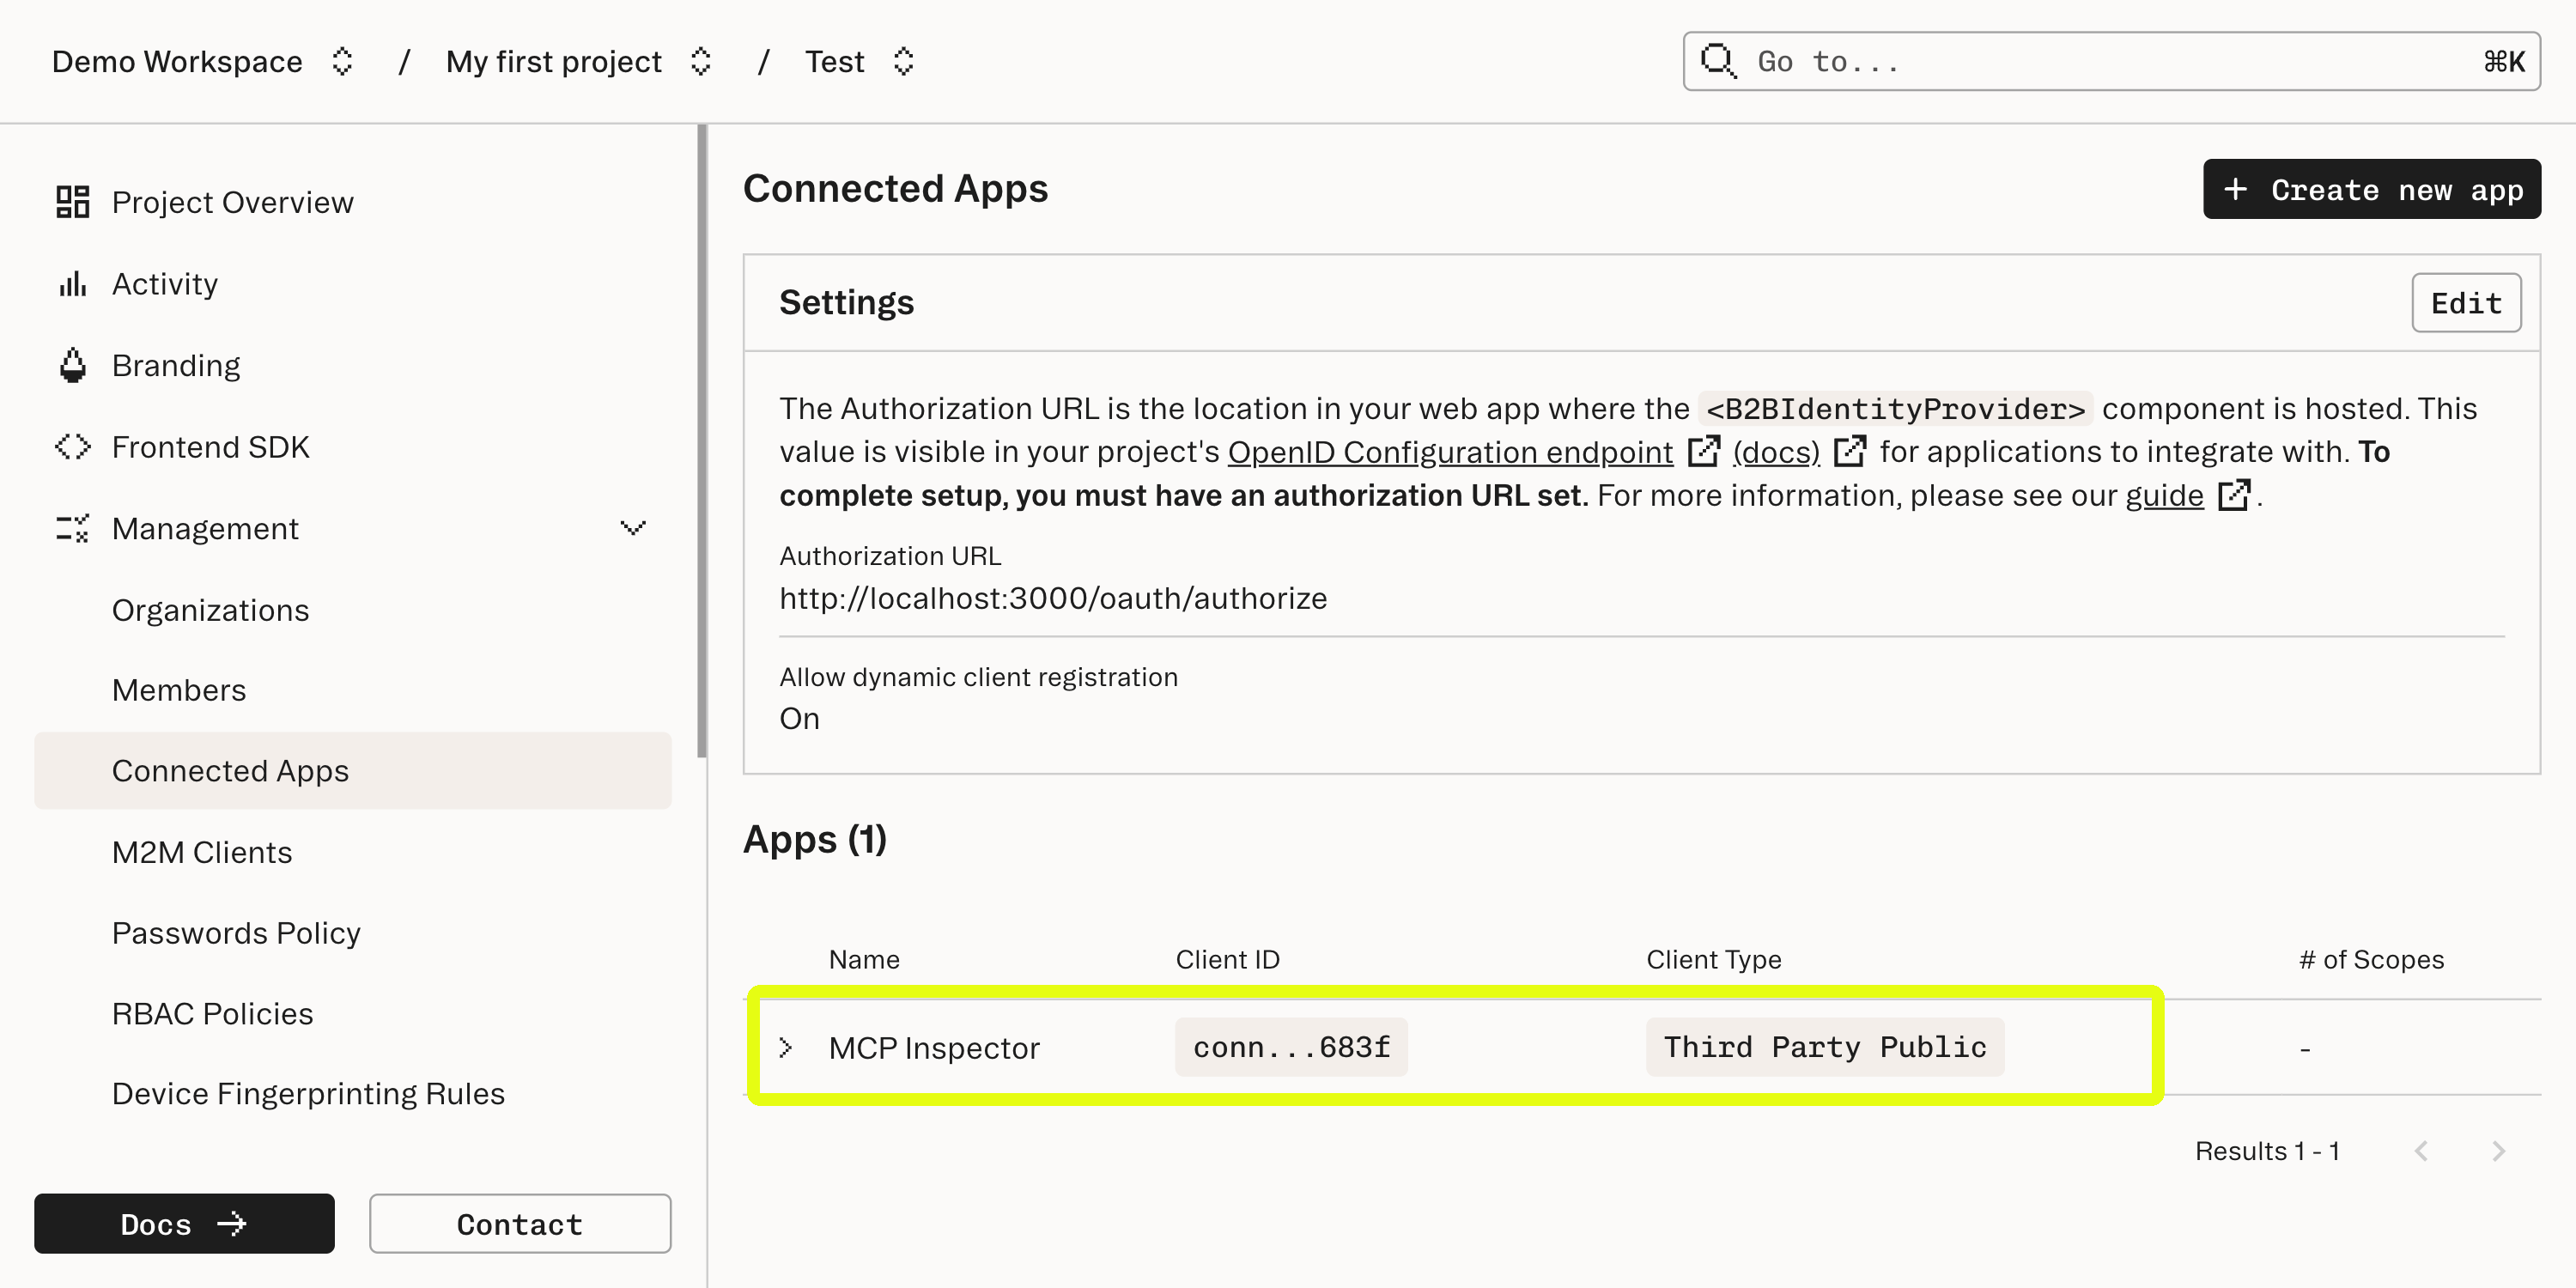
Authentication
Authentication
In the web client, the app wraps its components in a parent component that enforces authentication. This component verifies that there is a current Stytch user logged in before rendering its child component. If no user is logged in, it redirects to the login page.For the MCP server we use Stytch’s headless frontend SDK to authenticate. This retains user information from when we authorized the app connecting to our MCP server and uses this to make requests to Stytch’s API.
Authorization
Authorization
Deploying to Vercel
Vercel naturally supports deploying by linking a Github repository; just note, after the deploy, the location of the server will have changed away from
localhost, which requires additional configuration in Stytch. Once you have the URL for your Vercel app, repeat the process in Step 1 to add this URL as an “Authorized Application” in the “Frontend SDK” settings.What’s next
- View our guide on our B2B MCP Server example app to see a similar app using B2B Authentication with OAuth scopes and Role-Based Access Control
- View a similar walkthrough for deploying and MCP server as a Cloudflare Worker
- Familiarize yourself with Stytch’s B2B SDKs and Consumer SDKs for a deeper dive on how to integrate your MCP server with Stytch.
- Browse the Model Context Protocol documentation for more information about Remote MCP Servers.