Overview
In some cases you may want to increase or reduce friction for previously fingerprinted instances. For example, manuallyALLOW a user due to a false positive, or BLOCK an authentic user who violated the terms of service.
You can create a rule that changes the verdict action based on fingerprint attributes.
In this guide you’ll learn how to set up rules. By the end, you’ll have:
- Called the Set Rule endpoint to apply an authorization action on a specific fingerprint.
- Removed the rule.
Important considerations
Consider the following when setting a rule:Verify the request
When you receive a support request to be unblocked, you should consider the risk of social engineering. Bad actors can also file support requests to try to evade your defenses, so you shouldn’t blindly setALLOW rules based on support requests.
When setting an ALLOW rule for a customer who reaches out, you should confirm that the user is a good actor and should be allowed access to your application.
Determine which identifier to use
You’ll need a fingerprint, ID, or IPGEO attribute (IP address, ASN, or country code) you want to set a rule for. These identifiers are returned by the Fingerprint Lookup endpoint for eachtelemetry_id.
The ideal rule is precise and targets the specific users you are looking for. Consider the granularity and other characteristics to avoid setting a rule that unintentionally affects good users.
Table for uniqueness, stability, and precedence characteristics of each identifier
Table for uniqueness, stability, and precedence characteristics of each identifier
If multiple rules apply, the highest precedence wins. For example, one request matches a Visitor ID Rule to
ALLOW and a Country Code Rule to BLOCK, the more-specific Visitor ID Rule wins and the verdict is ALLOW.CIDR rule conflicts
Since CIDR block rules may conflict with each other, we have two additional rules for precedence:- The smallest block size takes precedence. For example, if an
ip_addressoverlaps with acidr_blockrule ofALLOWfor a block with a prefix of/32and acidr_blockrule ofBLOCKwith a prefix of/24, the rule match verdict will beALLOW. - Among equivalent size blocks,
BLOCKtakes precedence overCHALLENGE, which takes precedence overALLOW. For example, if anip_addressoverlaps with twocidr_blockrules with blocks of the same size that returnCHALLENGEandALLOW, the rule match verdict will beCHALLENGE.
Validate against historical traffic
Before setting a rule on an identifier, compare the identifier against your historical traffic if available. You can look up the various fingerprint types to identify the uniqueness in the Dashboard.- When you search an identifier in the Device Fingerprinting Dashboard, it will show how frequently other fingerprint types have shared that identifier. You should make sure the percentage of ALLOWs isn’t too high.
- When you create a new rule in the Dashboard, you can test the impact to check the number of changes is expected.
- In addition to the Stytch Dashboard, you should cross-reference the identifier with your own internal monitoring to verify that the rule won’t affect other valid users. Ensure the rule targets your expected scope of users.
Prerequisites
- An existing Stytch project in the Dashboard.
- The
project_idandsecretfor your project’s Test environment. These can be found under your project’s Project ID & API keys section in the Dashboard. - Device Fingerprinting enabled for your project.
- If you don’t have Device Fingerprinting enabled, you can request access here.
Steps
- Using the Dashboard
- Using the API
1
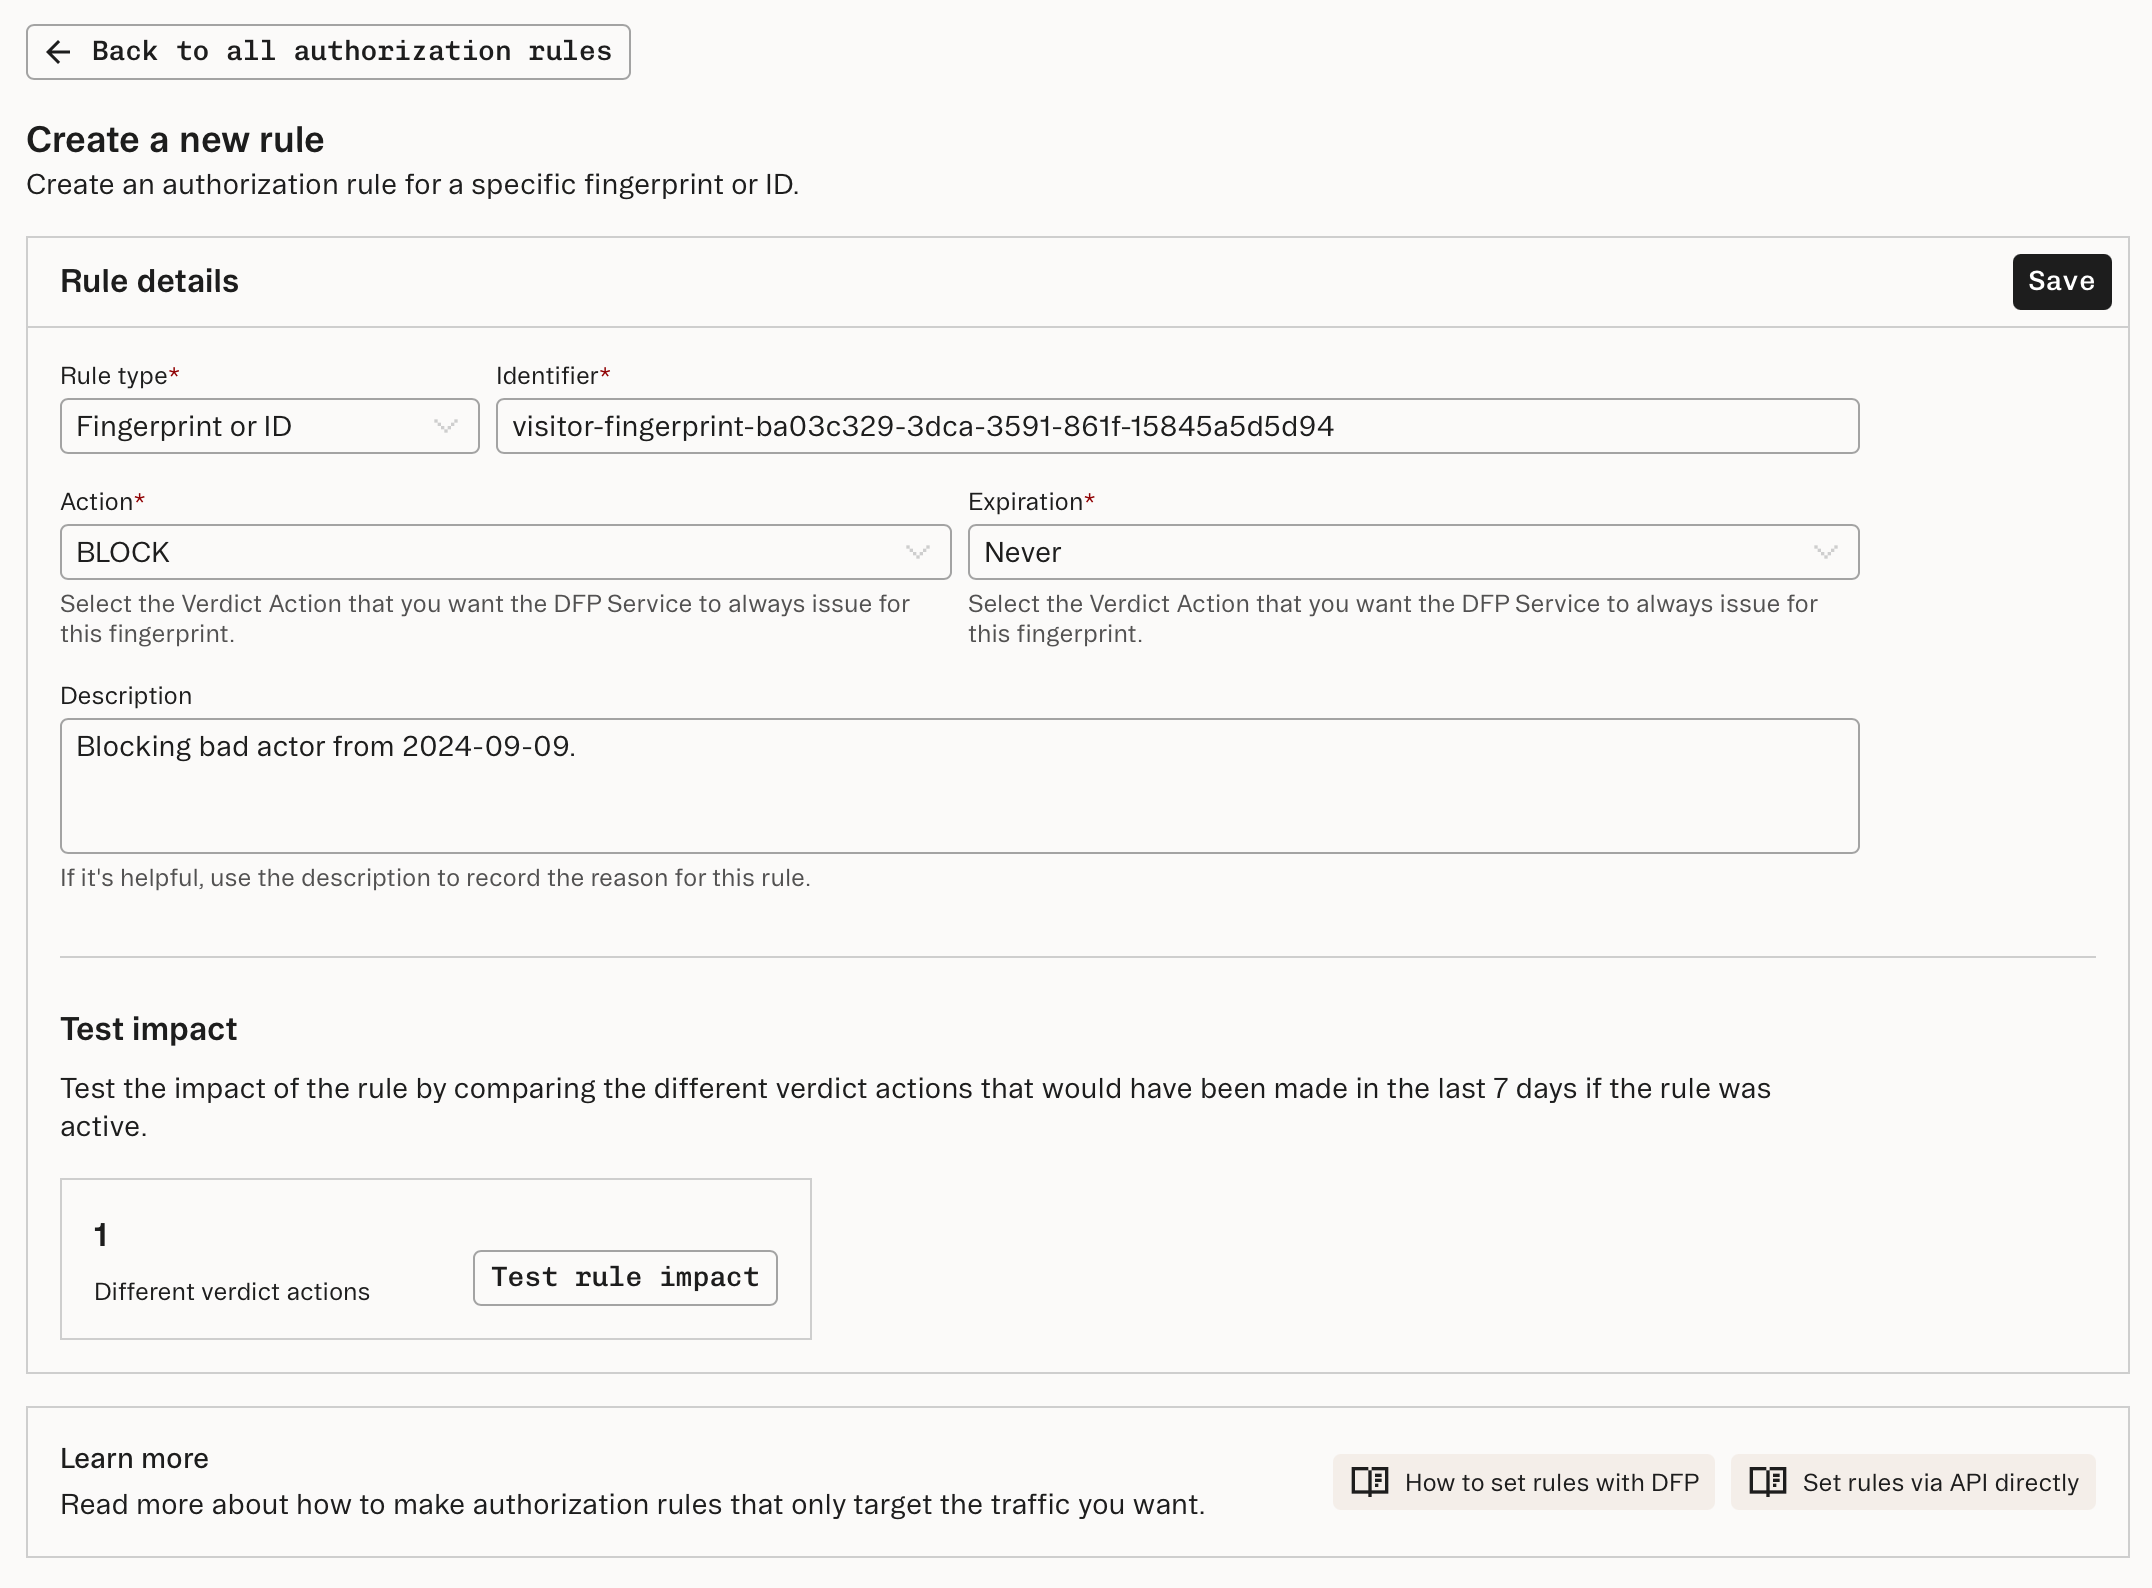
Create a rule in the Dashboard
- Navigate to Device Fingerprinting Rules in the Dashboard.
- Click New rule.
- Enter the identifier, like a
visitor_idorbrowser_id, or an IPGEO attribute (IP address, ASN, or country code). - Set action to
ALLOW,BLOCK, orCHALLENGE. - (Optional) Set an expiration time and a description for the rule.
- Click Test rule impact and confirm the expected impact.
- Click Save.
2
Example rule
BLOCK verdict. Any future calls to the Fingerprint Lookup endpoint involving this fingerprint will automatically return a BLOCK verdict with a reason of RULE_MATCH.You also have the option of providing an expires_in_minutes parameter if you need a rule to expire after a specified lifetime.
Since expires_in_minutes was omitted in our example request, the rule will be kept permanently.3
Deleting the rule
- Click the Delete rule button to delete the rule.

Want to try Stytch Device Fingerprinting?
Find out why Stytch’s device intelligence is trusted by Calendly, Replit, and many more.