To test out SCIM, set up an Entra developer instance to use for this guide.
Configure a SCIM connection for a specific Organization
1
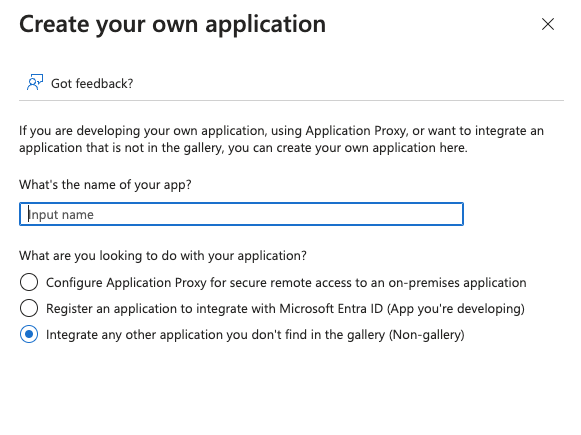
Create application in Entra
If you don’t already have an application in Entra, create one by navigating to “Applications” → “Enterprise Applications” and selecting “create your own application”.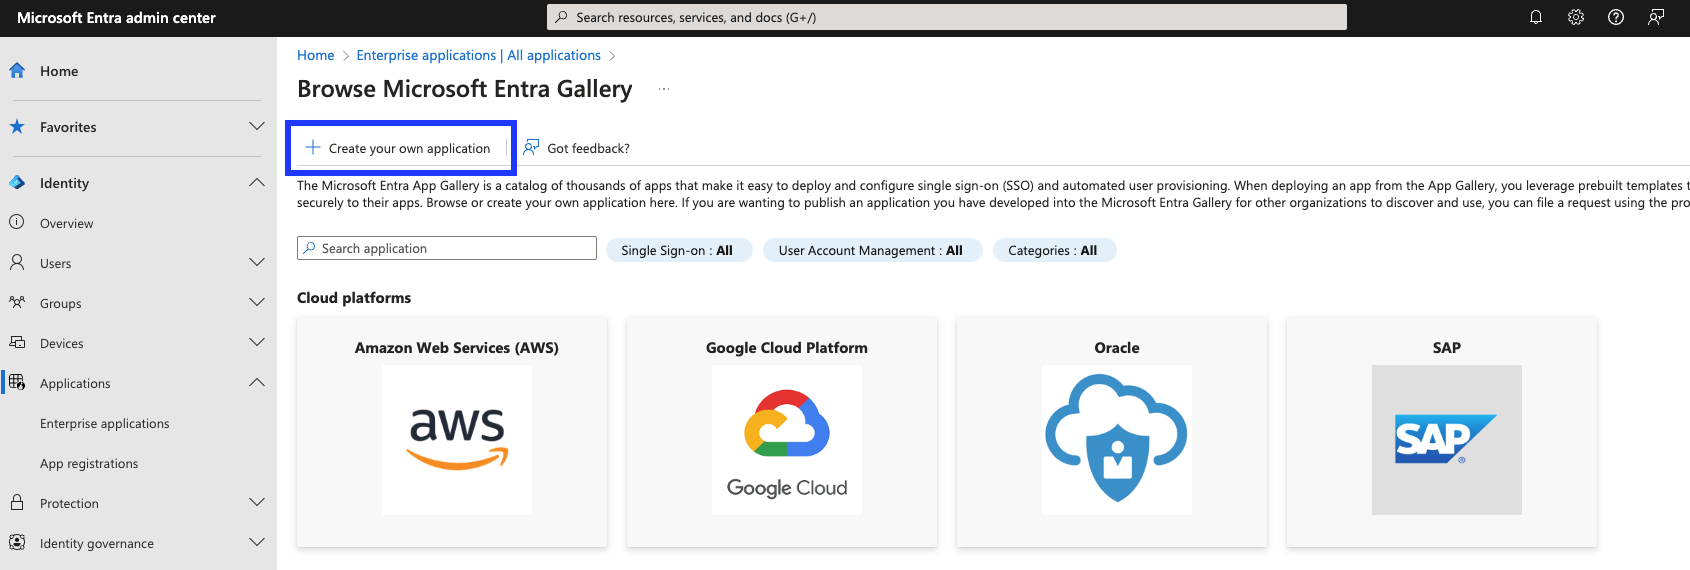
2
Enable automatic provisioning
Once you have an application, enable SCIM by clicking on “Provisioning” on the left hand management side bar, or “Provision User Accounts” under the Getting Started section.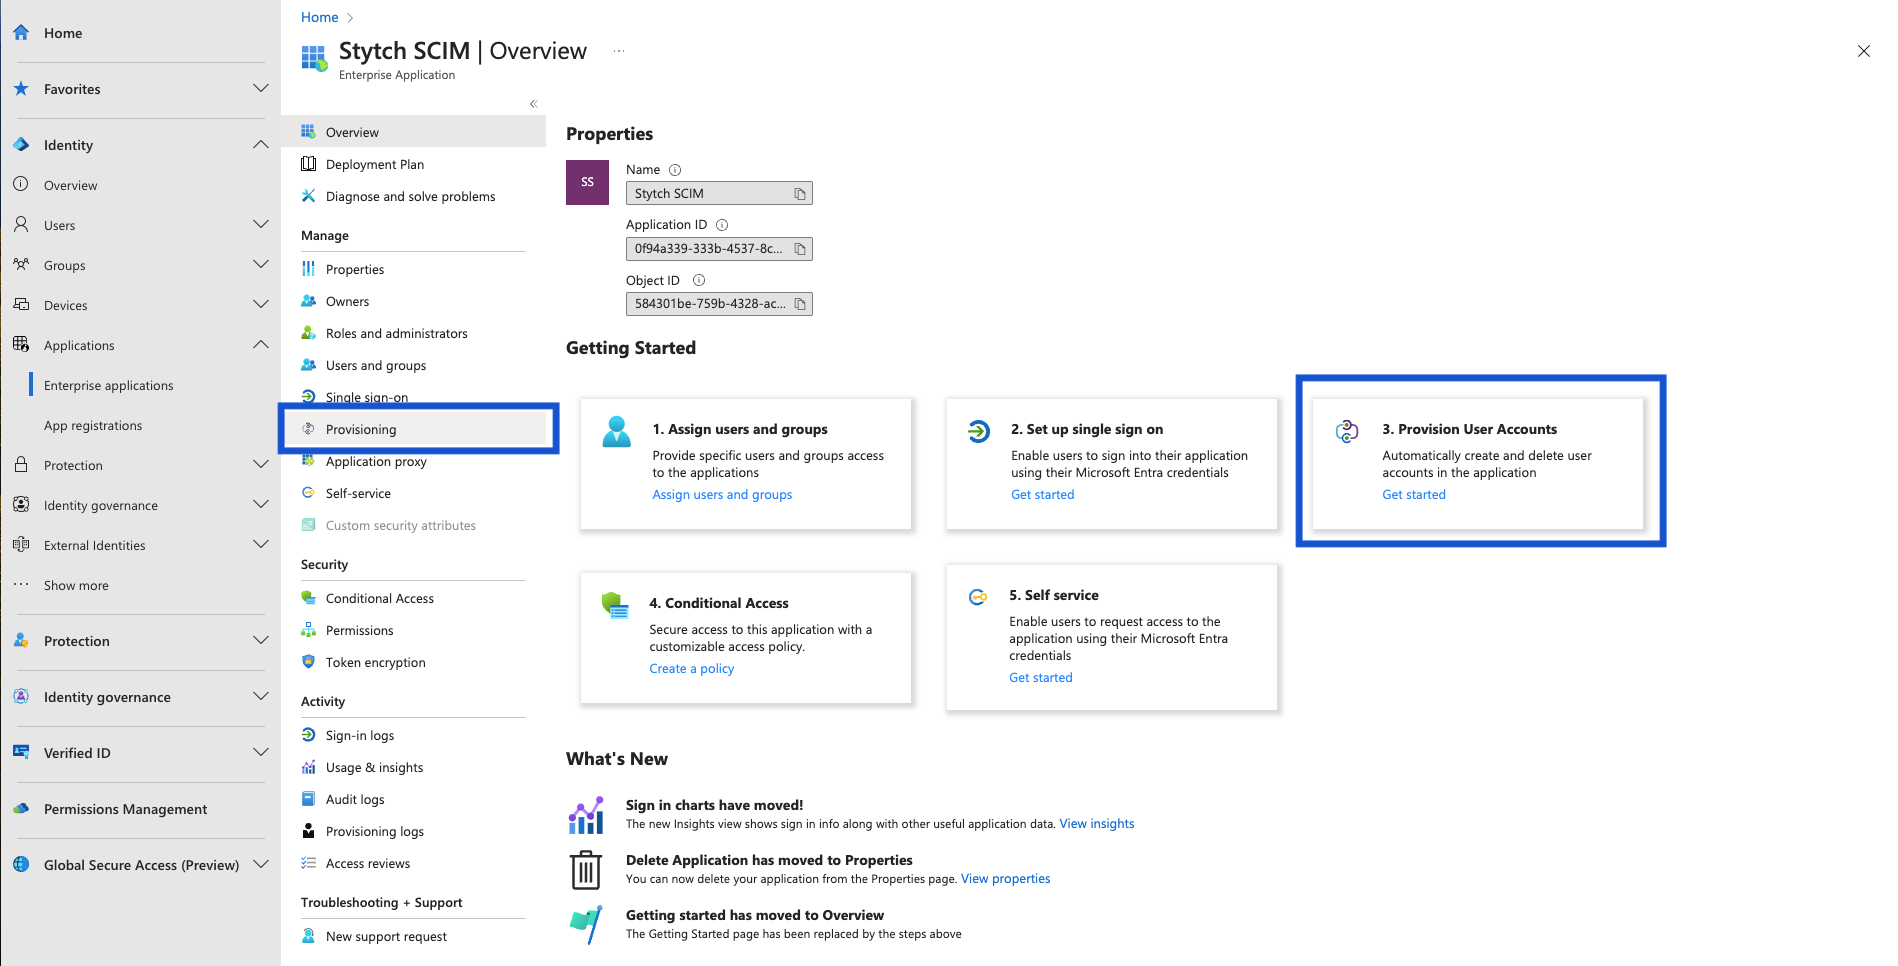
3
Create SCIM Connection in Stytch
Create a SCIM Connection on the Organization in the Stytch Dashboard or the Create SCIM Connection endpoint. Select Microsoft Entra as the IdP.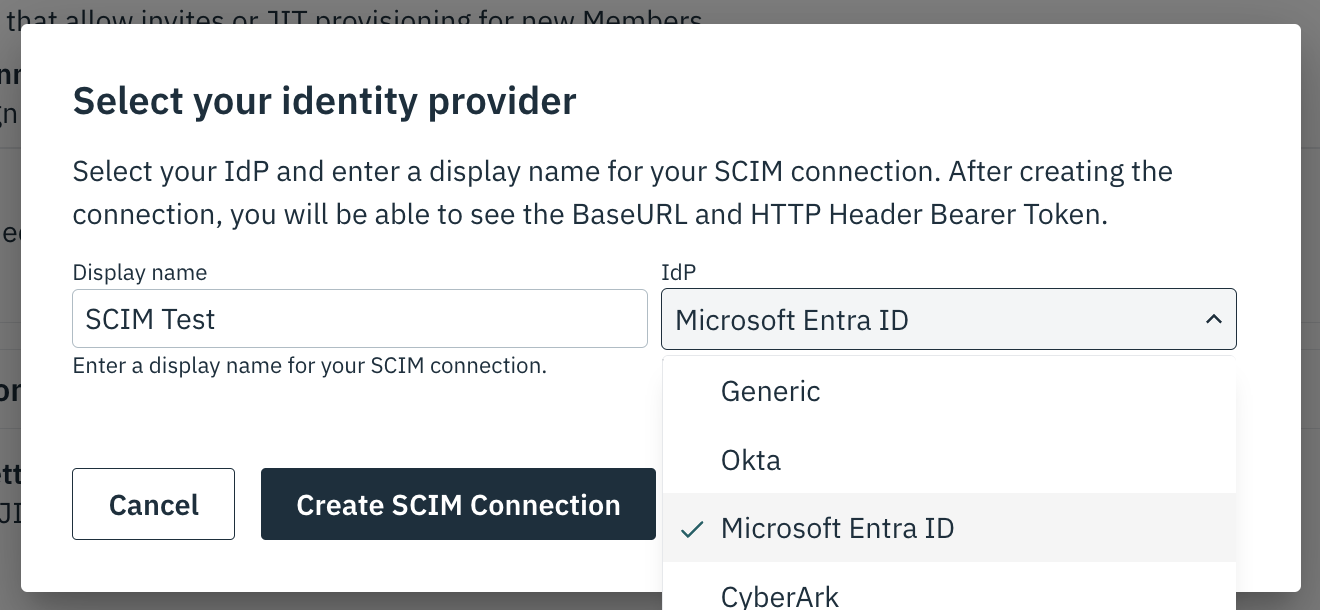
4
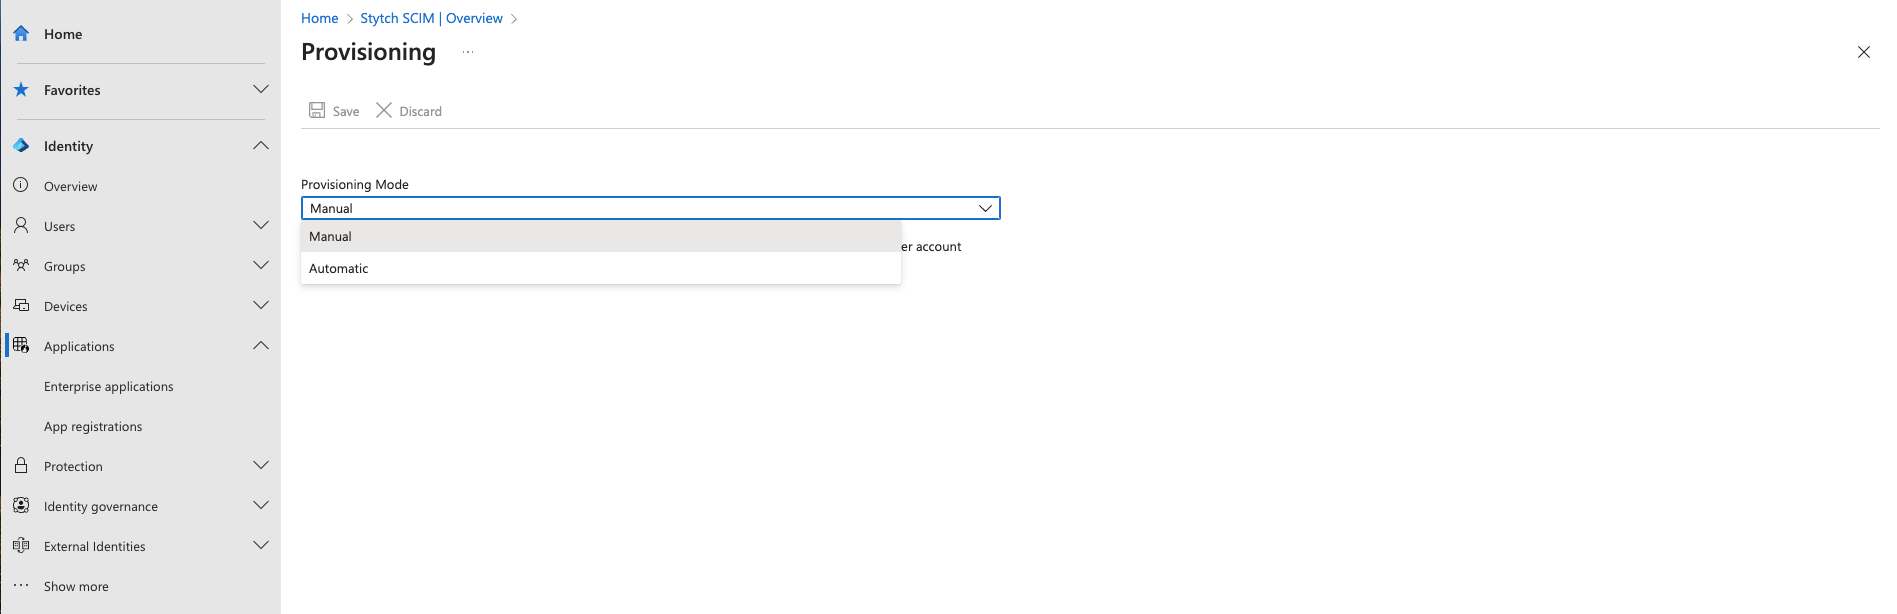
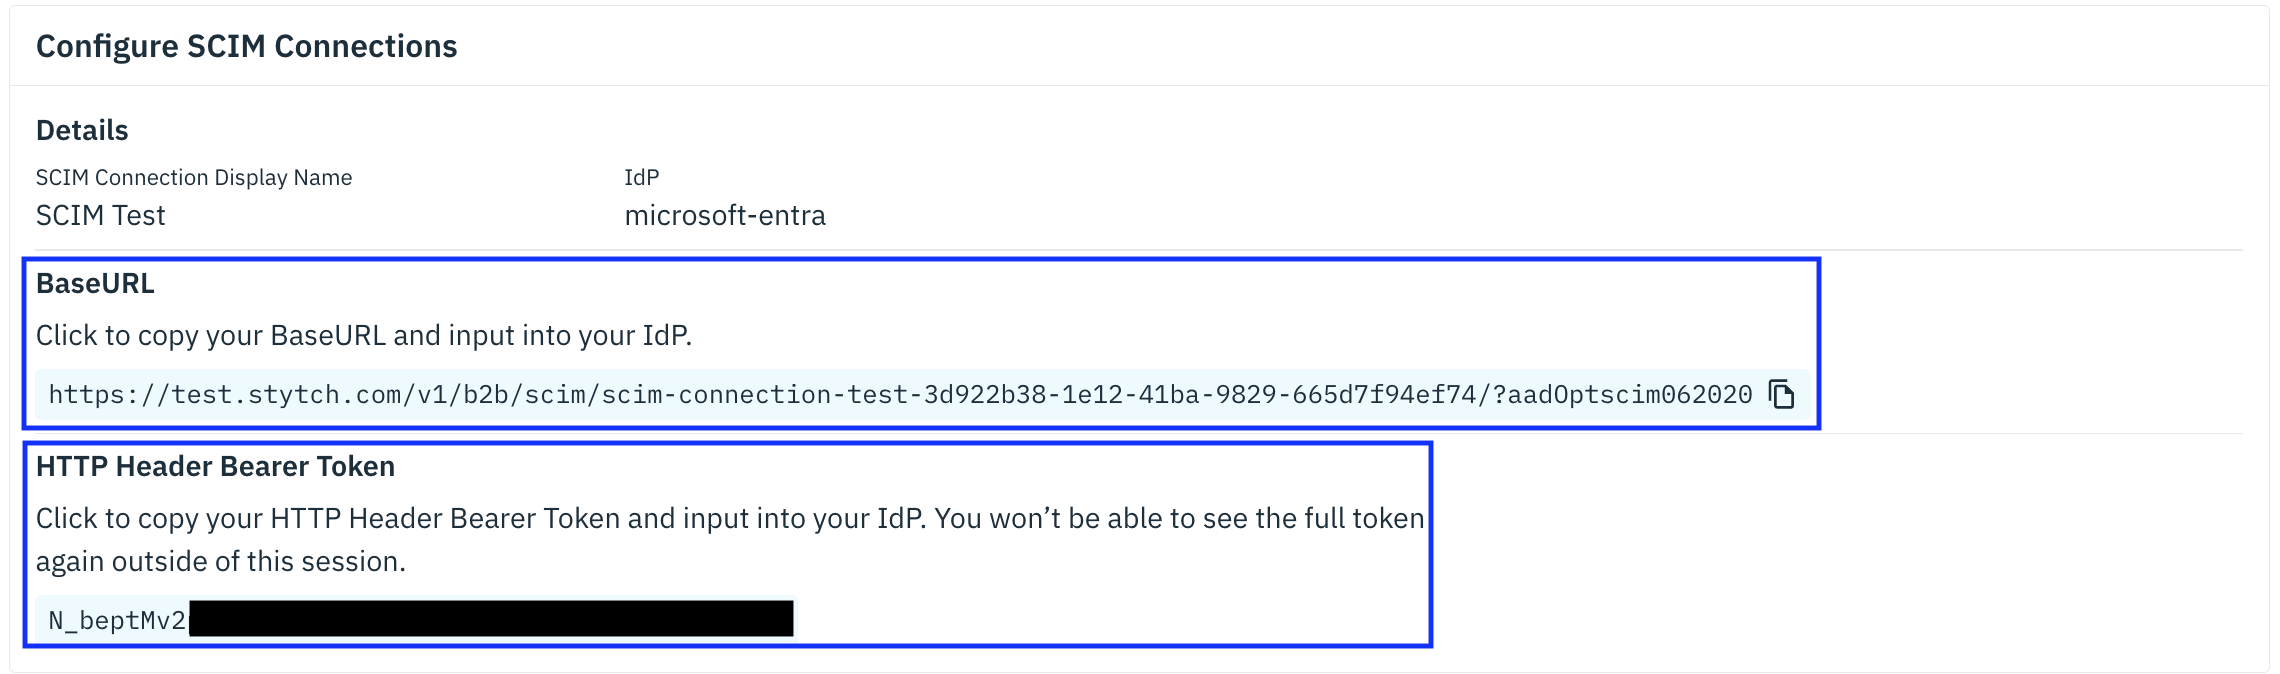
Configure SCIM credentials in Entra
On the “Provisioning” tab under “Admin Credentials”: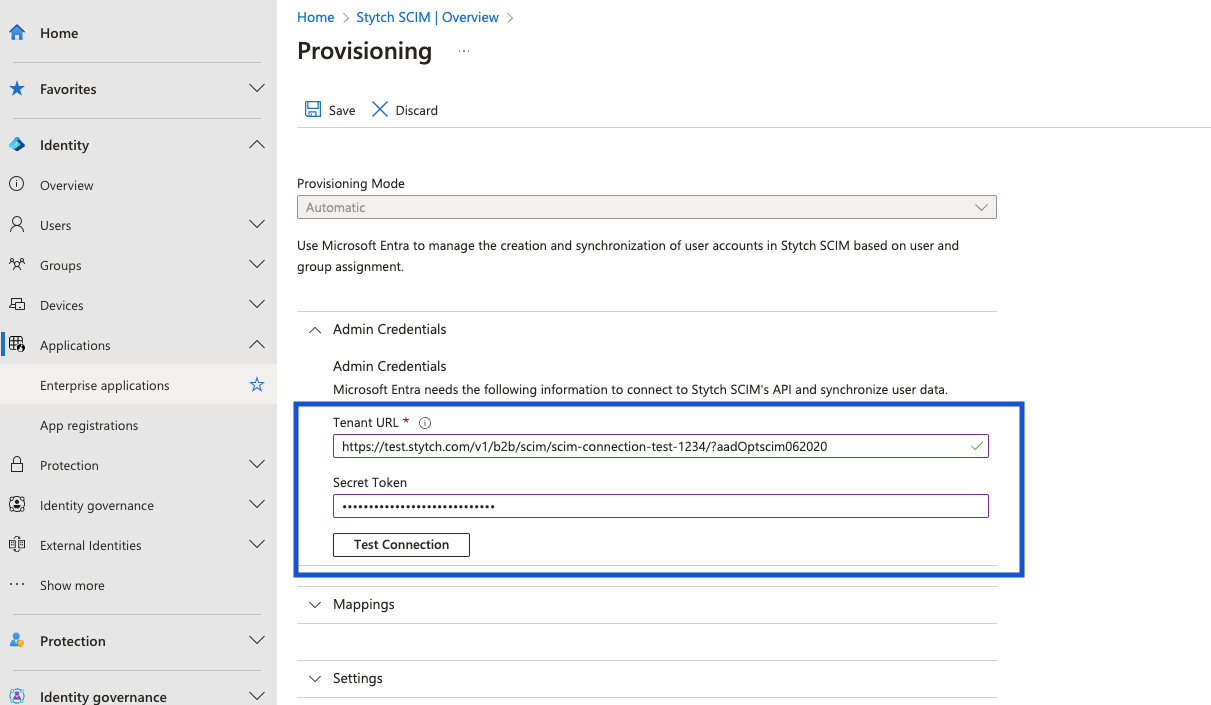
- Copy the “BaseURL” from Stytch into the “Tenant URL” field
- Copy the “HTTP Header Bearer Token” from Stytch into the “Secret Token” field
If you did not specify an IdP when creating the SCIM Connection, you must append
?aadOptscim062020 to the returned BaseURL to flag the application into Entra’s SCIM 2.0 compliant version-
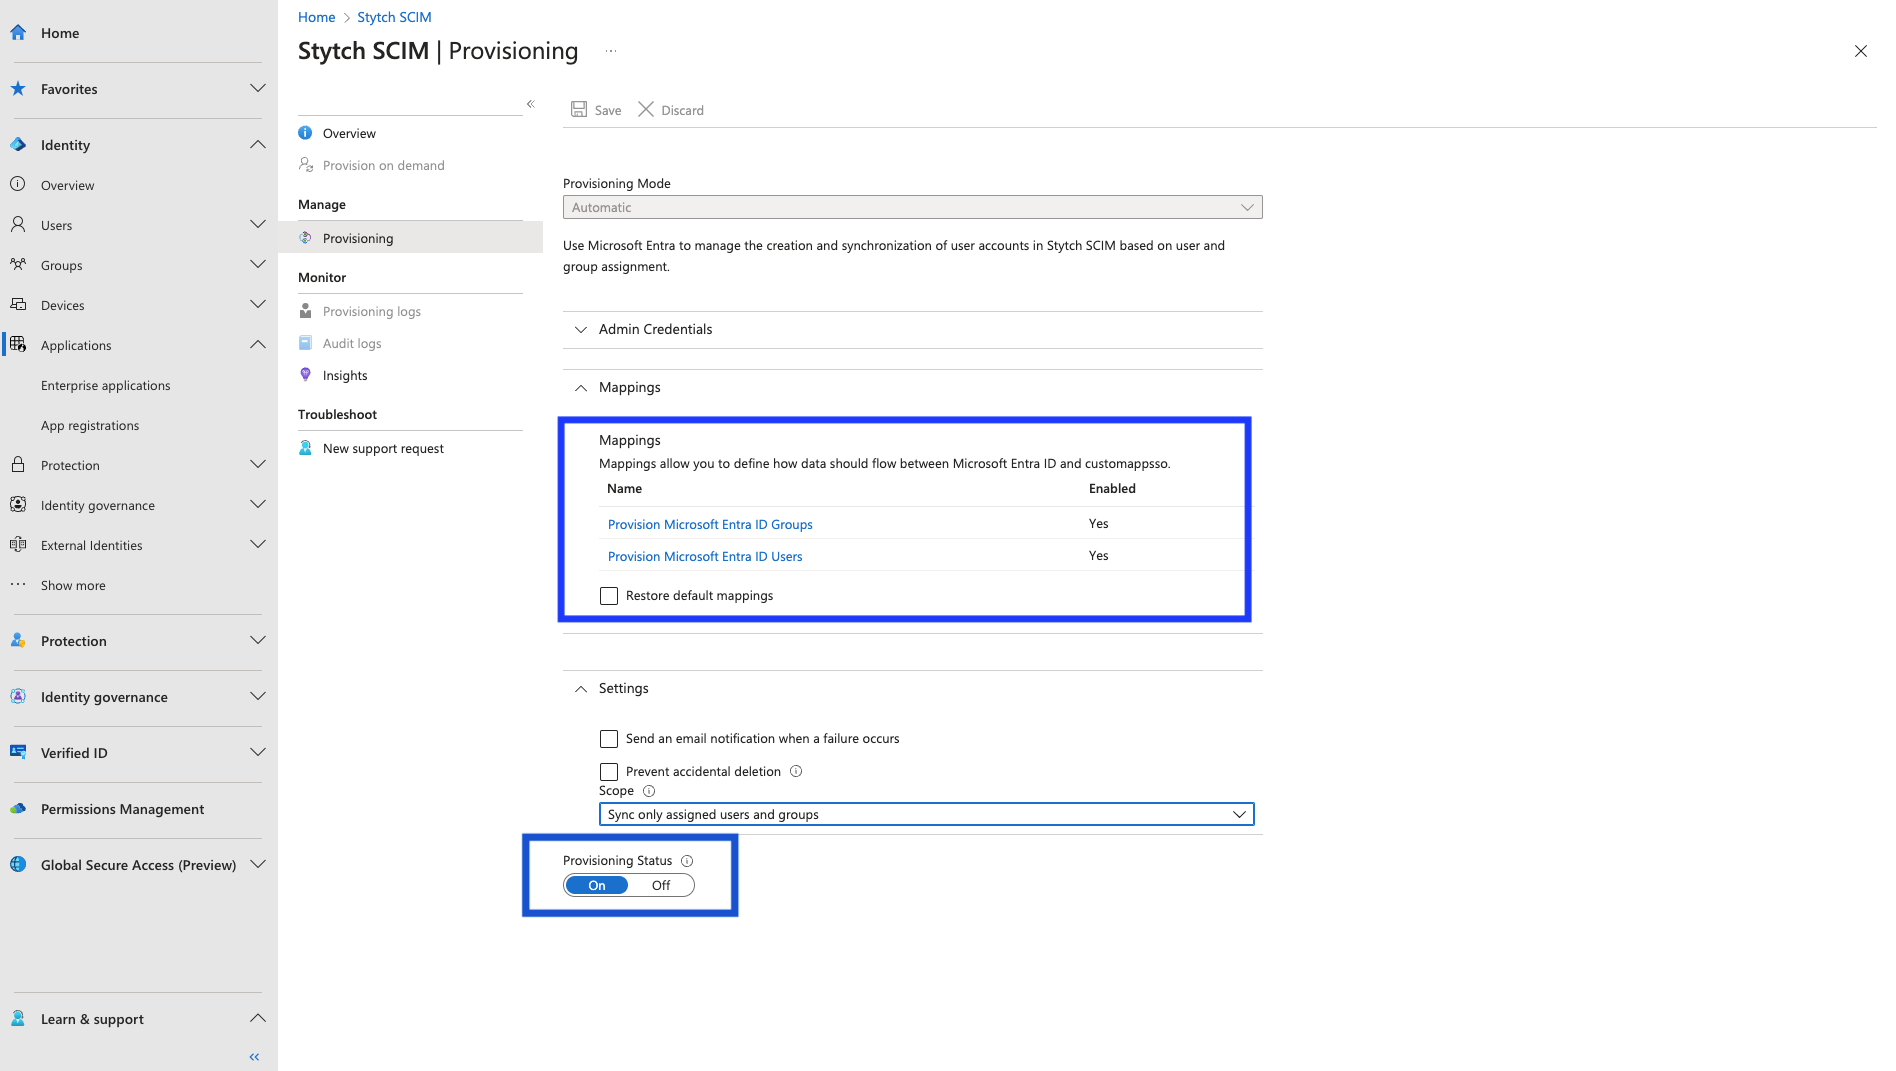
Under “Mappings” ensure that
objectIdis mapped toexternalId(i.e.objectIdis set to the “Source” attribute andexternalIdis set to the “Target” attribute). -
Toggle “Provisioning Status” to “On”.
5
Provision users
Once saved, you can test the SCIM integration by assigning people to and removing people from the application. Entra does automatic syncing on a 40 minute timer, but you can provision on demand to speed up testing.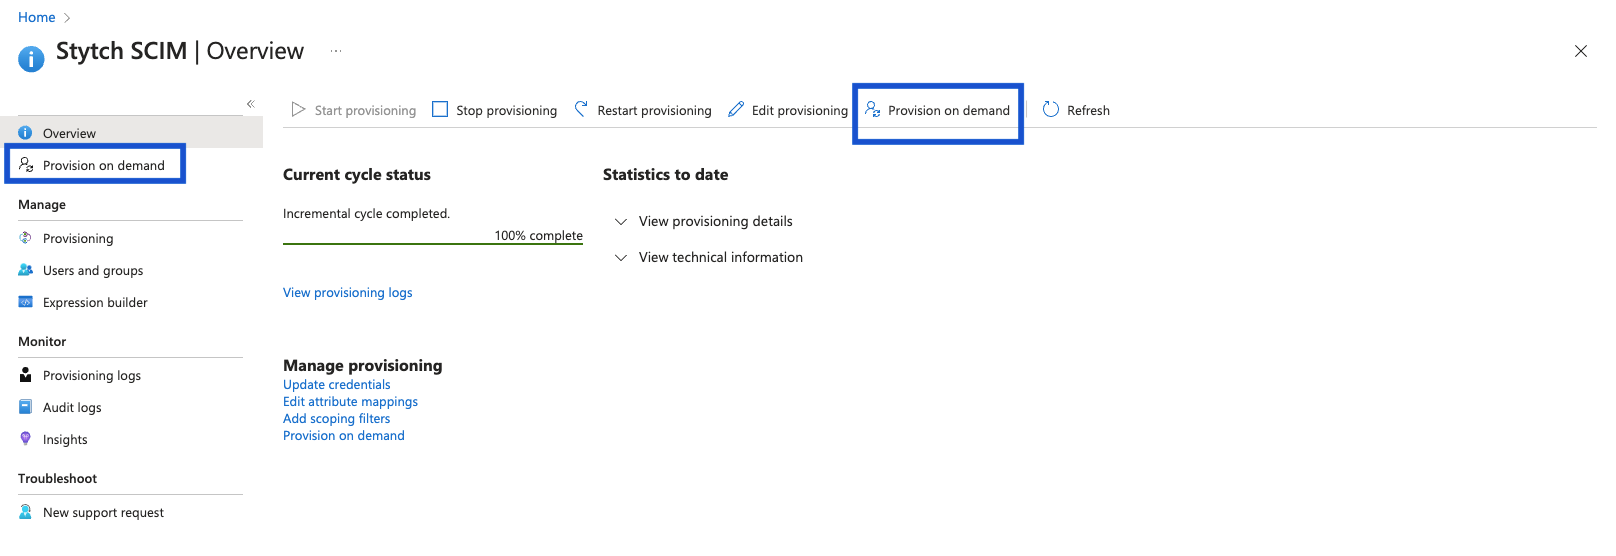
active to deactivated.6
(Optional) Configure webhooks
To notify your own system of changes that occur via SCIM, configure webhooks. See the full list of relevant webhooks here.
Next Steps
If you only have a few customers who require SCIM connections, you can manage them by hand in the Stytch Dashboard. However, as your enterprise customer base grows, you may want to build a UI in your application to allow admins of Organizations to self-serve creating and updating their own SCIM connections. The simplest way to add SCIM connection management to your application is to use Stytch’s pre-built Admin Portal component.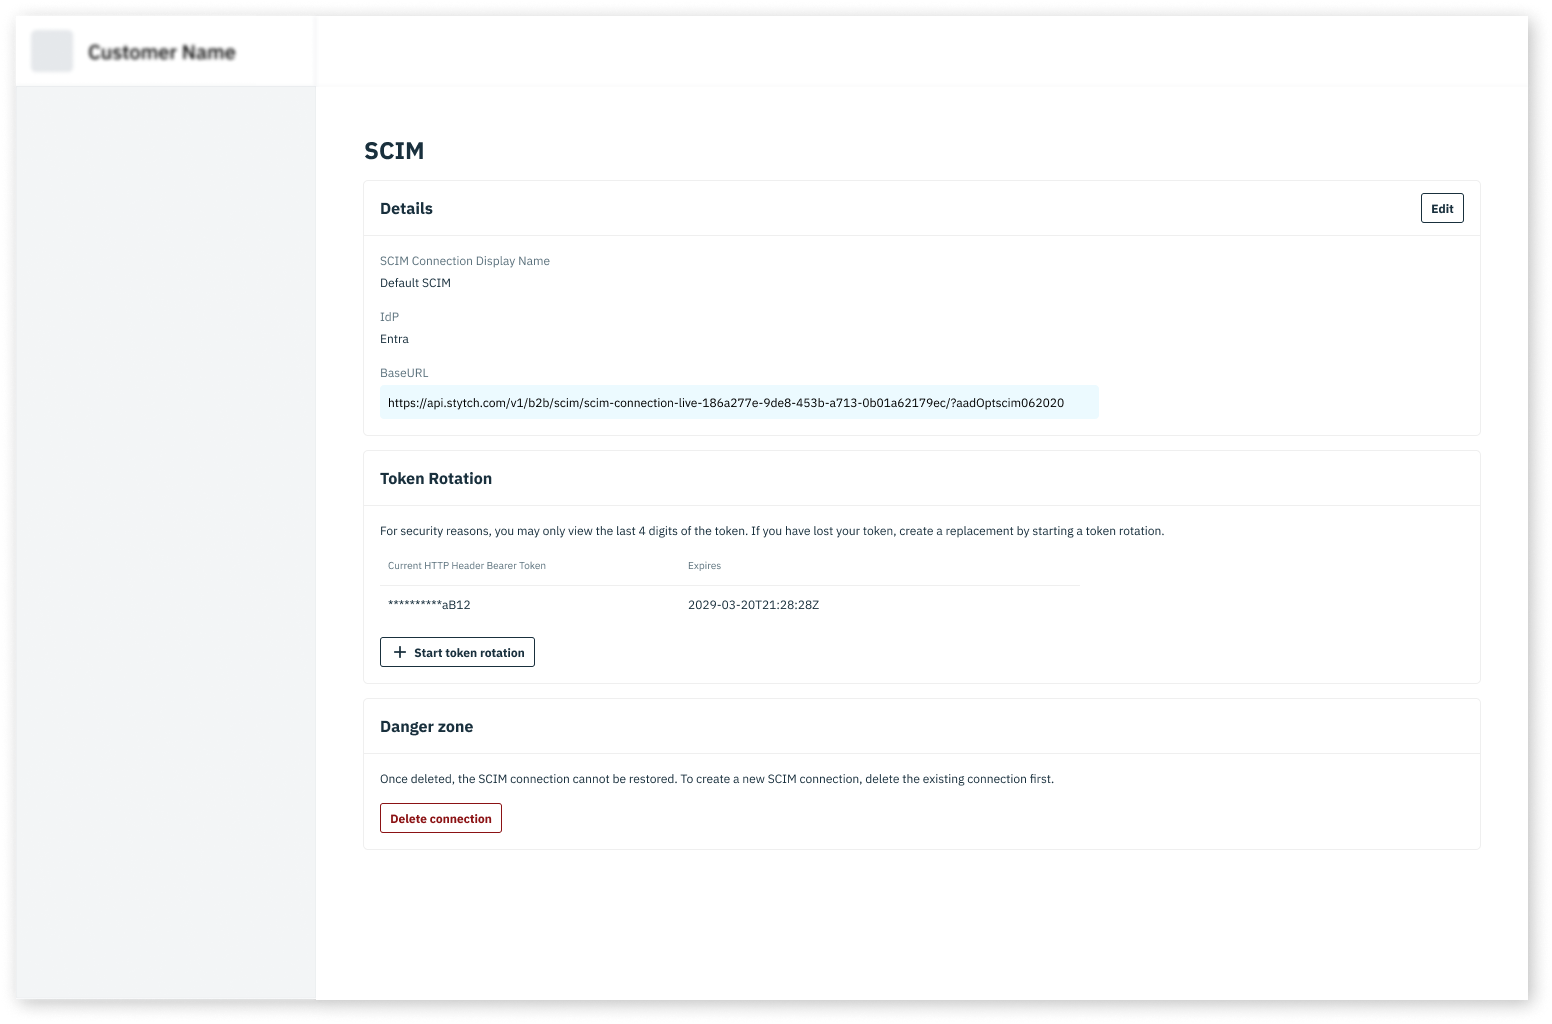
Admin Portal Guide
Read the guide on Admin Portal.
Admin Portal SDK Reference
Jump straight to the React, Next.js, or Vanilla JS SDK reference.