Overview
If you are using Stytch for Consumer or Multi-tenant authentication, you can use Protected Auth to ensure that only legitimate users can access your auth flows. Protected Auth is a frontend SDK feature that uses Device Fingerprinting to block bots and other suspicious activity at signup and login time.To use Protected Auth, you must use Stytch for authentication. If you use another authentication provider, you will integrate Device Fingerprinting using the API.
- Installed the frontend SDK.
- Turned on Observation mode.
- Turn on Enforcement mode.
Prerequisites
- JavaScript frontend SDK or mobile SDK (React Native, iOS, or Android) installed. Minimum versions required:
- Vanilla JS SDK:
v2.2.0 - React Native SDK:
v0.12.0 - iOS SDK:
v0.18.0 - Android SDK:
v0.14.0
- Vanilla JS SDK:
- An existing Stytch B2B or Consumer project in the Dashboard.
- The
project_idandsecretfor your project’s Test environment. These can be found under your project’s Project ID & API keys section in the Dashboard. - Device Fingerprinting enabled for your project.
- If you don’t have Device Fingerprinting enabled, you can request access here.
Get started
1
Install the SDK
Follow the Quickstart to get started with the SDK.
2
Enable Protected Auth in the Dashboard
Enable Protected Auth under Frontend SDK settings in the Dashboard: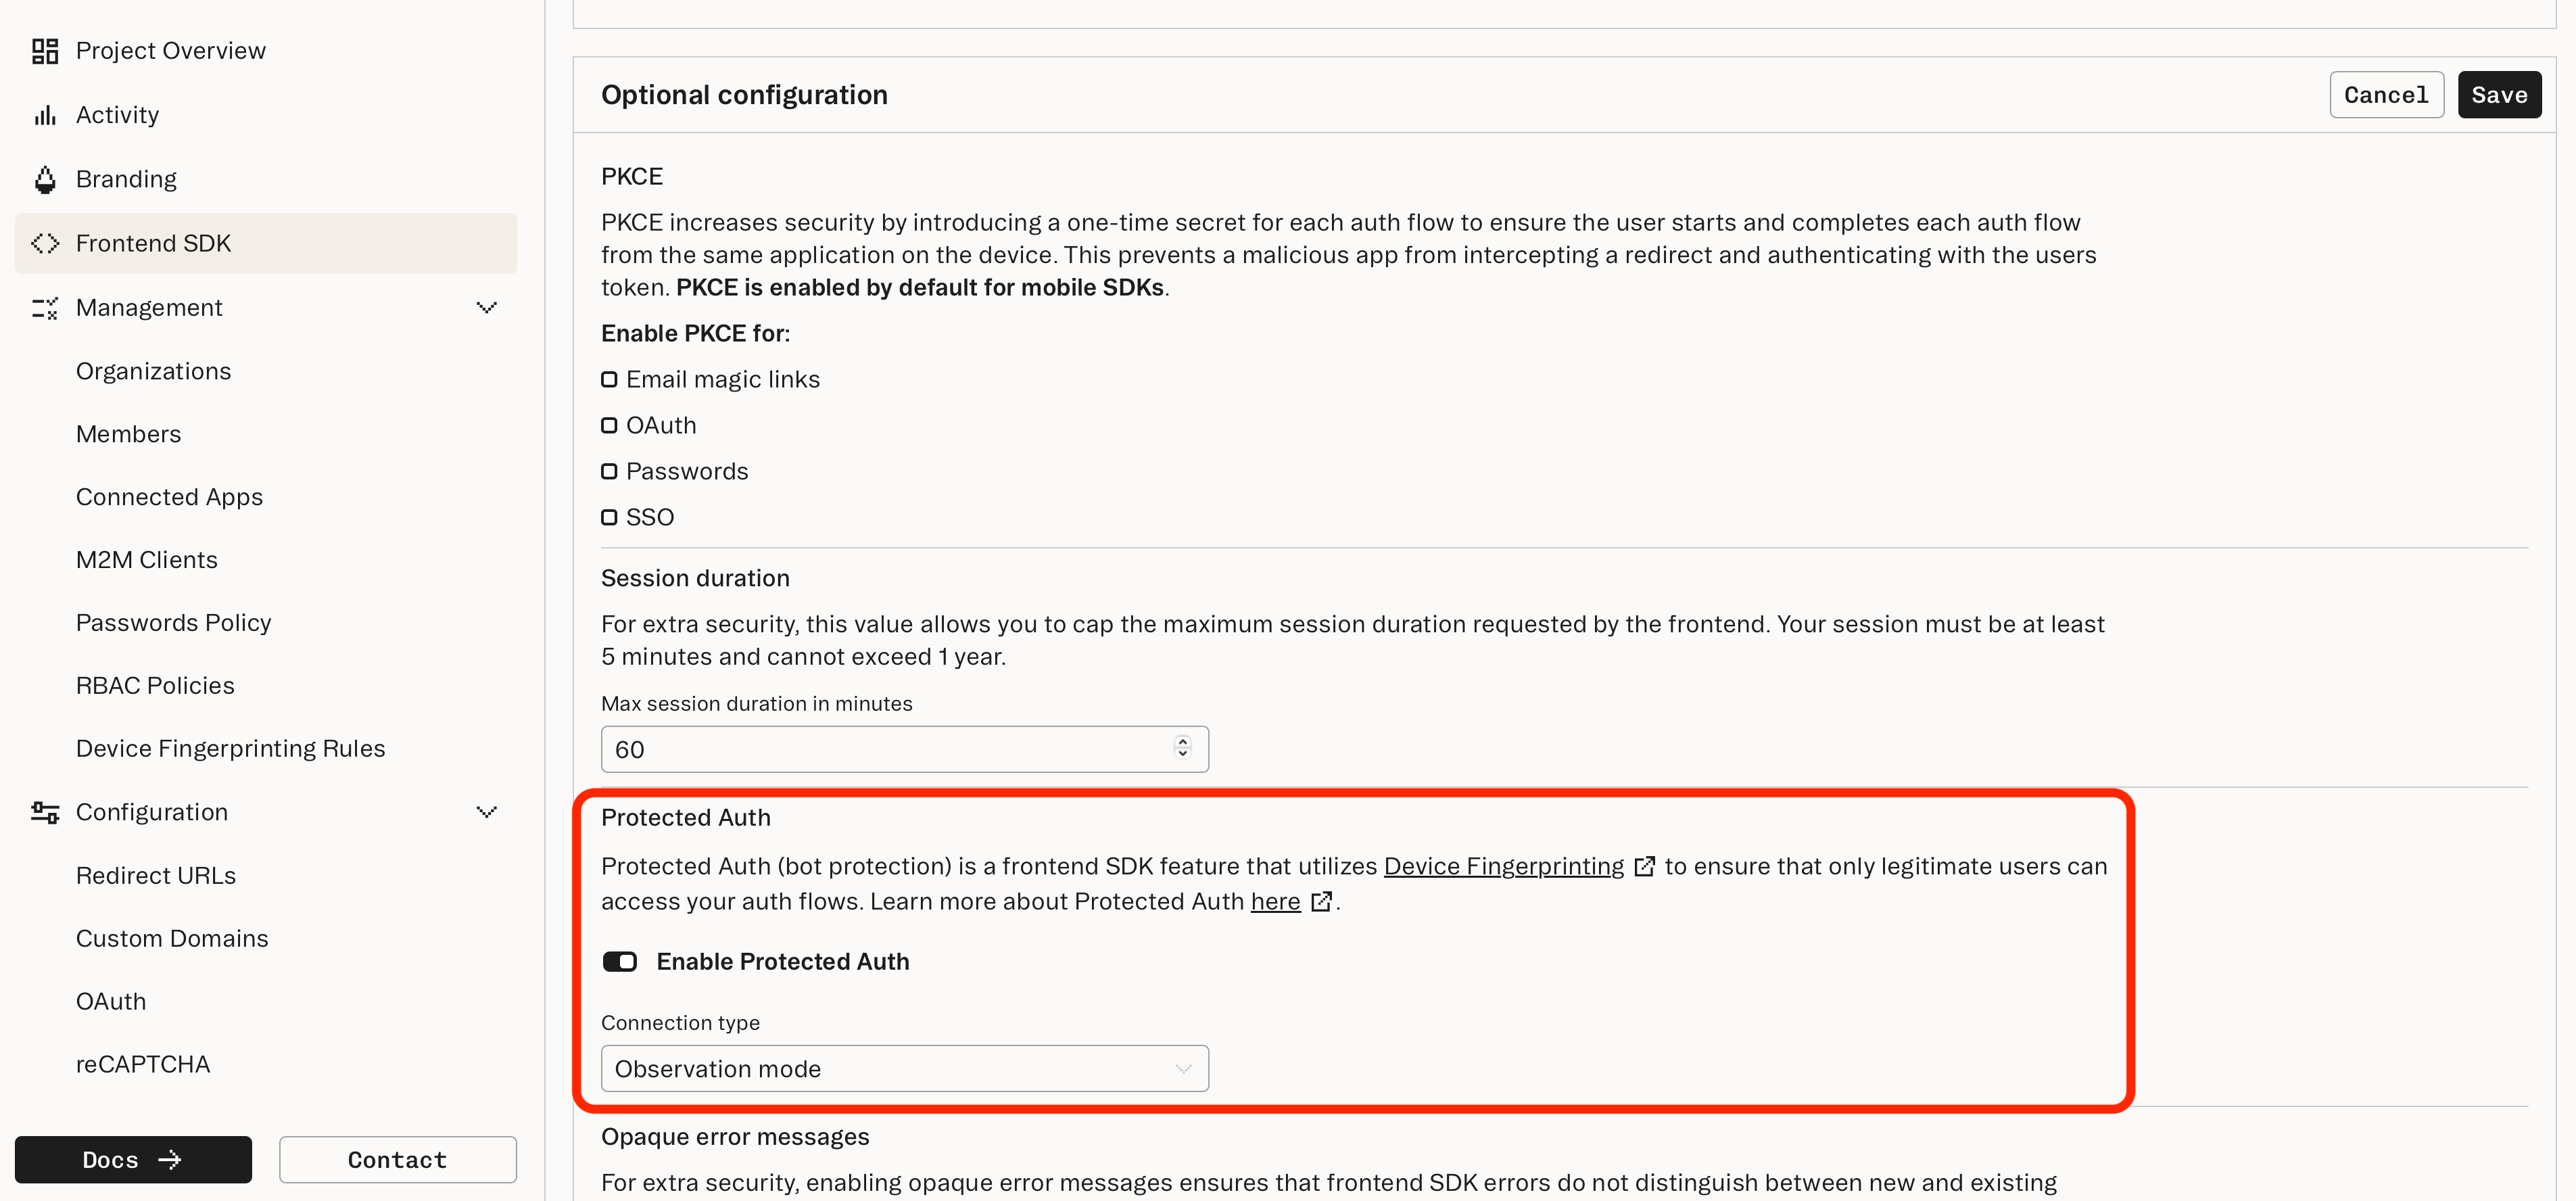
3
Observation mode
By default, the Connection Type is set to Observation mode when enabling Protected Auth. This mode:
- Automatically generates and submits a fingerprint to the Stytch API.
- The API will not enforce any action.
4
View activity logs in the Dashboard
Results of automatic fingerprint lookups show up as Device Fingerprinting Logs in the Dashboard.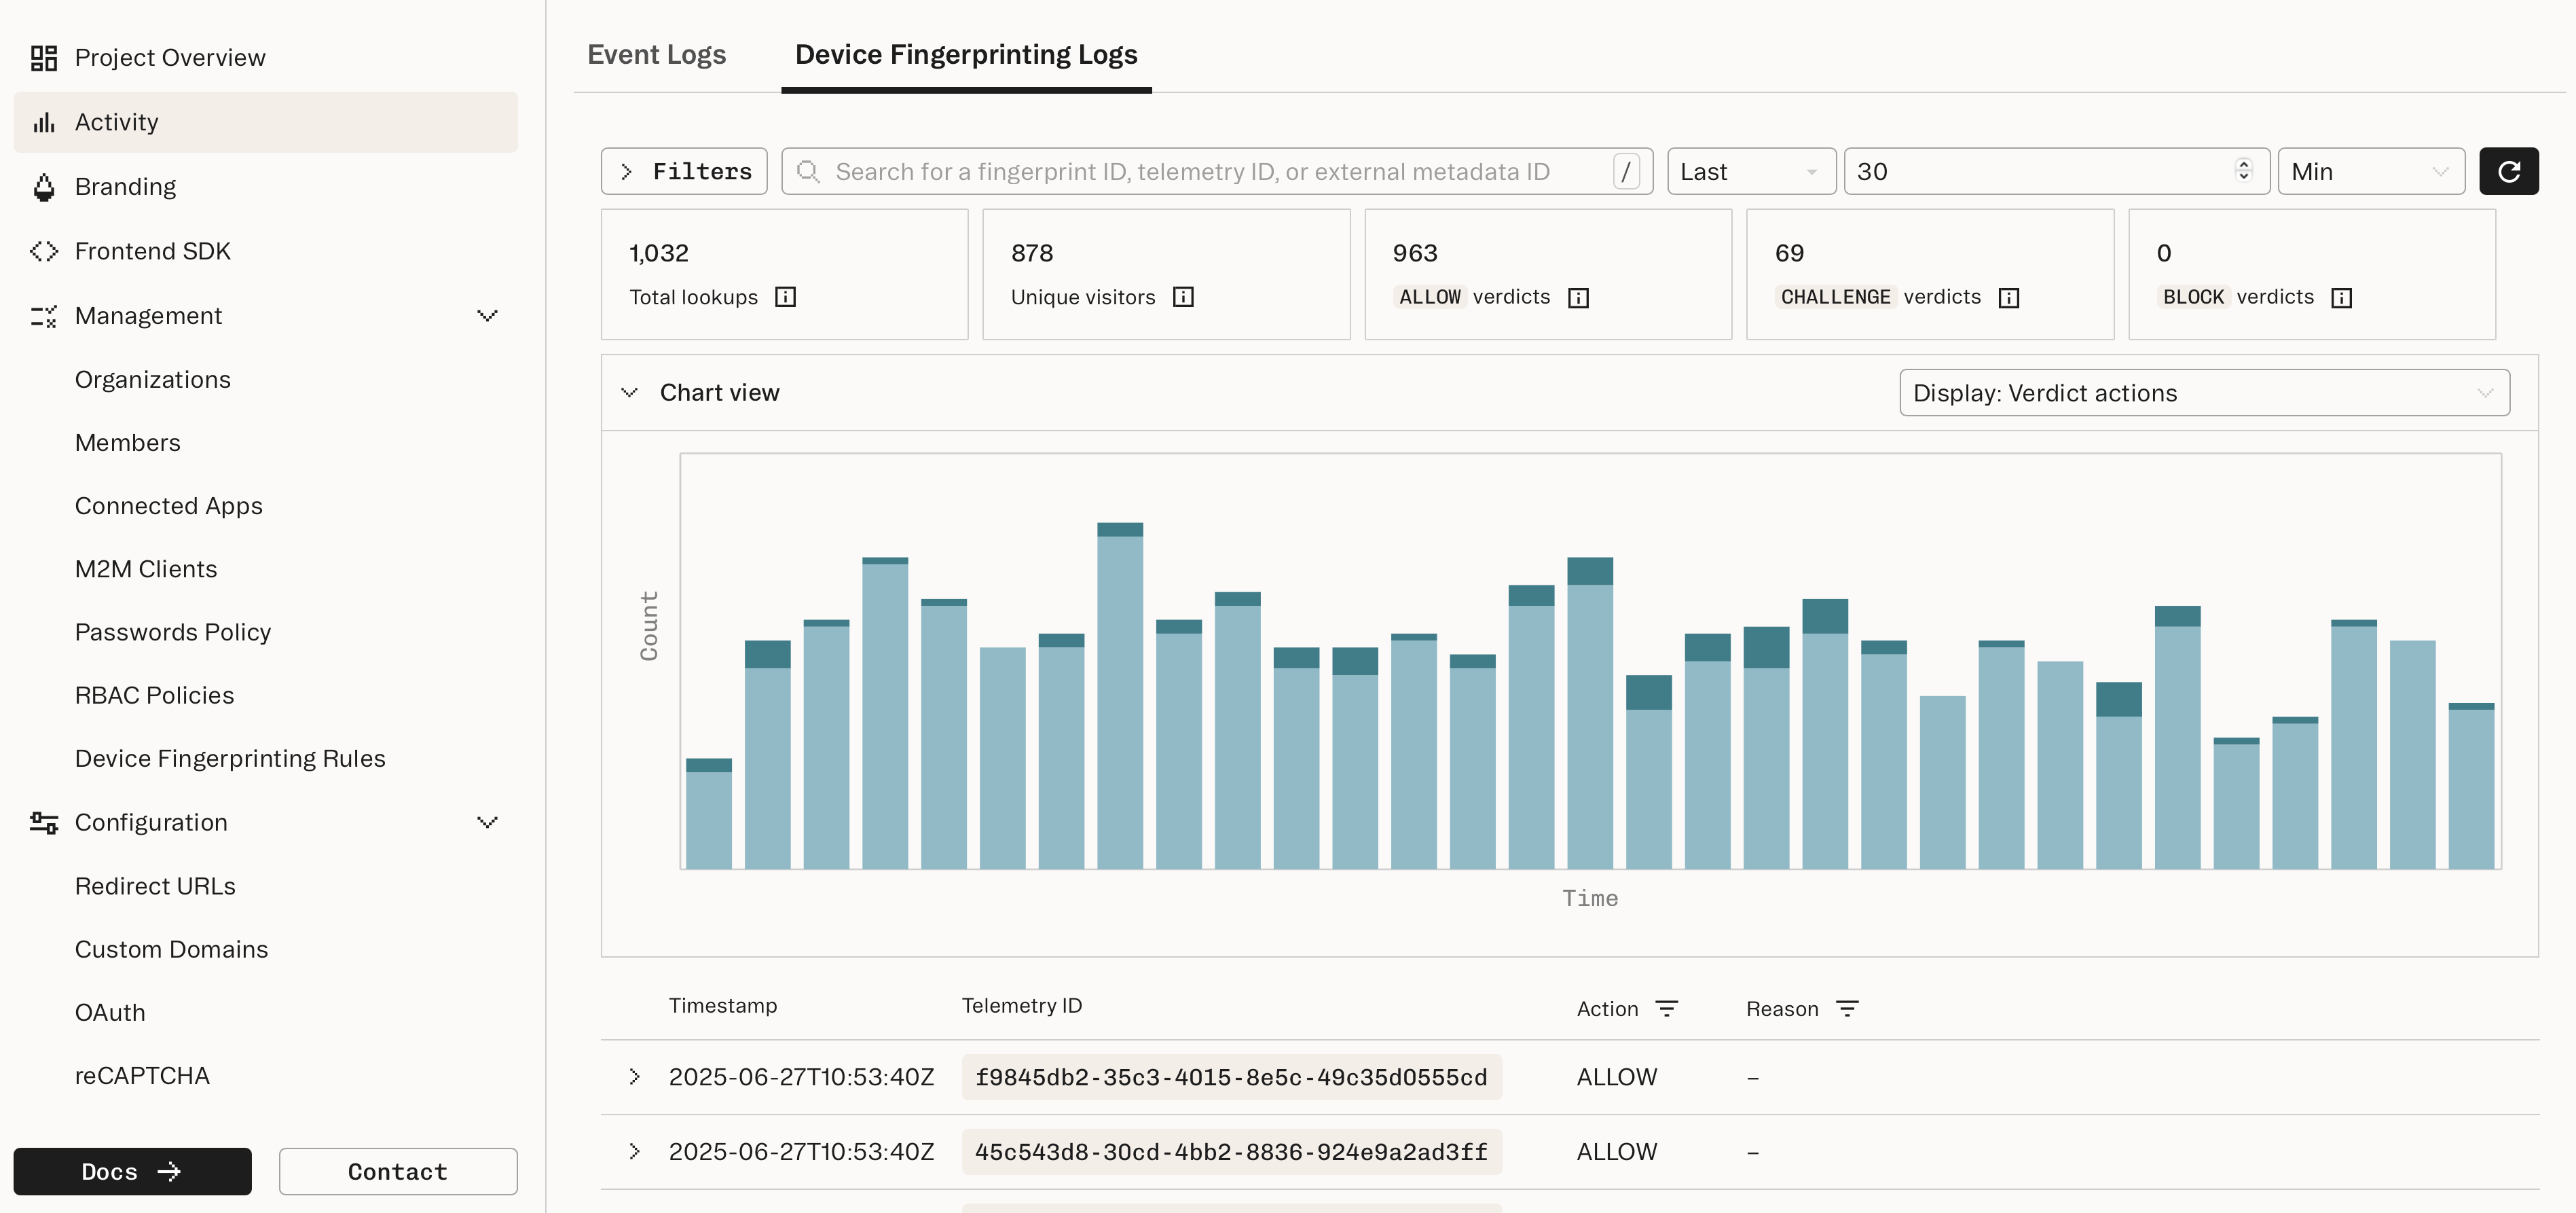
5
Enable Enforcement mode
Once you are comfortable with the verdicts for your traffic, you can switch the Connect Type to Enforcement mode. This enables the Stytch API to react to each lookup triggered by the SDK:
- For
ALLOWverdicts, continue requests in the normal authentication flow. - For
BLOCKverdicts, reject requests and return a401. - For
CHALLENGEverdicts, the default behavior will continue requests as if they received anALLOWverdicts.
6
(Optional) Configure challenge verdict handling
You can configure how Protected Auth handles challenge verdicts by adjusting the Challenge handling setting: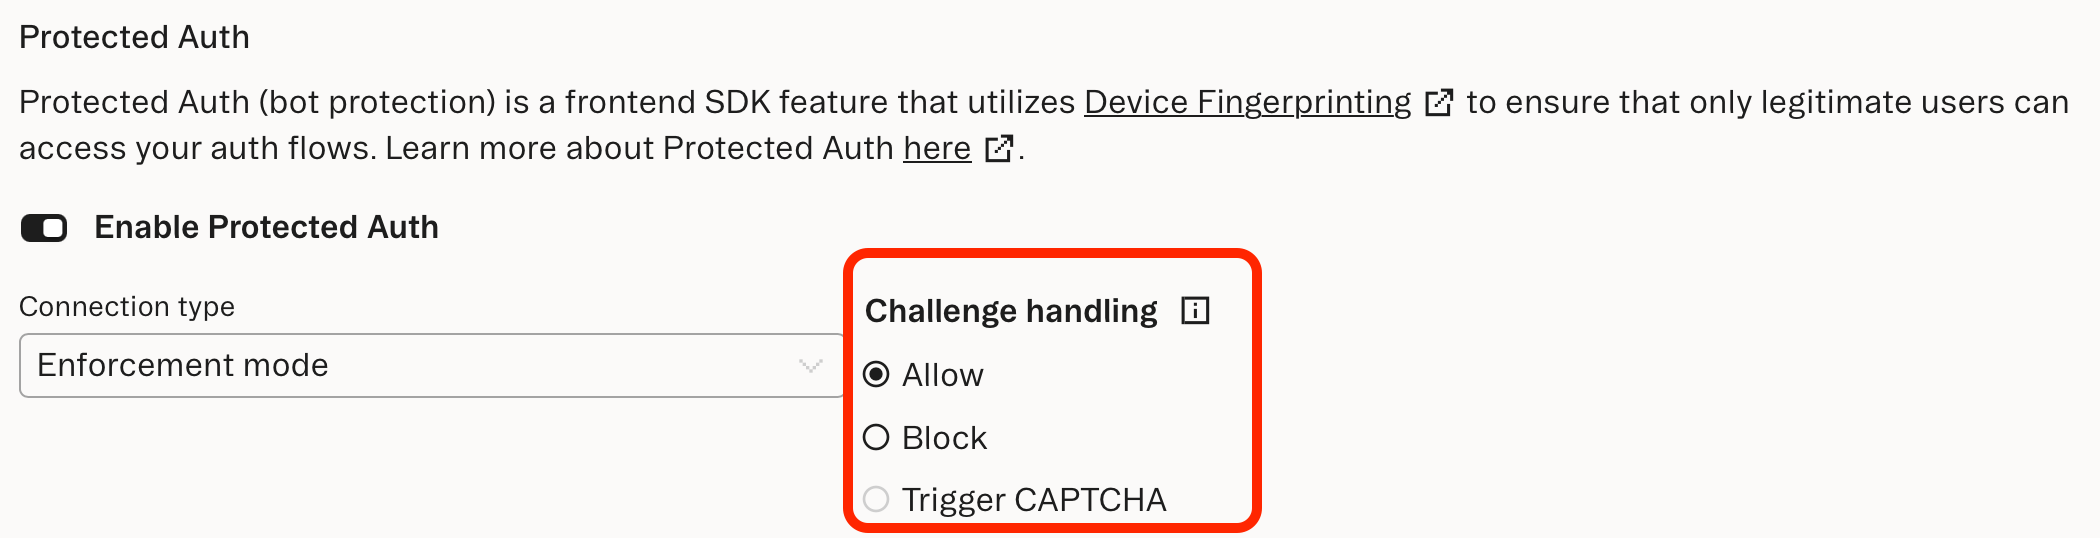
What’s next
Challenge verdict
Learn more about options for handling challenge verdicts.
Want to try Stytch Device Fingerprinting?
Find out why Stytch’s device intelligence is trusted by Calendly, Replit, and many more.