Configure your project in the Stytch Dashboard
- Create Login and Sign-up redirect URLs on the redirect URL configuration page.
- In Frontend SDK, authorize your domain and enable Email magic links → Enable the LoginOrCreate Flow.
- From Project ID & API keys, copy your
public_token.
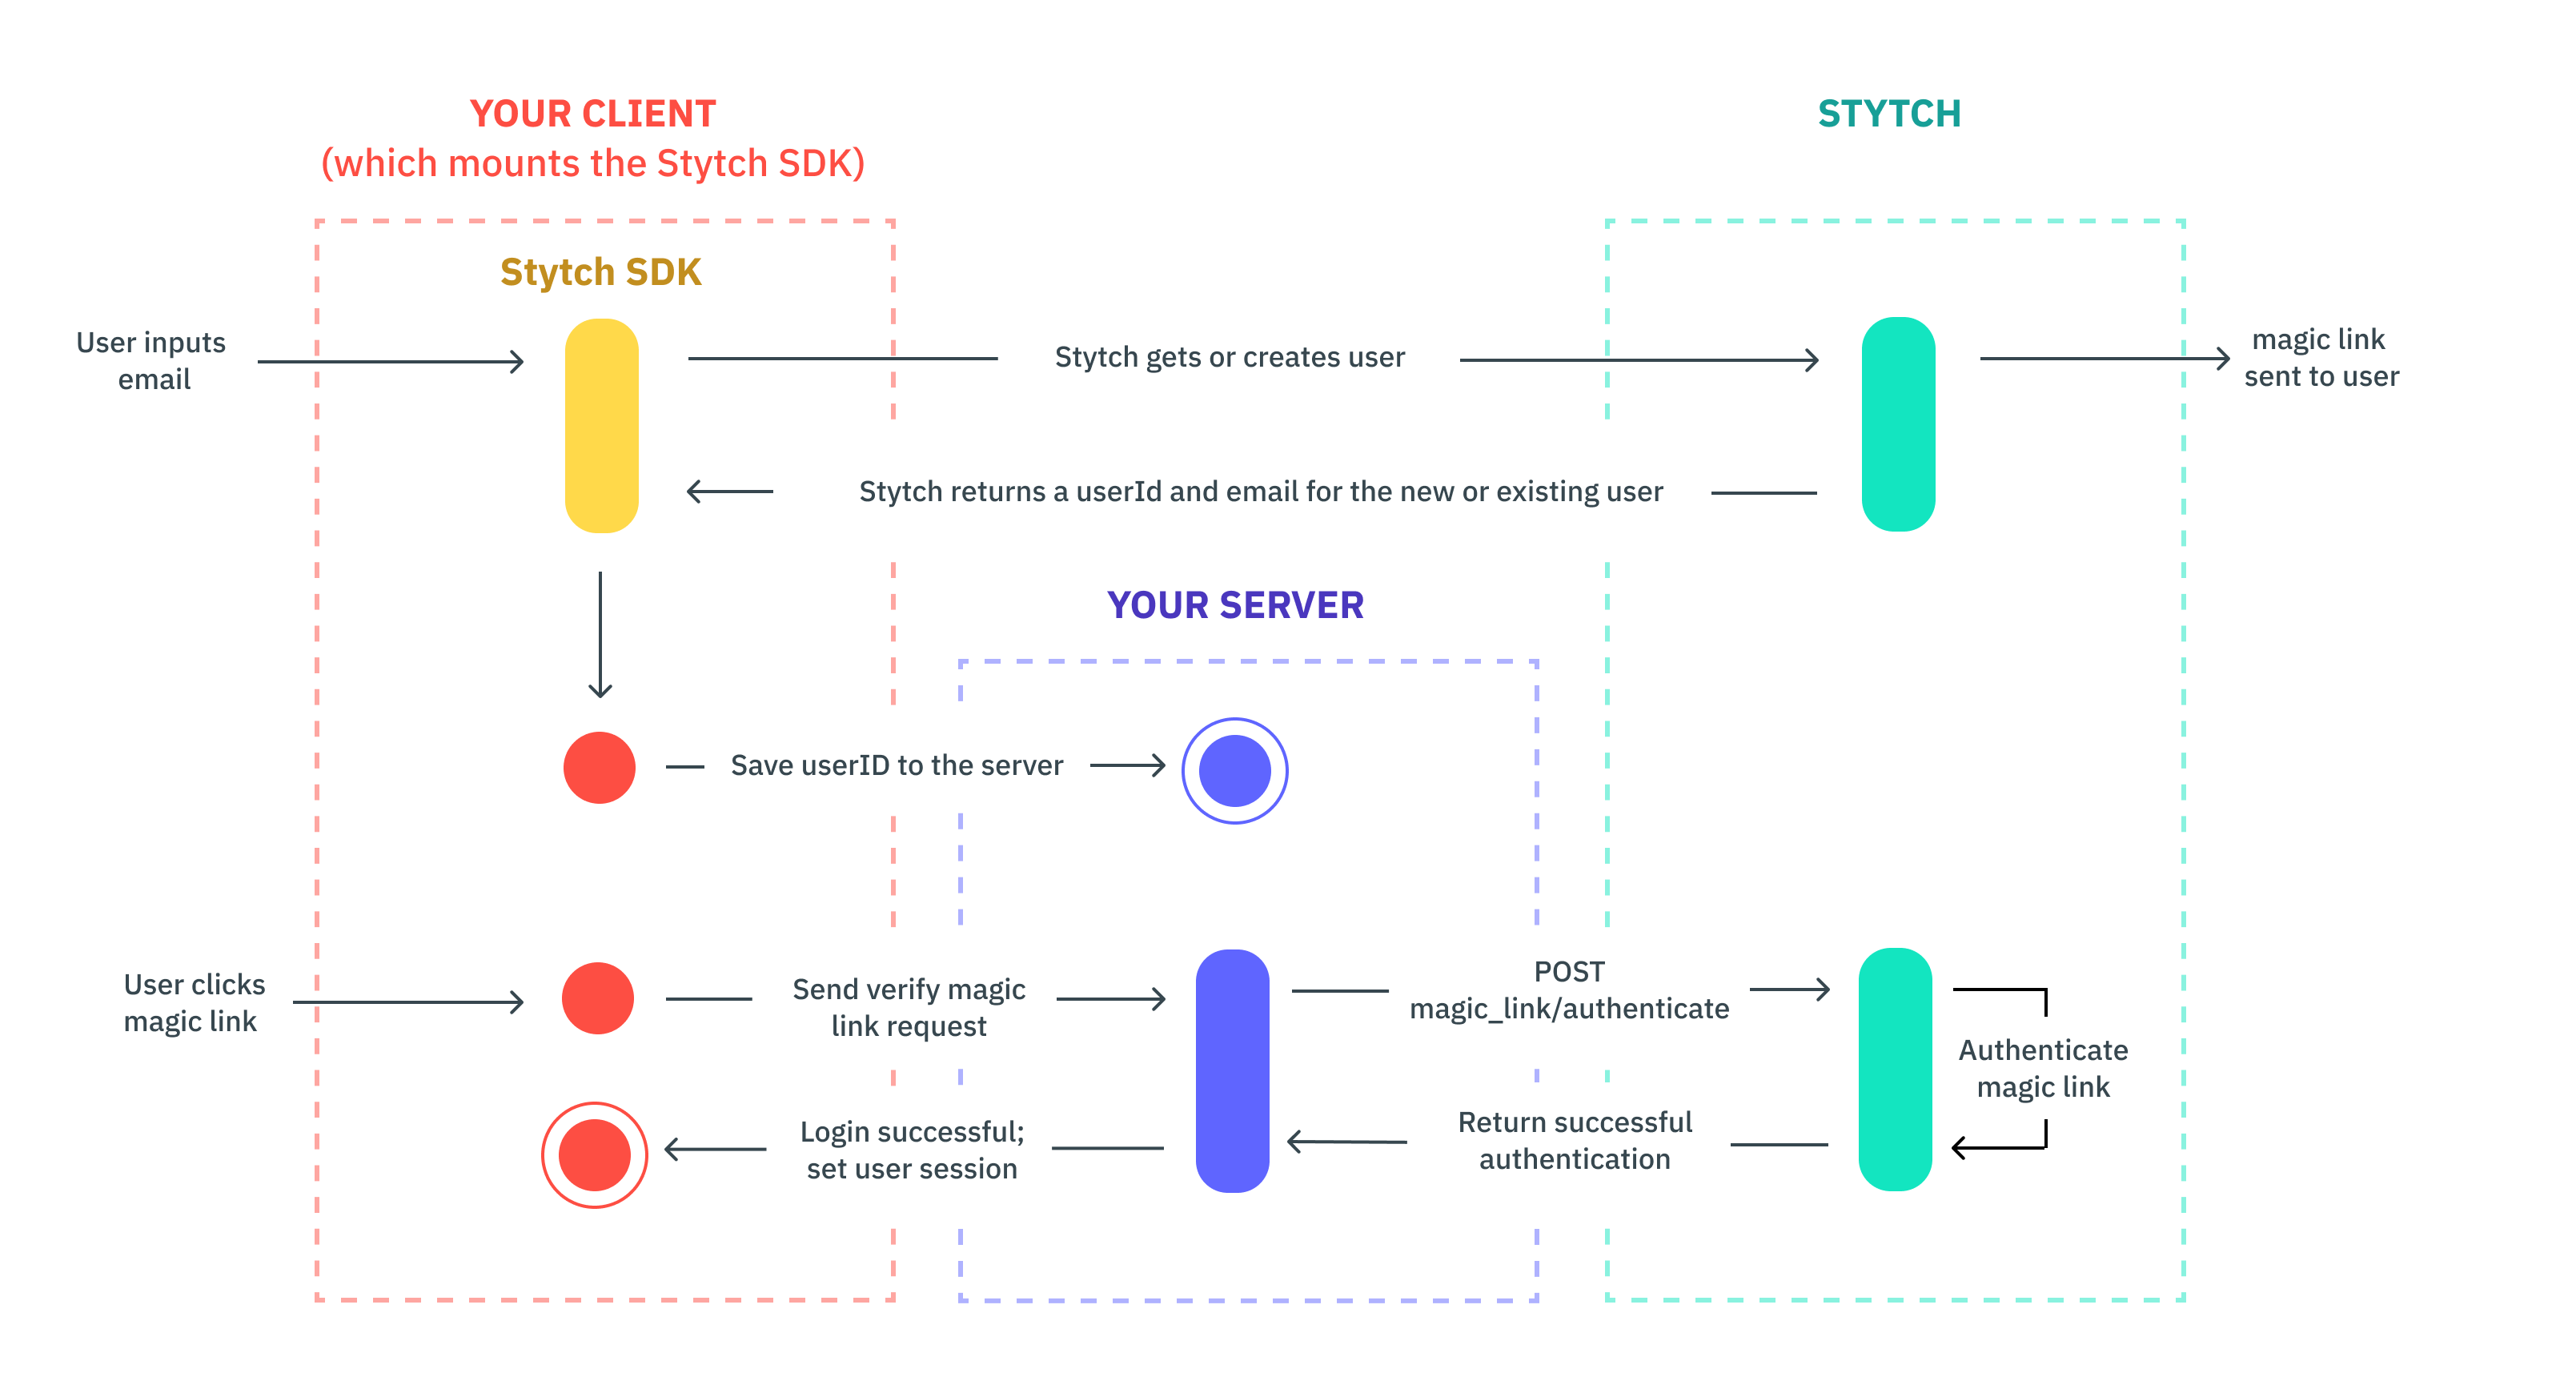
Add server-side support
Install the backend SDK:When a user logs in for the first time, the SDK creates a Stytch User and returns a Handle Magic Link authentication on a route that receives the If authentication is successful, create a user session and log them into your app. To keep users logged in longer, set
user_id. Save it in your user store.token query param:session_duration_minutes. See the session management guide.