Back to blog
How to create a closed source Objective-C++ framework for Swift Package Manager
Engineering
Mar 15, 2025
Author: Nidal Fakhouri
The Swift Package Manager (SPM) is a simple dependency manager, and unlike its predecessors and alternatives like Cocapods, it’s integrated directly in Xcode. With it you can easily add dependencies to your app or own Swift Package.
Publishing your package definition and code to a public repository makes it accessible for other developers to include as dependencies in their projects. You can search for available Swift Packages via the Swift Package Index.
By default the SPM publishes your code open source, but there may be reasons why you would want to distribute your code in a closed source manner as well.
In this article, we’ll explain and show you how. And if you want the code, here's the GitHub repo.
Table of contents
- Why we wanted a closed source package on SPM
- TL;DR how it all works
- GOTCHAS and lessons learned
- The tutorial
- Final thoughts
Why we needed a closed source package on SPM
For our purposes at Stytch, we wanted to make some proprietary commercial code for our Fraud & Risk Prevention product, an advanced device fingerprinting solution written in Objective-C++ / C++ / C, available on SPM. This approach would allow us to include it in our public, open source iOS SDK and enable our developer community to integrate it directly into their Swift projects as a separate dependency that was independent of the full Stytch iOS SDK.
By keeping the package closed source, we could protect our intellectual property while still allowing the developers to use it easily in their Swift applications.
TL;DR how it all works
Objective-C++
Objective-C++ is a programming language variant that allows you to mix C / C++ and Objective-C code within the same source file. Objective-C has the file extension .m whereas Objective-C++ has the file extension .mm.
XCFramework
An XCFramework is a package format introduced by Apple to simplify the distribution of binary libraries by bundling multiple versions of a library into a single framework. Created using Xcode, an XCFramework includes the necessary frameworks, libraries, and headers to build for multiple platforms such as iOS, macOS, visionOS, tvOS, watchOS, and DriverKit, including Simulator builds. These frameworks can be static or dynamic and include headers.
XCFrameworks address the limitations of traditional frameworks by streamlining development across platforms.
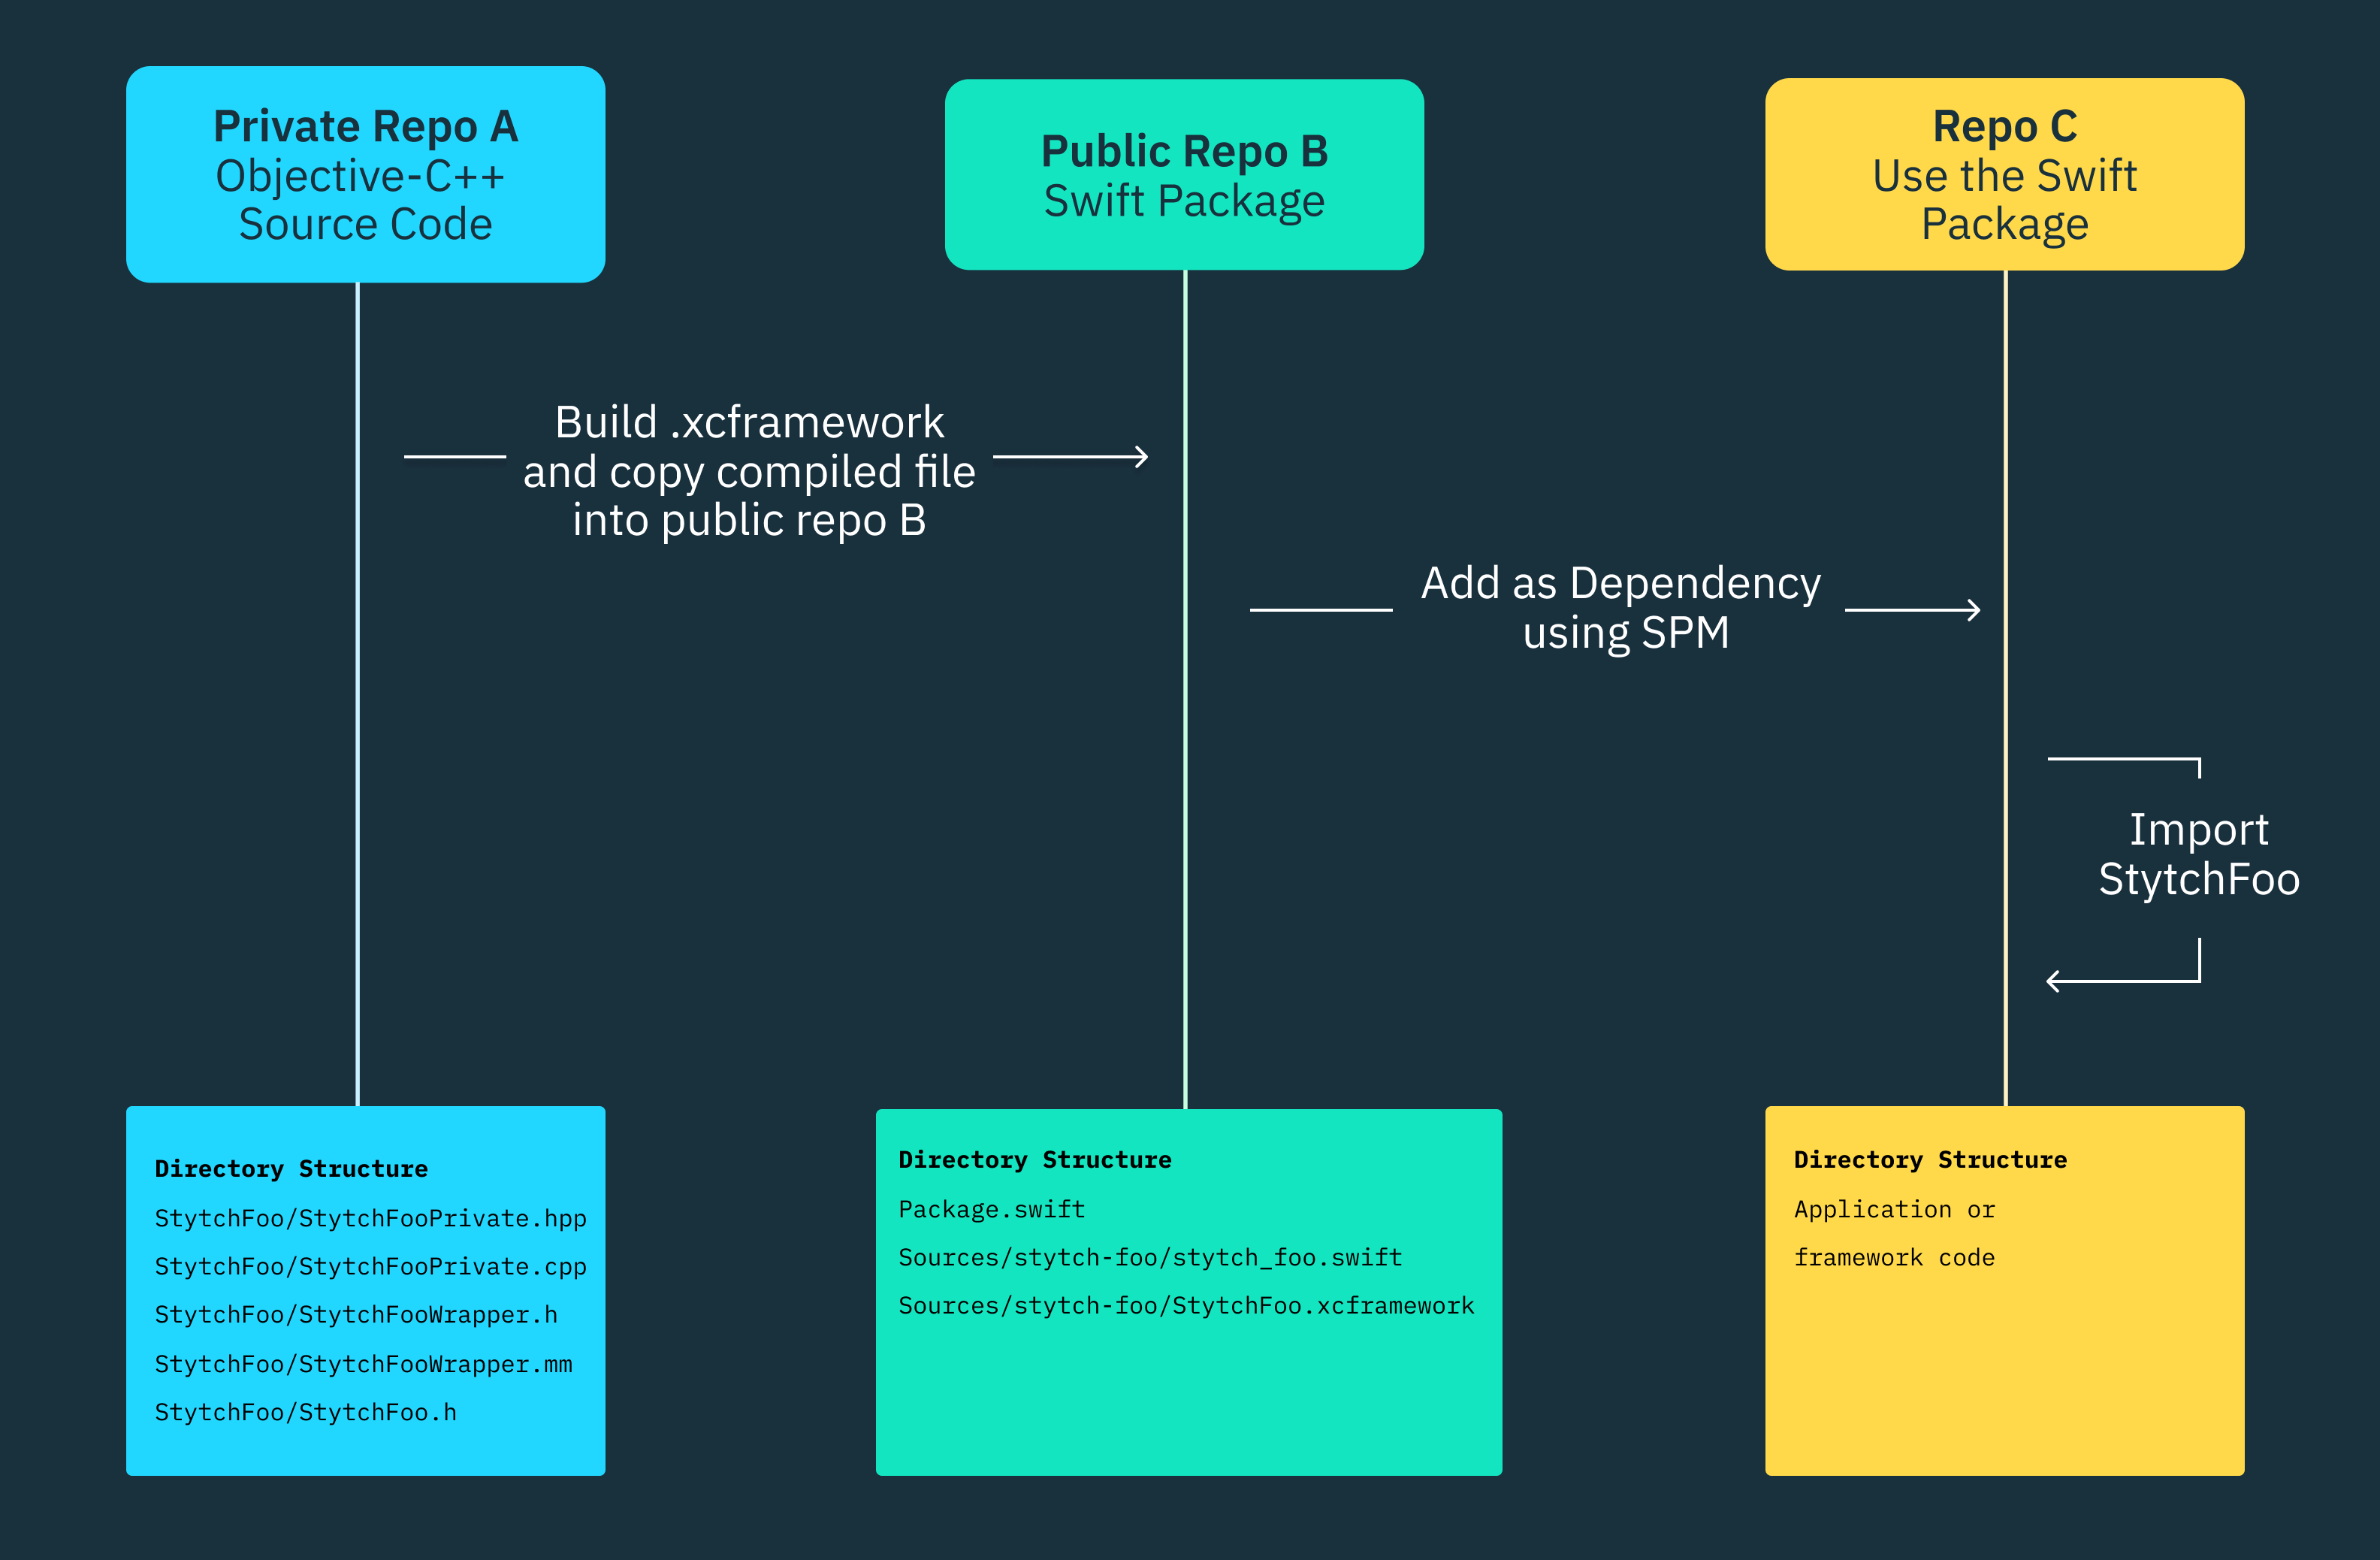
High-level overview
To create a closed source Objective-C++ framework in SPM, we decided to use a XCFramework in a private repo written in Objective-C++. Once compiled, the XCFramework is completely available to Swift code through the interface defined by the Objective-C++ files and their corresponding public headers. We then added the XCFramework to a publicly available Swift package and added that package as a dependency of our Stytch iOS SDK.
GOTCHAs and lessons learned
The tutorial below will demonstrate that this is a relatively simple process, however it required some trial and error for us to figure out.
At first I created a static library file (.a), which I wasted a few hours trying to compile a universal binary for, only to then determine that you could only add a XCFramework to a Swift package. In my initial implementation of the static library, I had a bridging header for what I hoped would be a Swift file talking directly to the C++ code, which worked in that context.
But when I realized I had to port this over to a XCFramework, I found that XCFramework files do not support bridging headers. I had to remove the Swift layer and make the framework only Objective-C, C++, and Objective-C++.
This was fine in the end since everything we could implement in Swift we could also achieve in Objective-C. The framework could have Swift files in it, but they would not be able to communicate with the Objective-C files and would simply provide a parallel set of functionality (there is a chance that you can fix this with a .moudlemap file but I did not investigate further).
The tutorial
If you'd like to follow the tutorial with the code side-by-side, check out the GitHub repo where we've uploaded all the files you'll need to create a closed source framework.
Part 1: Commit to private repo A
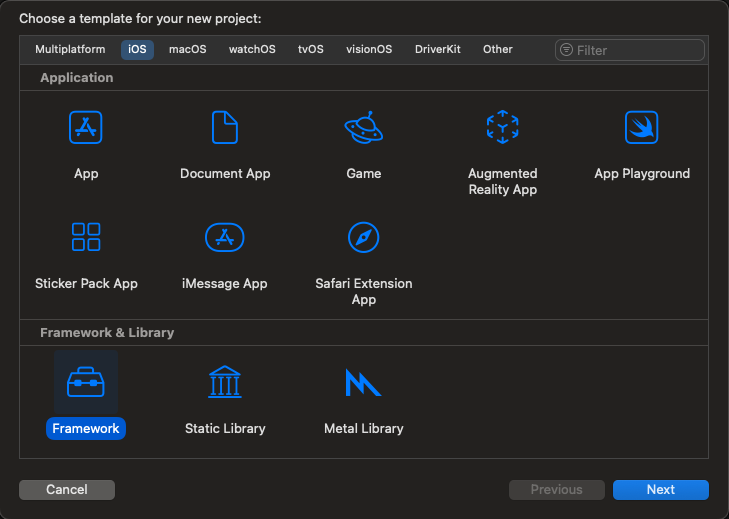
In Xcode click File->New->Project and select Framework and click Next.
Add a name under the Product Name field and click Next. For this example I chose “StytchFoo.”
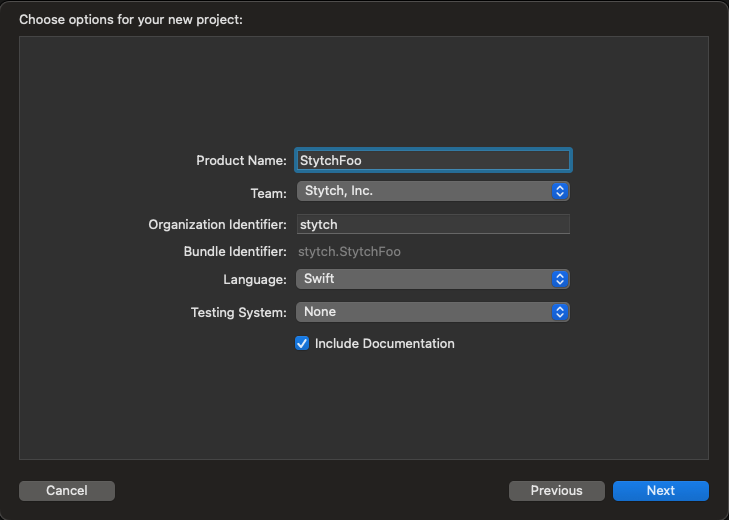
A new empty project should look like this:
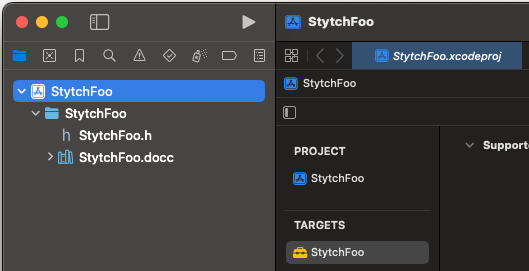
Add the follow files based on your naming convention:
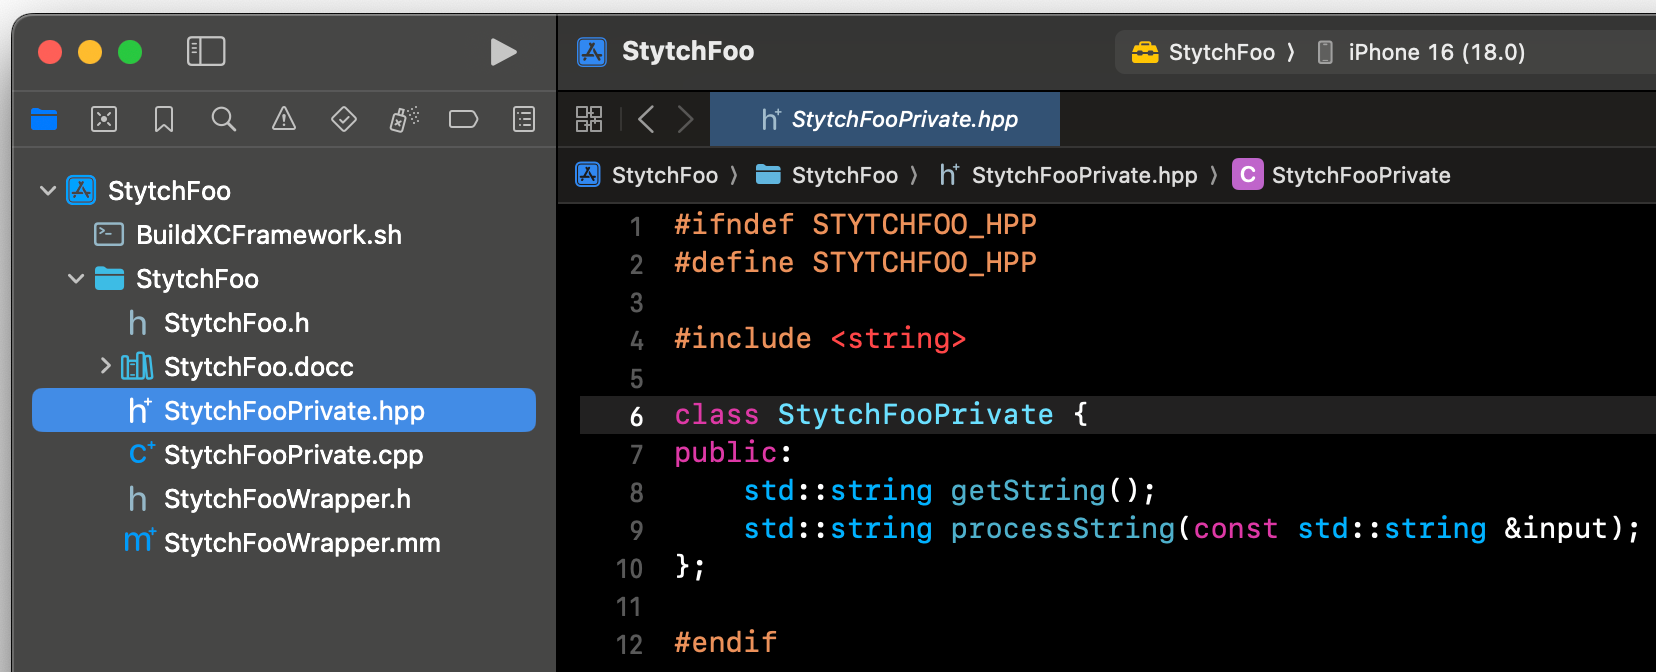
StytchFooPrivate.hpp
StytchFooPrivate.cpp
StytchFooWrapper.h
StytchFooWrapper.mm
Implementation of StytchFooPrivate.hpp
This implementation demonstrates two functions; one that will return a String defined in C++ and another one that we will be able to call from Swift with a String parameter type that will modify that String in C++ and return a new one.
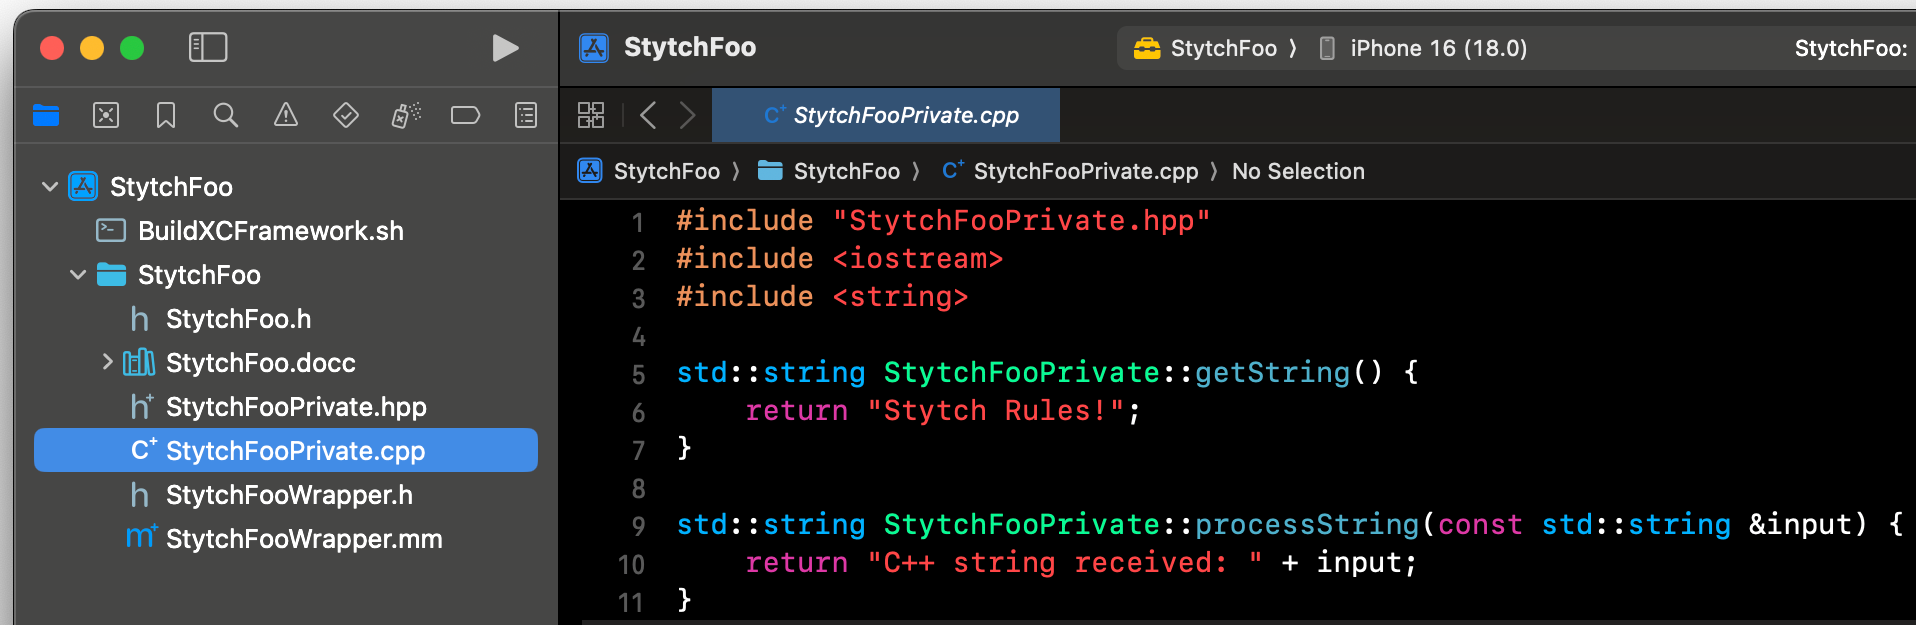
Implementation of StytchFooPrivate.cpp
Here is the implementation of those functions described above.
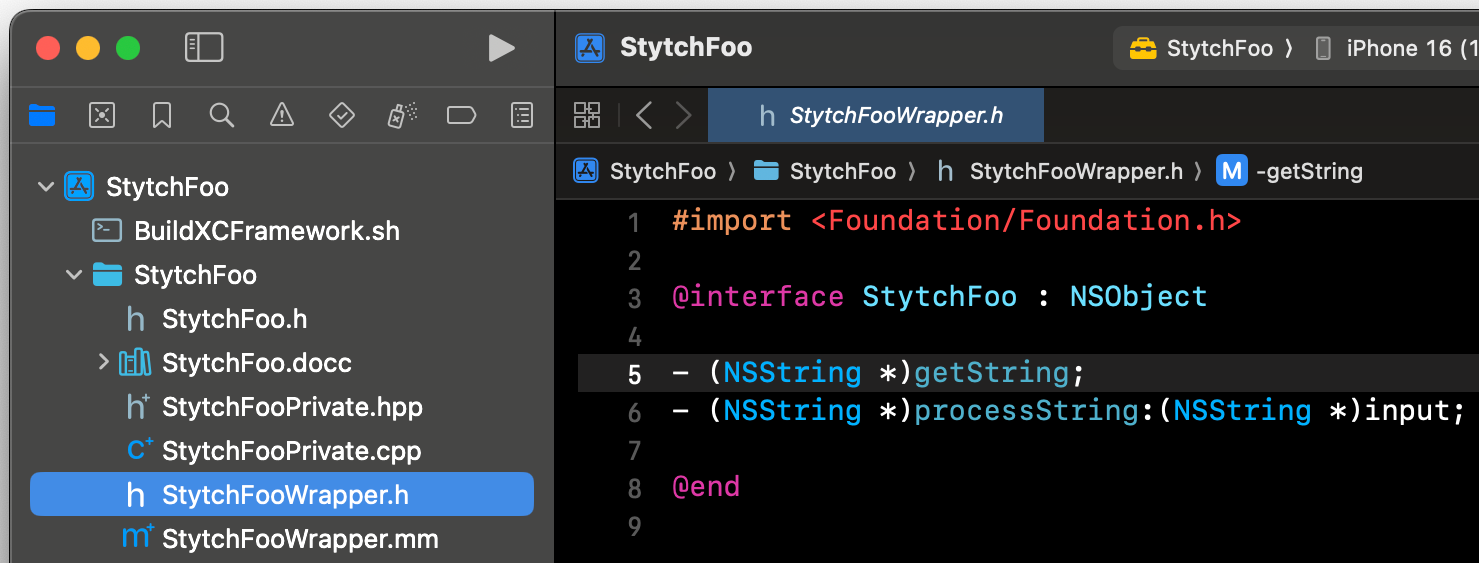
Implementation of StytchFooWrapper.h
This will be the publicly visible interface to Swift, I named the files StytchFooWrapper, but named the actual Objective-C object only StytchFoo because I could not have a StytchFoo.h file as that would have collided with the public header for the framework. Therefore StytchFoo will be the name of the object we refer to in Swift code.
Here we will define a parallel interface as the StytchFooPrivate.hpp file.
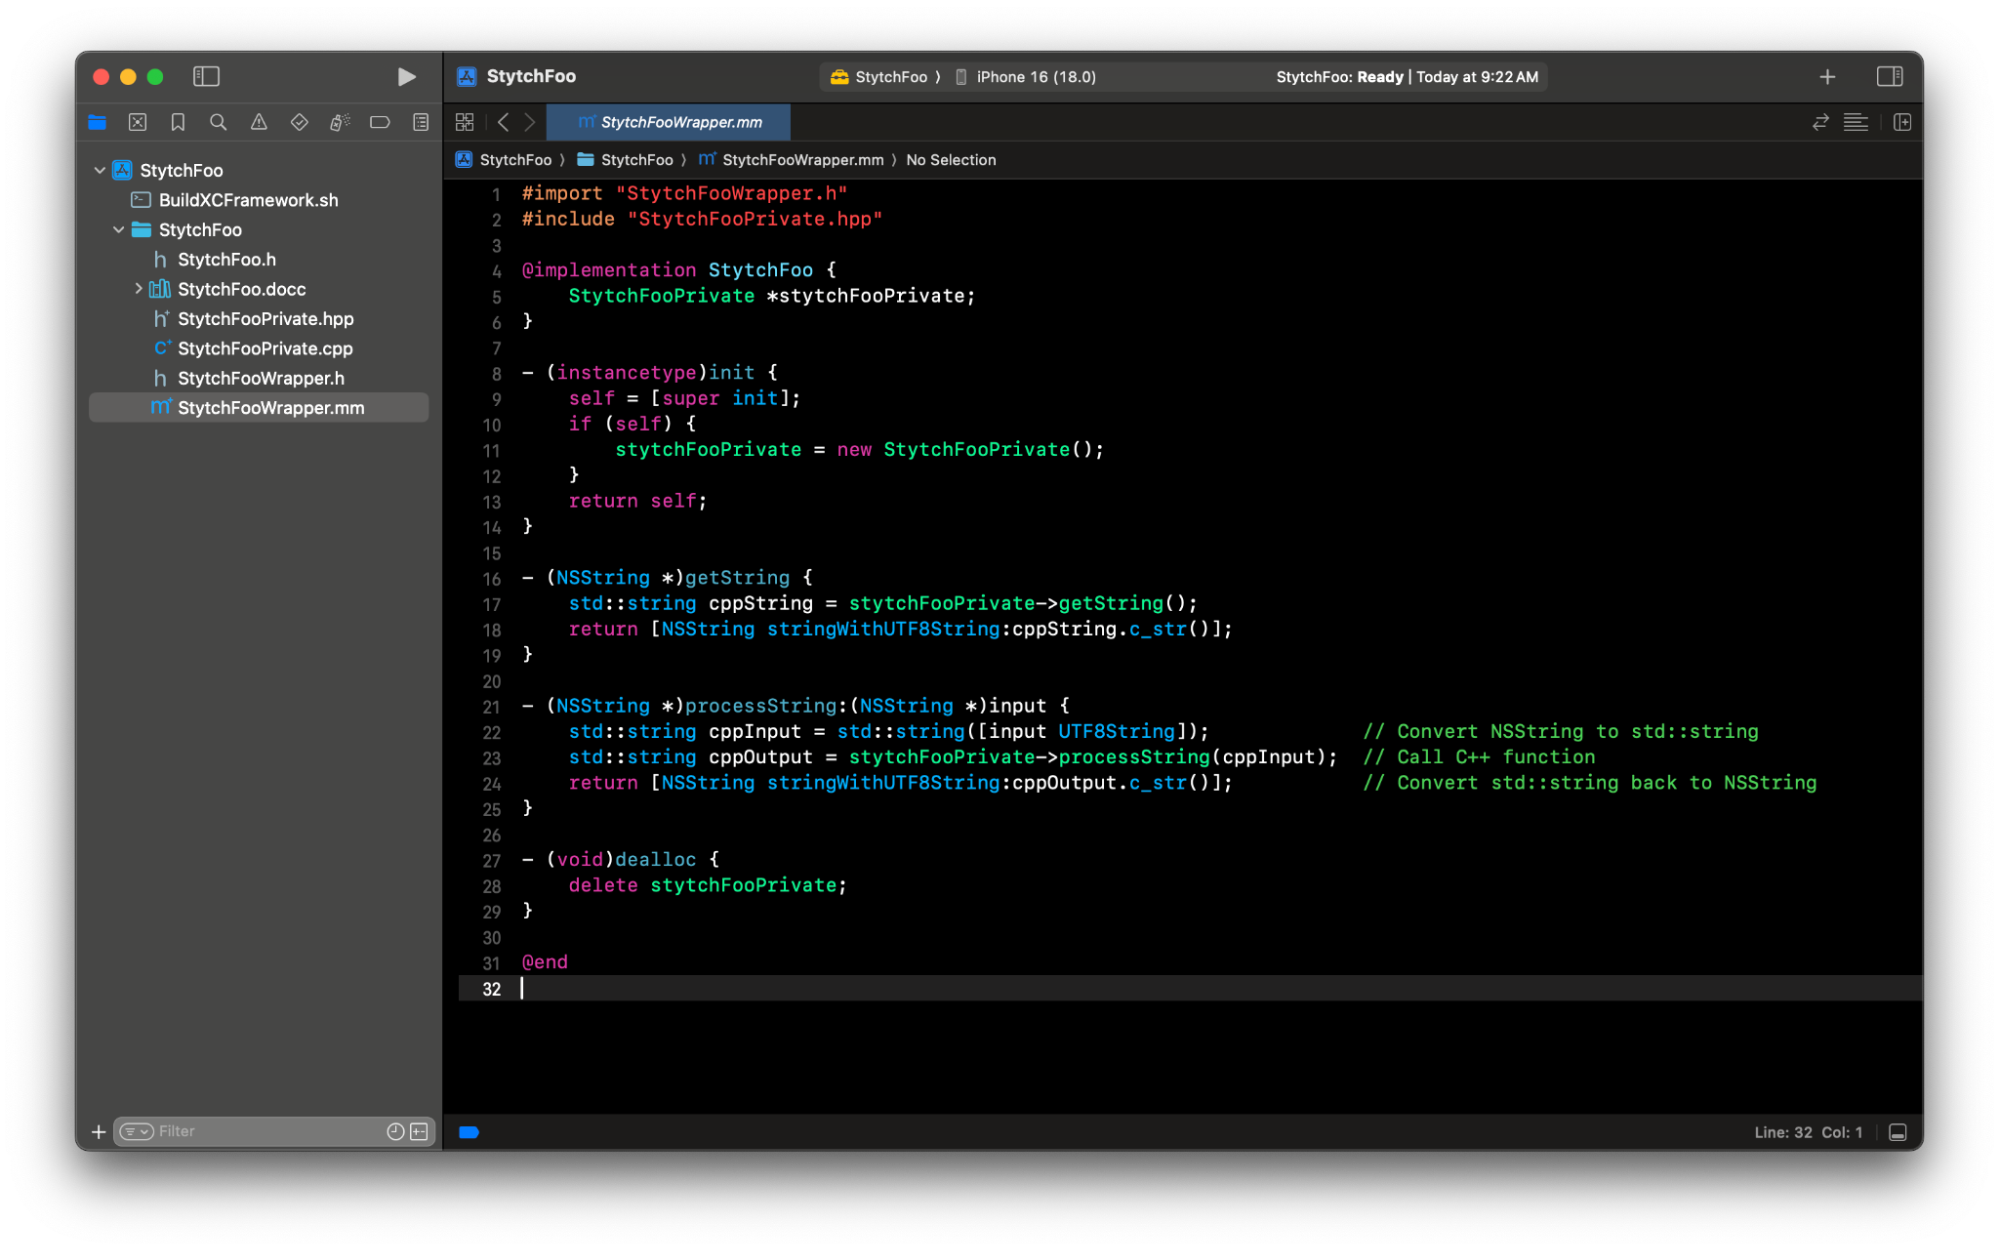
Implementation of StytchFooWrapper.mm
Here in the implementation file we hold a private reference to the StytchFooPrivate C++ object. A standard Objective-C file will have the extension .m but notice that the file extension for this file is .mm, which makes it a Objective-C++ file where we can write both Objective-C and C++ in one file.
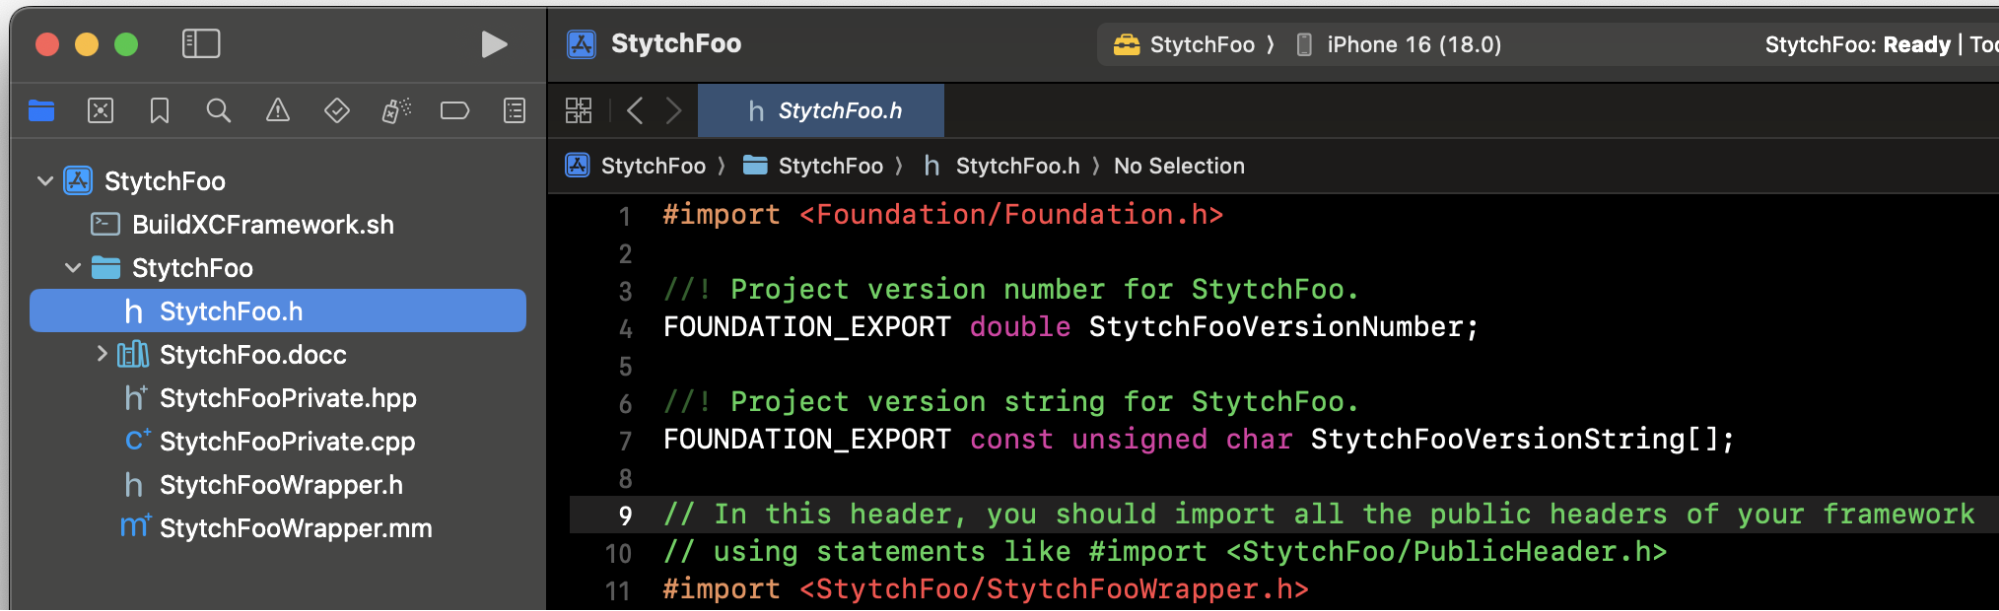
Next we need to make sure the right header files are public to the framework.
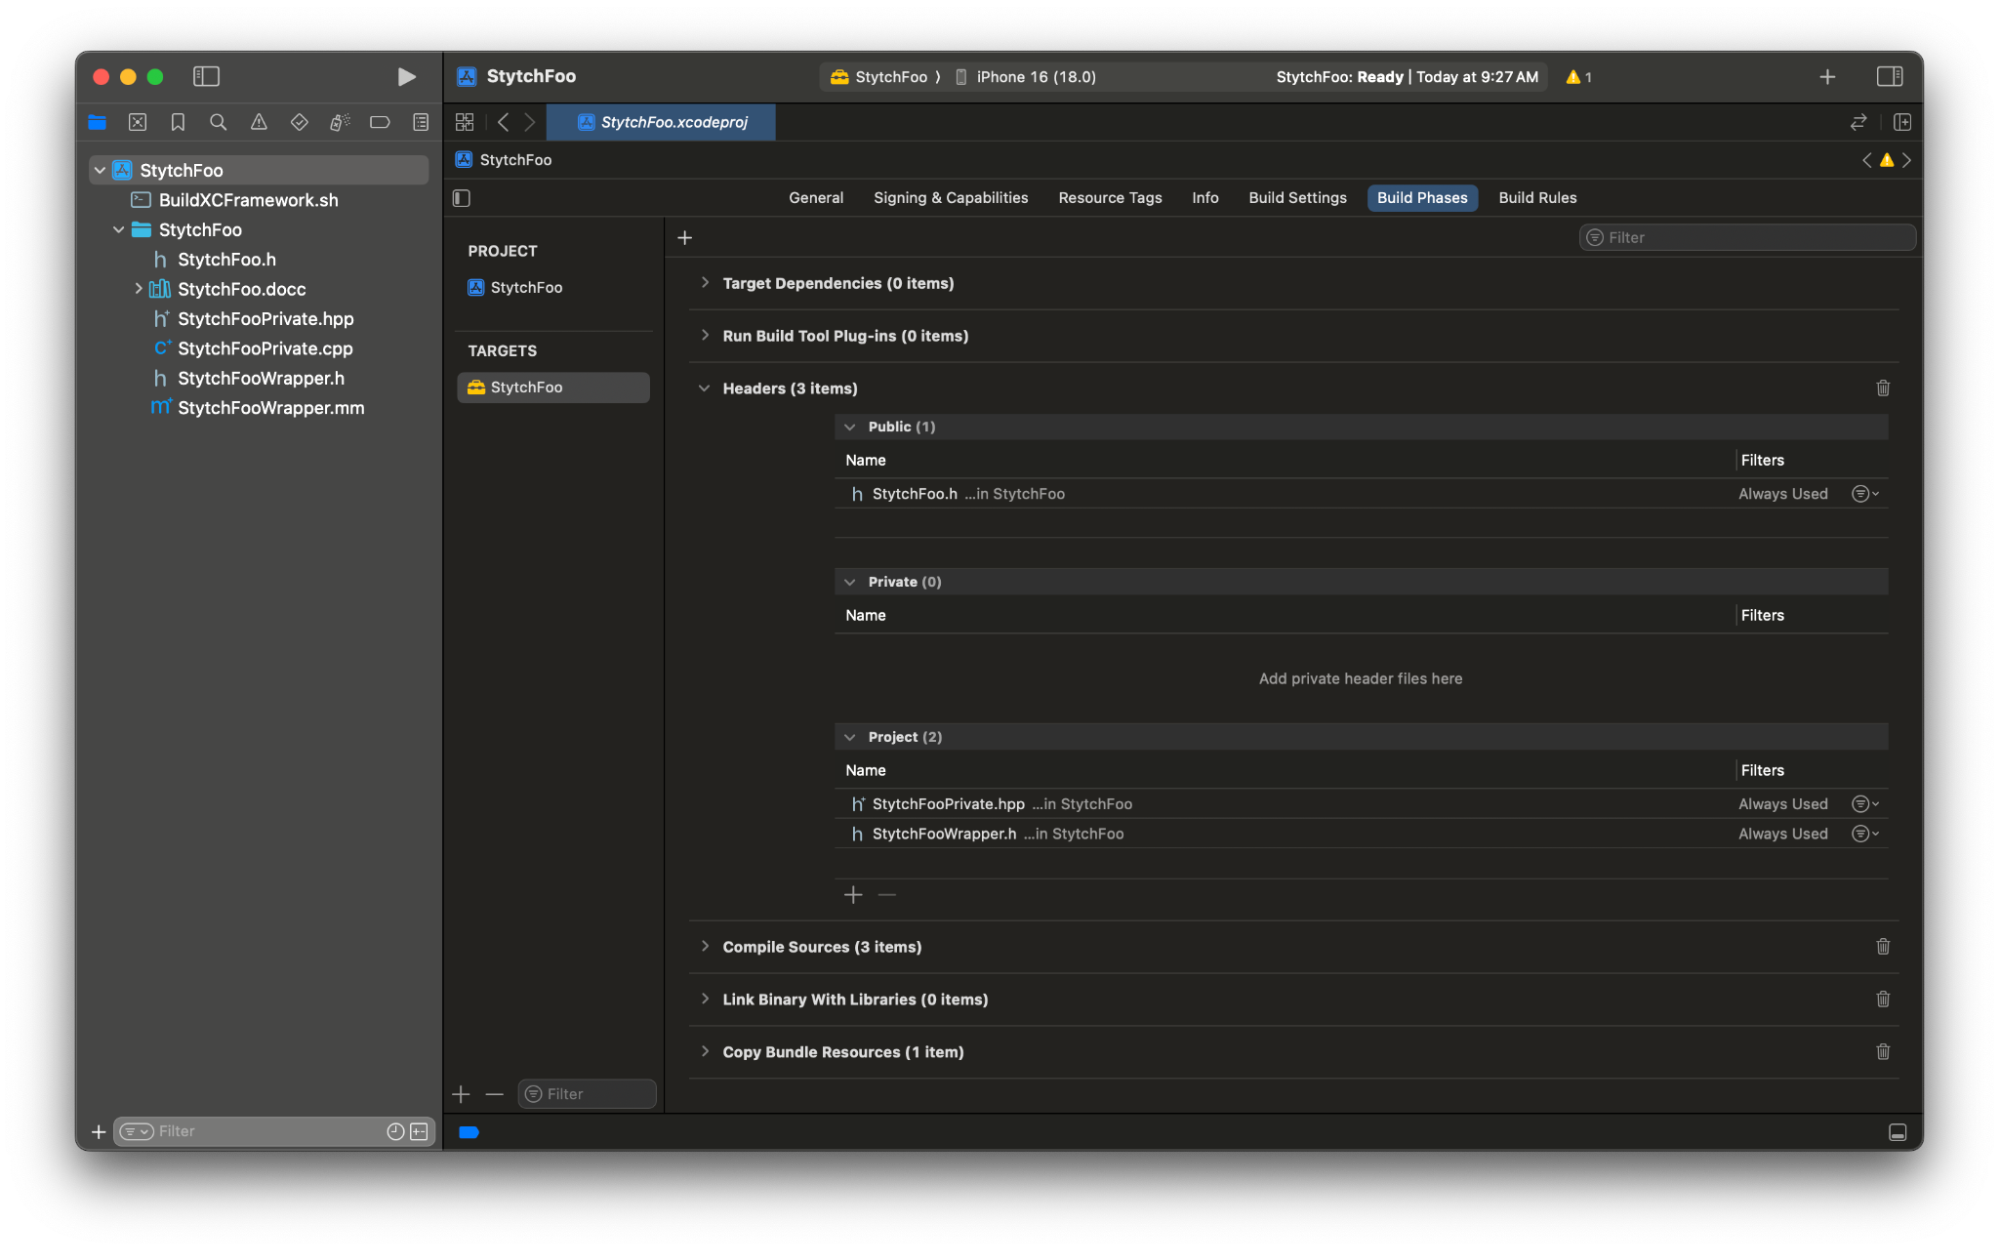
Select the project file in the left hand menu called the project navigator. Make sure your framework target is selected under the TARGETS section, here its highlight with a yellow toolbox icon. Then from the top menu select Build Phases.
Unfold the Headers section and you will see that the StytchFooWrapper.h is not under the Public section.
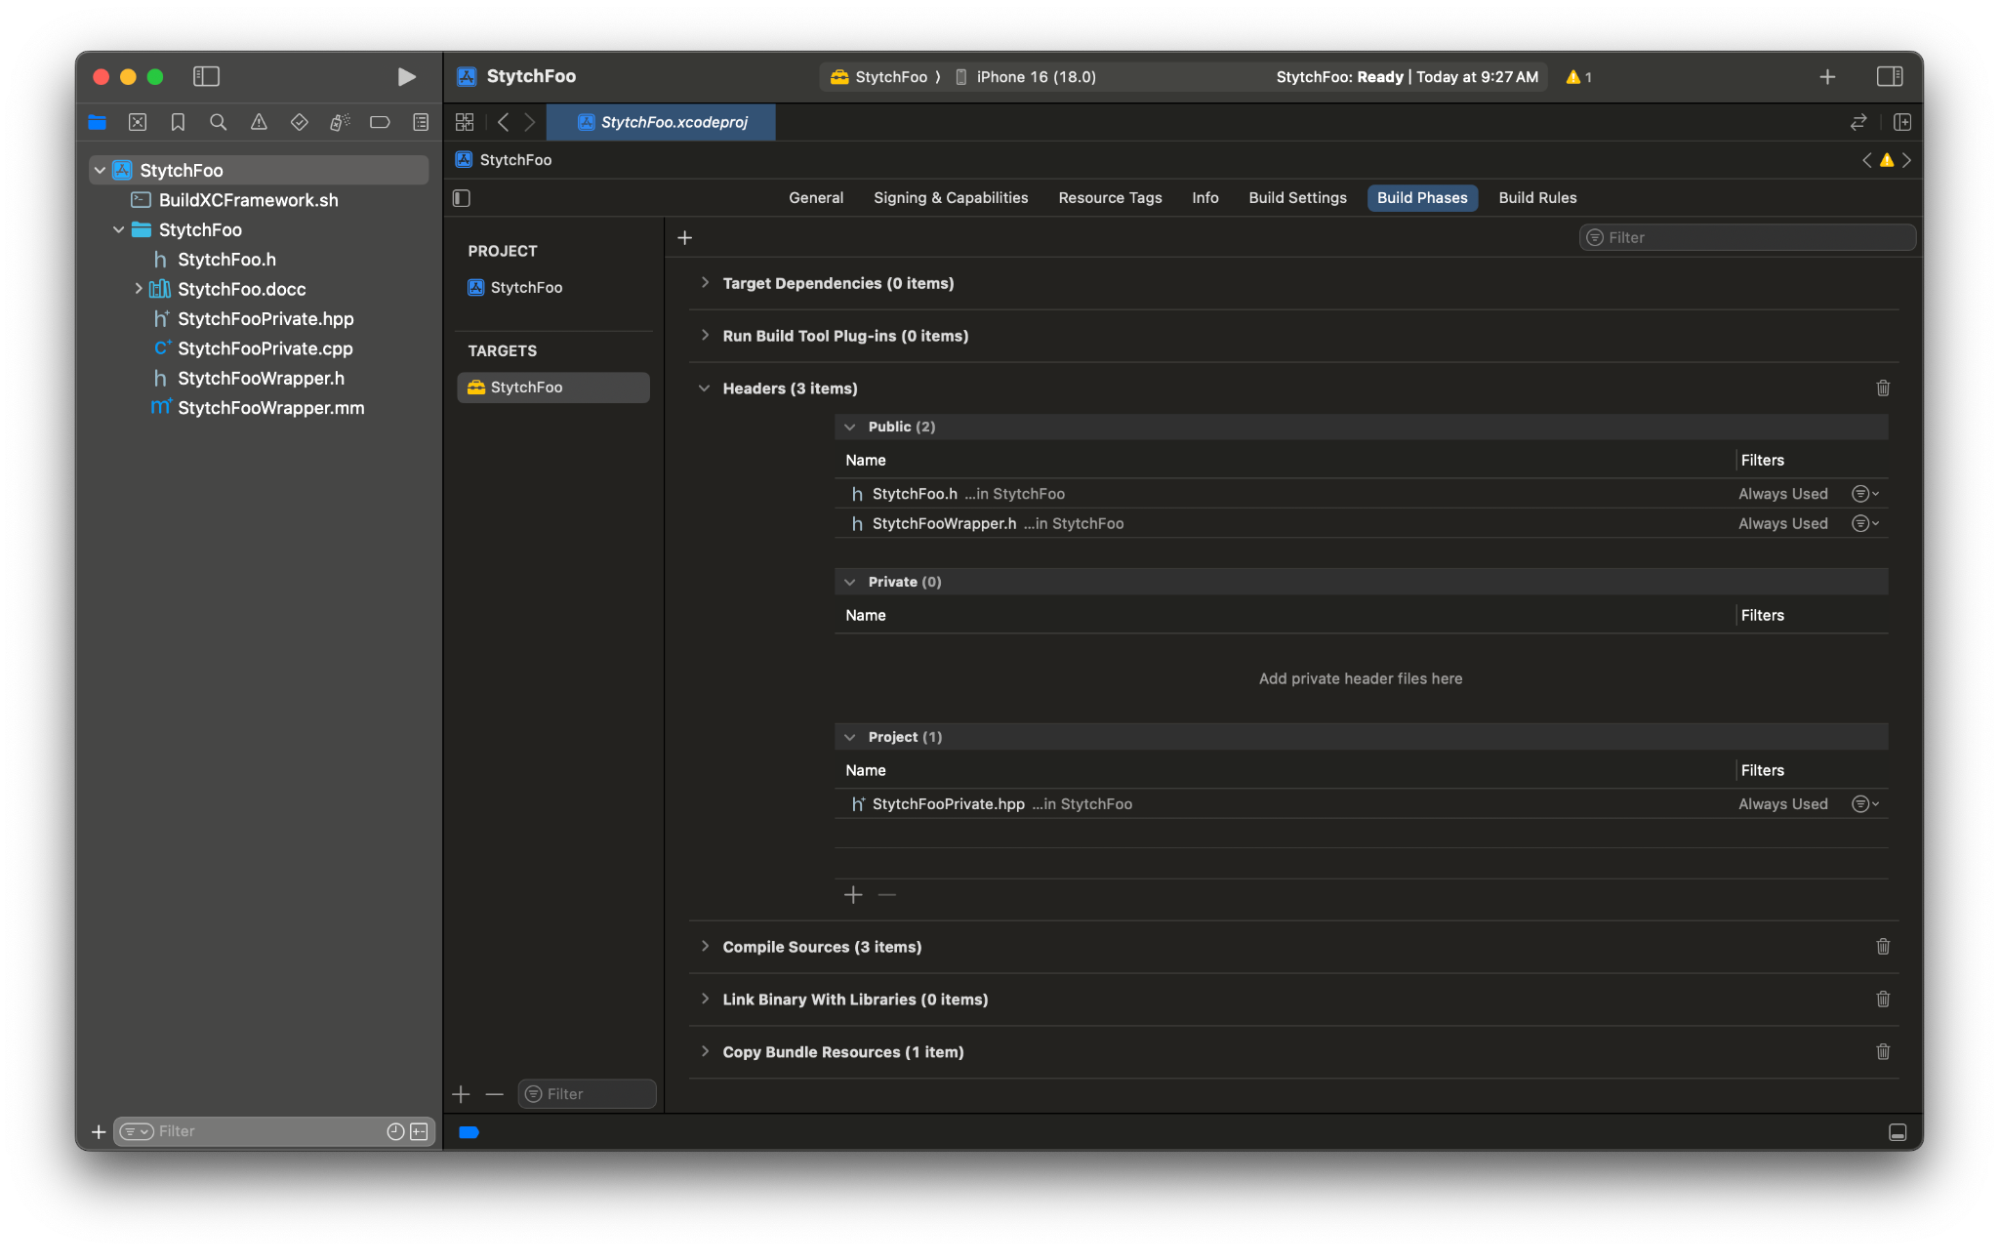
Drag the StytchFooWrapper.h file into the public section.
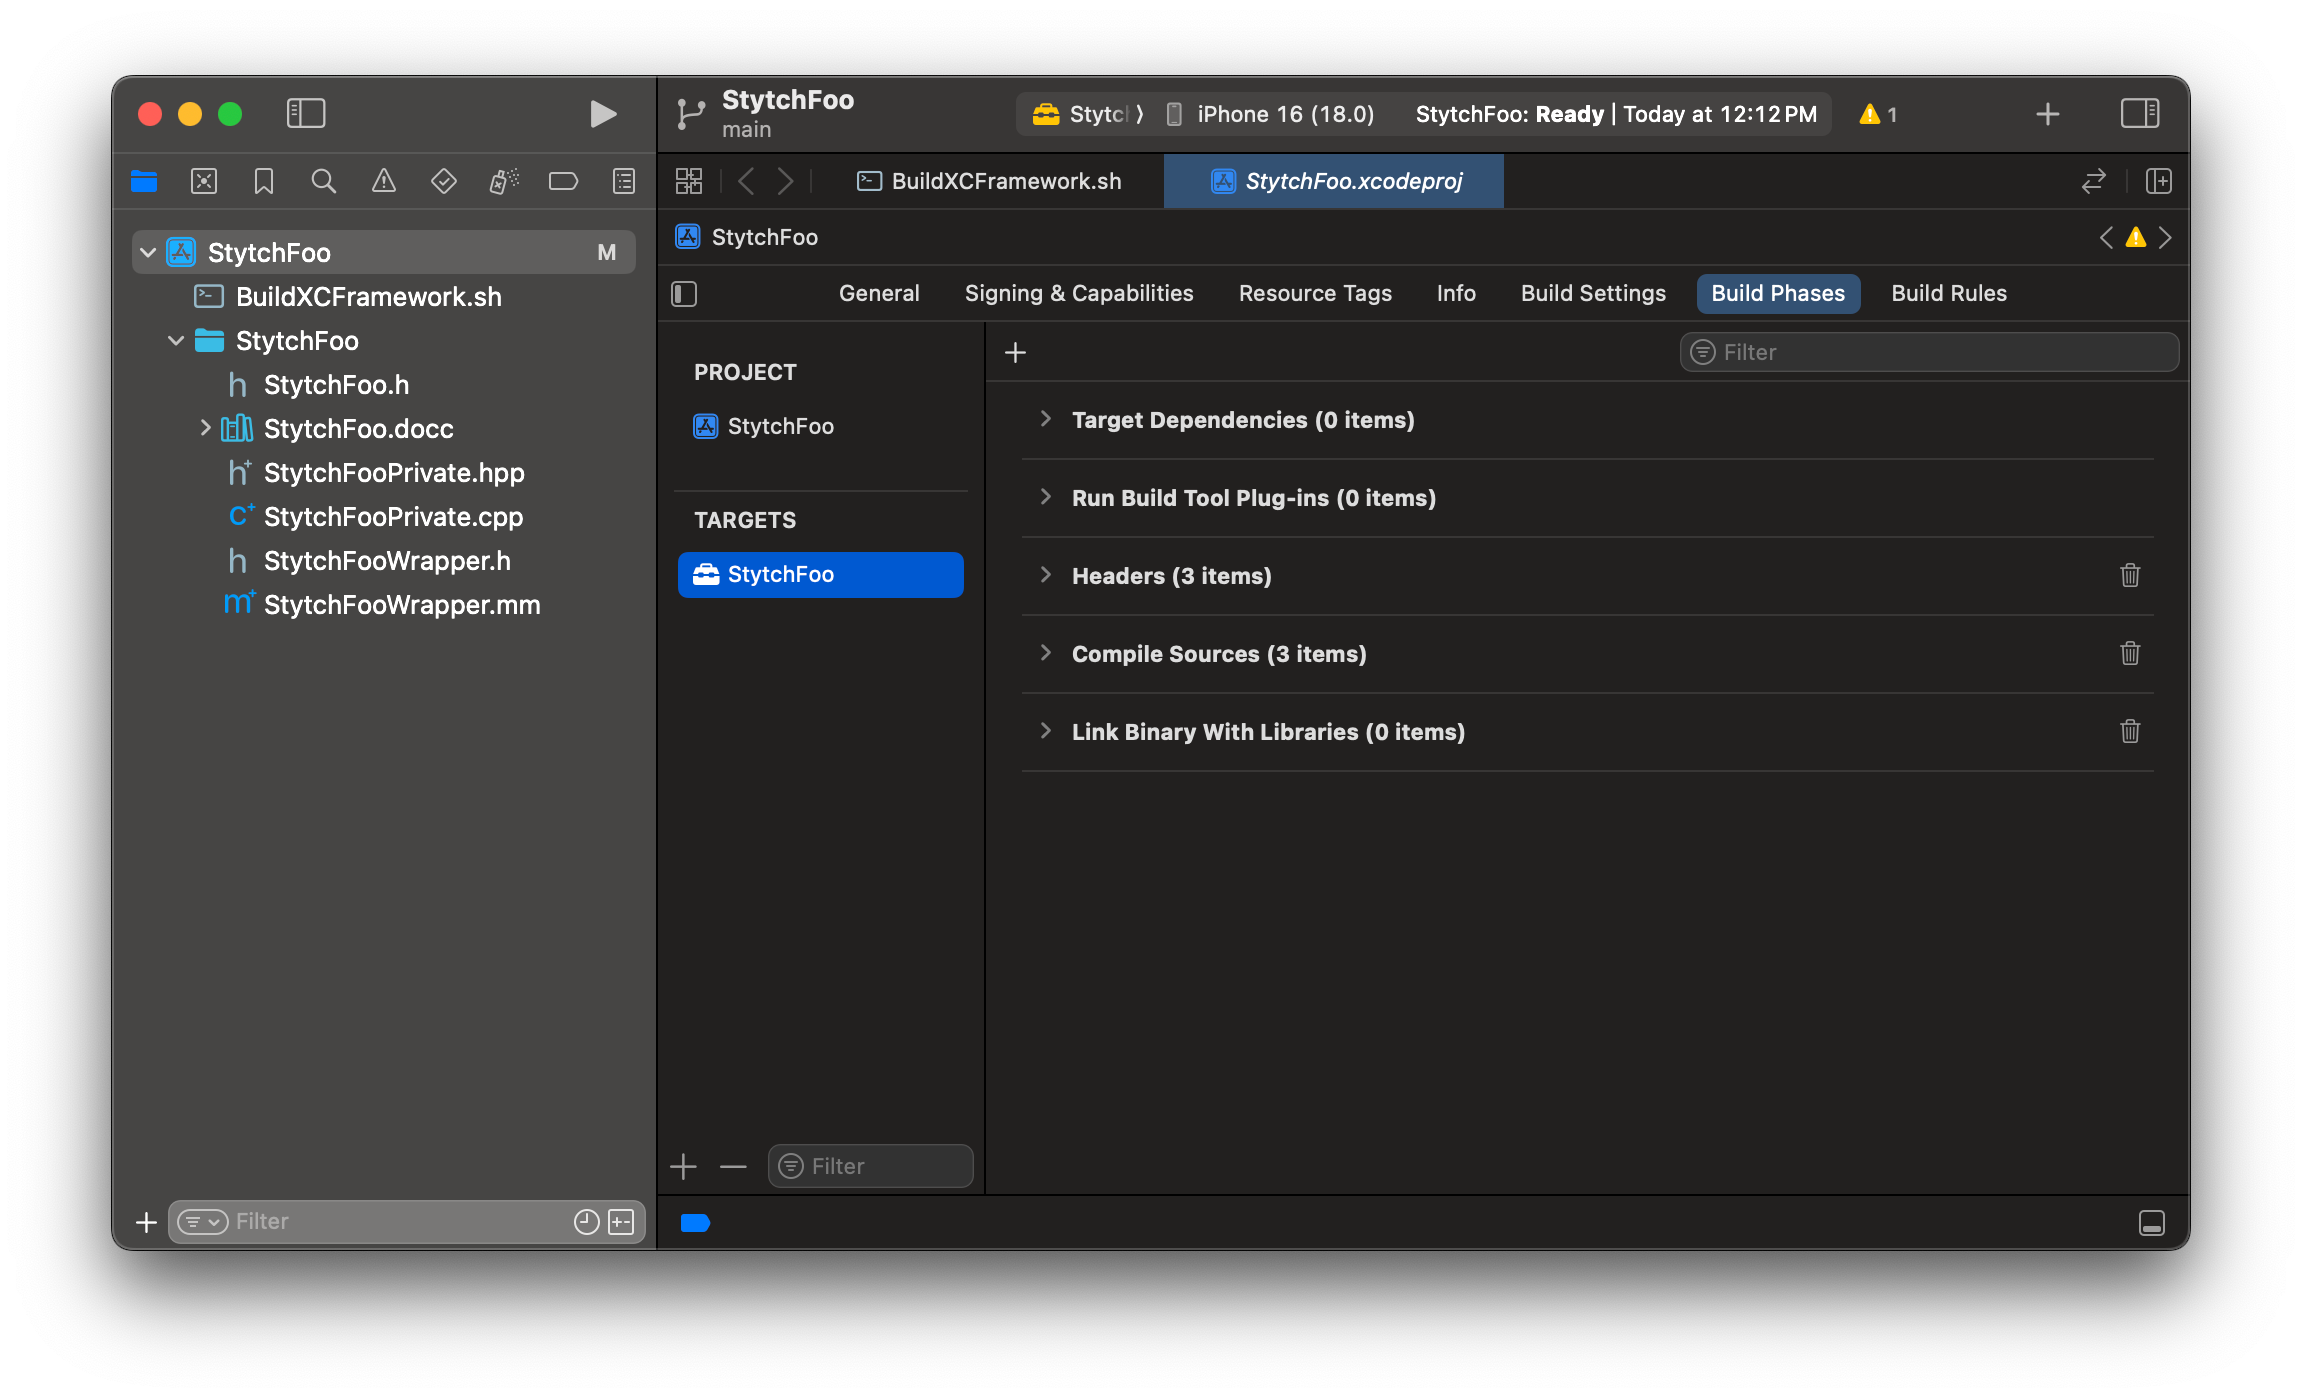
Delete the Copy Bundle Resources section by clicking the trash can icon on the right to prevent source files from being copied into the final XCFramework for distribution. Your build phases should only include the following sections.
Then open the StytchFoo.h header file and add #import <StytchFoo/StytchFooWrapper.h> .
Now let's add a script that will build the framework for distribution.
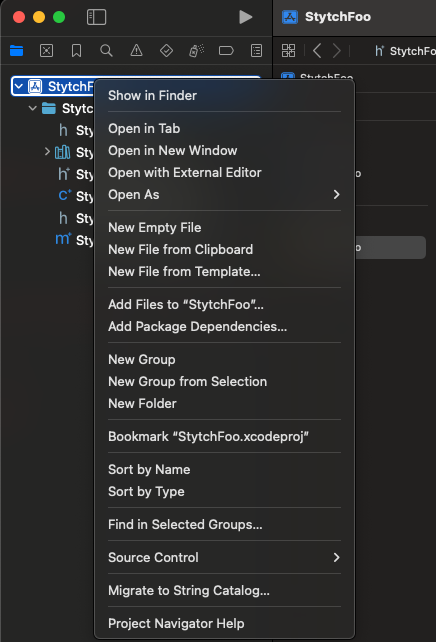
Right click on the project file and select New Empty File.
Create a script called BuildXCFramework.sh, this will create a universal binary .XCFramework that can be run on device and simulator.
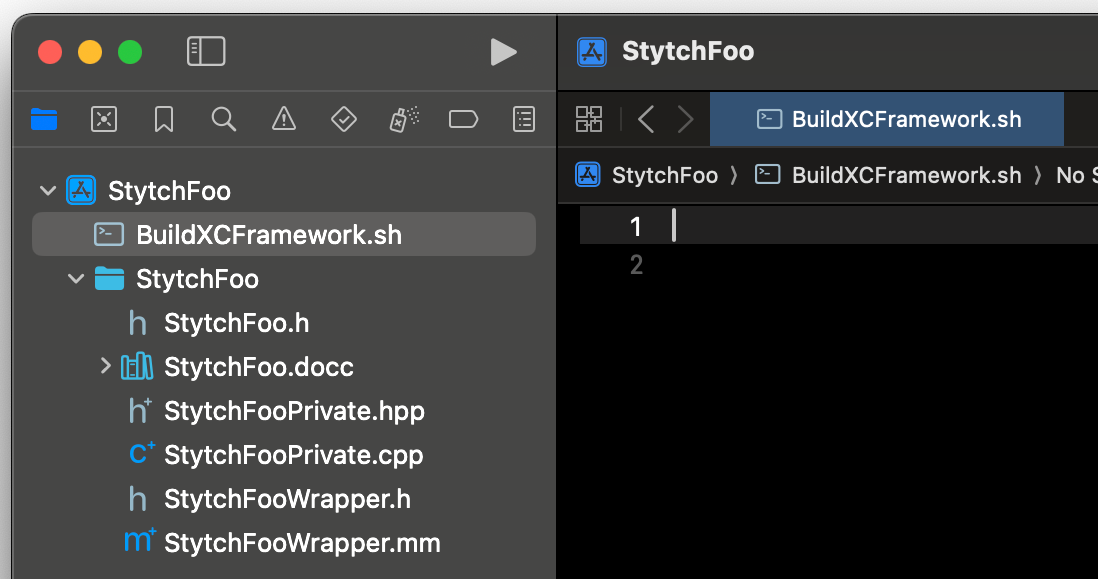
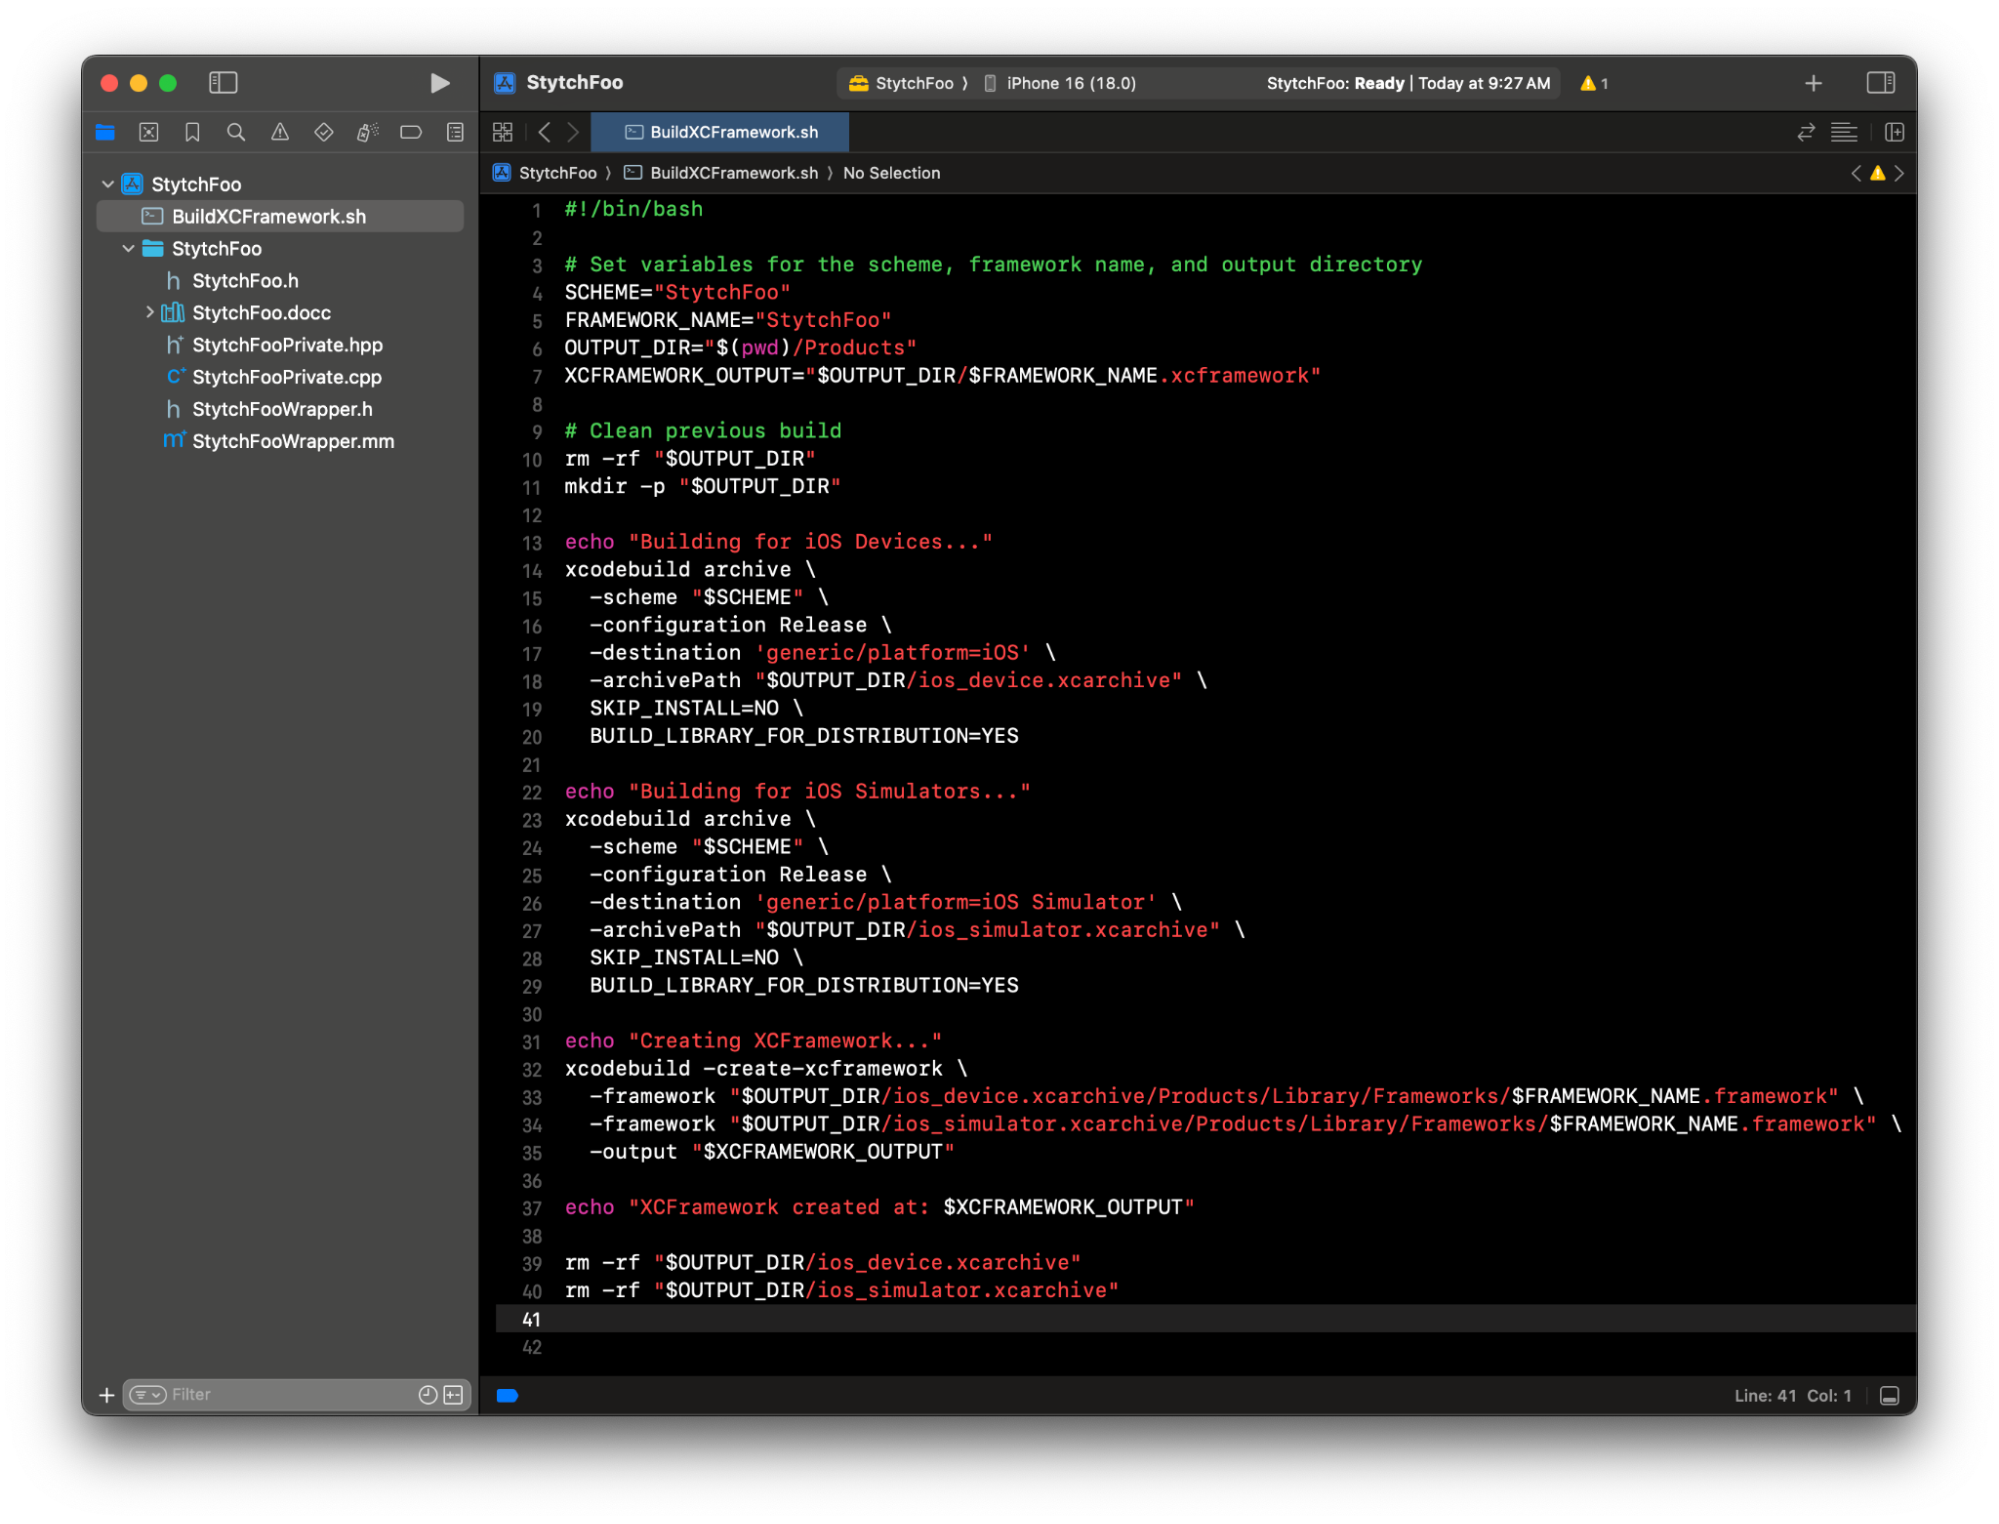
Implementation of BuildXCFramework.sh
Adjust the values as needed for your naming scheme.
Navigate to your project directory and type the following commands in the terminal:
chmod +x BuildXCFramework.shTo modify permissions on the script to run it, you only need to run it once.
./BuildXCFramework.shTo run the script each time you want to build the framework, run this:
StytchFoo % chmod +x BuildXCFramework.sh
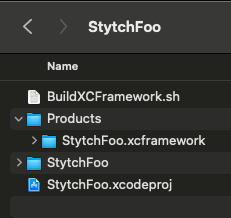
StytchFoo % ./BuildXCFramework.shAfter you run the BuildXCFramework.sh script you can check your project directory and you should see a Product directory with the built .xcframework in it. We will need to copy it into the Swift package for step 2.
Part 2: Commit to public repo B
Create a public repo and navigate to the empty repo and type:
swift package init --name stytch-foo --type libraryThis will create a new Swift package named stytch-foo.
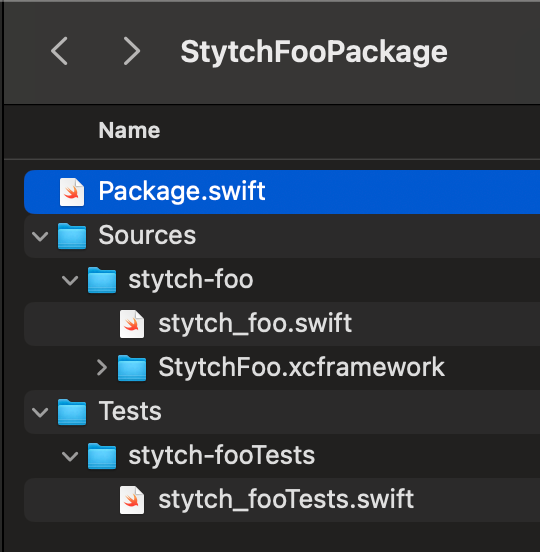
In my case I named the directory StytchFooPackage.
Copy your .xcframework file generated in the private repo in step 1 and copy it into the stytch-foo directory of your newly created package. It should look like this:
You can double click on the Package.swift file to open the package in Xcode.
Modify your Package.swift file to follow this example file given. We must add a .binaryTarget to the package for the .xcframework.
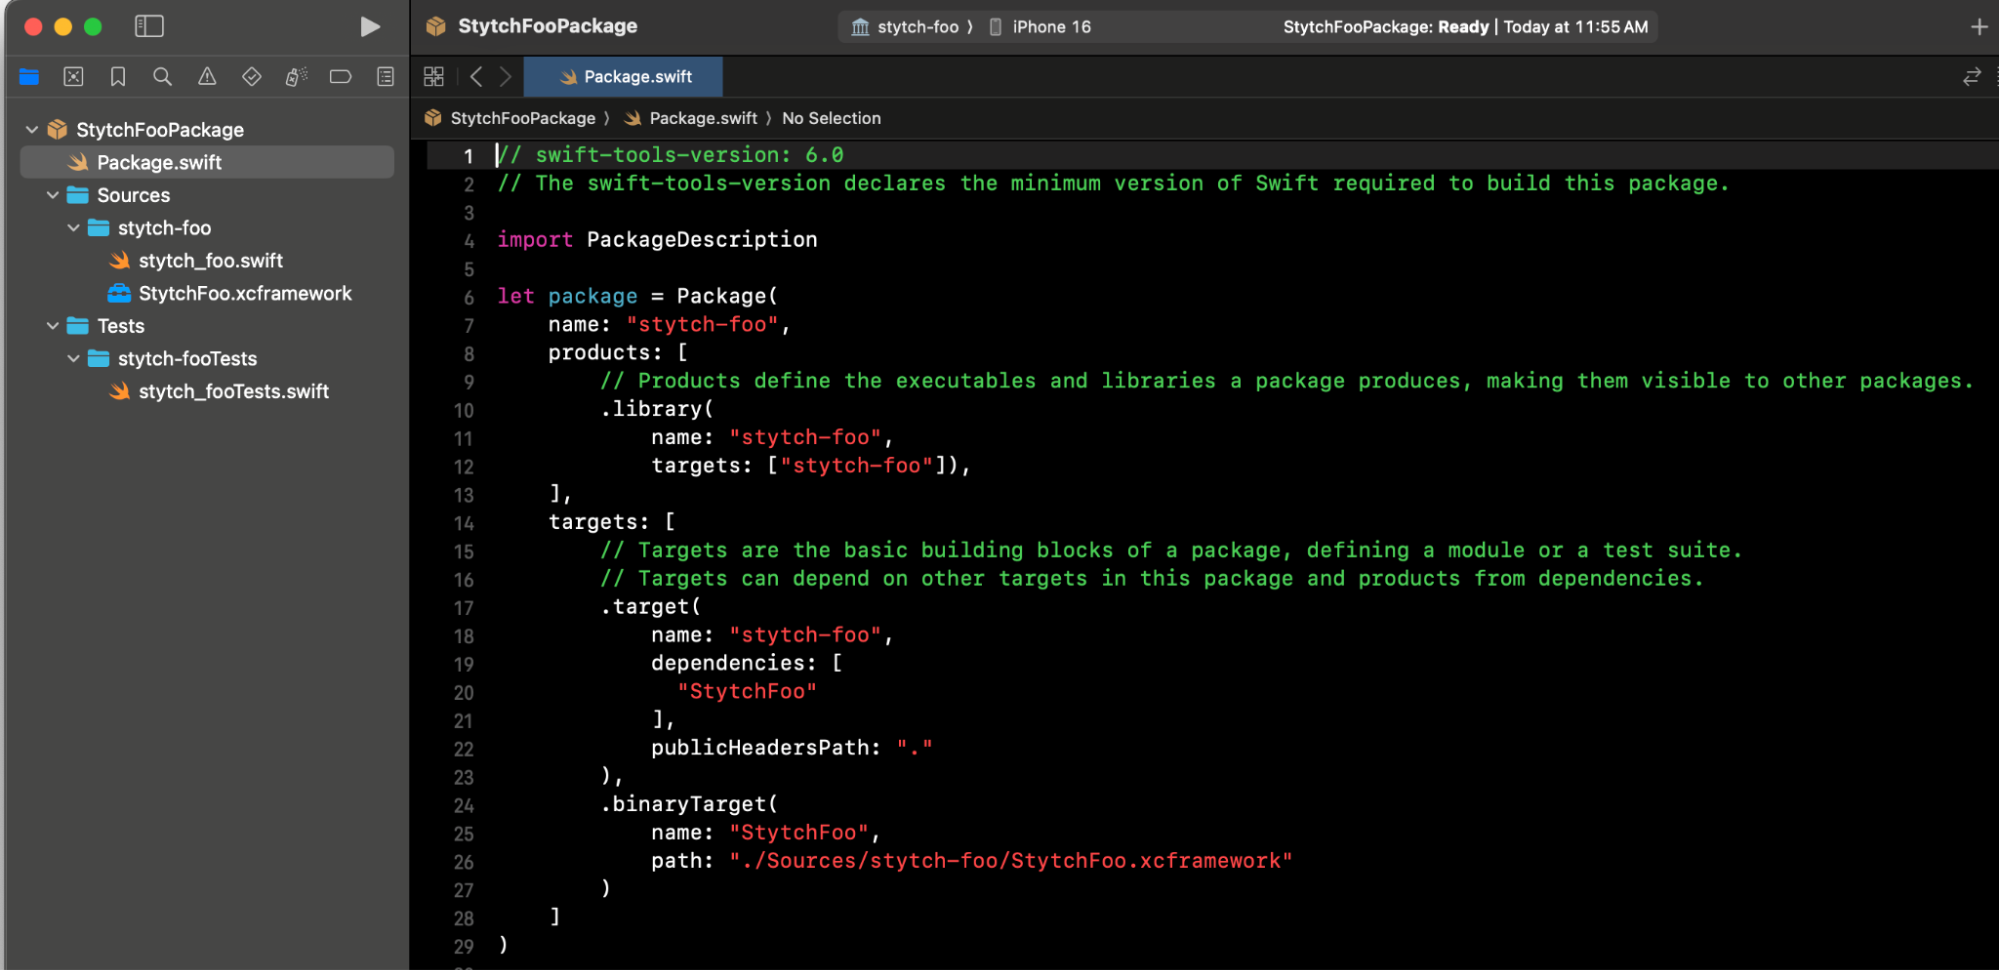
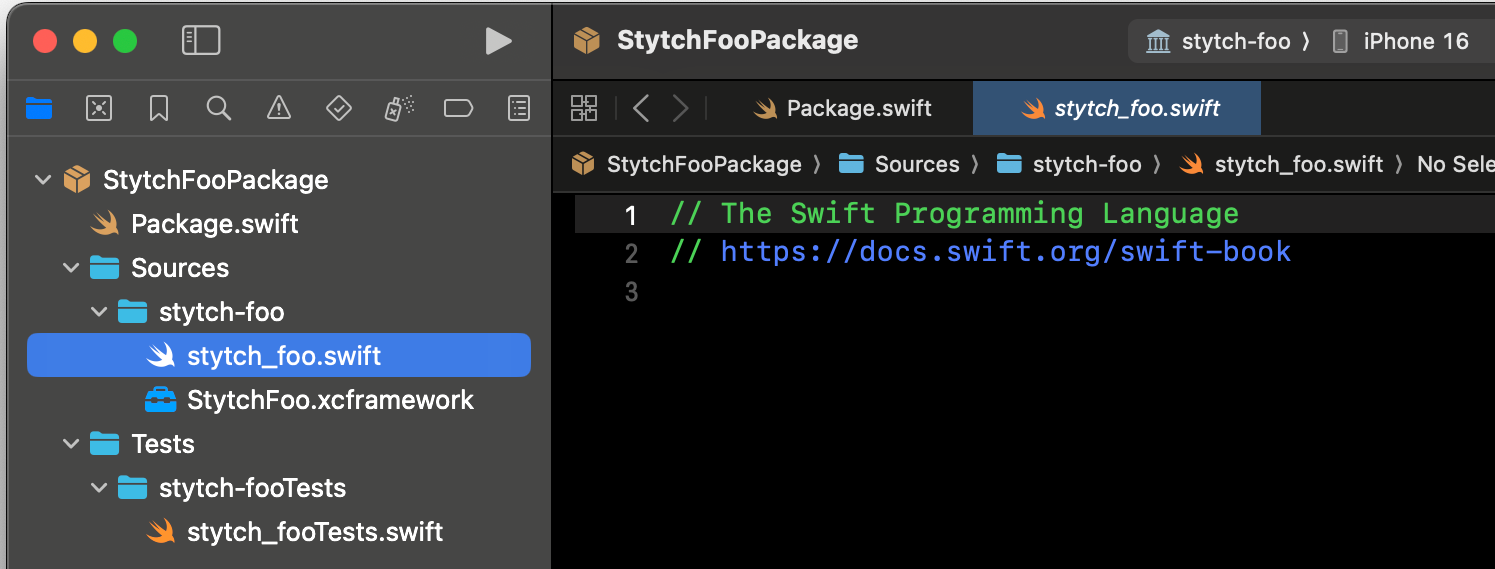
There must be an empty Swift file matching the package name, I could not figure out why.
Commit these changes to your public repo and your Swift package is live!
Part 3: Commit to repo C, your application repo
In Xcode click File->New->Project and select App and click Next.
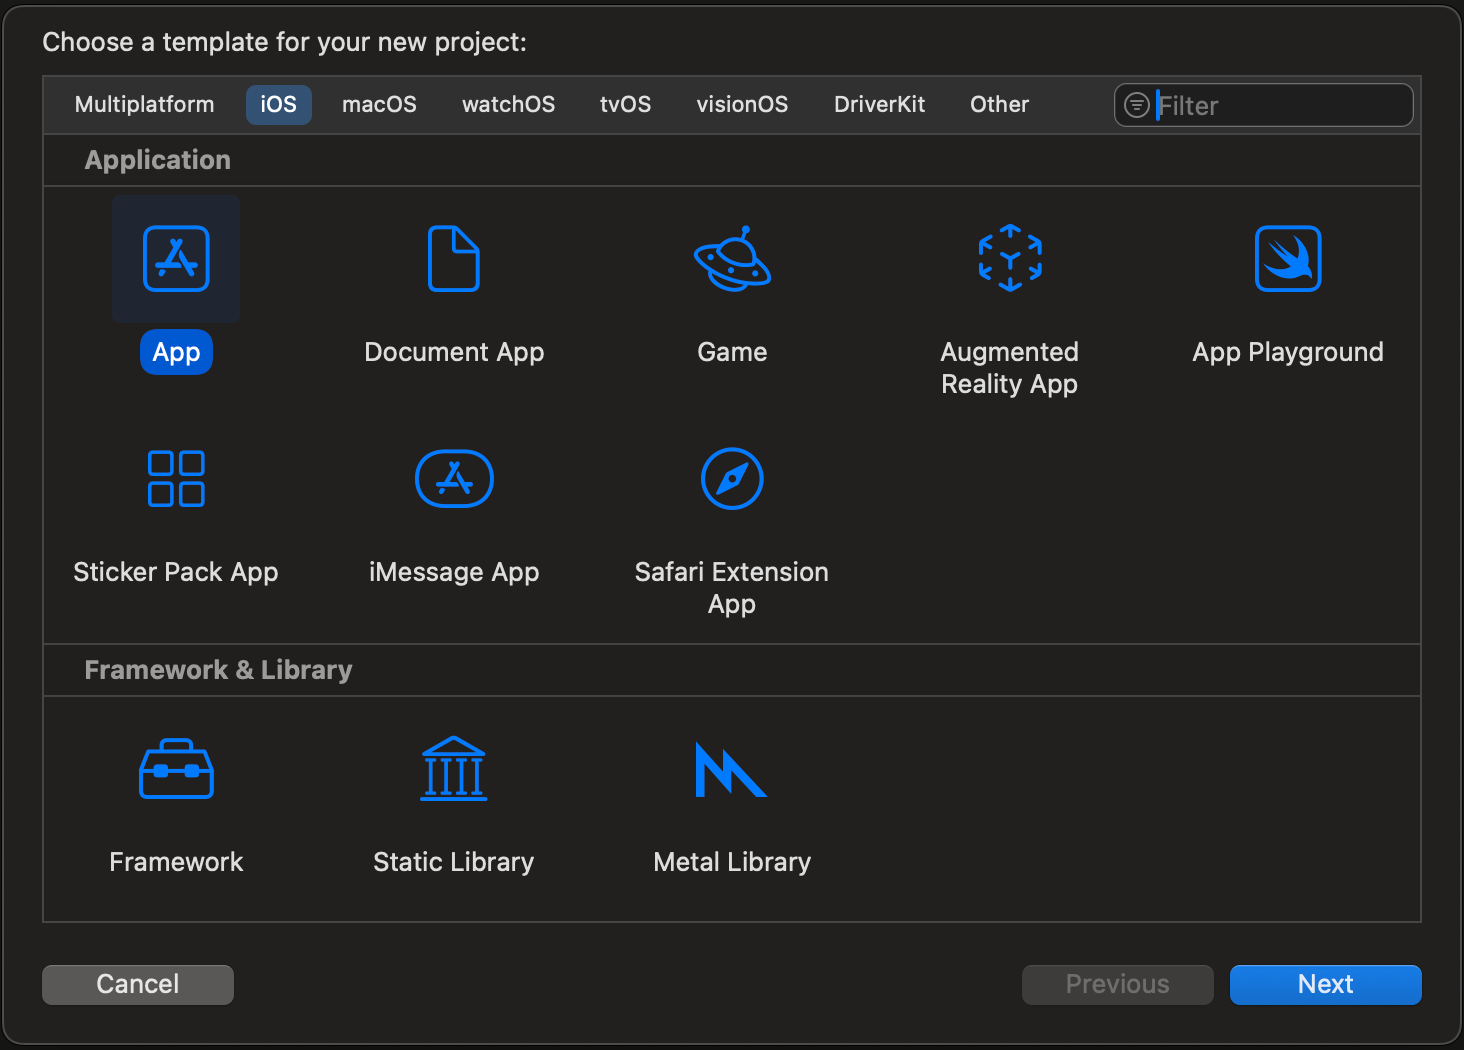
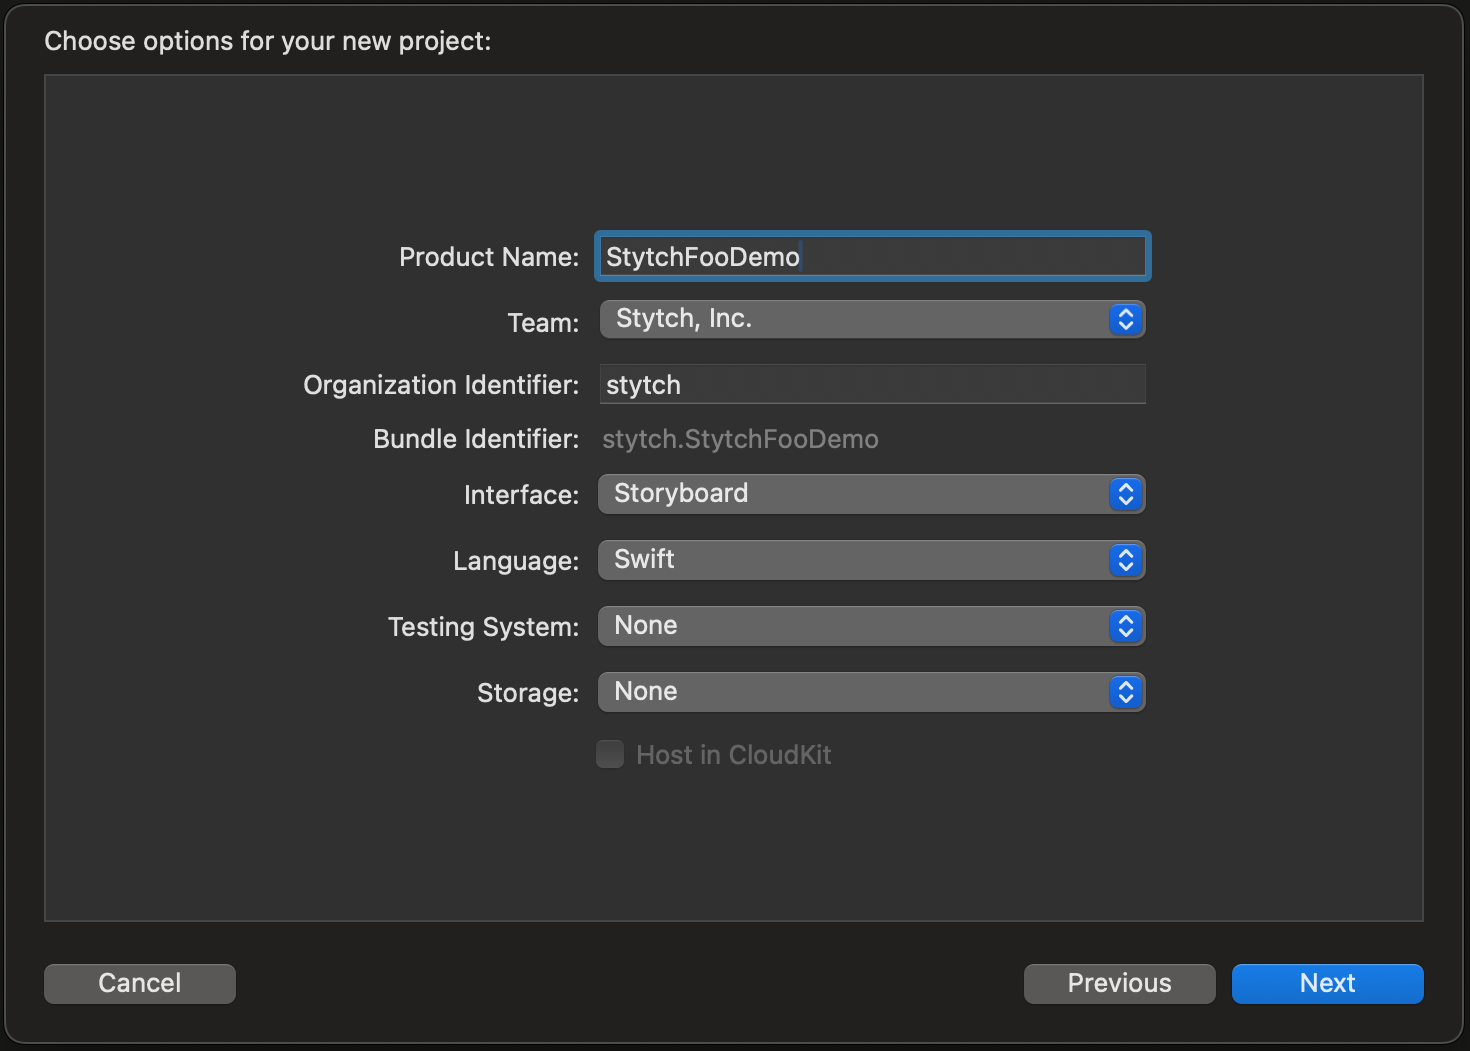
Add a name under the Product Name field and click Next. For this example I chose “StytchFooDemo.”
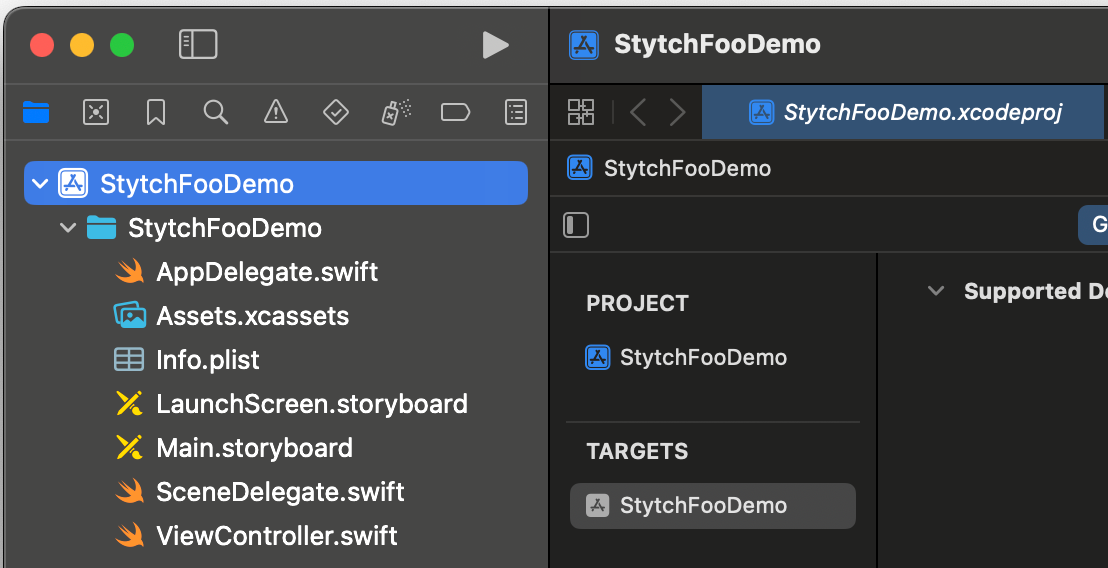
The default project at creation should look like this:
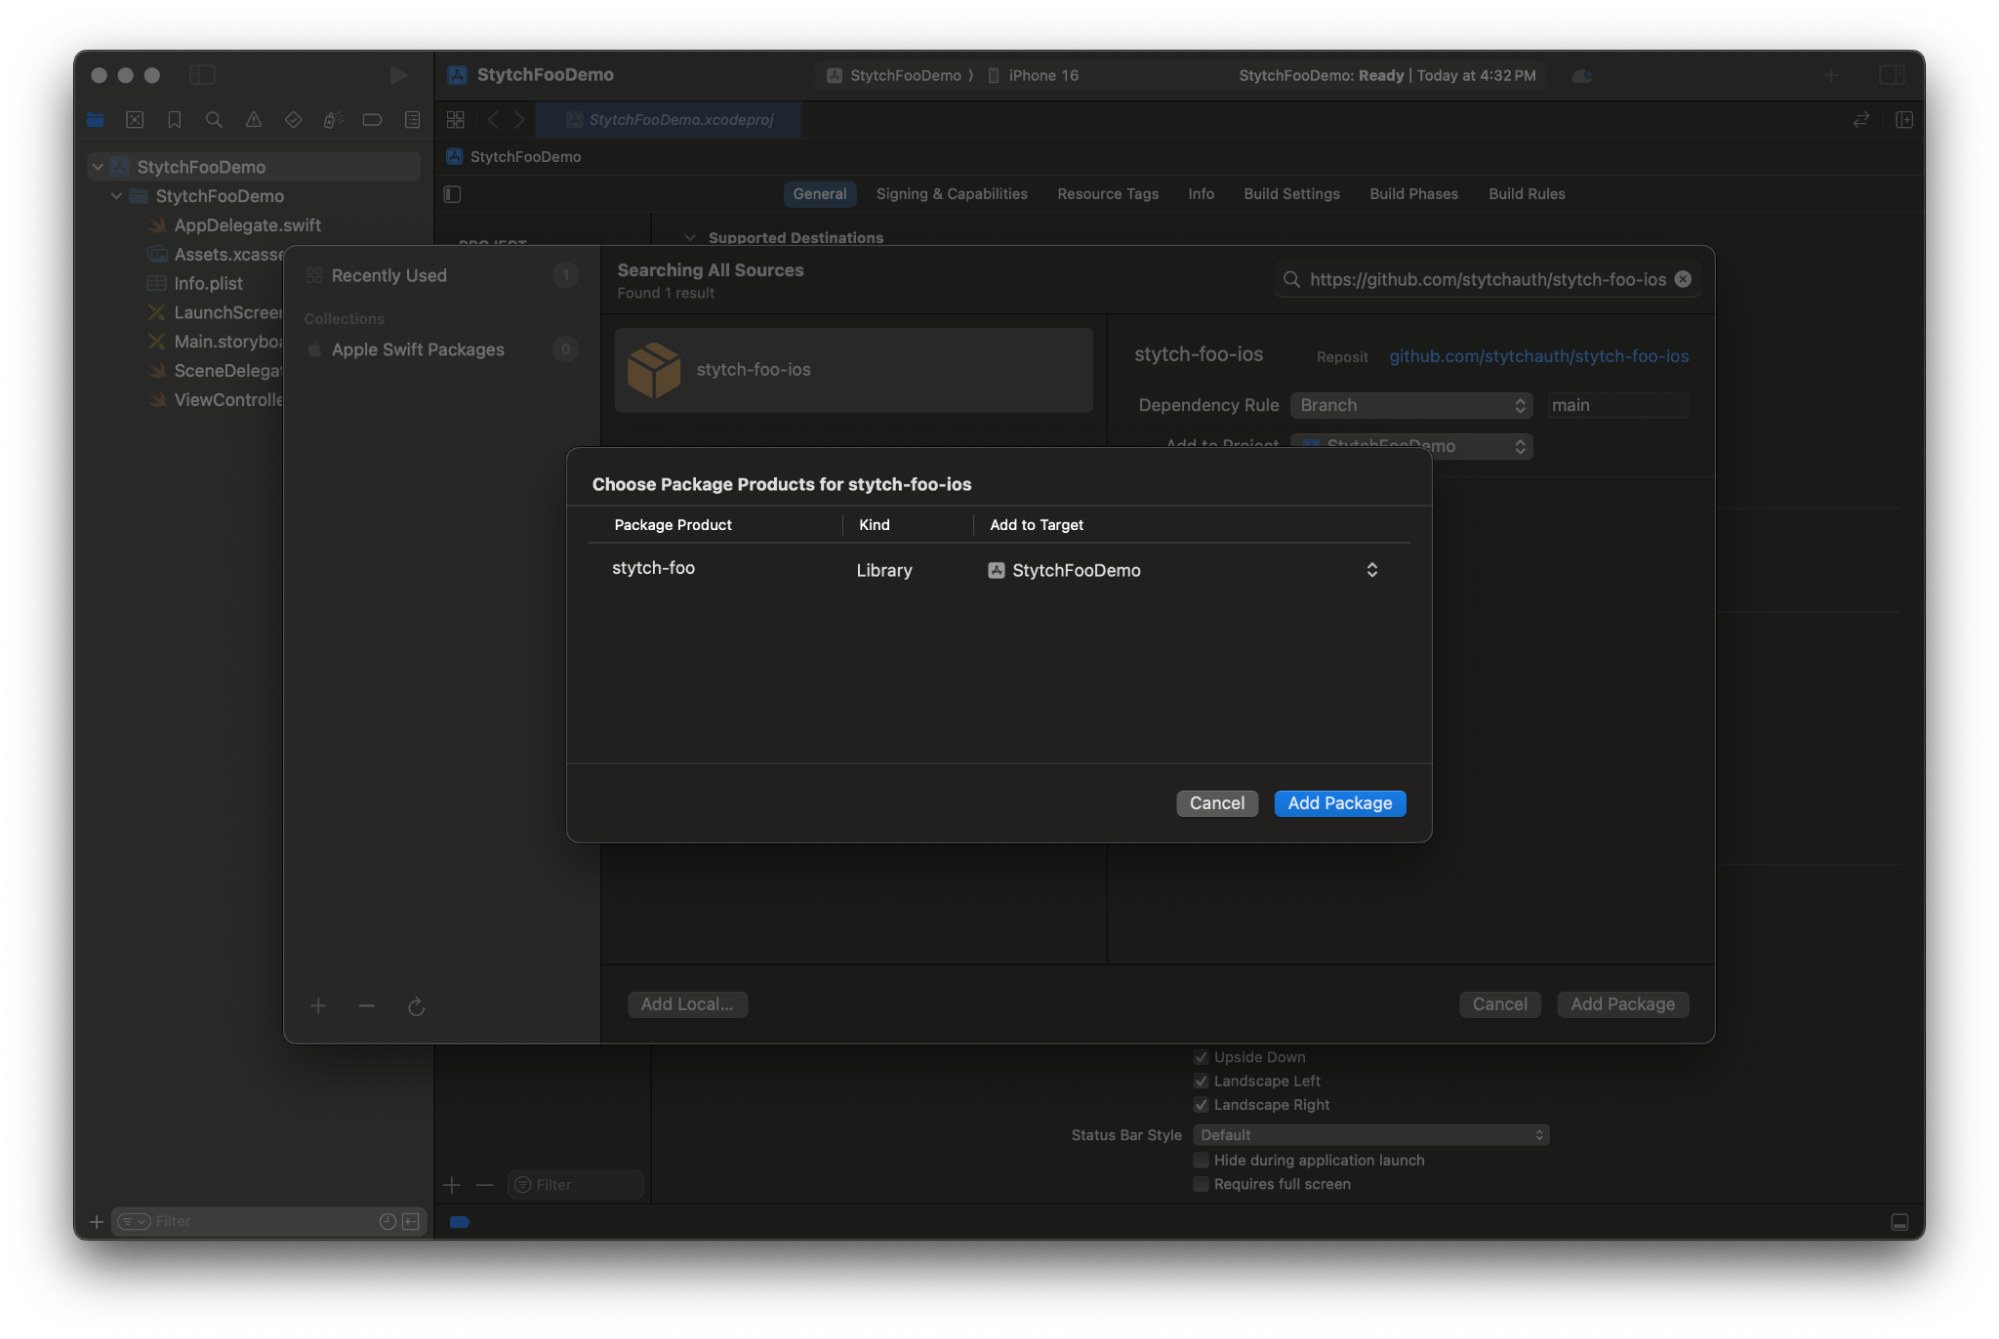
In Xcode click File->New->Add Package Dependencies.
Once the window opens add the url to the repo to the top left of the below window and it will come up as an option to select. Select the package as seen below and click Add Package.
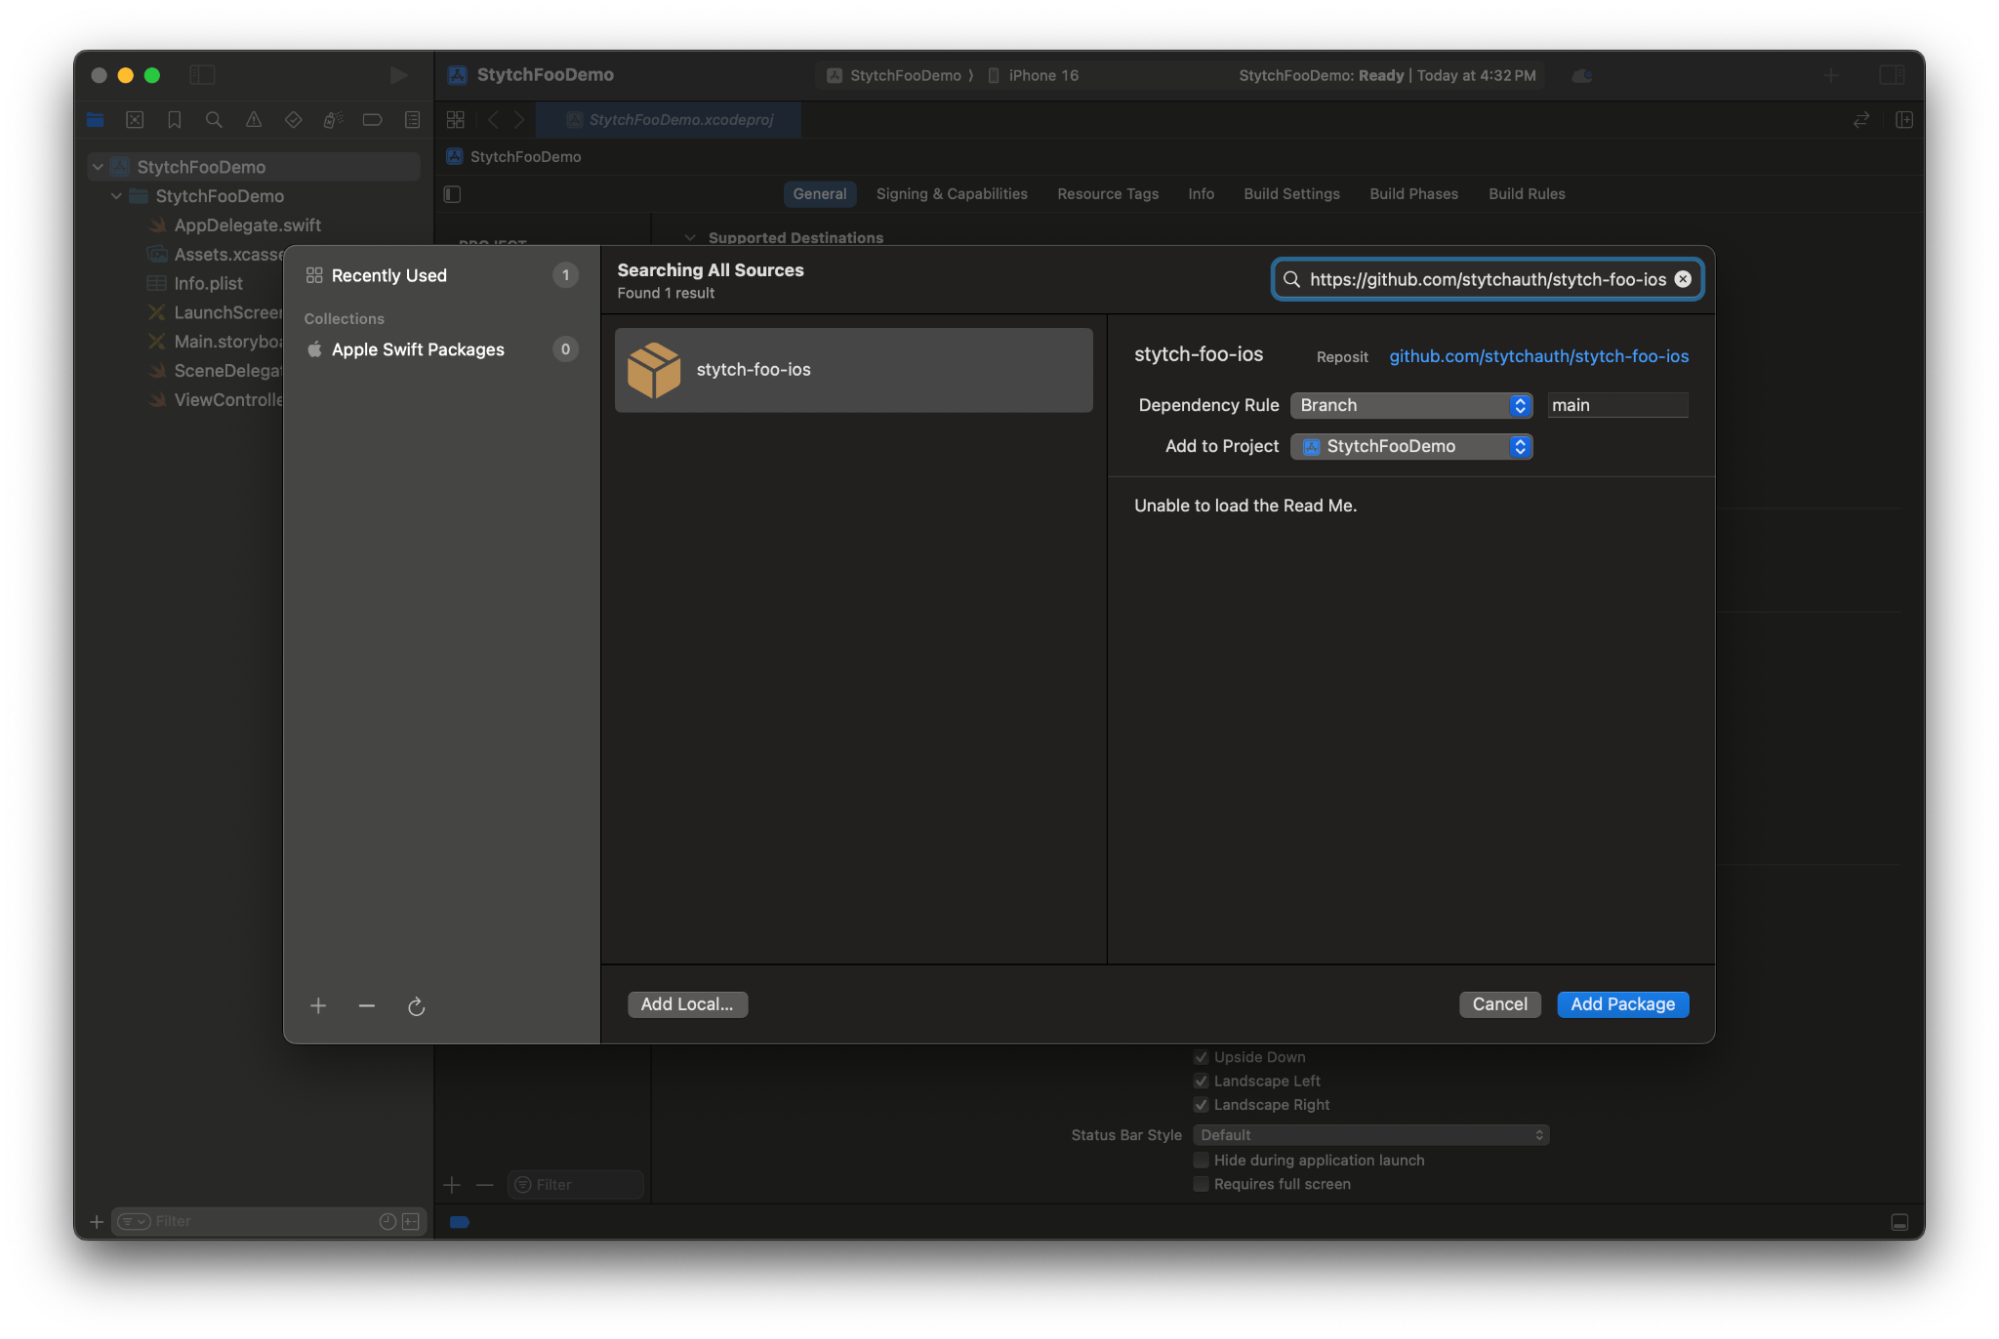
Click Add Package again.
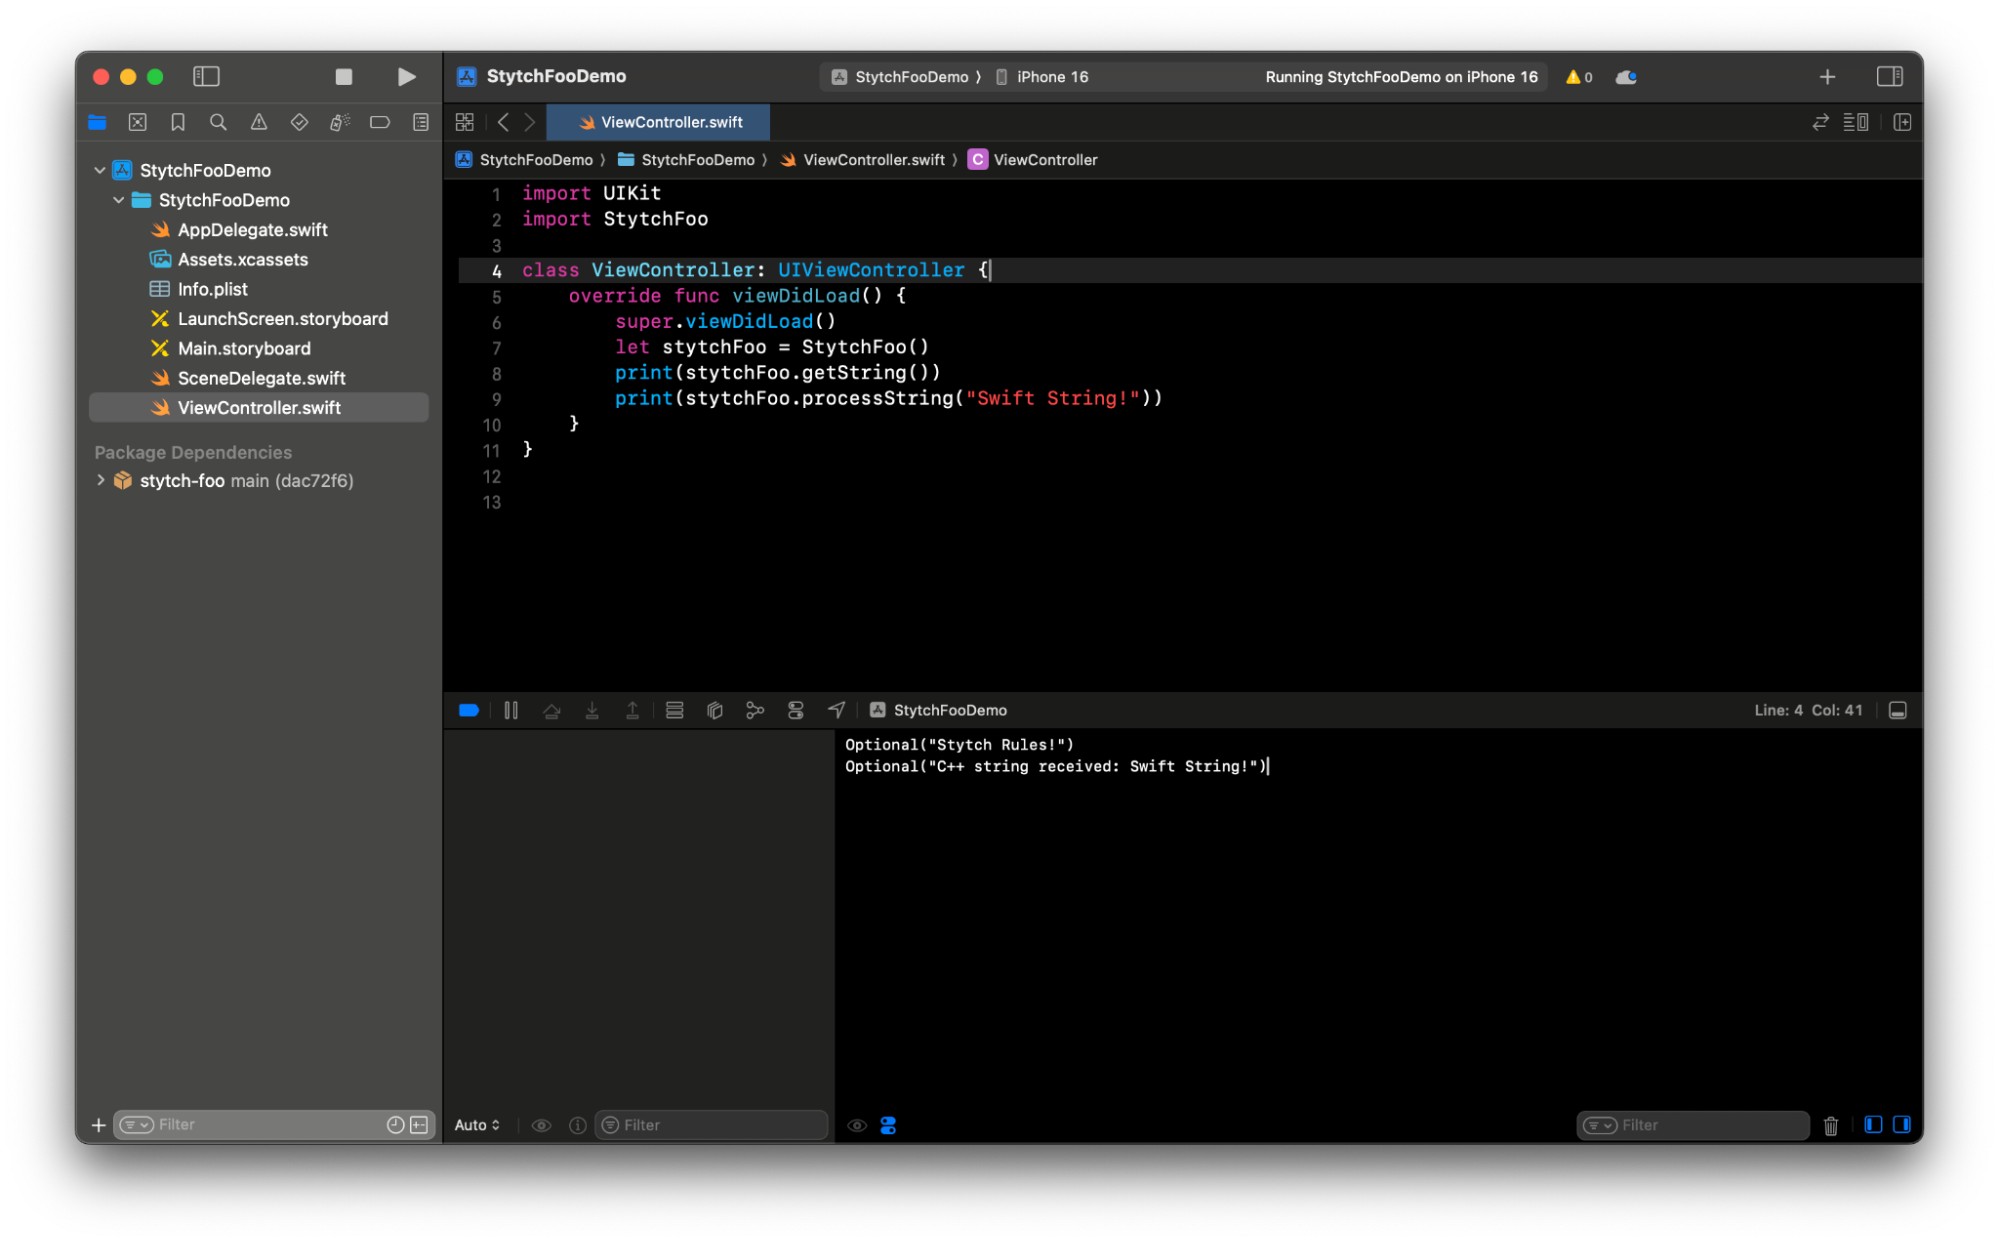
Here is where we tie it all together!
Now we can add the import statement import StytchFoo and use our StytchFoo object defined in part 1 of the tutorial in StytchFooWrapper.h and StytchFooWrapper.mm.
If you look in the console in the attached image you will see the log statements that match the implementation of StytchFooPrivate.cpp from step 1. Therefore this demonstrates that this Swift code is calling into C++ code.
Final thoughts
Building a closed source Objective-C++ framework for Swift Package Manager provides a practical way to distribute proprietary functionality securely and efficiently. By leveraging XCFrameworks, we encapsulated our code in a robust, reusable package that integrates seamlessly into Swift projects while protecting our intellectual property. There are many potential approaches to solving this problem, and this article outlines just one path.
If solving problems and reading topics like this interest you, check out our careers page.
Happy coding!
Build with Stytch
APIs and SDKs for authentication, authorization, security and fraud prevention


Authentication & Authorization
Fraud & Risk Prevention
© 2020-2026 Stytch. All rights reserved.