Back to blog
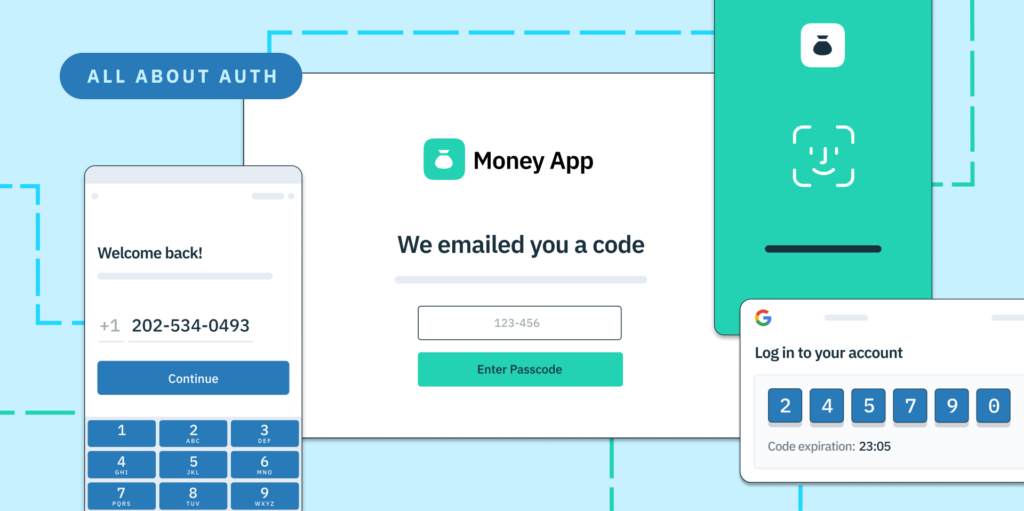
How to Enforce Multi-Factor Authentication with Node.js and Stytch
Auth & identity
May 30, 2024
Author: Kumar Harsh
In modern cybersecurity, using a single authentication factor alone like passwords is rarely able to prevent attackers from gaining unauthorized access to personal data. That’s why multifactor authentication (MFA) is so important. MFA adds additional layers of security to your existing authentication methods by requiring users to verify their identity a second, third, or any number of times using additional methods of authentication.
The additional methods of authentication often include keys that are hard to forge, such as a one-time code through an authenticator app or text message, or an on-device verification using the device’s primary login methods, which may include biometric sensors. This makes the authentication process more difficult to crack.
MFA is used in all sorts of scenarios, ranging from financial transactions and accessing sensitive data, like medical records and business documents, to securing online accounts, such as social media, email, and shopping, as well as accessing cloud applications and services.
In this article, you’ll learn how to set up MFA in your own Node.js-based app using Stytch, a popular identity platform for developers.
Enforcing Multifactor Authentication
MFA isn’t simply a security add-on; it’s a paradigm shift in access control. This approach significantly reduces the risk of unauthorized access, safeguarding sensitive data and mitigating security breaches.
Data breaches are one of the prime reasons organizations should choose to enforce MFA as they often inflict financial losses, diminish trust, and damage reputations. MFA significantly reduces this risk, transforming the login process into a multistep verification procedure, deterring even the most equipped attackers.
Enforcing MFA requires careful planning. Organizations often choose to make MFA adoption mandatory for all members to ensure everyone benefits from enhanced security. However, individual user preferences can cause issues. Some users might prefer an opt-in approach for specific accounts, like financial platforms or sensitive internal systems. This enables employees to customize their security posture based on their needs and risk tolerance.
That’s why you should consider implementing MFA and an opt-in approach based on your specific business needs. You can come up with an arrangement that makes the best use of both of these approaches, such as requiring executives (who have elevated access to organization data and resources) to have mandatory MFA for all accounts, while other employees can choose to opt-in for specific sensitive applications. You’ll learn how to implement both of these approaches here.
Enforcing MFA in Node.js
In this tutorial, you’ll implement an MFA setup in a Node.js-based backend using Stytch. Email is used as the first authentication method, and SMS-based one-time passwords (OTP) are used as the second authentication method. However, the use of SMS-based OTPs for the second factor of authentication is conditional depending on whether an organization enforces it or a user opts into it.
This tutorial utilizes Stytch’s Discovery login feature, which allows users to view all their memberships and associated organizations upon logging in. Users can then choose the specific organization they wish to authenticate into.
Here’s what the user flow looks like:
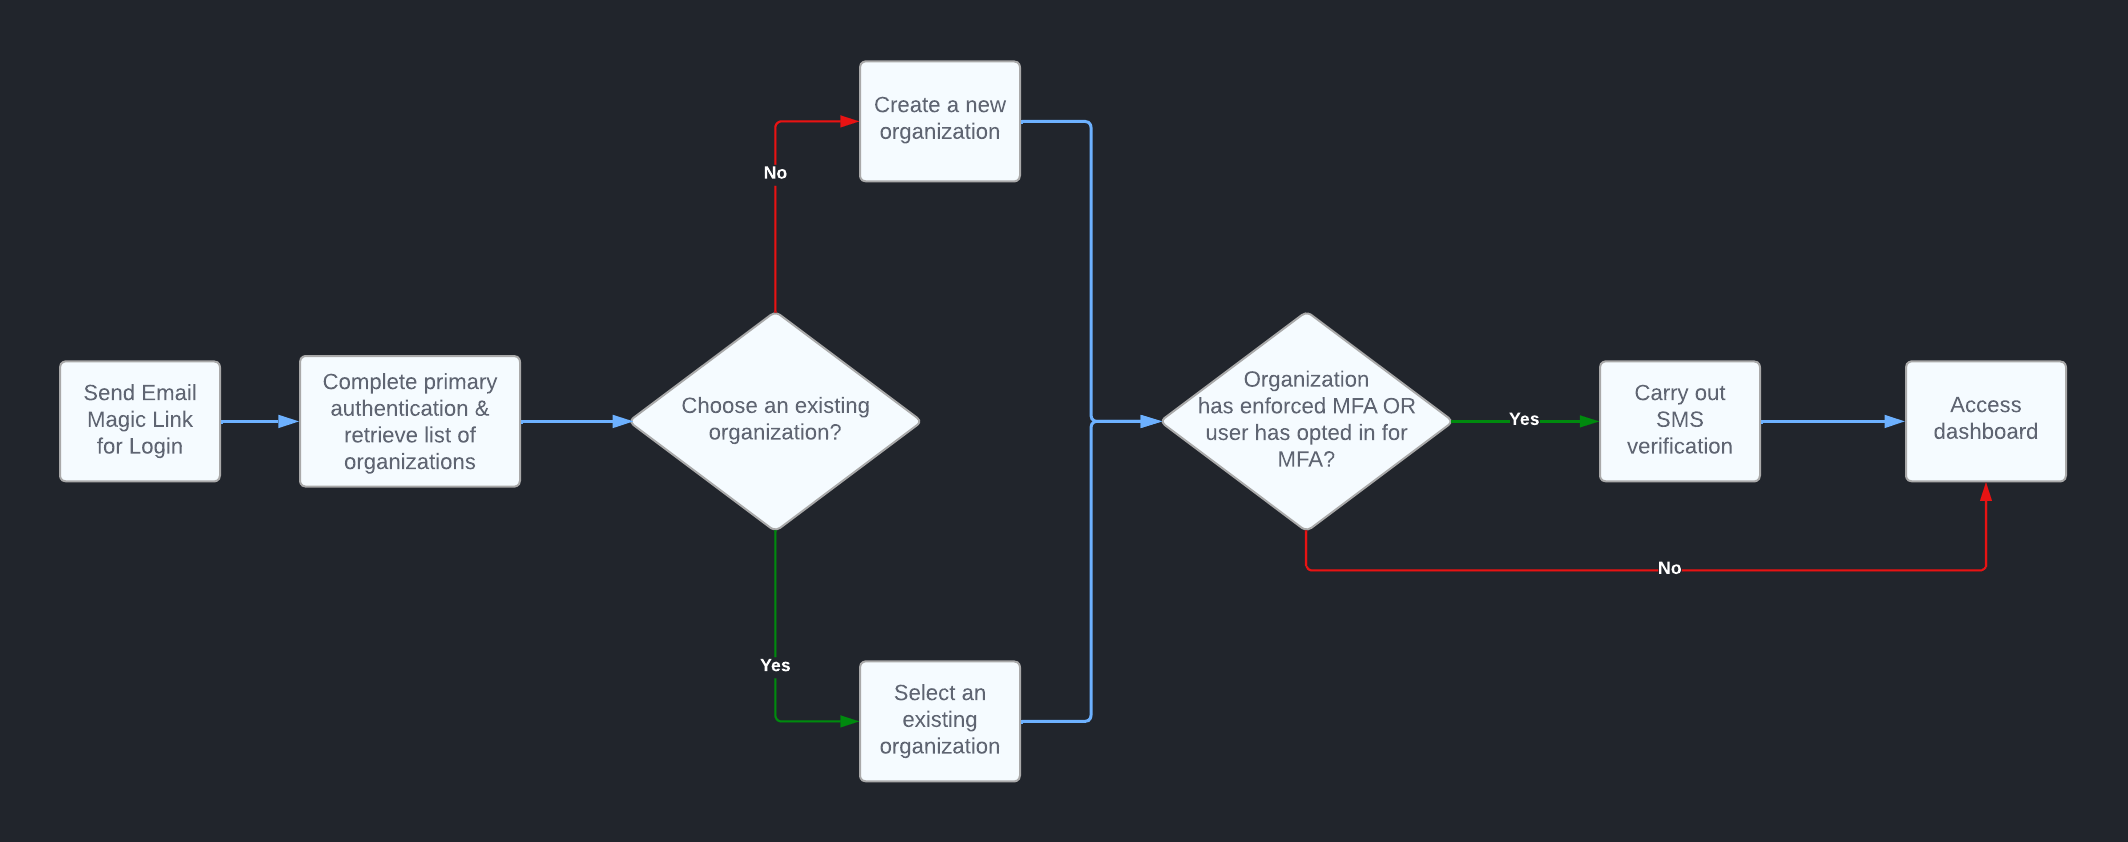
To keep primary authentication straightforward and passwordless, you’ll use email links to sign in users. Once the user clicks on the email link and its integrity is verified, Stytch returns a list of all organizations that the user is a part of, along with an intermediate session token. At this point, the user can either choose to sign into an organization that they’re already a part of or create a new organization as part of a new sign-up.
Those signing into an existing organization need to exchange their intermediate session token to complete the authentication within their organization. If their chosen organization requires MFA, they receive the intermediate session token back and carry out SMS verification. The intermediate session token is consumed as part of the SMS code verification step, and the user receives a session token upon successful completion of the two-step authentication process.
Those creating a new organization can use the intermediate session token to create the new organization. They are designated as the administrators of the newly created organization, and they can choose to enforce MFA for all members before creating the organization. Should they choose to enforce MFA, they’ll be redirected through the MFA code sending and verification process before finally completing the login process. Any new user added to the organization is required to go through the MFA step every time they try to log in.
For organizations that do not enforce MFA for all members, the logged-in members have the option to opt in for MFA from the dashboard. Once they do, they need to carry out MFA verification the next time they log in.
Prerequisites
To build this app, you need Node.js and npm installed on your system. To keep things simple, you’ll clone a prebuilt project from GitHub, which has the frontend for the app already built in React. Then you’ll learn how to create the necessary endpoints in the Node.js app to develop user flows.
Start by cloning the GitHub repo by running the following command:
git clone https://github.com/stytchauth/stytch-blog-example-app-b2b-mfa-login-js-nodeSwitch to the starter branch, which only has the frontend code and an empty backend folder where you’ll write your Node.js app.
git checkout starterCreate a Node.js app
To build the backend, you need to create two files: app.jsx and session.jsx. The app.jsx file contains the code for your server, and the session.jsx file contains a few helper functions to manage user sessions.
You’ll develop the backend server using Express. You’ll also use CORS for cross-origin requests, dotenv for accessing Stytch credentials stored in a .env file, cookie-parser for managing cookies, and the Stytch Node.js library for implementing the authentication flows.
Start by creating app.jsx and session.jsx, and installing the dependencies by running the following commands:
touch app.js
touch session.js

npm i cookie-parser cors dotenv express stytch
Once these run, create a .env file in the backend folder and save the following contents in it:
STYTCH_PROJECT_ID=
STYTCH_SECRET=
STYTCH_PROJECT_ENV= “TEST” || “LIVE”
You’ll populate these values after you create a free Stytch account.
Set Up Stytch
Head over to the Stytch website and sign up for a free account. Once you’ve created an account, you’ll be asked to create your first organization. Click on the Create an organization button to create one:
You’ll be redirected to a form where you need to provide your name and your organization’s name:

You also need to choose the authentication type for your first project: consumer authentication or B2B SaaS authentication. The main differentiator is that projects with B2B SaaS authentication let you create organizations that your users can sign up for while those with consumer authentication type do not allow this.
For this tutorial, choose the B2B SaaS authentication type and click on Get started. This creates the project in your new Stytch account.
Next, go to the API keys page and retrieve the Project ID and Secret:
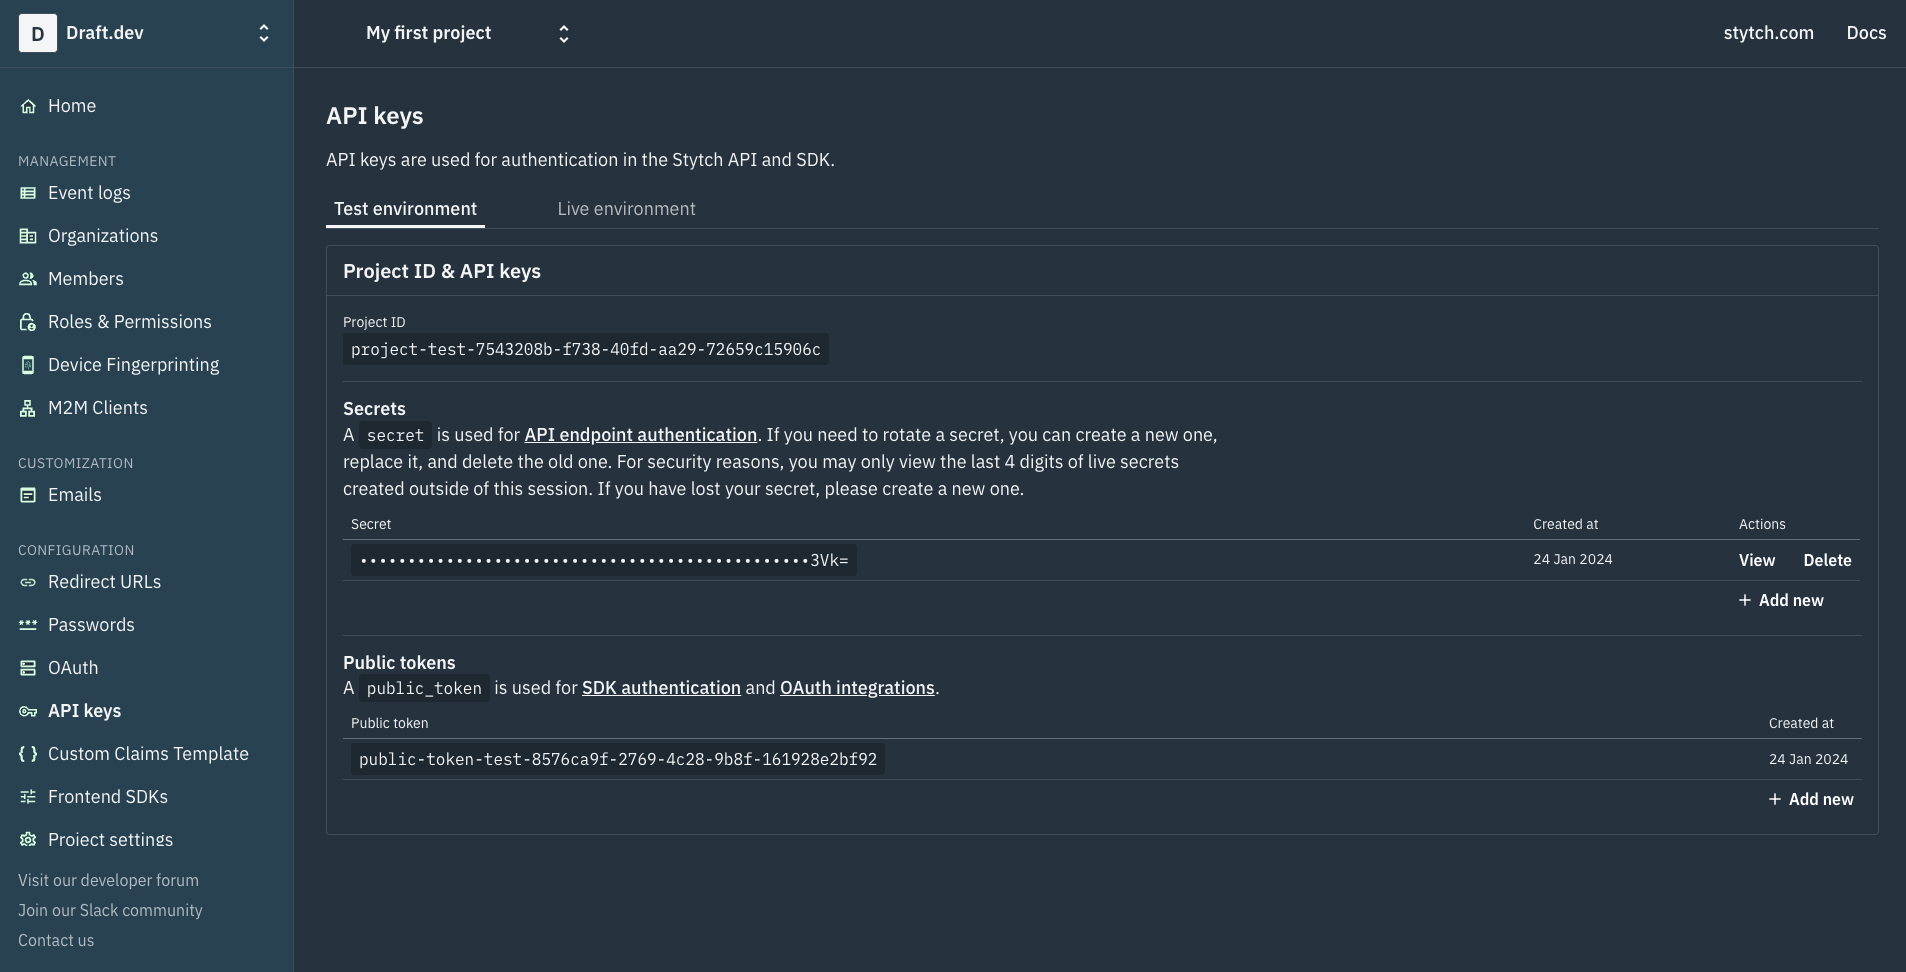
You’ll notice two tabs on this page: Test environment and Live environment. Stytch provides you with two separate environments (with their own sets of credentials) to help keep development and production isolated. Make sure to retrieve the keys from the Test environment tab for this tutorial.
Store these values in the .env file you just created. Now, you’re ready to set up the Express app and use these values to initialize the Stytch SDK.
Finally, you’ll need to set up a Redirect URL in the Dashboard to redirect users back to your application when clicking the magic link. To do that, navigate to the Redirect URLs page on the Stytch dashboard. Make sure you’ve selected the Test environment on the top of the page:
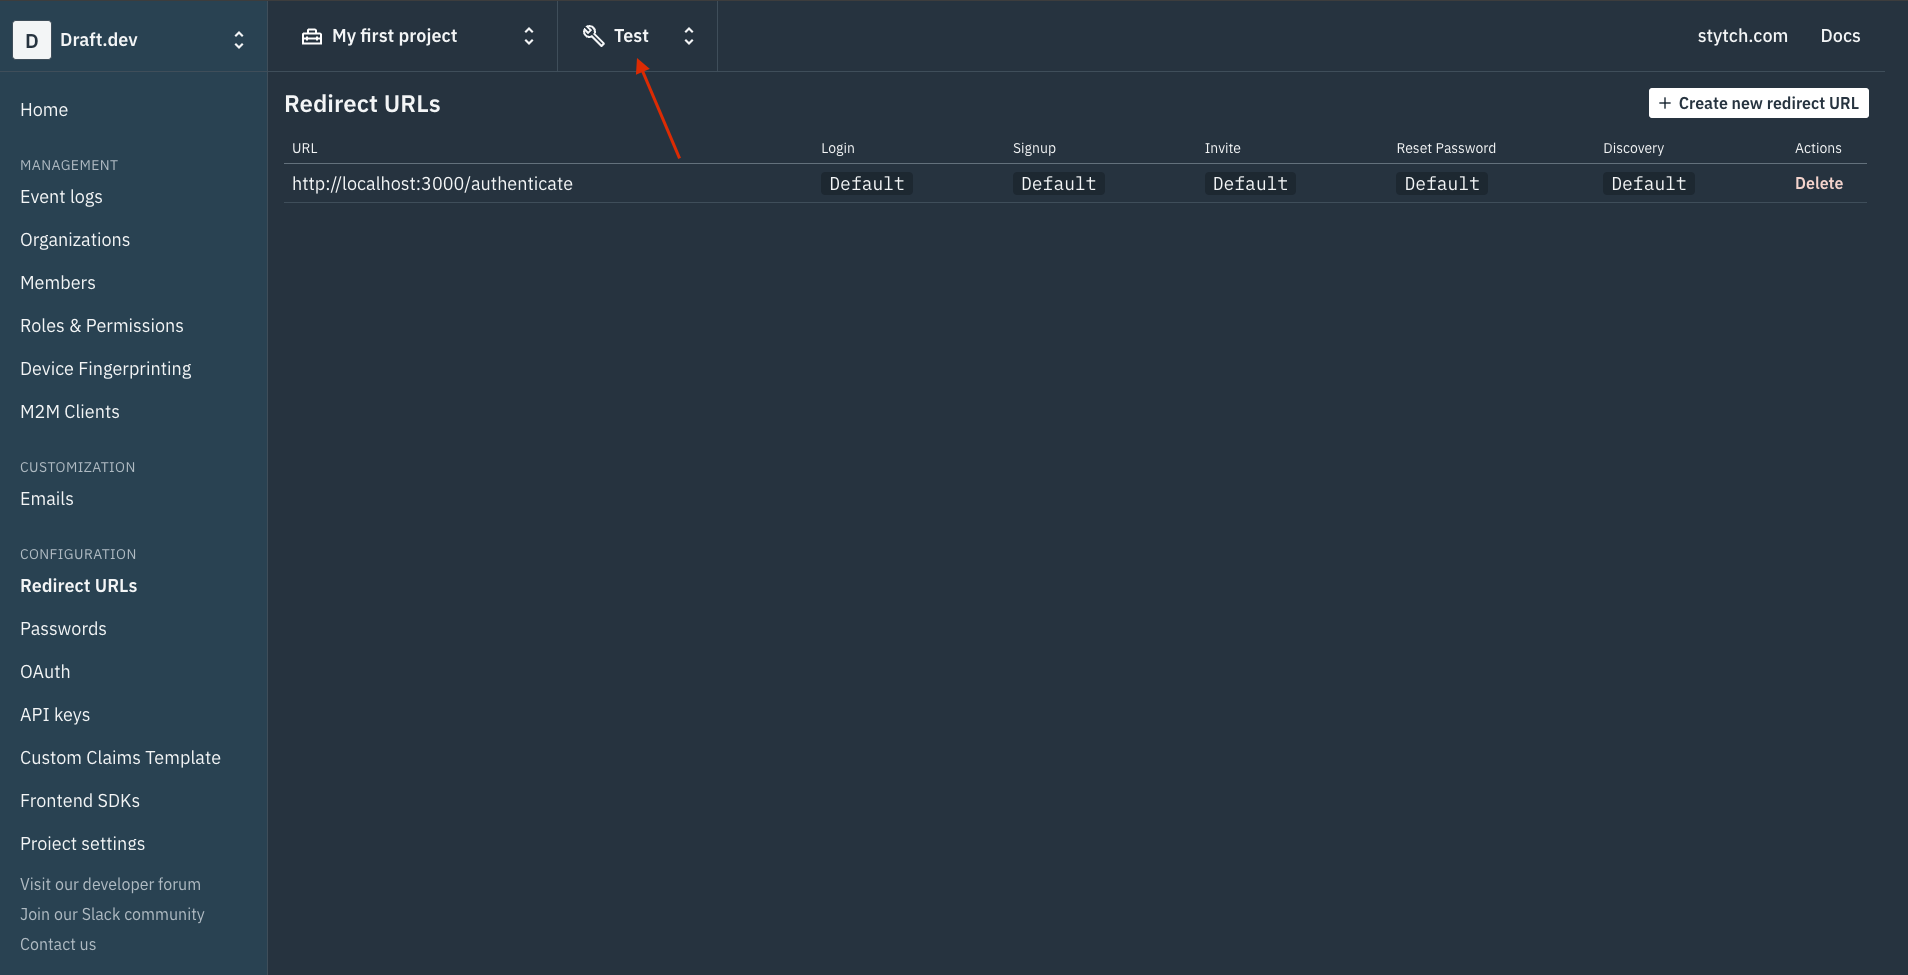
On this page, click on the white + Create new redirect URL button. In the form that opens up, enter http://localhost:5173/auth/callback as the URL and check the box next to Discovery to set this URL for redirects originating from Discovery API calls. This is what the form will look like before you submit it:
Click on the white Ok button to save the new redirect URL. Now, you’re ready to start writing the code!
Develop the App
To start developing the app, store the following contents in the session.js file:
const SESSION_DURATION_MINUTES = 60;
const INTERMEDIATE_SESSION_DURATION_MINUTES = 10;

const SESSION_COOKIE = "session";
const INTERMEDIATE_SESSION_COOKIE = "intermediate_session";

function setSession(req, res, sessionJWT) {
  res.cookie(SESSION_COOKIE, sessionJWT, {
    httpOnly: true,
    maxAge: 1000 * 60 * SESSION_DURATION_MINUTES, // minutes to milliseconds
  });
}

function clearSession(req, res) {
  res.clearCookie(SESSION_COOKIE);
}

function setIntermediateSession(req, res, intermediateSessionToken) {
    res.cookie(INTERMEDIATE_SESSION_COOKIE, intermediateSessionToken, {
      httpOnly: true,
      maxAge: 1000 * 60 * INTERMEDIATE_SESSION_DURATION_MINUTES, // minutes to milliseconds
    })
}

function clearIntermediateSession(req, res) {
  res.clearCookie(INTERMEDIATE_SESSION_COOKIE);
}

function getIntermediateSession(req, res) {
  const intermediateSession = req.cookies[INTERMEDIATE_SESSION_COOKIE];
  return intermediateSession
}

function getDiscoverySessionData(req, res) {
  const intermediateSession = req.cookies[INTERMEDIATE_SESSION_COOKIE];

  if (intermediateSession) {
    return {
      intermediateSession,
      error: false,
    };
  }
  return { error: true };
}

function revokeSession(req, res, stytchClient) {
  const sessionJWT = req.cookies[SESSION_COOKIE];
  if (!sessionJWT) {
    return;
  }
  // Delete the session cookie by setting maxAge to 0
  res.cookie(SESSION_COOKIE, "", { maxAge: 0 });
  // Call Stytch in the background to terminate the session
  // But don't block on it!
  stytchClient.sessions
    .revoke({ session_jwt: sessionJWT })
    .then(() => {
      console.log("Session successfully revoked");
    })
    .catch((err) => {
      console.error("Could not revoke session", err);
    });
}

module.exports = {
  SESSION_DURATION_MINUTES,
  INTERMEDIATE_SESSION_DURATION_MINUTES,
  setSession,
  clearSession,
  setIntermediateSession,
  clearIntermediateSession,
  getIntermediateSession,
  getDiscoverySessionData,
  revokeSession
}
This file contains a list of methods that help you store and manage the tokens for your auth sessions and intermediate sessions. You’ll use them later when writing the endpoints.
Next, open up the app.js file and add the following to it:
const express = require("express")
const stytch = require("stytch")
const cookieParser = require("cookie-parser")
require('dotenv').config()
const cors = require('cors')
const {
    getIntermediateSession,
    setIntermediateSession,
    setSession,
    clearSession,
    clearIntermediateSession,
    revokeSession,
    getDiscoverySessionData
} = require("./session")

const stytchEnv =
    process.env.STYTCH_PROJECT_ENV === "live"
        ? stytch.envs.live
        : stytch.envs.test;

const stytchClient = new stytch.B2BClient({
    project_id: process.env.STYTCH_PROJECT_ID || "",
    secret: process.env.STYTCH_SECRET || "",
    env: stytchEnv,
});
This code imports the necessary packages, configures dotenv to load the environment variables from the .env file, and initializes the Stytch client.
Next, add the following lines of code to initialize an Express app and configure the necessary middlewares:
const frontendDomain = "http://localhost:5173"

const app = express()

app.use(express.json())
app.use(cors({ origin: frontendDomain, credentials: true }))
app.use(cookieParser())
Additionally, define the following helper function to help you extract the domain from an email:
function toDomain(email) {
    return email.split("@")[1];
}
This comes in handy when using the email address of the user to determine the domain name of their organization.
Write the Endpoints
Now, you’re ready to write the endpoints.
There are a total of nine endpoints. Here’s a quick overview of what they’ll do:
/api/discovery/startstarts the discovery flow by sending an email magic link to the user./api/auth/callbackreceives the callback from Stytch when someone clicks on a magic link./api/discovery/createcreates a new organization./api/discovery/get-organizationretrieves the details of an organization./api/discovery/select-organizationselects an existing organization and completes the authentication process according to its MFA policy./api/mfa/sendsends a OTP to the phone number of the current user for MFA./api/mfa/authenticateauthenticates if the OTP provided by the user is correct to complete MFA./api/mfa/updateallows users to update their MFA preference (if the chosen organization allows)./api/auth/logoutlogs out the current user.
Now, you can write the code for each of these endpoints.
Paste the following code in the app.js file for the /api/discovery/start endpoint:
app.post("/api/discovery/start", async (req, res) => {

    const { email } = req.body

    const params = {
        email_address: email,
        discovery_redirect_url: `${frontendDomain}/auth/callback`
    };

    try {
        let resp = await stytchClient.magicLinks.email.discovery.send(params)

        res.status(200).json({ message: "Email sent" })
    } catch (e) {
        console.error(e)
        res.status(500).json({ message: "Something went wrong" })
    }
})
This endpoint retrieves the user’s email from the request body and makes use of the frontendDomain you already defined in the file to send a magic link to the user with the redirect link that brings them back into the app when the authentication is complete.
Paste the following code in the app.js file for the /api/auth/callback endpoint:
app.post("/api/auth/callback", async (req, res) => {

    const { token } = req.body

    const params = {
        discovery_magic_links_token: token,
    };

    try {
        let resp = await stytchClient.magicLinks.discovery.authenticate(params)

        setIntermediateSession(req, res, resp.intermediate_session_token);

        res.status(200).json(resp)
    } catch (e) {
        console.error(e)
        res.status(e.status_code).json({ error: e.error_message })
    }
})
This endpoint is called by the frontend when a user clicks the magic link in their email and opens the app. It collects the token generated as part of the email magic link process and authenticates the user with it. It also saves the intermediate session token in the cookies for use in later auth process steps.
Paste the following code in the app.js file for the /api/discovery/create endpoint:
app.post("/api/discovery/create", async (req, res) => {

    const intermediateSession = getIntermediateSession(req, res);

    if (!intermediateSession) {
        console.error("User not logged in")
        res.status(400).json({message: "Not logged in", redirectPath: "/"})
    }
    const { organizationName, requireMfa } = req.body;

    try {
        const { member, organization, session_jwt, intermediate_session_token } =
            await stytchClient.discovery.organizations.create({
                intermediate_session_token: intermediateSession,
                email_allowed_domains: [],
                organization_name: organizationName,
                session_duration_minutes: 60,
                mfa_policy: requireMfa ? "REQUIRED_FOR_ALL" : "OPTIONAL"
            });

        // Make the organization discoverable to other emails
        try {
            await stytchClient.organizations.update({
                organization_id: organization.organization_id,
                email_jit_provisioning: "RESTRICTED",
                sso_jit_provisioning: "ALL_ALLOWED",
                email_allowed_domains: [toDomain(member.email_address)],
            });
        } catch (e) {
            if (e.error_type == "organization_settings_domain_too_common") {
                console.error("User domain is common email provider, cannot link to organization");
            } else {
                throw e;
            }
        }

        // Mark the first user in the organization as the admin
        await stytchClient.organizations.members.update({
            organization_id: organization.organization_id,
            member_id: member.member_id,
            trusted_metadata: { admin: true },
        });

        // Check if the organization requires MFA before logging in
        if (session_jwt === "") {
            setIntermediateSession(req, res, intermediate_session_token)
            clearSession(req, res)
            res.status(200).json({ message: "Organization created. Proceed for MFA", redirectPath: `/smsmfa?sent=false&org_id=${organization.organization_id}&member_id=${member.member_id}`, organizationId: organization.organization_id });
            return
        }

        // If not, set the session values and redirect the user to the dashboard
        clearIntermediateSession(req, res);
        setSession(req, res, session_jwt);
        res.status(200).json({ message: "Organization created", redirectPath: `/dashboard`, organizationId: organization.organization_id });

    } catch (error) {
        console.error(error);
        res.status(500).json({ message: "Something went wrong", redirectPath: `/` });
    }
})
This endpoint lets users create a new organization. It collects the intermediate session token from the cookies and the organization name and MFA policy from the request. Then it creates the organization using the stytchClient.discovery.organizations.create method and makes the organization accessible to other users with emails on the same domain. It also marks the current user as an admin in the organization.
Next, the endpoint proceeds to log the current user in. Ideally, the user should automatically be logged in if the organization doesn’t enforce MFA. If the user is not logged in automatically (ie the session_jwt is empty), it redirects the frontend to the SMS verification page.
Paste the following code in the app.js file for the /api/discovery/get-organization endpoint:
app.post("/api/discovery/get-organization", async (req, res) => {
    const { organizationId, memberEmail } = req.body

    // If no organization was sent, revoke the session and make the user log in again
    if (!organizationId || Array.isArray(organizationId)) {
        revokeSession(req, res, stytchClient)
        res.status(500).json({ message: "No organization ID found", redirectPath: "/" });
        console.error("No organization ID found")
        return
    }

    try {
        let resp = await stytchClient.organizations.members.get({ organization_id: organizationId, email_address: memberEmail })

        res.status(200).json({ message: "Org retrieved successfully", organization: resp.organization, member: resp.member })
    } catch (e) {
        console.error(e)
        res.status(500).json({ message: "Something went wrong" })
    }
})
This endpoint retrieves the details of an organization and the currently logged-in member using the organization ID and the member’s email to populate details in the dashboard.
Paste the following code in the app.js file for the /api/discovery/select-organization endpoint:
app.post("/api/discovery/select-organization", async (req, res) => {

    // If no session found, redirect users to log in
    const discoverySessionData = getDiscoverySessionData(req, res);
    if (discoverySessionData.error) {
        console.error("No session tokens found...");
        res.status(400).json({ message: "No session tokens found", redirectPath: "/" });
        return
    }

    const { organizationId } = req.body

    if (!organizationId || Array.isArray(organizationId)) {
        console.error("No organization ID found");
        res.status(500).json({ message: "No organization ID found", redirectPath: "/discovery" });
        return
    }

    try {
        const { session_jwt, organization, member, intermediate_session_token } = await stytchClient.discovery.intermediateSessions.exchange({
            intermediate_session_token: discoverySessionData.intermediateSession,
            organization_id: organizationId,
            session_duration_minutes: 60,
        });

        // Check if the organization requires MFA before logging in
        if (session_jwt === "") {
            setIntermediateSession(req, res, intermediate_session_token)
            clearSession(req, res)
            res.status(200).json({ message: "2FA started", redirectPath: `/smsmfa?sent=false&org_id=${organization.organization_id}&member_id=${member.member_id}`, organizationId: organization.organization_id })
            return
        }

        // If not, set the session values and redirect the user to the dashboard
        setSession(req, res, session_jwt);
        clearIntermediateSession(req, res);
        res.status(200).json({ message: "Auth complete", redirectPath: `/dashboard`, organizationId: organization.organization_id });
        return
    } catch (error) {
        console.error(error);
        res.status(500).json({ message: "Could not authenticate", redirectPath: "/discovery" });
    }
})
This endpoint allows users to select one organization and log into it. It starts by verifying if an intermediate token exists and then uses the organization ID to authenticate the user (using the stytchClient.discovery.intermediateSessions.exchange call). If the organization does not enforce MFA and the user hasn’t opted into MFA, the user is directly authenticated and redirected to the dashboard. Otherwise, the user is redirected to the SMS verification page for MFA.
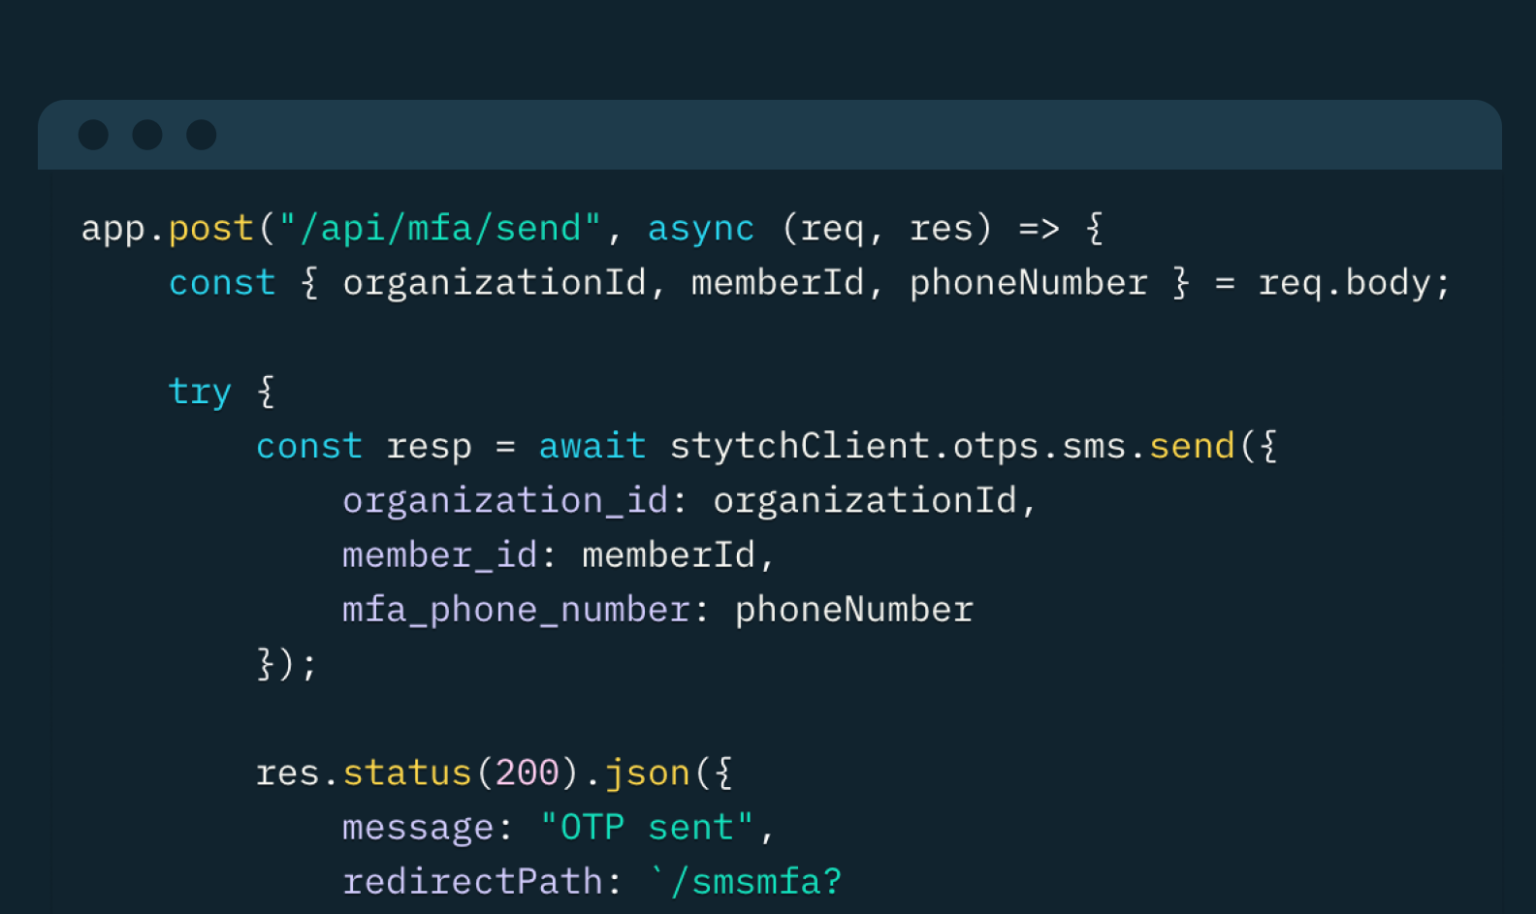
Paste the following code in the app.js file for the /api/mfa/send endpoint:
app.post("/api/mfa/send", async (req, res) => {
    const { organizationId, memberId, phoneNumber } = req.body;

    try {
        const resp = await stytchClient.otps.sms.send({
            organization_id: organizationId,
            member_id: memberId,
            mfa_phone_number: phoneNumber
        });

        res.status(200).json({ message: "OTP sent", redirectPath: `/smsmfa?sent=true&org_id=${resp.organization.organization_id}&member_id=${resp.member.member_id}` })

    } catch (error) {
        console.error(error);
        res.status(200).json({ message: "Could not send OTP", redirectPath: `/discovery` })
    }
})
This endpoint retrieves the organization ID, member ID, and the user’s phone number in E.164 format (eg “+12223334444”) to send them an OTP on their phone for verification. Make sure that you understand how Stytch bills you for sending international OTPs and that your users don’t fall in one of the unsupported countries. The next step would be to authenticate the users using the code that they received.
Paste the following code in the app.js file for the /api/mfa/authenticate endpoint:
app.post("/api/mfa/authenticate", async (req, res) => {
    const discoverySessionData = getDiscoverySessionData(req, res);
    if (discoverySessionData.error) {
        console.error("No session tokens found...");
        res.status(400).json({ message: "No session tokens found", redirectPath: "/" });
        return
    }

    const { organizationId, memberId, code } = req.body;

    try {
        const { session_jwt } = await stytchClient.otps.sms.authenticate({
            organization_id: organizationId,
            member_id: memberId,
            code: code,
            intermediate_session_token: discoverySessionData.intermediateSession,
        });
        setSession(req, res, session_jwt);
        clearIntermediateSession(req, res);
        res.status(200).json({ message: "OTP Authentication successful", redirectPath: `/dashboard` })
    } catch (error) {
        console.error(error);
        res.status(200).json({ message: "Could not authenticate with OTP" })
    }
})
This endpoint authenticates a user using their intermediate session token, organization ID, member ID, and the code that they received on their phone. Once done, the authentication process is complete, and the user can now be redirected to the dashboard. Now, the only major task left is to allow users to change their MFA opt-in status.
Paste the following code in the app.js file for the /api/mfa/update endpoint:
app.post("/api/mfa/update", async (req, res) => {
    const { organizationId, memberId, mfaOptIn } = req.body

    if (!organizationId || Array.isArray(organizationId)) {
        res.status(500).json({ message: "No organization ID found", redirectPath: "/" });
        return
    }

    try {
        let resp = await stytchClient.organizations.members.update({
            organization_id: organizationId,
            member_id: memberId,
            mfa_enrolled: mfaOptIn
        })

        res.status(200).json({ message: "MFA opt-in updated successfully", organization: resp.organization })
    } catch (e) {
        console.error(e)
        res.status(500).json({ message: "Something went wrong" })
    }
})
This endpoint allows users to update their MFA opt-in status.
Please note that this is applicable only for organizations that allow users to enroll for MFA optionally. So you need to verify that your organization has an OPTIONAL MFA policy. In this demo app, this has been done on the frontend in the dashboard.jsx file to avoid unnecessary backend calls:
//...
<p style={{cursor: "pointer"}} onClick={onMFAToggle}>
    <u>
    {organization.mfa_policy === "OPTIONAL" ?
    "Opt " + (member.mfa_enrolled ? "out from" : "in for") + " MFA"
: ""}
</u>
</p>
//...
The use of a conditional expression ensures that the option to change the MFA opt-in is only available to users whose current organization has an OPTIONAL MFA policy.
Finally, add an endpoint that allows users to log out. For that, paste the following code in the app.js file for the /api/auth/logout endpoint:
app.get("/api/auth/logout", async (req, res) => {
    revokeSession(req, res, stytchClient);
    res.status(200).json({ message: "Logged out", redirectPath: "/login" })
})
At this point, you’ve finished setting up your endpoints. You can refer to the complete code of this file on the GitHub repo for reference. It’s time to see the app in action!
Watch the App in Action
To see your project in action, you need to start both the backend and the frontend apps in separate terminal windows.
For the backend app, you can use the following command:
node app.jsFor the frontend app, use this command:
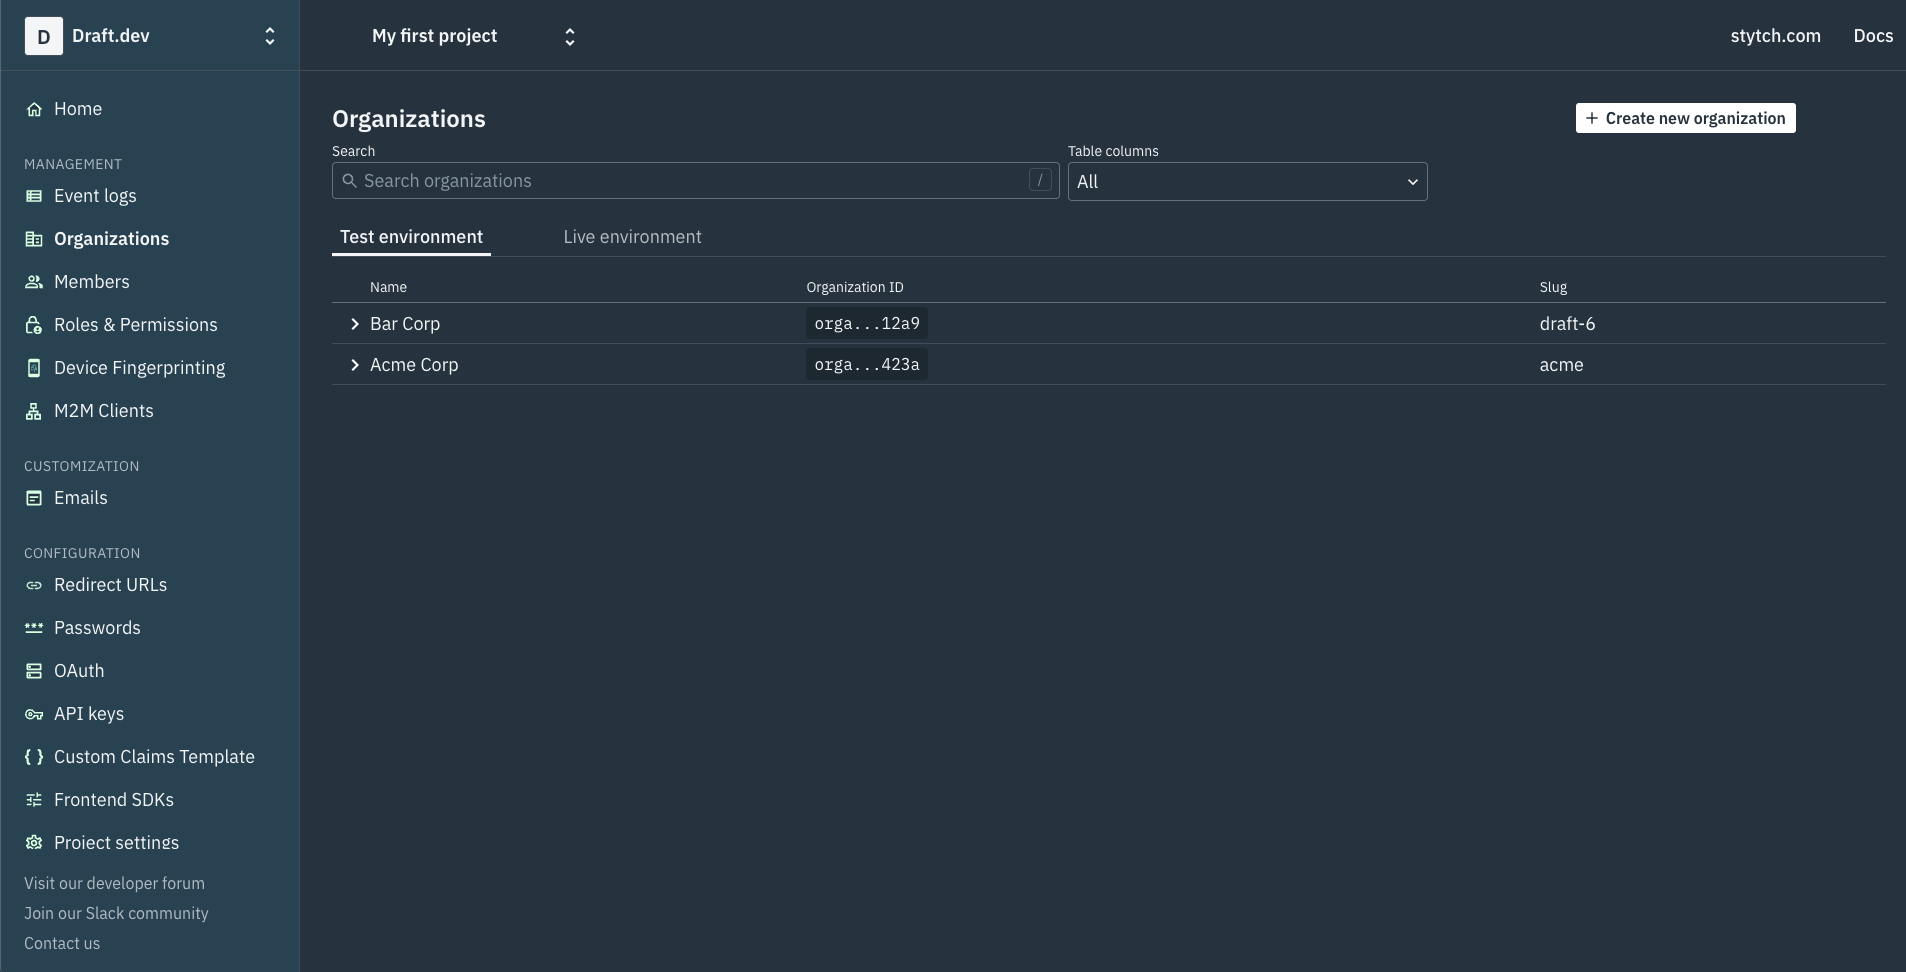
npm run devTo try out the various authentication scenarios, you need to create two organizations in your Stytch project and set the MFA policy of one of the organizations as OPTIONAL and the other one as REQUIRED_FOR_ALL. To do that, head over to the Organizations page on your Stytch dashboard and click on the white + Create new organization button on the top right:
On the New Org page, enter the name of your organization along with a slug that you can use in your app to create customized URLs (ie org-1.yourapp.com and org-2.yourapp.com) for the organizations. You also need to choose whether you want to enforce MFA for all users by turning on the Require MFA option:
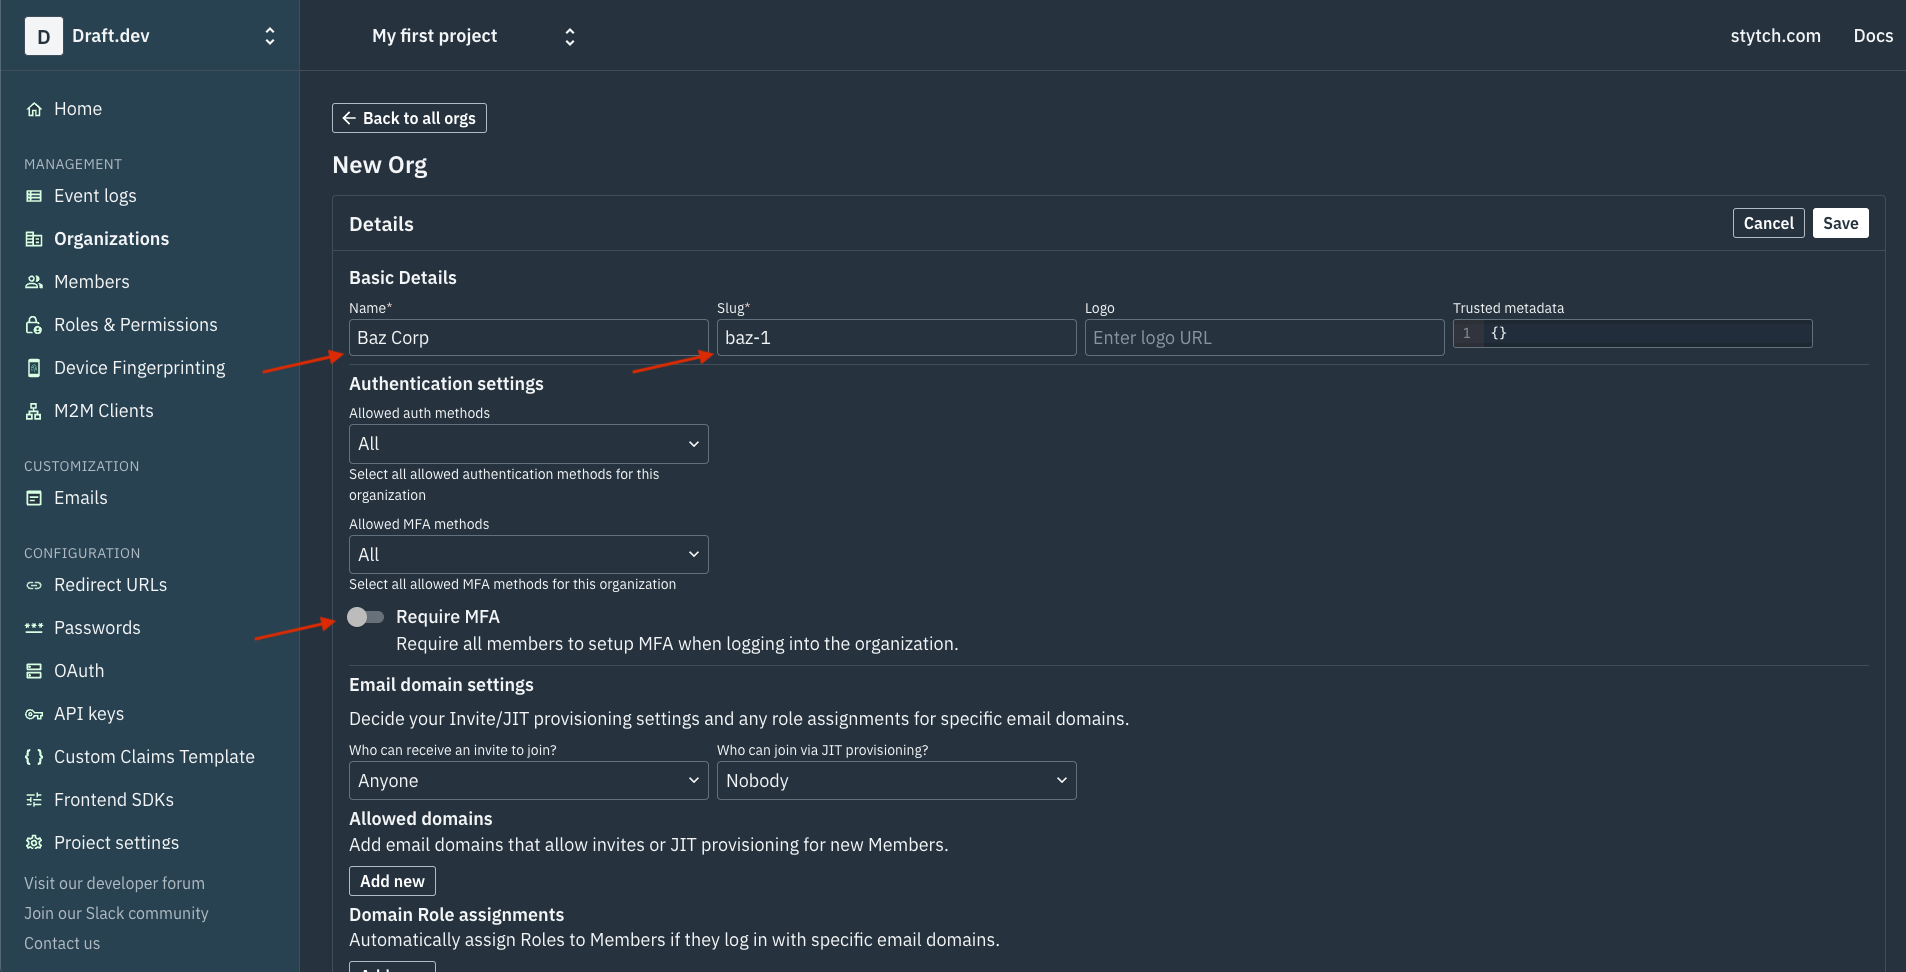
When creating a new organization, you can also configure other options, such as allowed authentication and MFA methods, email domain settings, and just-in-time (JIT) provisioning. When done, make sure you save your changes.
Following a similar process, create another organization that enforces MFA for all its members. When you’ve finished, it’s time to test out the authentication flows you developed in your project.
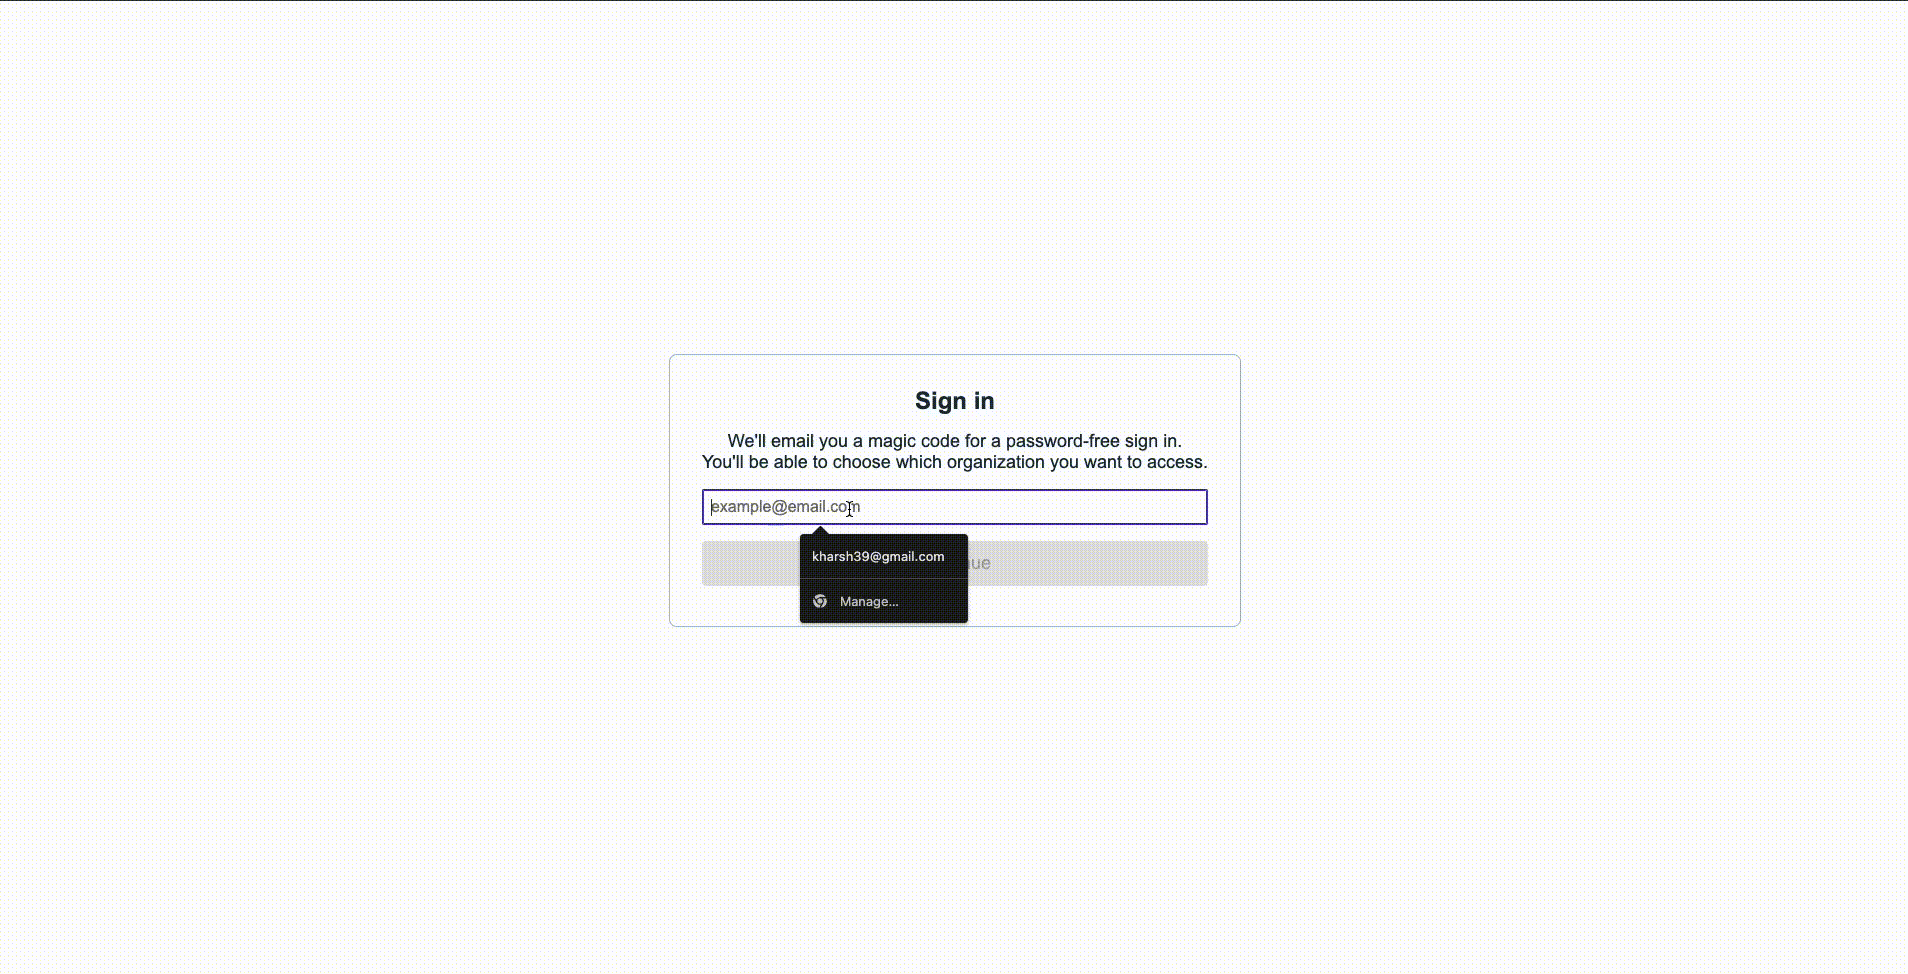
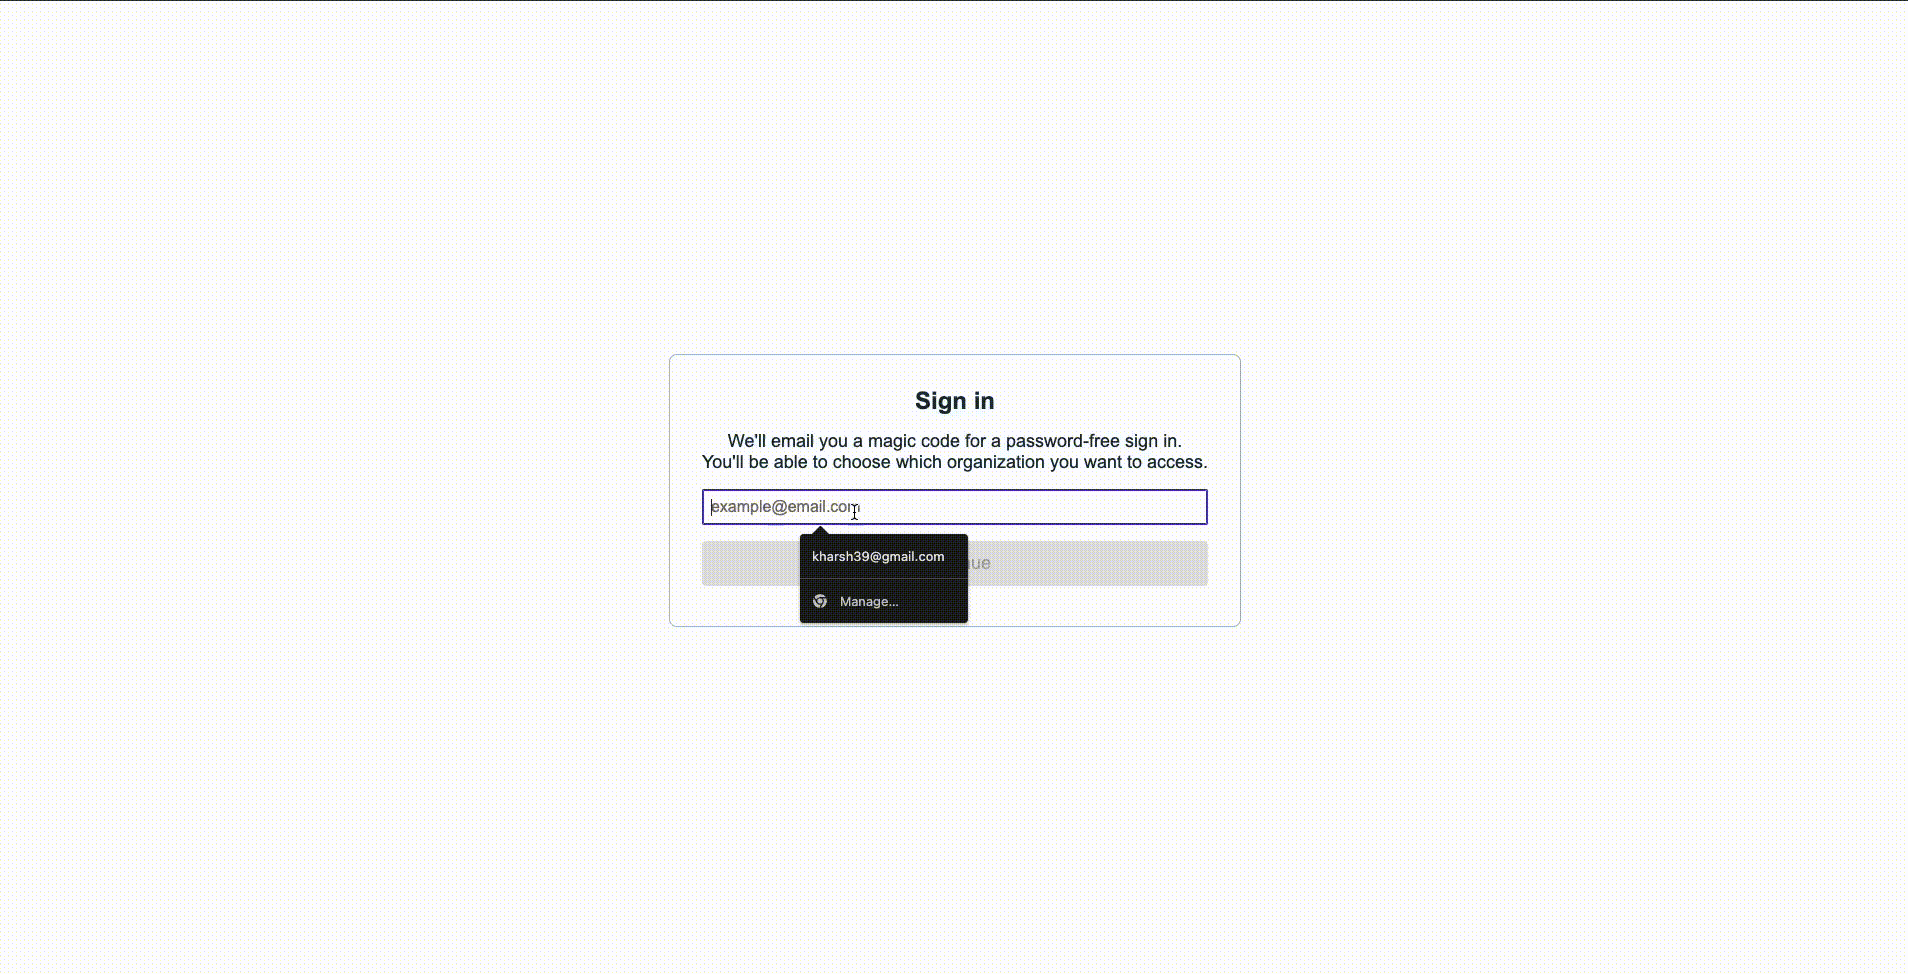
For an organization that doesn’t enforce MFA (and the member hasn’t opted in), the authentication flow looks like this:
When the MFA is either enforced or opted in, your authentication flow looks like this:
And finally, this is how you can toggle your MFA opt-in status if your organization allows it:
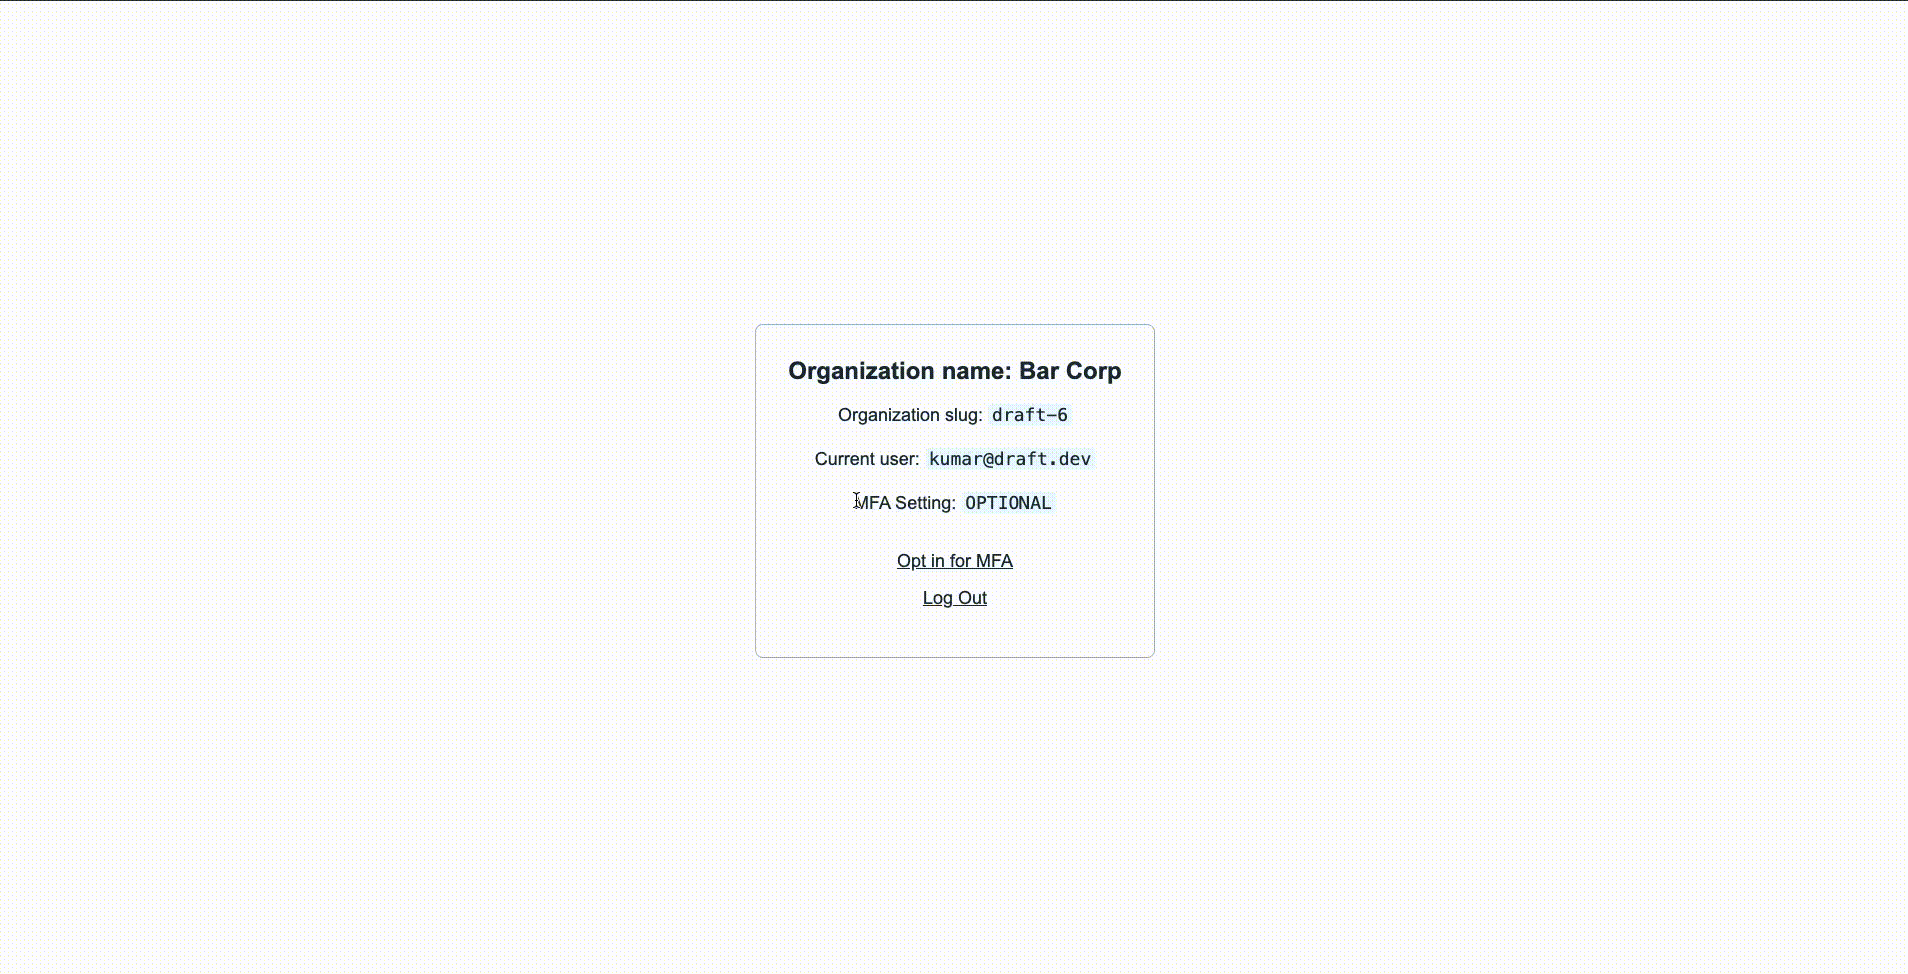
This organization allows users to opt in for MFA. Initially, the user had opted in for MFA and had to go through the complete authentication process. However, after opting out, the user didn’t need to complete SMS verification anymore.
The Stytch SDK allows you to do so much more than just MFA. You can also provision users through single sign-on (SSO) or JIT and configure granular roles and permissions for your users as well. Make sure to explore their other guides to learn about everything that Stytch offers!
Conclusion
MFA is no longer an option—it’s imperative. In this article, you learned all about MFA and its use cases, from finance to personal accounts, and the crucial distinction between enforced (organizational mandate) and enrolled (individual opt-in) approaches.
You also saw how Stytch shines when it comes to implementing MFA. With support across platforms, including Node.js, Go, Python, and Ruby, and frontend platforms, including React, React Native, iOS, and Android, Stytch can help you quickly get started with MFA. If you’re interested in learning more, check out the Stytch official docs.
Build auth with Stytch
Pricing that scales with you • No feature gating • All of the auth solutions you need plus fraud & risk

Authentication & Authorization
Fraud & Risk Prevention
© 2020-2026 Stytch. All rights reserved.