/
Contact usSee pricingStart building

    About B2B Saas Authentication

    Introduction
    Stytch B2B Basics
    Integration Approaches
      Full-stack overview
      Frontend (pre-built UI)
      Frontend (headless)
      Backend
    Next.js
      Routing
      Authentication
      Sessions
    Migrations
      Overview
      Reconciling data models
      Migrating user data
      Additional migration considerations
      Zero-downtime deployment
      Defining external IDs for members
      Exporting from Stytch
    Custom Domains
      Overview

    Authentication

    Single Sign On
    • Resources

      • Overview
        External SSO Connections
    • Integration Guides

      • Start here
        Backend integration guide
        Headless integration guide
        Pre-built UI integration guide
    OAuth
    • Resources

      • Overview
        Authentication flows
        Identity providers
        Google One Tap
        Provider setup
    • Integration Guides

      • Start here
        Backend integration
        Headless frontend integration
        Pre-built UI frontend integration
    Connected AppsBeta
      Setting up Connected Apps
      About Remote MCP Servers
    • Resources

      • Integrate with AI agents
        Integrate with a remote MCP server
    Sessions
    • Resources

      • Overview
        JWTs vs Session Tokens
        How to use Stytch JWTs
        Custom Claims
    • Integration Guides

      • Start here
        Backend integration
        Frontend integration
    Email OTP
      Overview
    Magic Links
    • Resources

      • Overview
        Email Security Scanner Protections
    • Integration Guides

      • Start here
        Backend integration
        Headless frontend integration
        Pre-built UI frontend integration
    Multi-Factor Authentication
    • Resources

      • Overview
    • Integration Guides

      • Start here
        Backend integration
        Headless frontend integration
        Pre-built UI frontend integration
    Passwords
      Overview
      Strength policies
    UI components
      Overview
      Implement the Discovery flow
      Implement the Organization flow
    DFP Protected Auth
      Overview
      Setting up DFP Protected Auth
      Handling challenges
    M2M Authentication
      Authenticate an M2M Client
      Rotate client secrets
      Import M2M Clients from Auth0

    Authorization & Provisioning

    RBAC
    • Resources

      • Overview
        Stytch Resources & Roles
        Role assignment
    • Integration Guides

      • Start here
        Backend integration
        Headless frontend integration
    SCIM
    • Resources

      • Overview
        Supported actions
    • Integration Guides

      • Using Okta
        Using Microsoft Entra
    Organizations
      Managing org settings
      JIT Provisioning

    Testing

    E2E testing
    Sandbox values
Get support on SlackVisit our developer forum

Contact us

B2B Saas Authentication

/

Guides

/

Authorization & Provisioning

/

SCIM

/

Integration Guides

/

Using Microsoft Entra

Setting up SCIM with Microsoft Entra

SCIM requests are sent from a workforce IdP to Stytch, so the first step is to create a test instance with a popular workforce IdP like Microsoft Entra.

Create application in Entra

If you don’t already have an application in Entra, you can create one by navigating to “Applications” → “Enterprise Applications” and selecting “create your own application”.
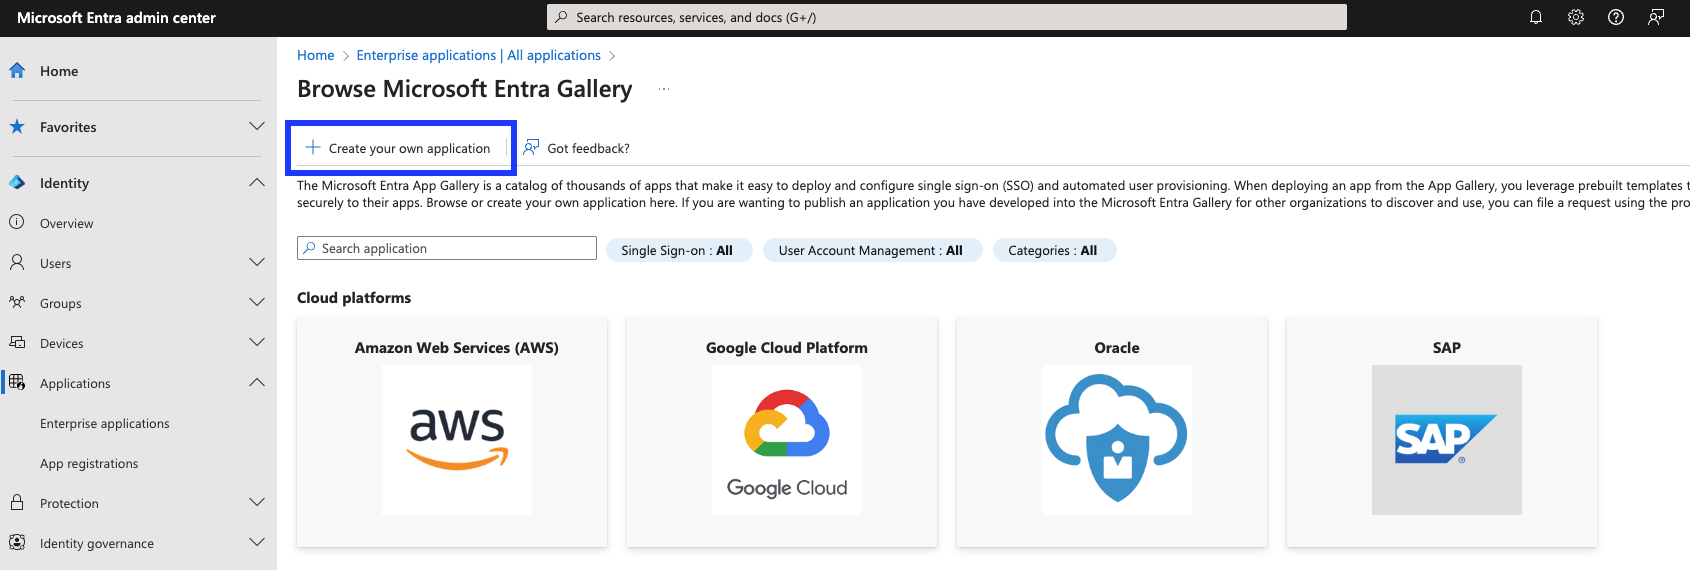
Go to Entra App Catalog to create SCIM app

In the app creation flow, input a name for your application and select “Integrate any other application you didn’t find in the gallery).
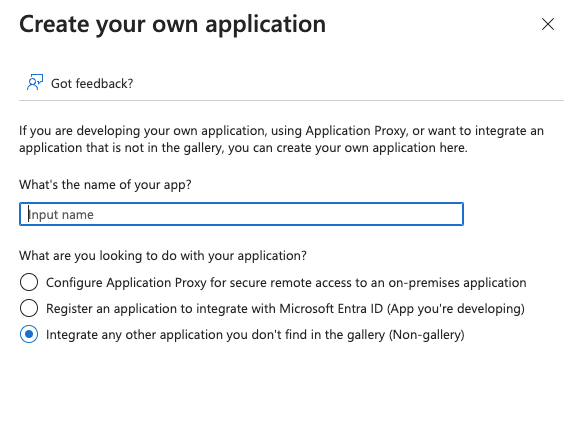
Create your SCIM application in Microsoft Entra

2
Enable autometic provisioning

Once you have an application, you can enable SCIM by clicking on “Provisioning” on the left hand management side bar, or “Provision User Accounts” under the Getting Started section.
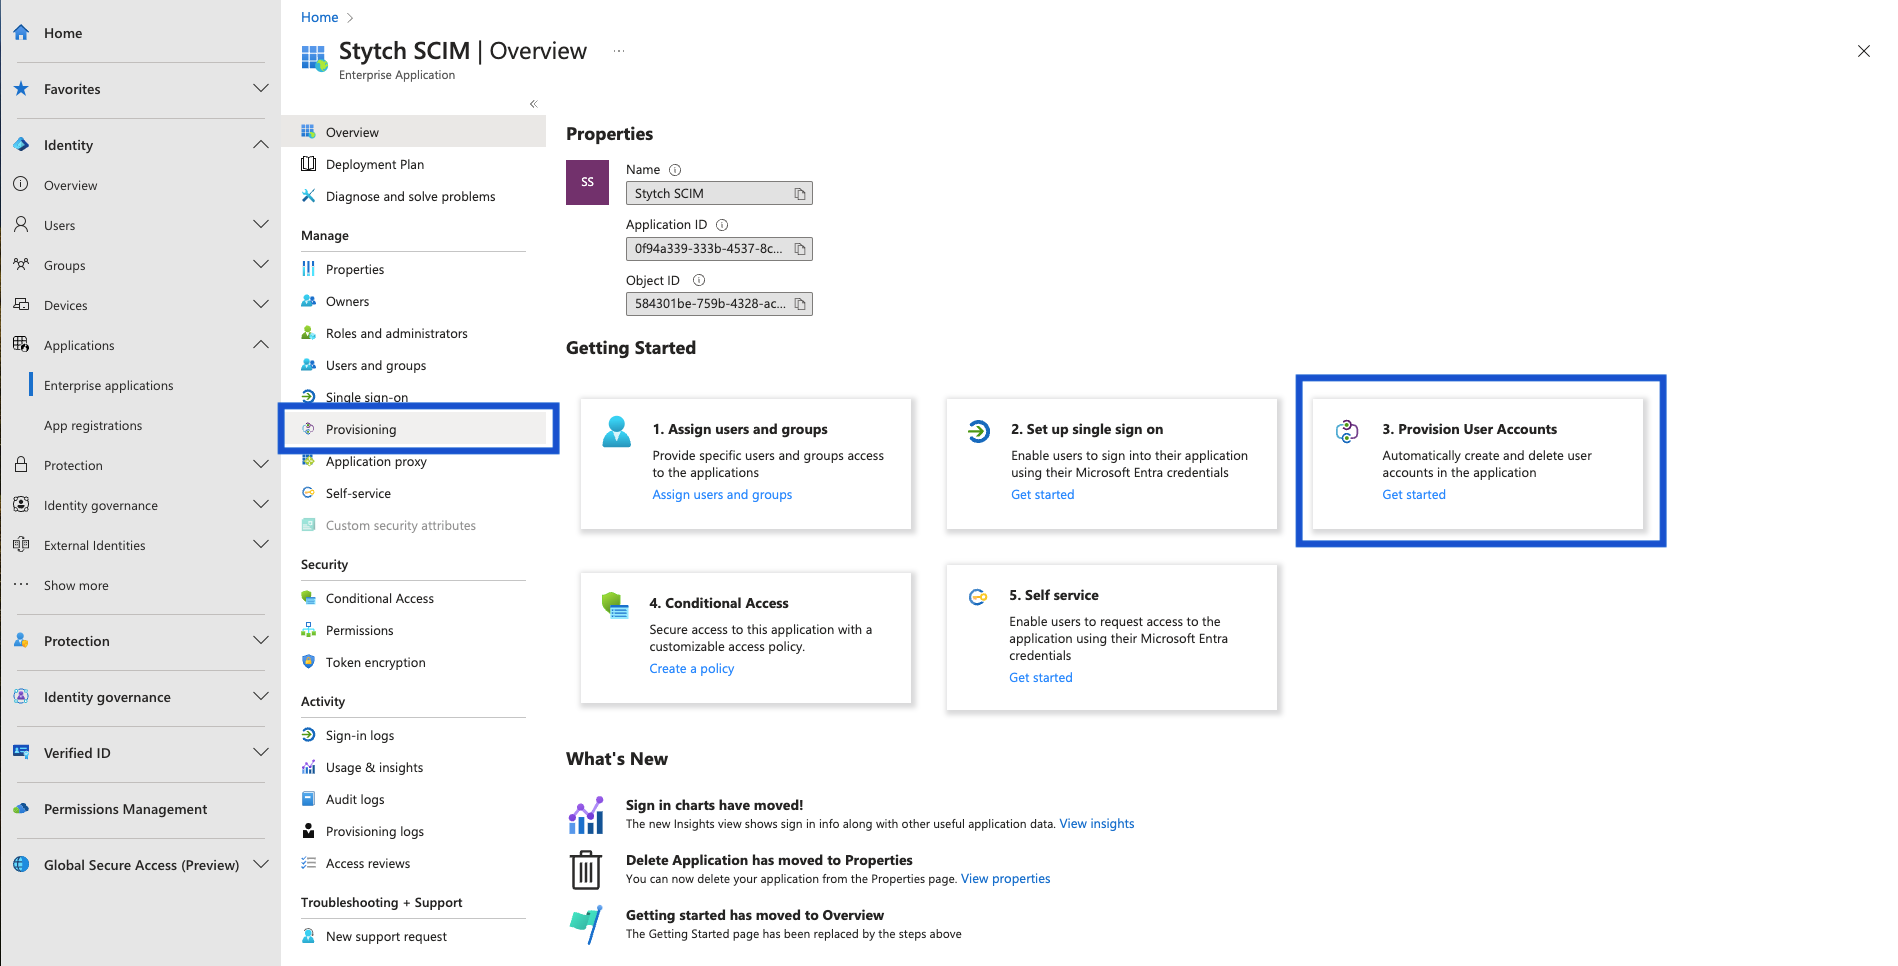
In Entra app navigate to Provisioning

On the next view click “Get started” and then switch the provisioning mode from “Manual” to “Automatic”.

Select automatic provisioning mode in Entra SCIM app

You will then be prompted to input Admin Credentials.

3
Create Stytch SCIM Connection

Create a new Microsoft Entra SCIM Connection in Stytch in the dashboard by navigating to Organizations then clicking your desired Organization and clicking the Add new button in the Configure SCIM Connection section.
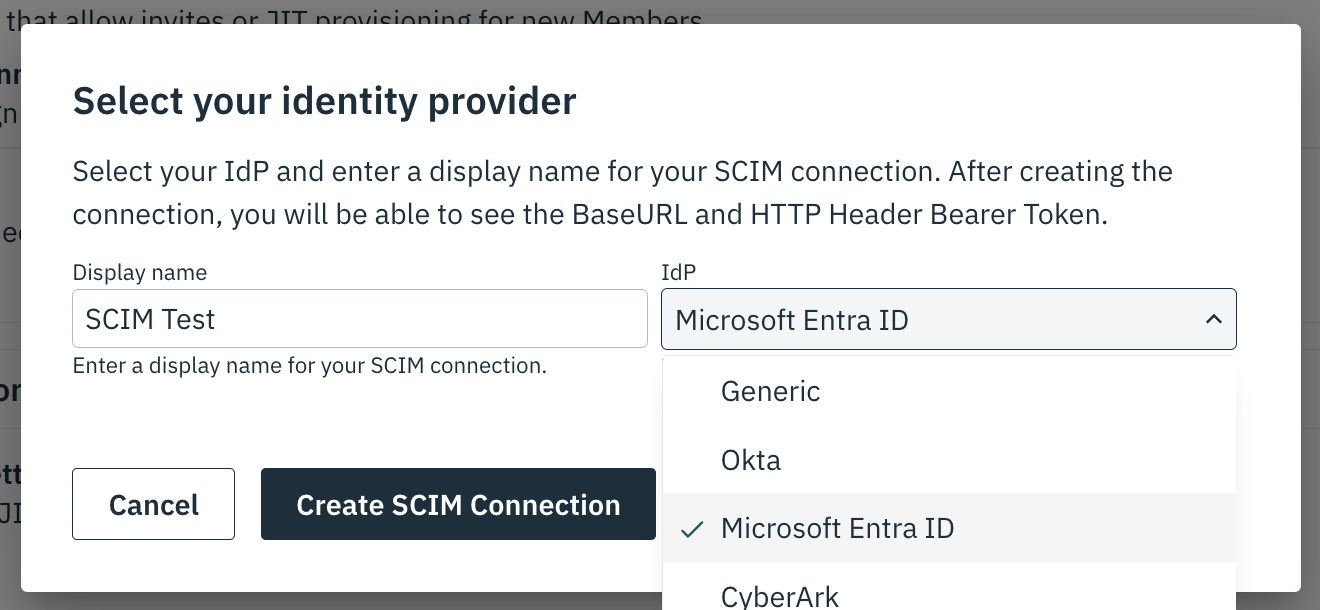
Create Microsoft Entra SCIM Connection In Stytch

Alternatively you can create through the Create SCIM Connection API – specifying Microsoft Entra as the IdP:

{
    "display_name": "Example Display Name",
    "identity_provider": "microsoft-entra"
}
Entra Connection Credentials from Stytch

4
Configure SCIM Credentials in Entra

Taking the values from your Stytch SCIM connection, enter the returned base_url as the “Tenant URL” and the bearer_token as the “Secret Token”.

If you did not specify an IdP when creating the SCIM Connection, you must append ?aadOptscim062020 to the returned BaseURL, in order to flag the application into Entra’s SCIM 2.0 compliant version.
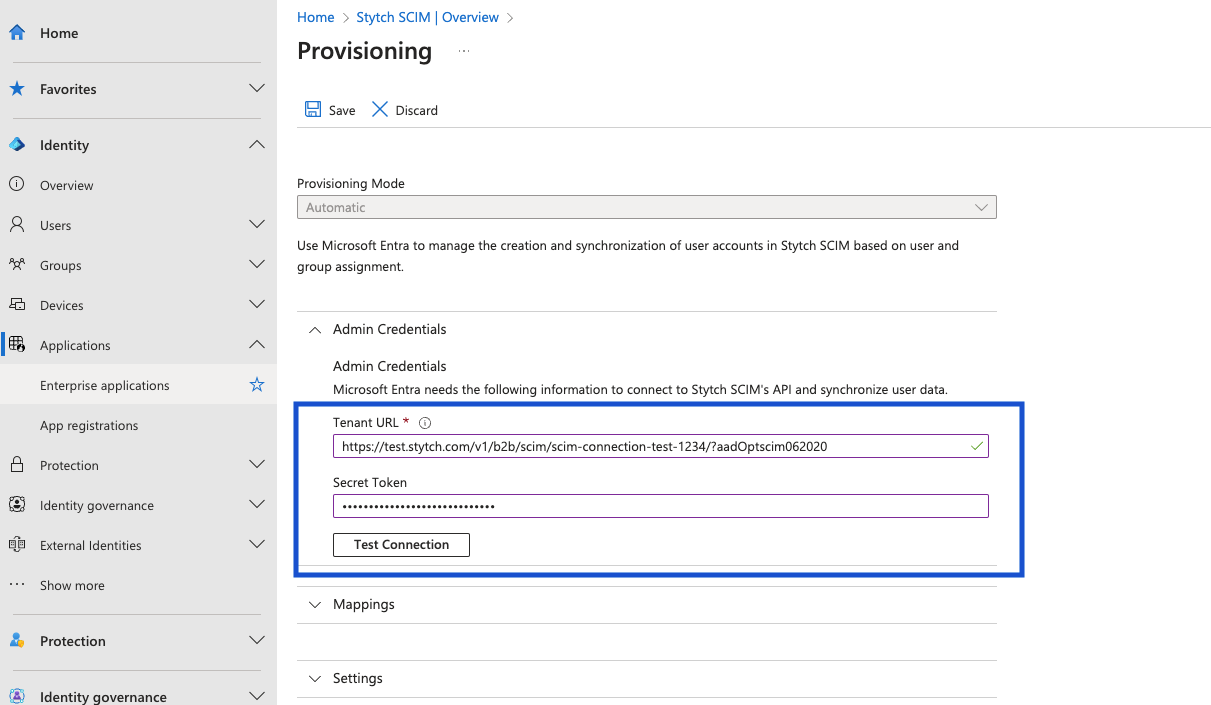
Input admin credentials for SCIM with Microsoft Entra

Click Test Connection and then save.

Once you’ve saved, click back into “Provisioning”, verify the Mapping and Settings. Within the users mappings, ensure you are mapping objectId to externalId (i.e. objectId is set to the Source attribute and externalId is set to the Target attribute). Next, turn Provisioning Status to “On”.
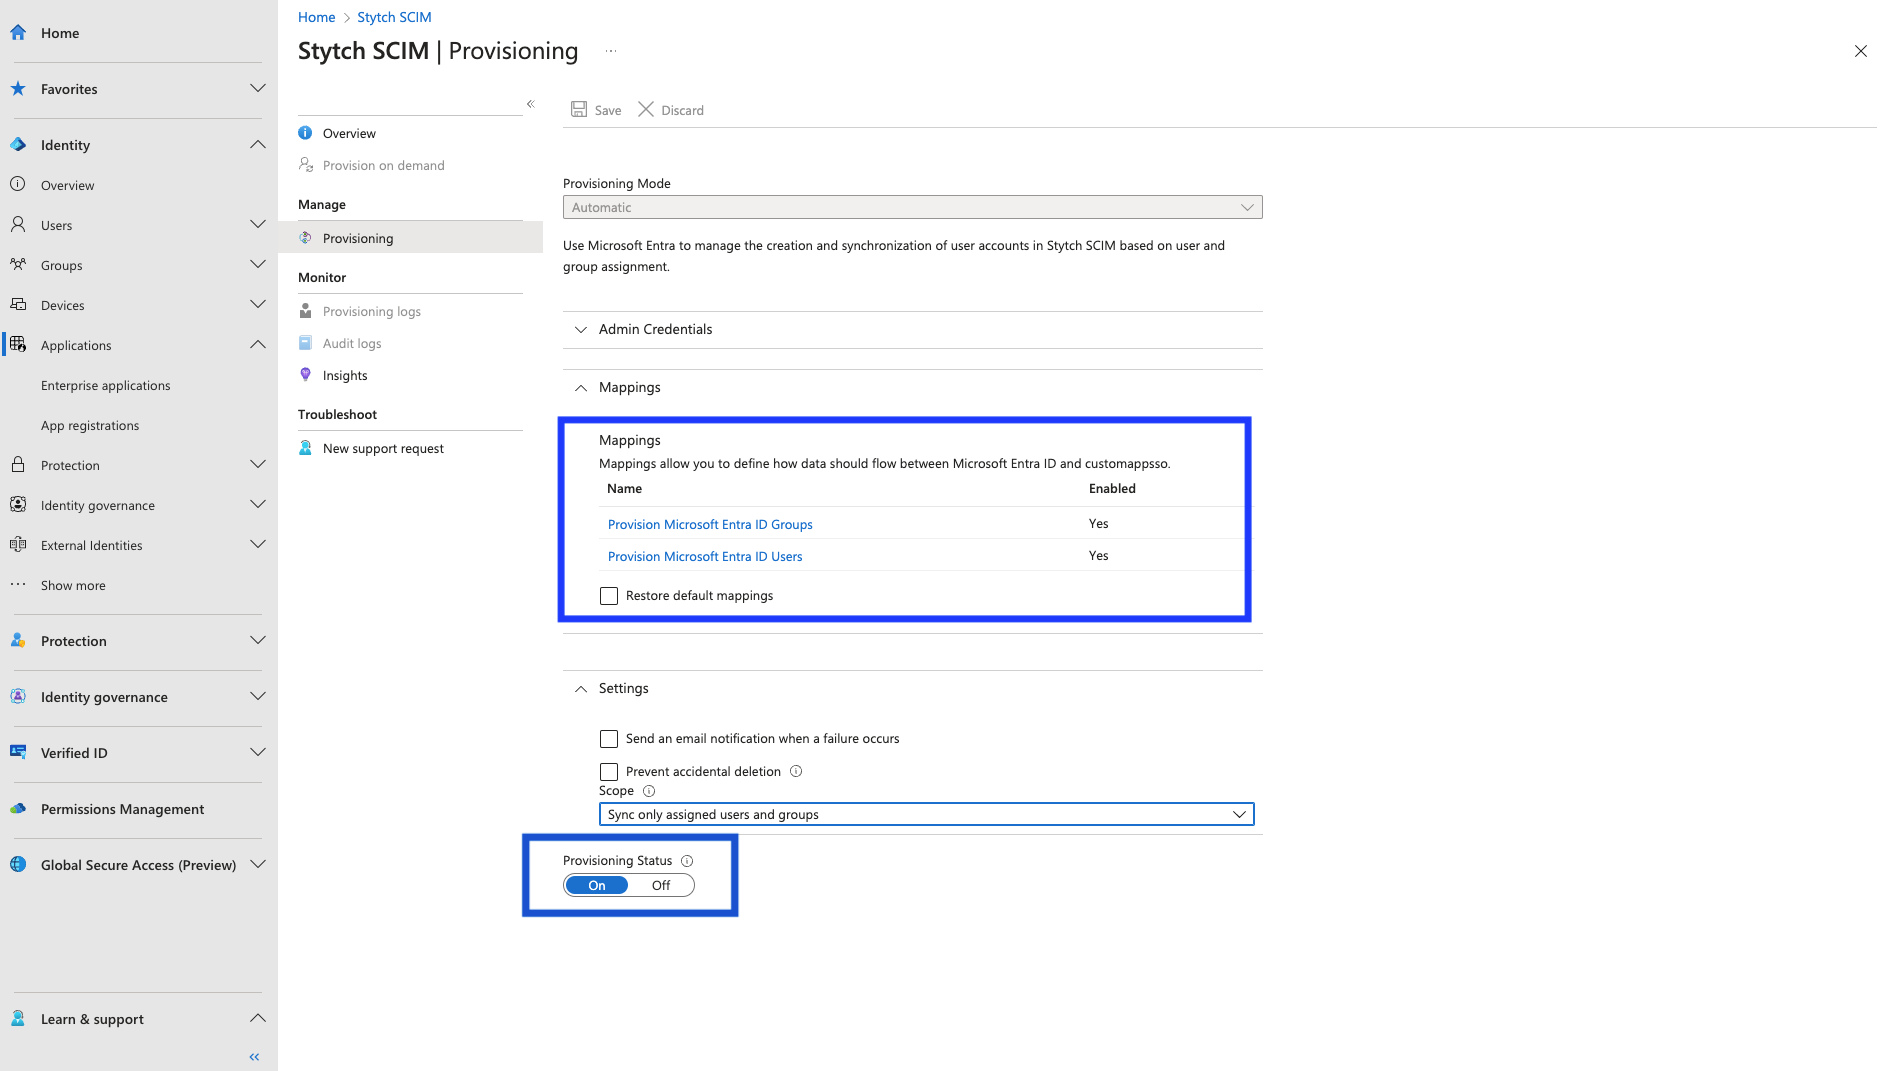
Enable provisioning for Entra SCIM

5
Provision users

Once saved, you can test the SCIM integration by Assigning/Removing people from the application and seeing these changes propagate to your Stytch Member records. Entra does automatic syncing on a 40 minute timer, but you can also provision on demand to speed up testing.
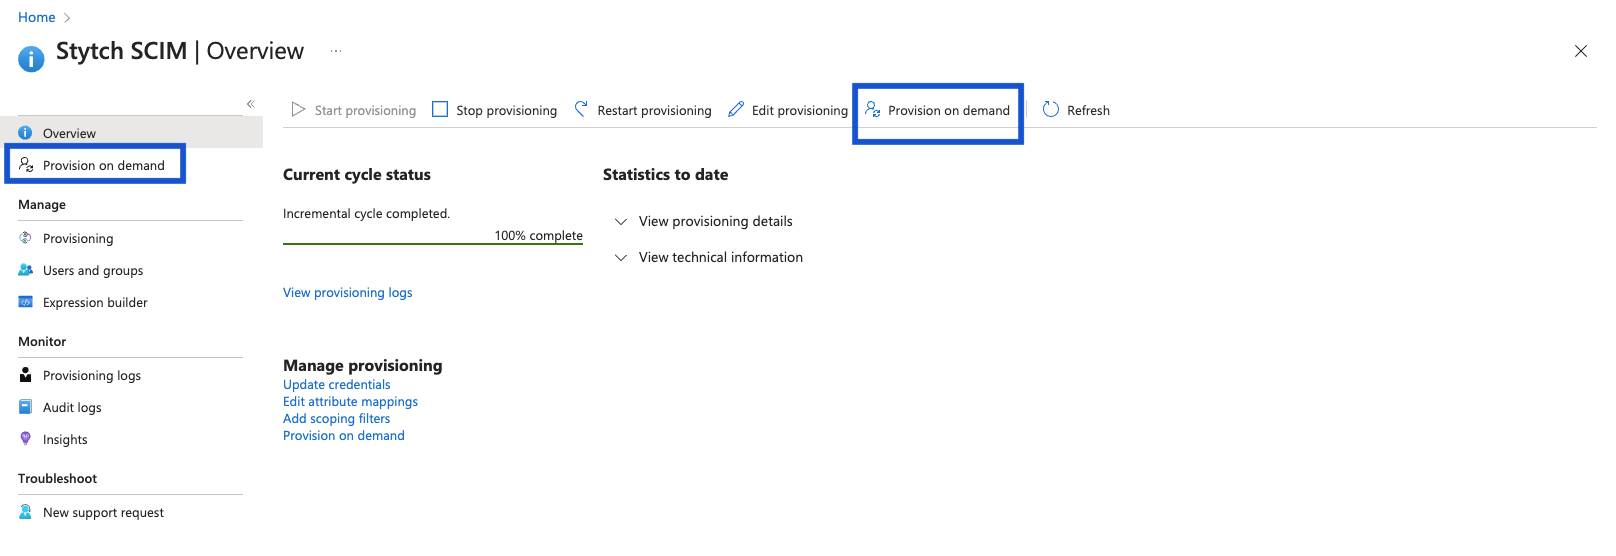
Provision on demand with Entra for testing

6
(Optional) Configure webhooks

To notify your own system of changes that occur via SCIM, you can configure webhooks.

Create application in Entra

2.

Enable autometic provisioning

3.

Create Stytch SCIM Connection

4.

Configure SCIM Credentials in Entra

5.

Provision users

6.

(Optional) Configure webhooks