Pre-built UI Frontend Integration of OAuth
In Stytch’s B2B product there are two different versions of the OAuth authentication flow:
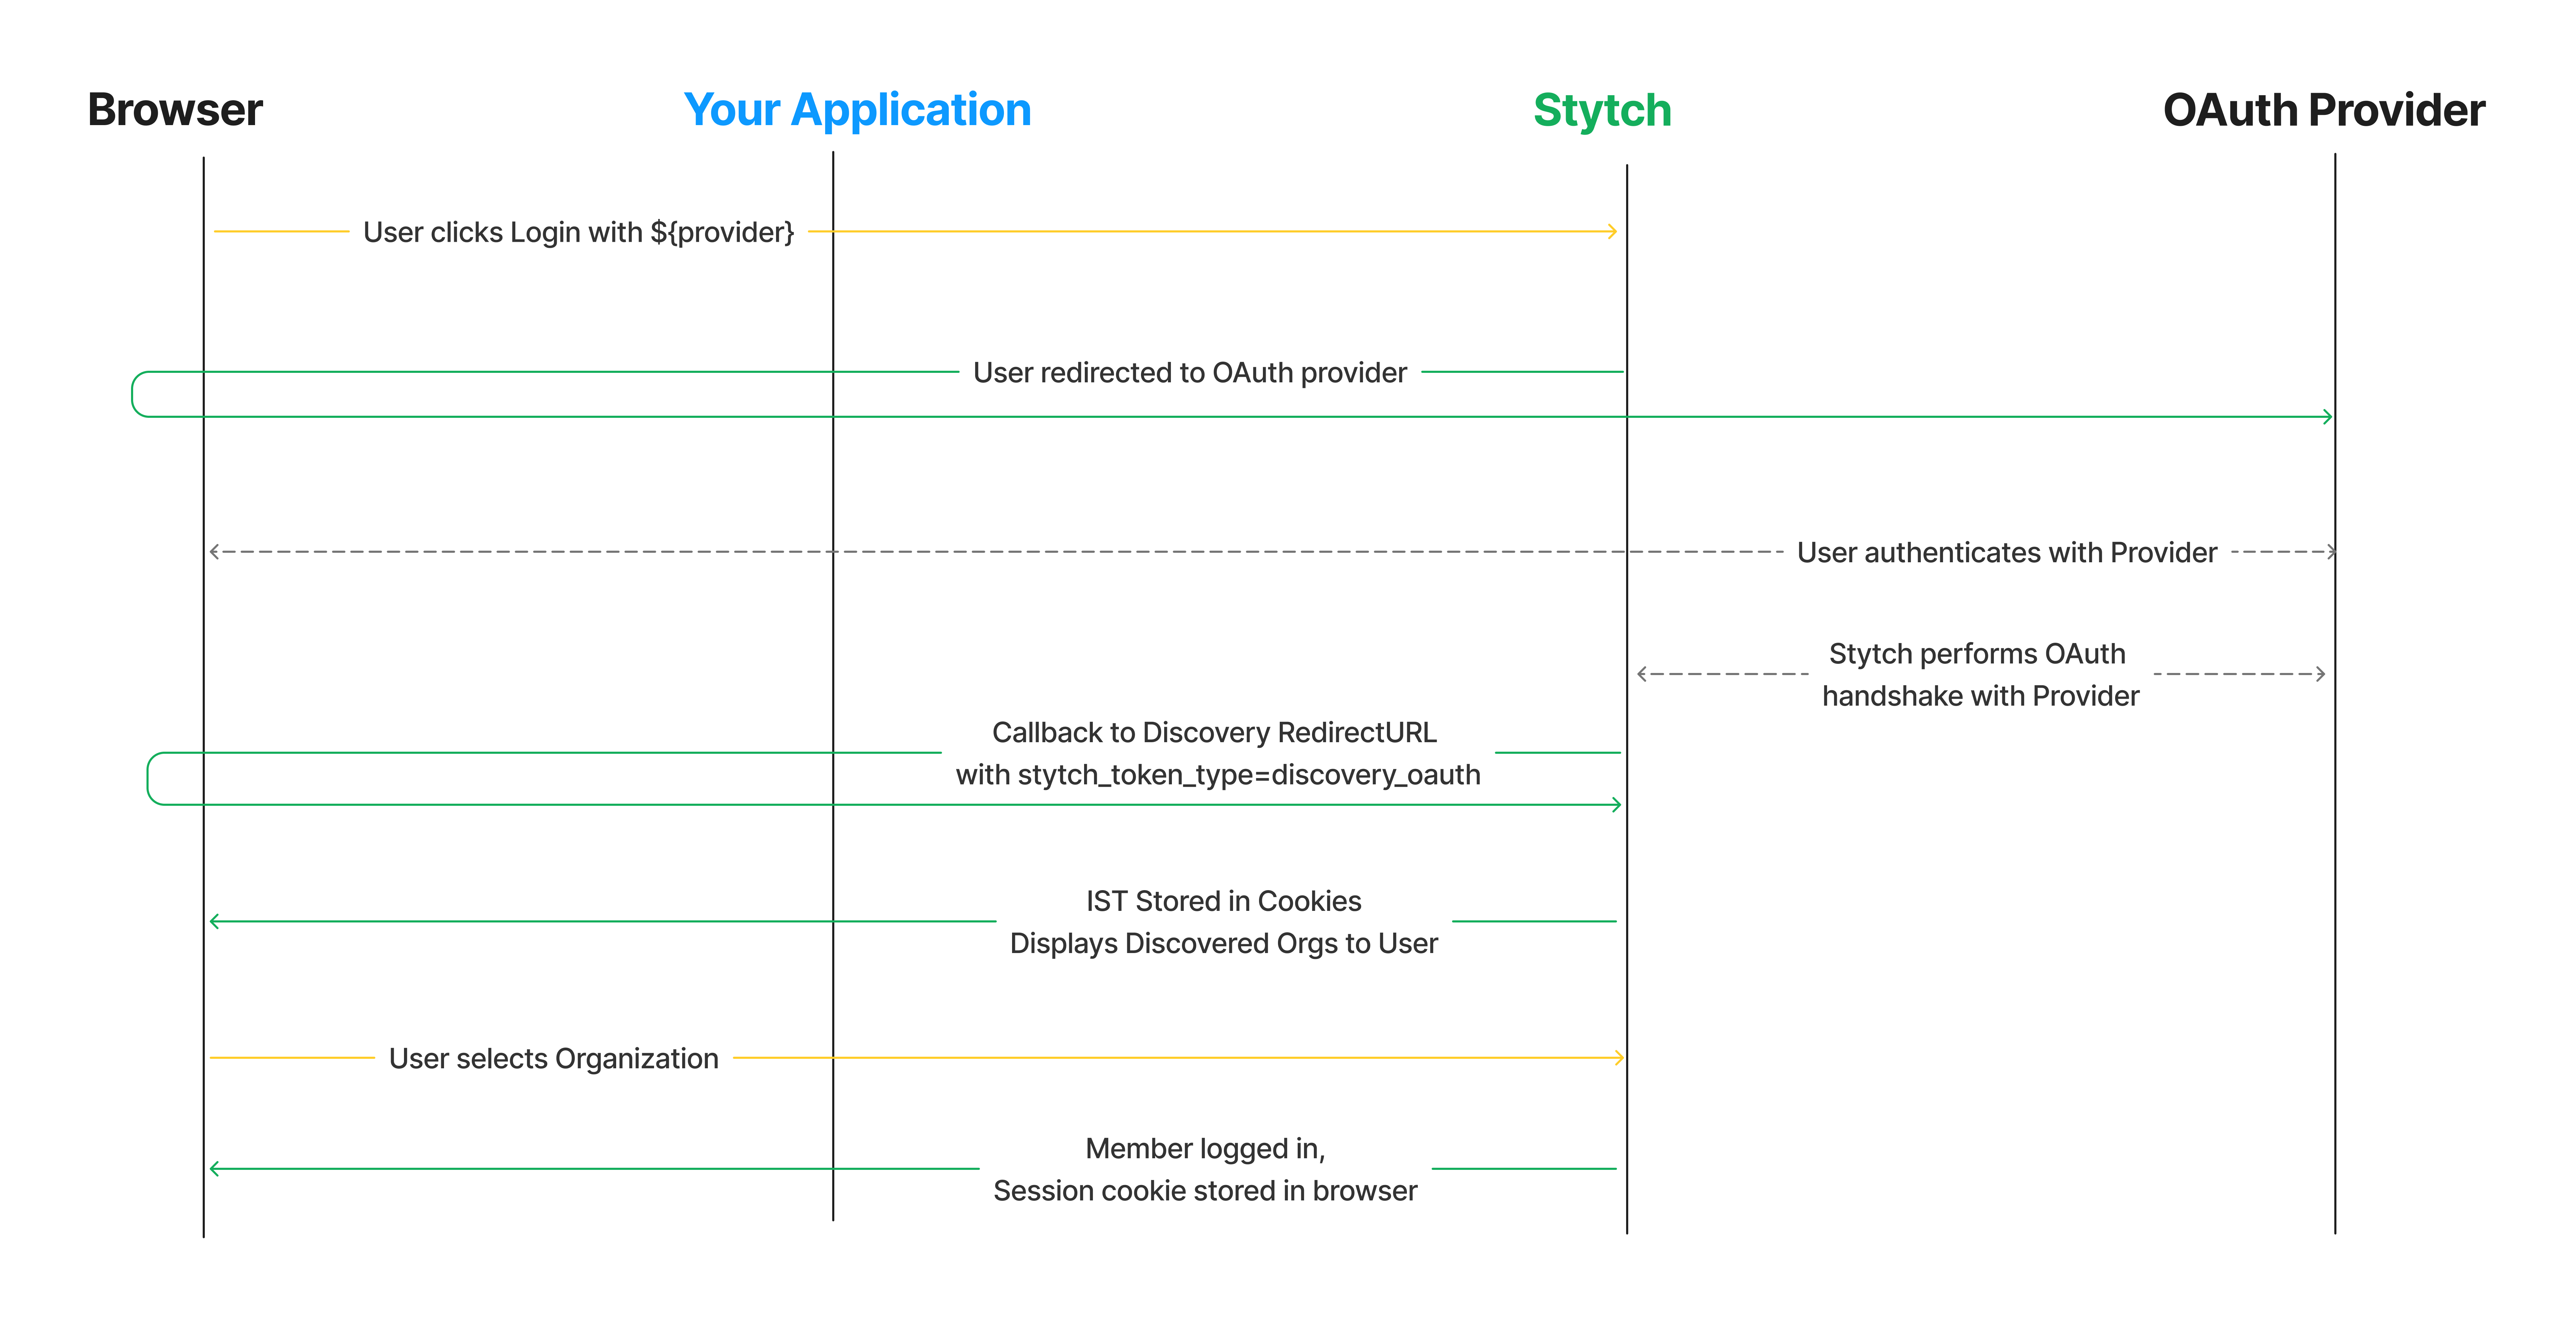
- Discovery Authentication: used for self-serve Organization creation or login prior to knowing the Organization context
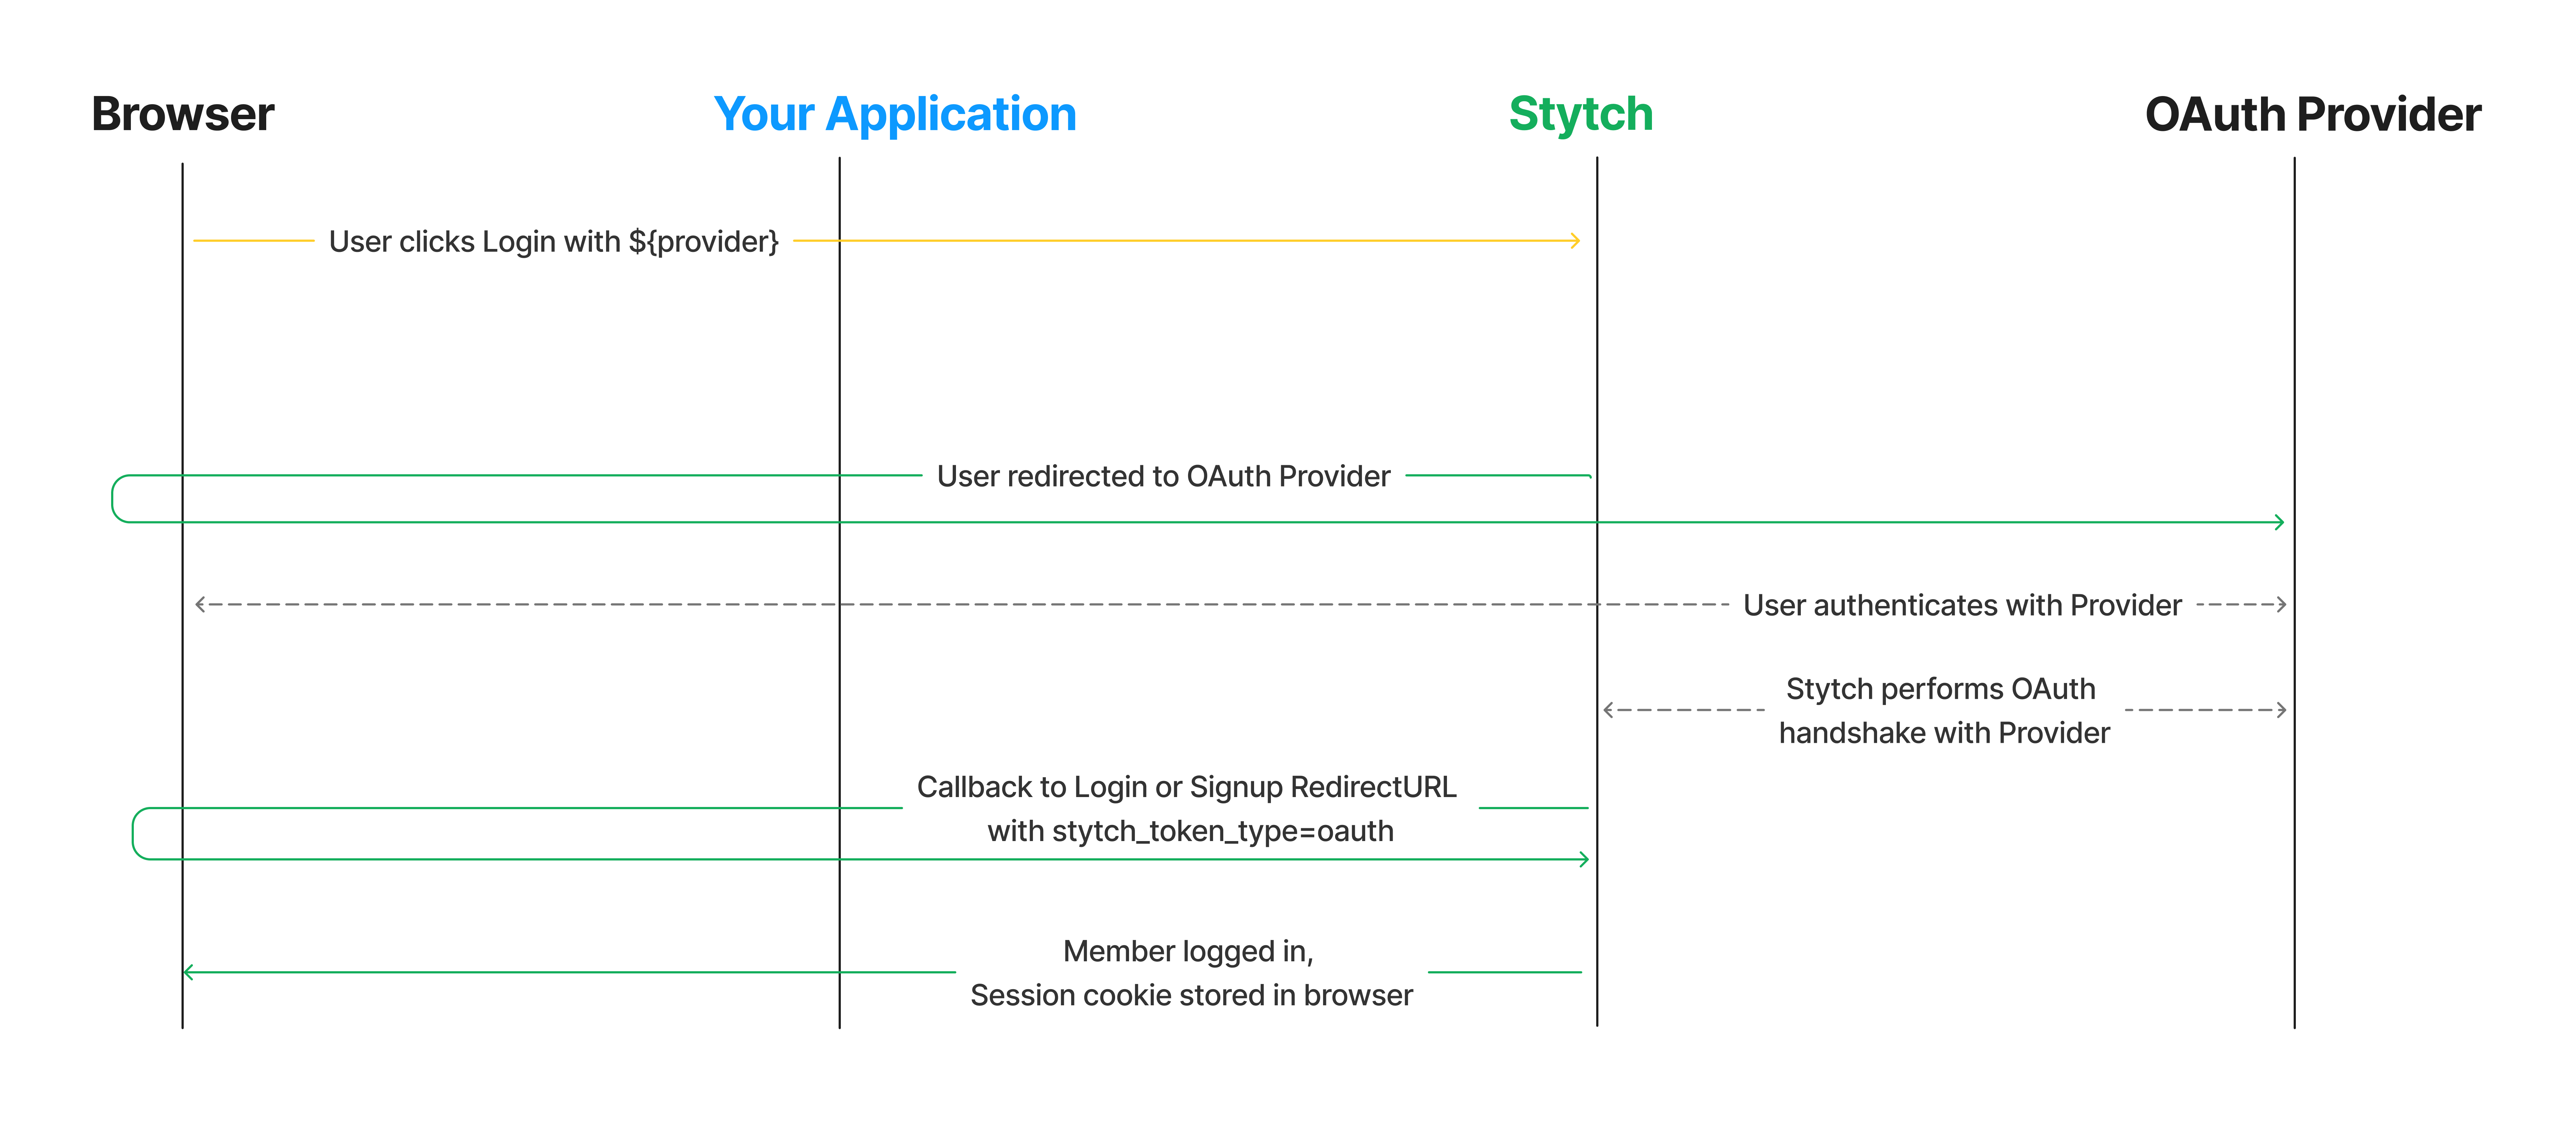
- Organization-specific Authentication: used when you already know the Organization that the end user is trying to log into
 Discovery OAuth sequence when UI component is rendered on Discovery Redirect URL
 Organization OAuth sequence when UI component is rendered on Signup and Login Redirect URLs
This guide walks through how to offer OAuth for both scenarios using Stytch's frontend SDK with pre-built UI.
Steps
1Complete config steps
If you haven't done so already:
- Complete the steps in the OAuth Integration Guide Start Here
- Enable the Frontend SDKs in your Stytch Dashboard
- In the Frontend SDK config, enable Create Organizations under "Enabled Methods"
2Add OAuth to UI Config
In order to surface the OAuth providers that you wish to support in the UI, you can add them to the UI config defined for the discovery and organization auth flows.
import React from 'react';
import { StytchB2B } from '@stytch/react/b2b';

const Login = () => {
  const style = {
    fontFamily: 'Arial',
  };

  // Example config for the Discovery auth flow, hosted on a generic login page
  var discoveryConfig = {
    authFlowType: "Discovery",
    products: ['oauth'],
    oauthOptions: {
      providers: [{ type: 'google' }, { type: 'microsoft' }]
    },
  };

 // Example config for the Organization auth flow, hosted on an
  // Organization-specific login page
  var organizationConfig = {
    authFlowType: "Organization",
    products: ['oauth'],
    oauthOptions: {
      providers: [{ type: 'google' }, { type: 'microsoft' }]
    },
  };

  return (
    <div>
      // Choose either the discoveryConfig or the organizationConfig
      <StytchB2B config={discoveryConfig} styles={style} callbacks={callbacks} />
    </div>
  );
};

export default Login;
<!DOCTYPE html>
<html lang="en">
<body>
<div class="app">
<div>
<div id="stytch-sdk"></div>
</div>
</div>
<script>
import { StytchB2BUIClient } from '@stytch/vanilla-js/b2b';
const stytch = new StytchB2BUIClient('PUBLIC_TOKEN');
var styles = {
fontFamily: 'Arial',
};
// Example config for the Discovery auth flow, to be hosted on a
// generic login page
var discoveryConfig = {
authFlowType: "Discovery",
products: ['oauth'],
oauthOptions: {
providers: [{ type: 'google' }, { type: 'microsoft' }]
},
};
// Example config for the Organization auth flow, to be hosted on an
// Organization-specific login page
var organizationConfig = {
authFlowType: "Organization",
products: ['oauth'],
oauthOptions: {
providers: [{ type: 'google' }, { type: 'microsoft' }]
},
};
stytch.mount({
elementId: "#stytch-sdk",
styles,
callbacks,
// Choose either the discoveryConfig or the organizationConfig
config: discoveryConfig,
});
</script>
</body>
</html>3Render UI Component on Redirect URL
Render the Stytch UI component on the Redirect URL(s) that you specified in the Stytch Dashboard during the initial setup steps.
When rendered, the UI component will automatically handle the redirect from Stytch based on the stytch_token_type, either prompting the user with the discovered organizations view and handling how they choose to proceed or logging them in directly.