RBAC Dashboard
Configure your policy in the Stytch Dashboard.
Frontend SDKs
Gate UI with RBAC checks from the client.
Backend checks
Authorize requests on your backend with sessions.authenticate.
The RBAC Policy
An RBAC policy is a governing document that stores all access controls. It is the canonical source for RBAC authorizations within a Stytch Project, made up of three core concepts:- Resources: entities within your application
- Examples:
documents,images,invoices
- Examples:
- Actions: valid operations on a resource
- Examples:
create,read,update,delete
- Examples:
- Roles: named collections of permissions
- Examples:
admin,editor,viewer
- Examples:
Resources
A Resource represents an entity in your application and is identified by a uniqueresource_id string you define.
Actions
Actions are the allowed operations on a Resource. Actions can be standard CRUD operations or application-specific actions likeshare, invite, or export.
Roles and permissions
A permission is a combination of a Resource and an Action (for example,read on documents). Roles are named sets of permissions. A Role can also include the wildcard action * to grant all actions for a Resource.
Set up your policy in the Dashboard
1
Create custom resources and actions
In the RBAC Dashboard, select Resources and Create New Resource. Define a 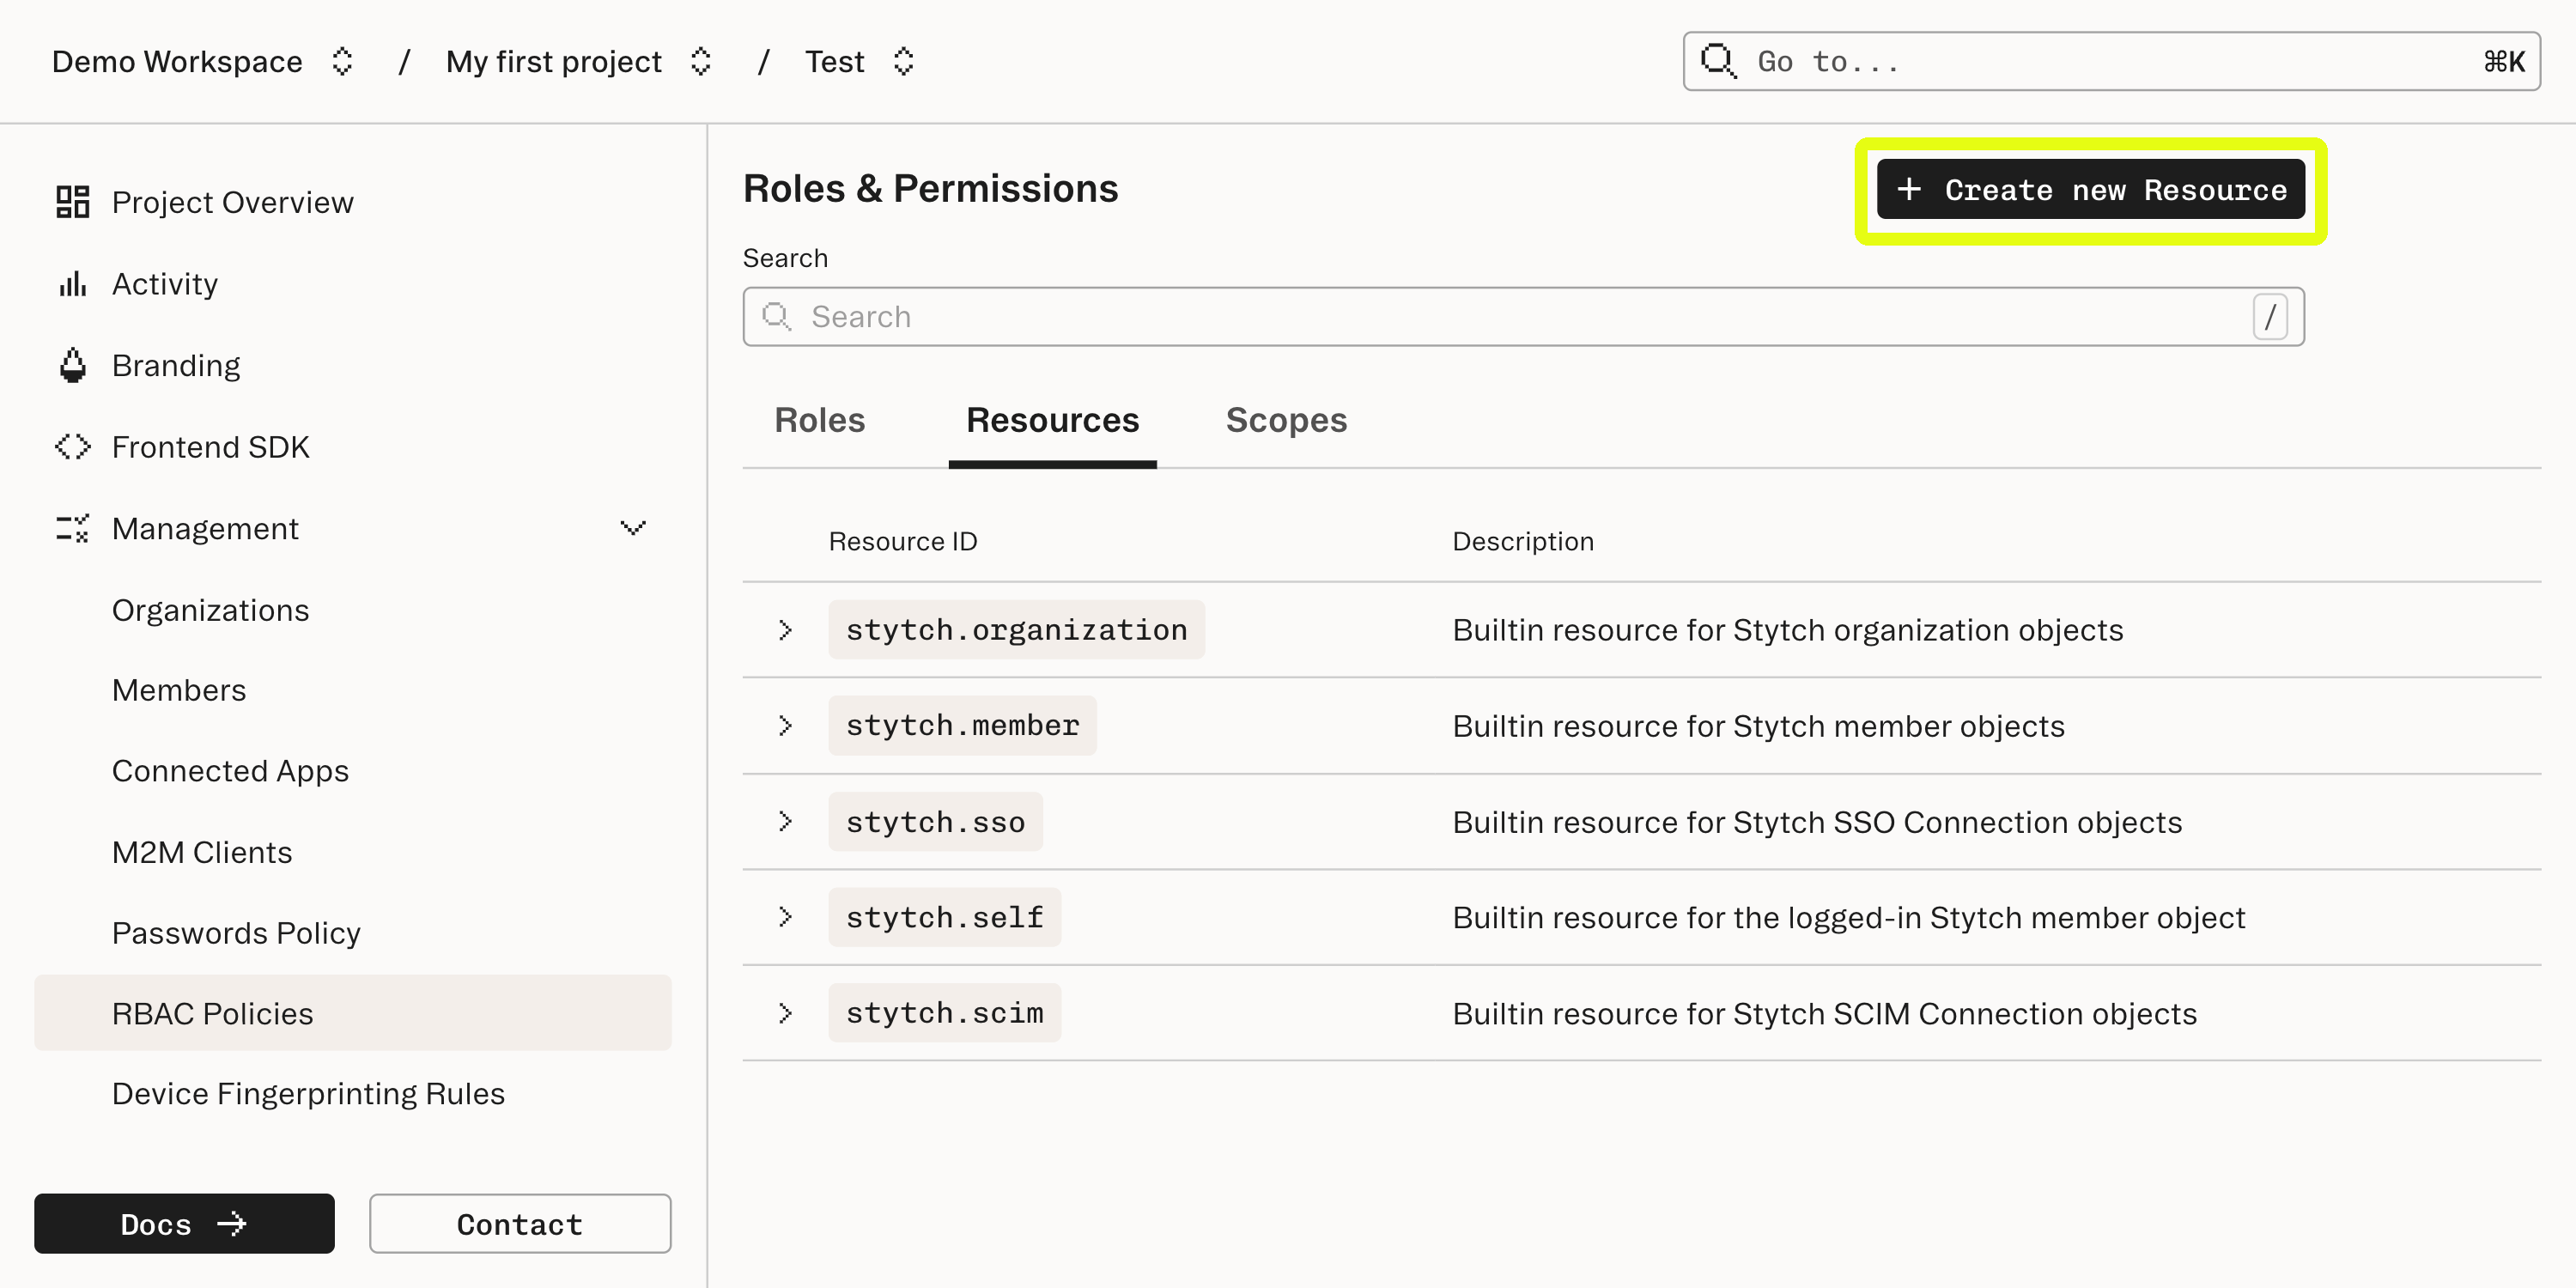
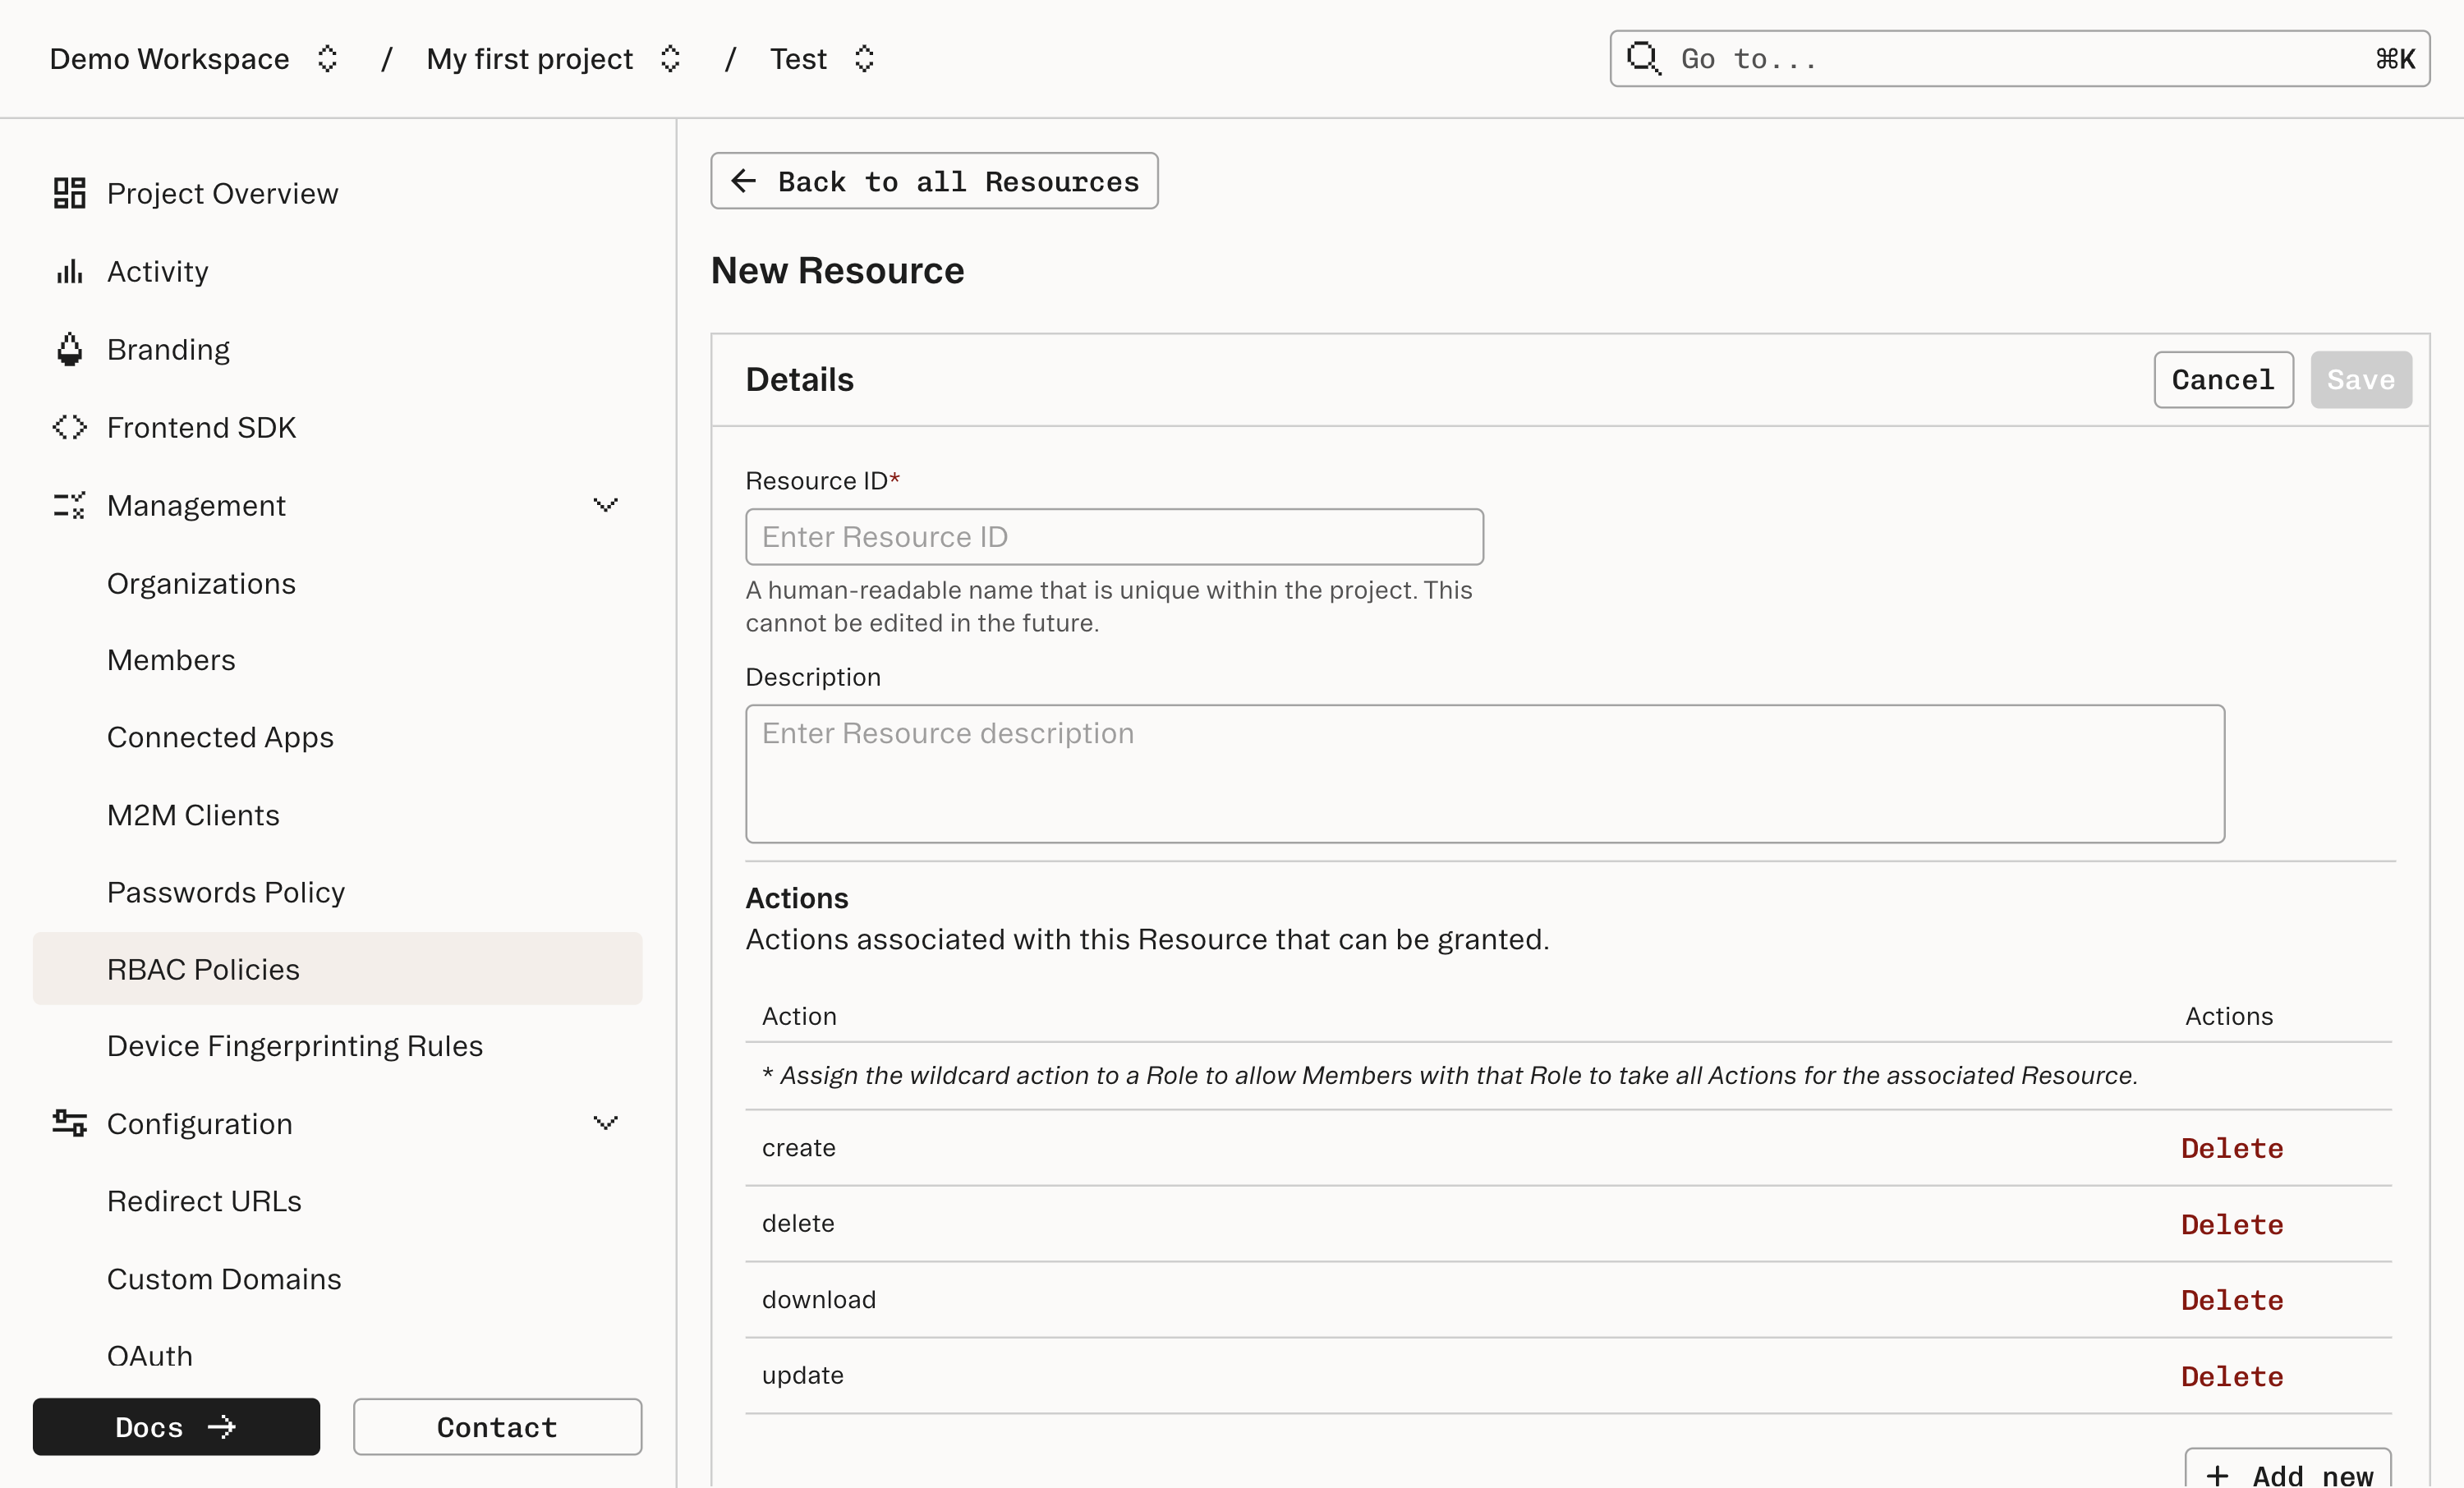
resource_id and the list of actions allowed for that Resource.documents Resource might support create, update, delete, and download.2
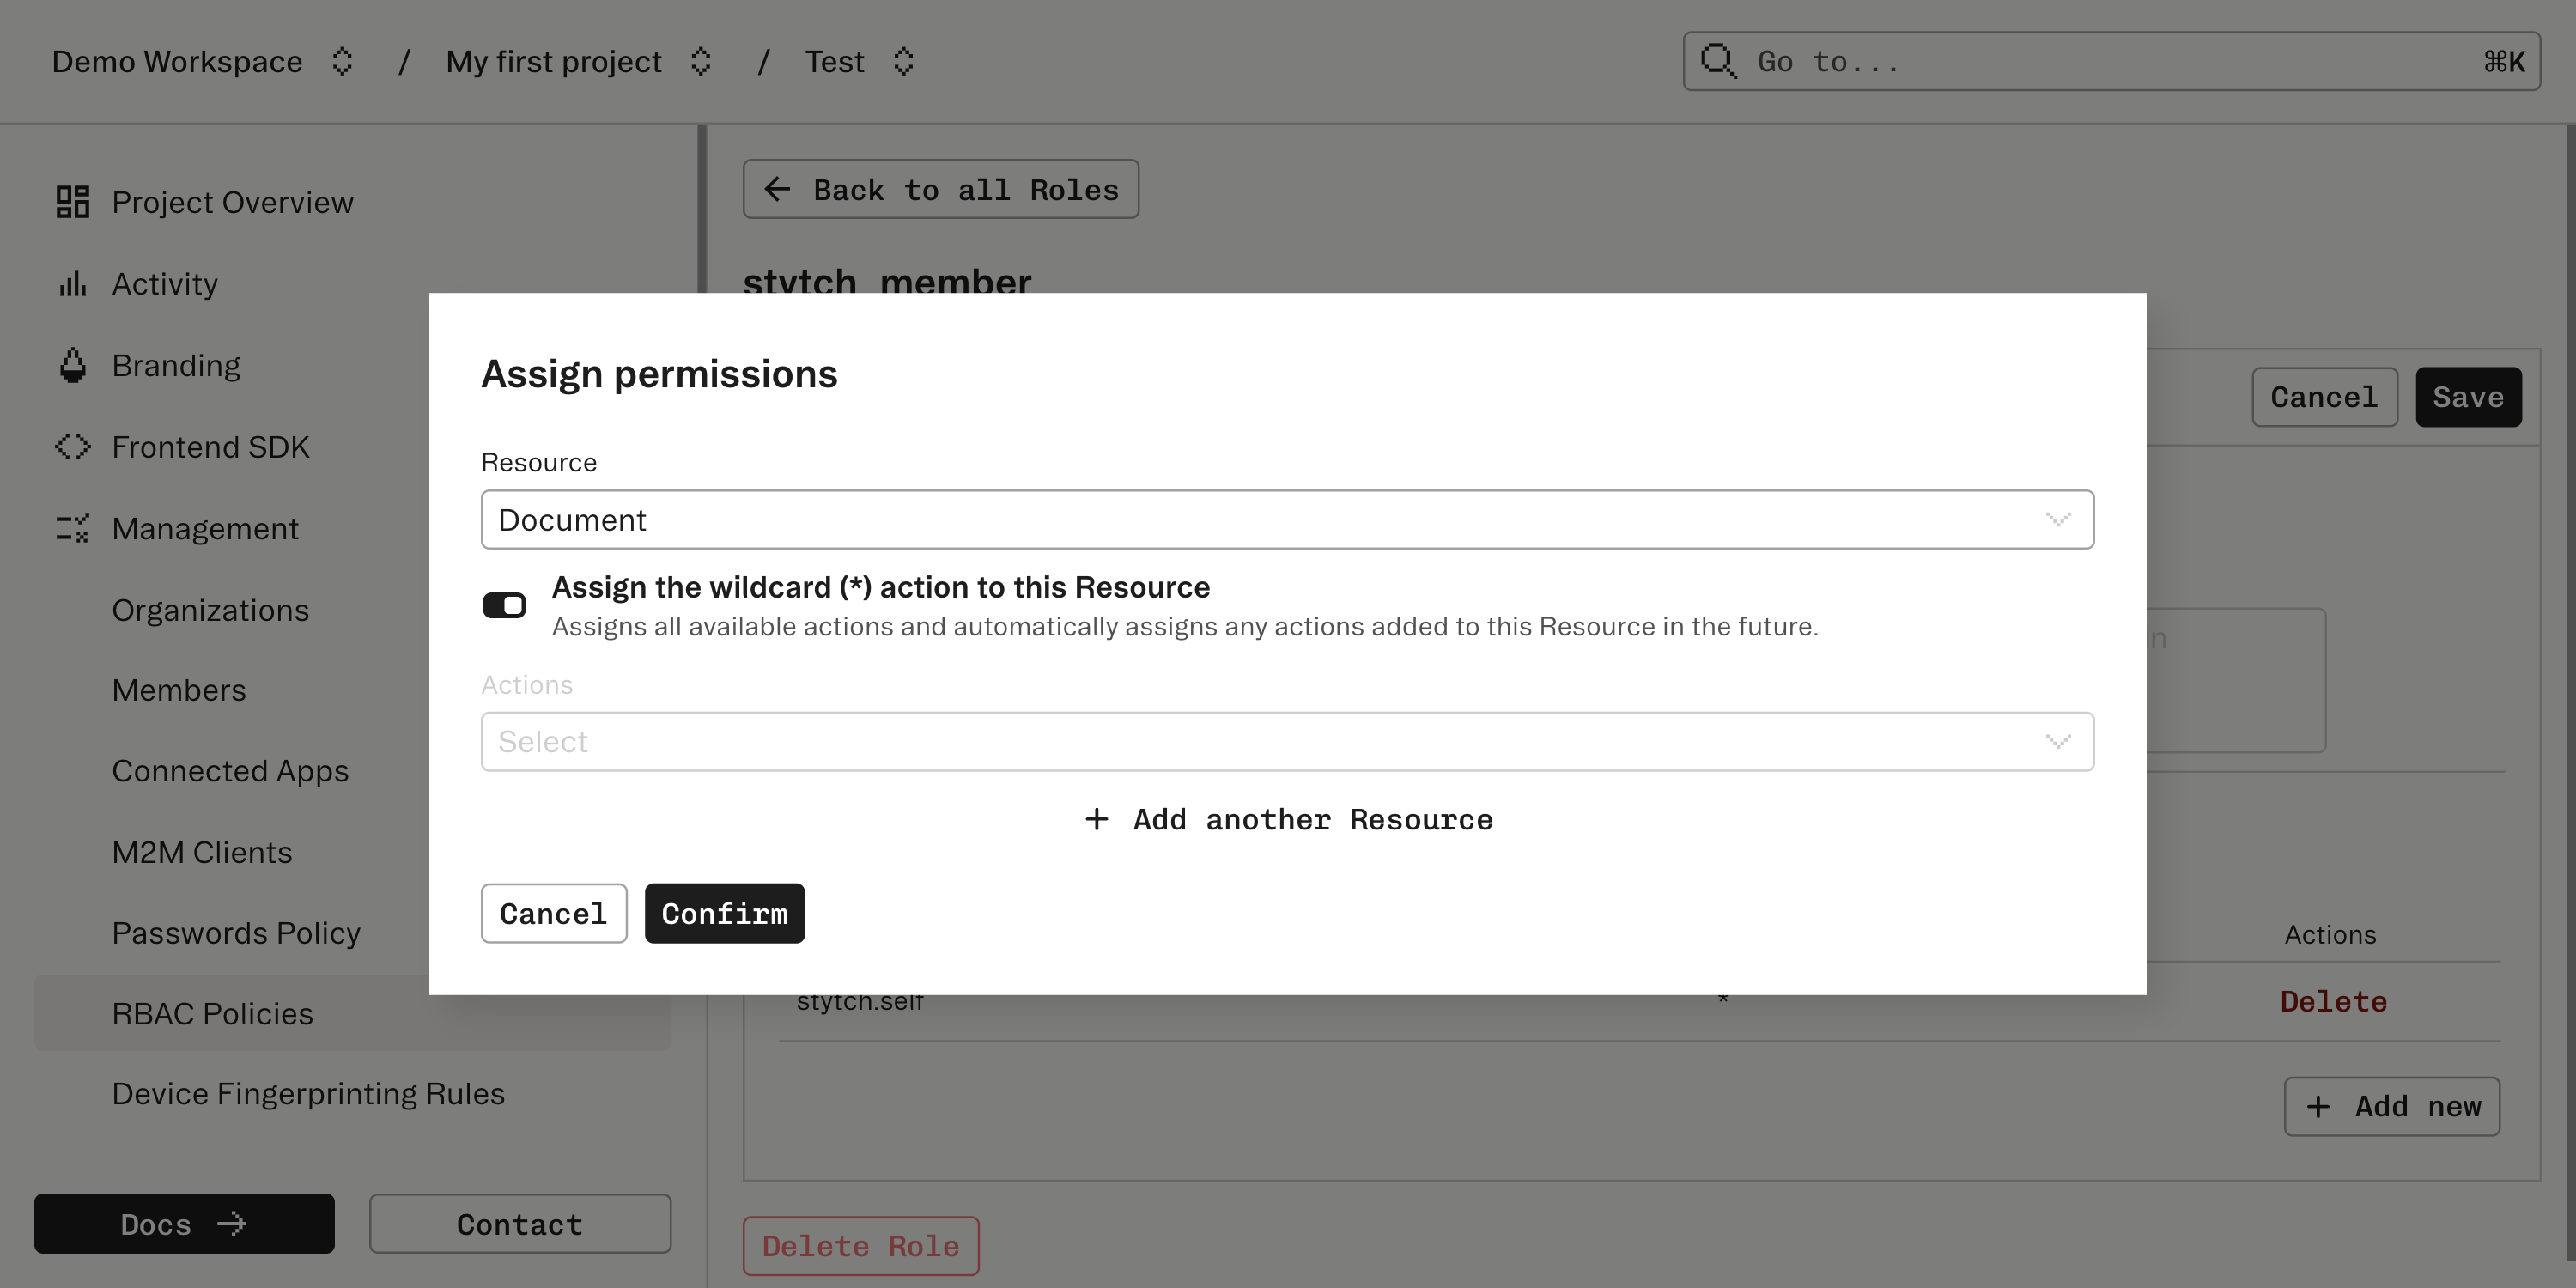
Assign permissions to roles
Navigate to Roles. You’ll see a default Role: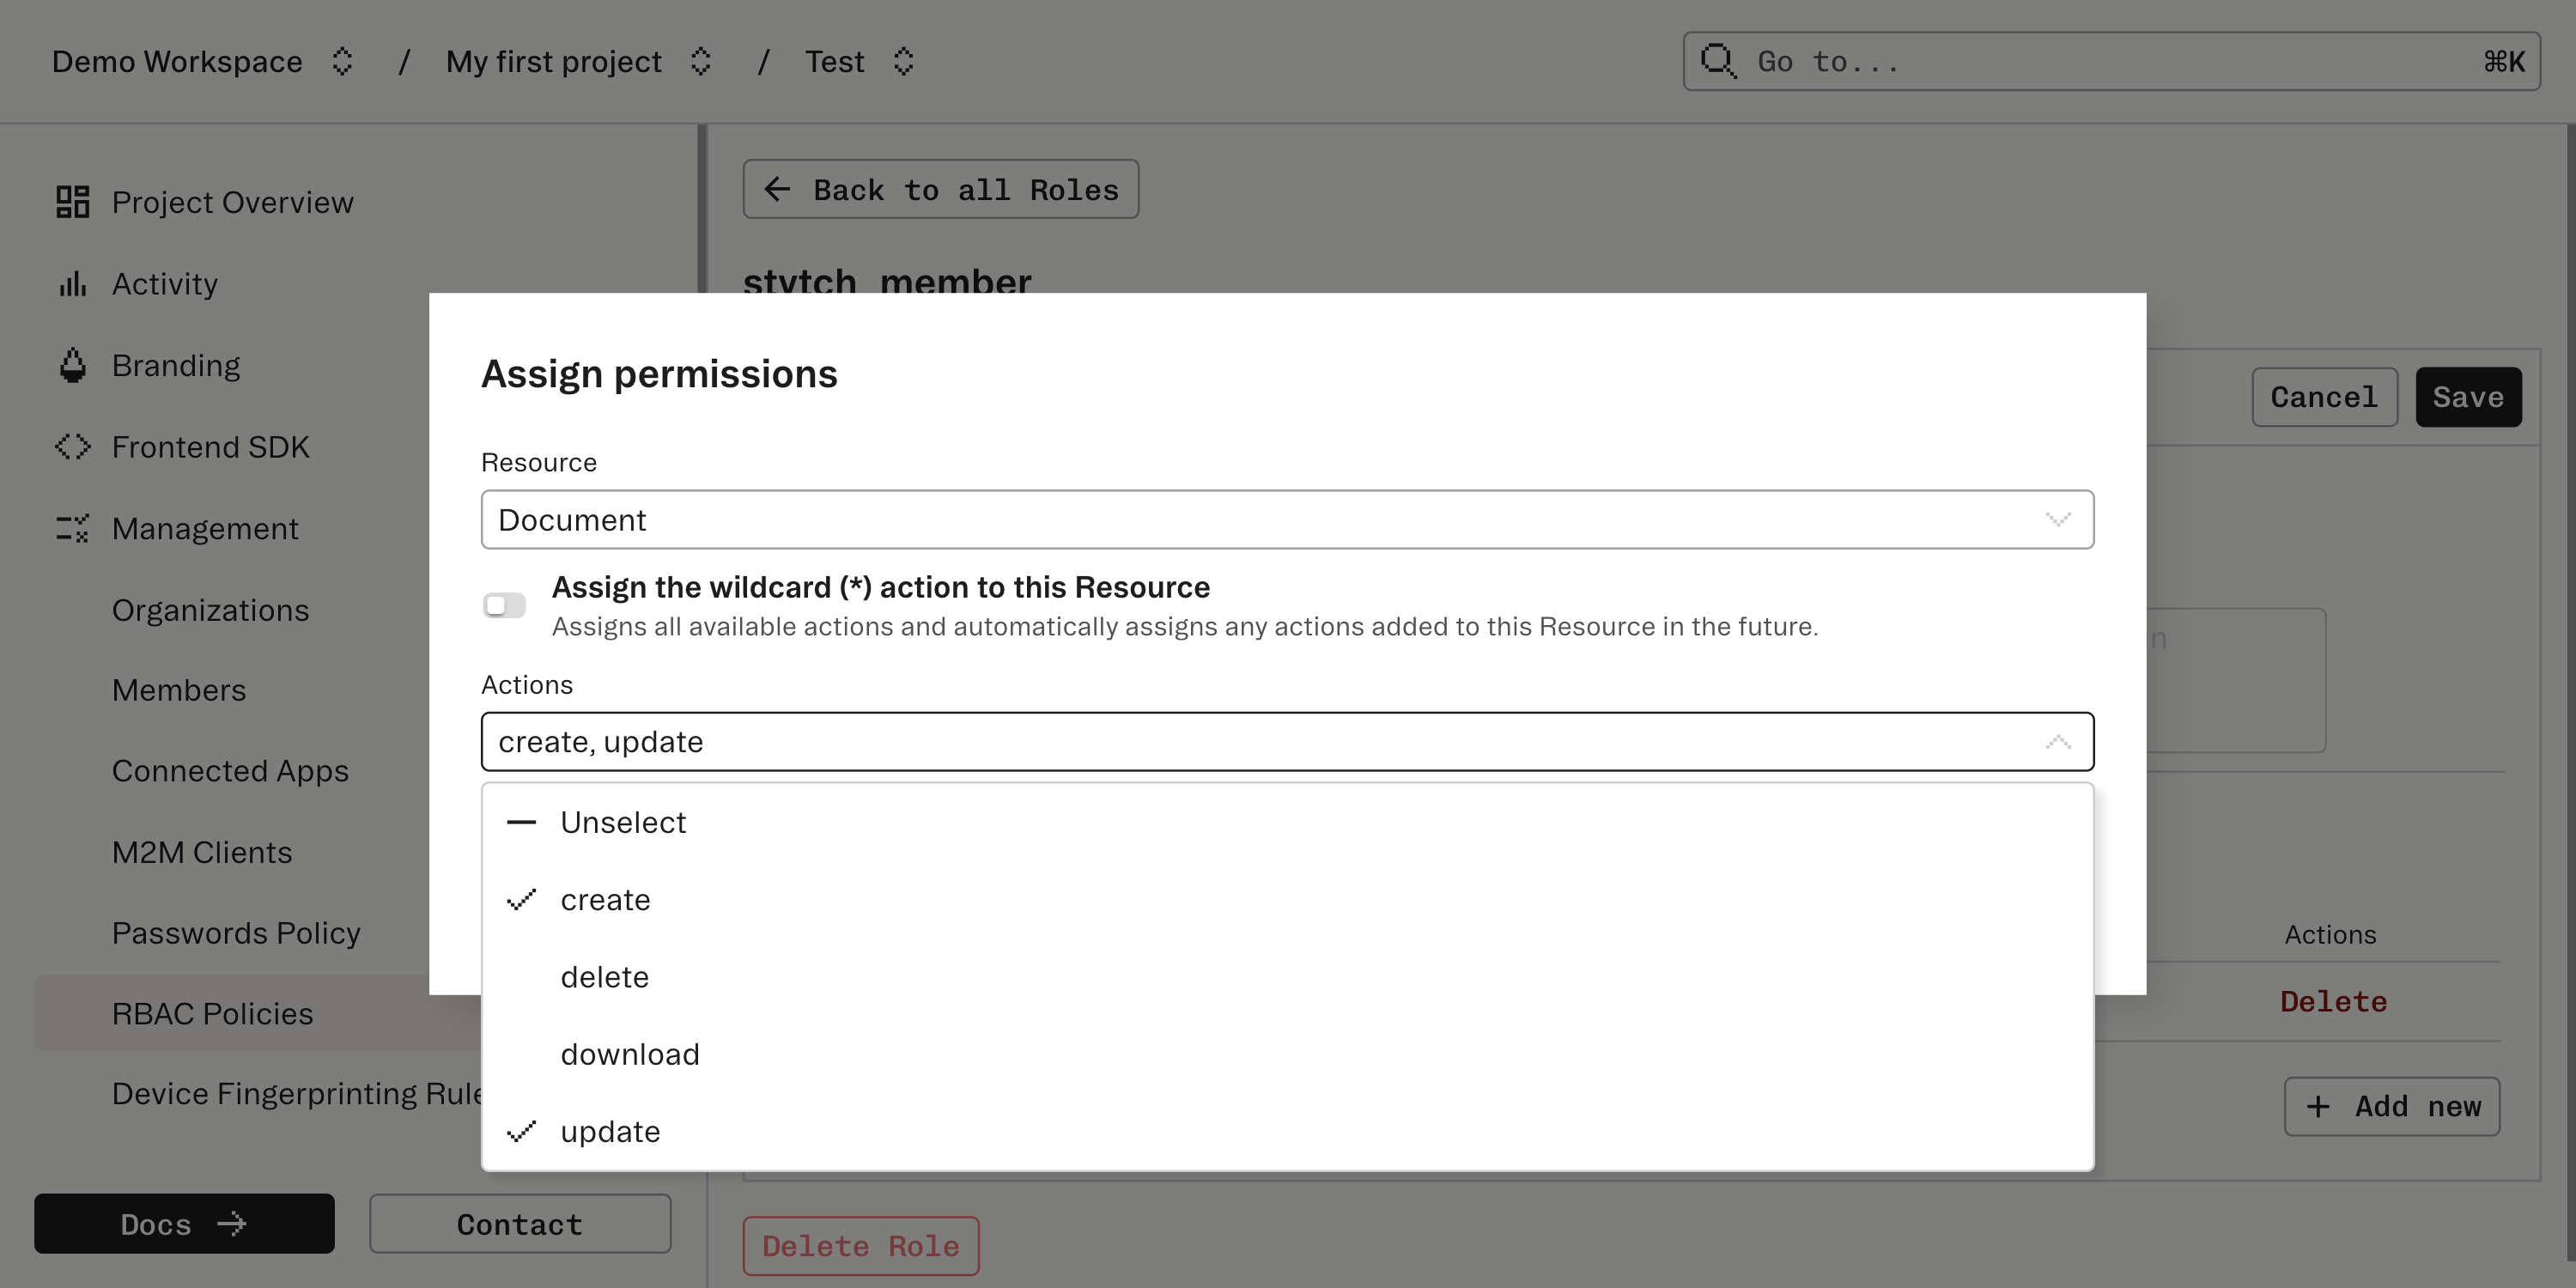
stytch_user: automatically assigned to all Users and grants basic permissions like updating their own name.
*.3
Implement backend RBAC checks
Add server-side authorization checks before honoring requests. See the backend enforcement guide.
4
Add frontend RBAC handling
Use the frontend SDKs to gate UI. See the frontend authorization section.