1
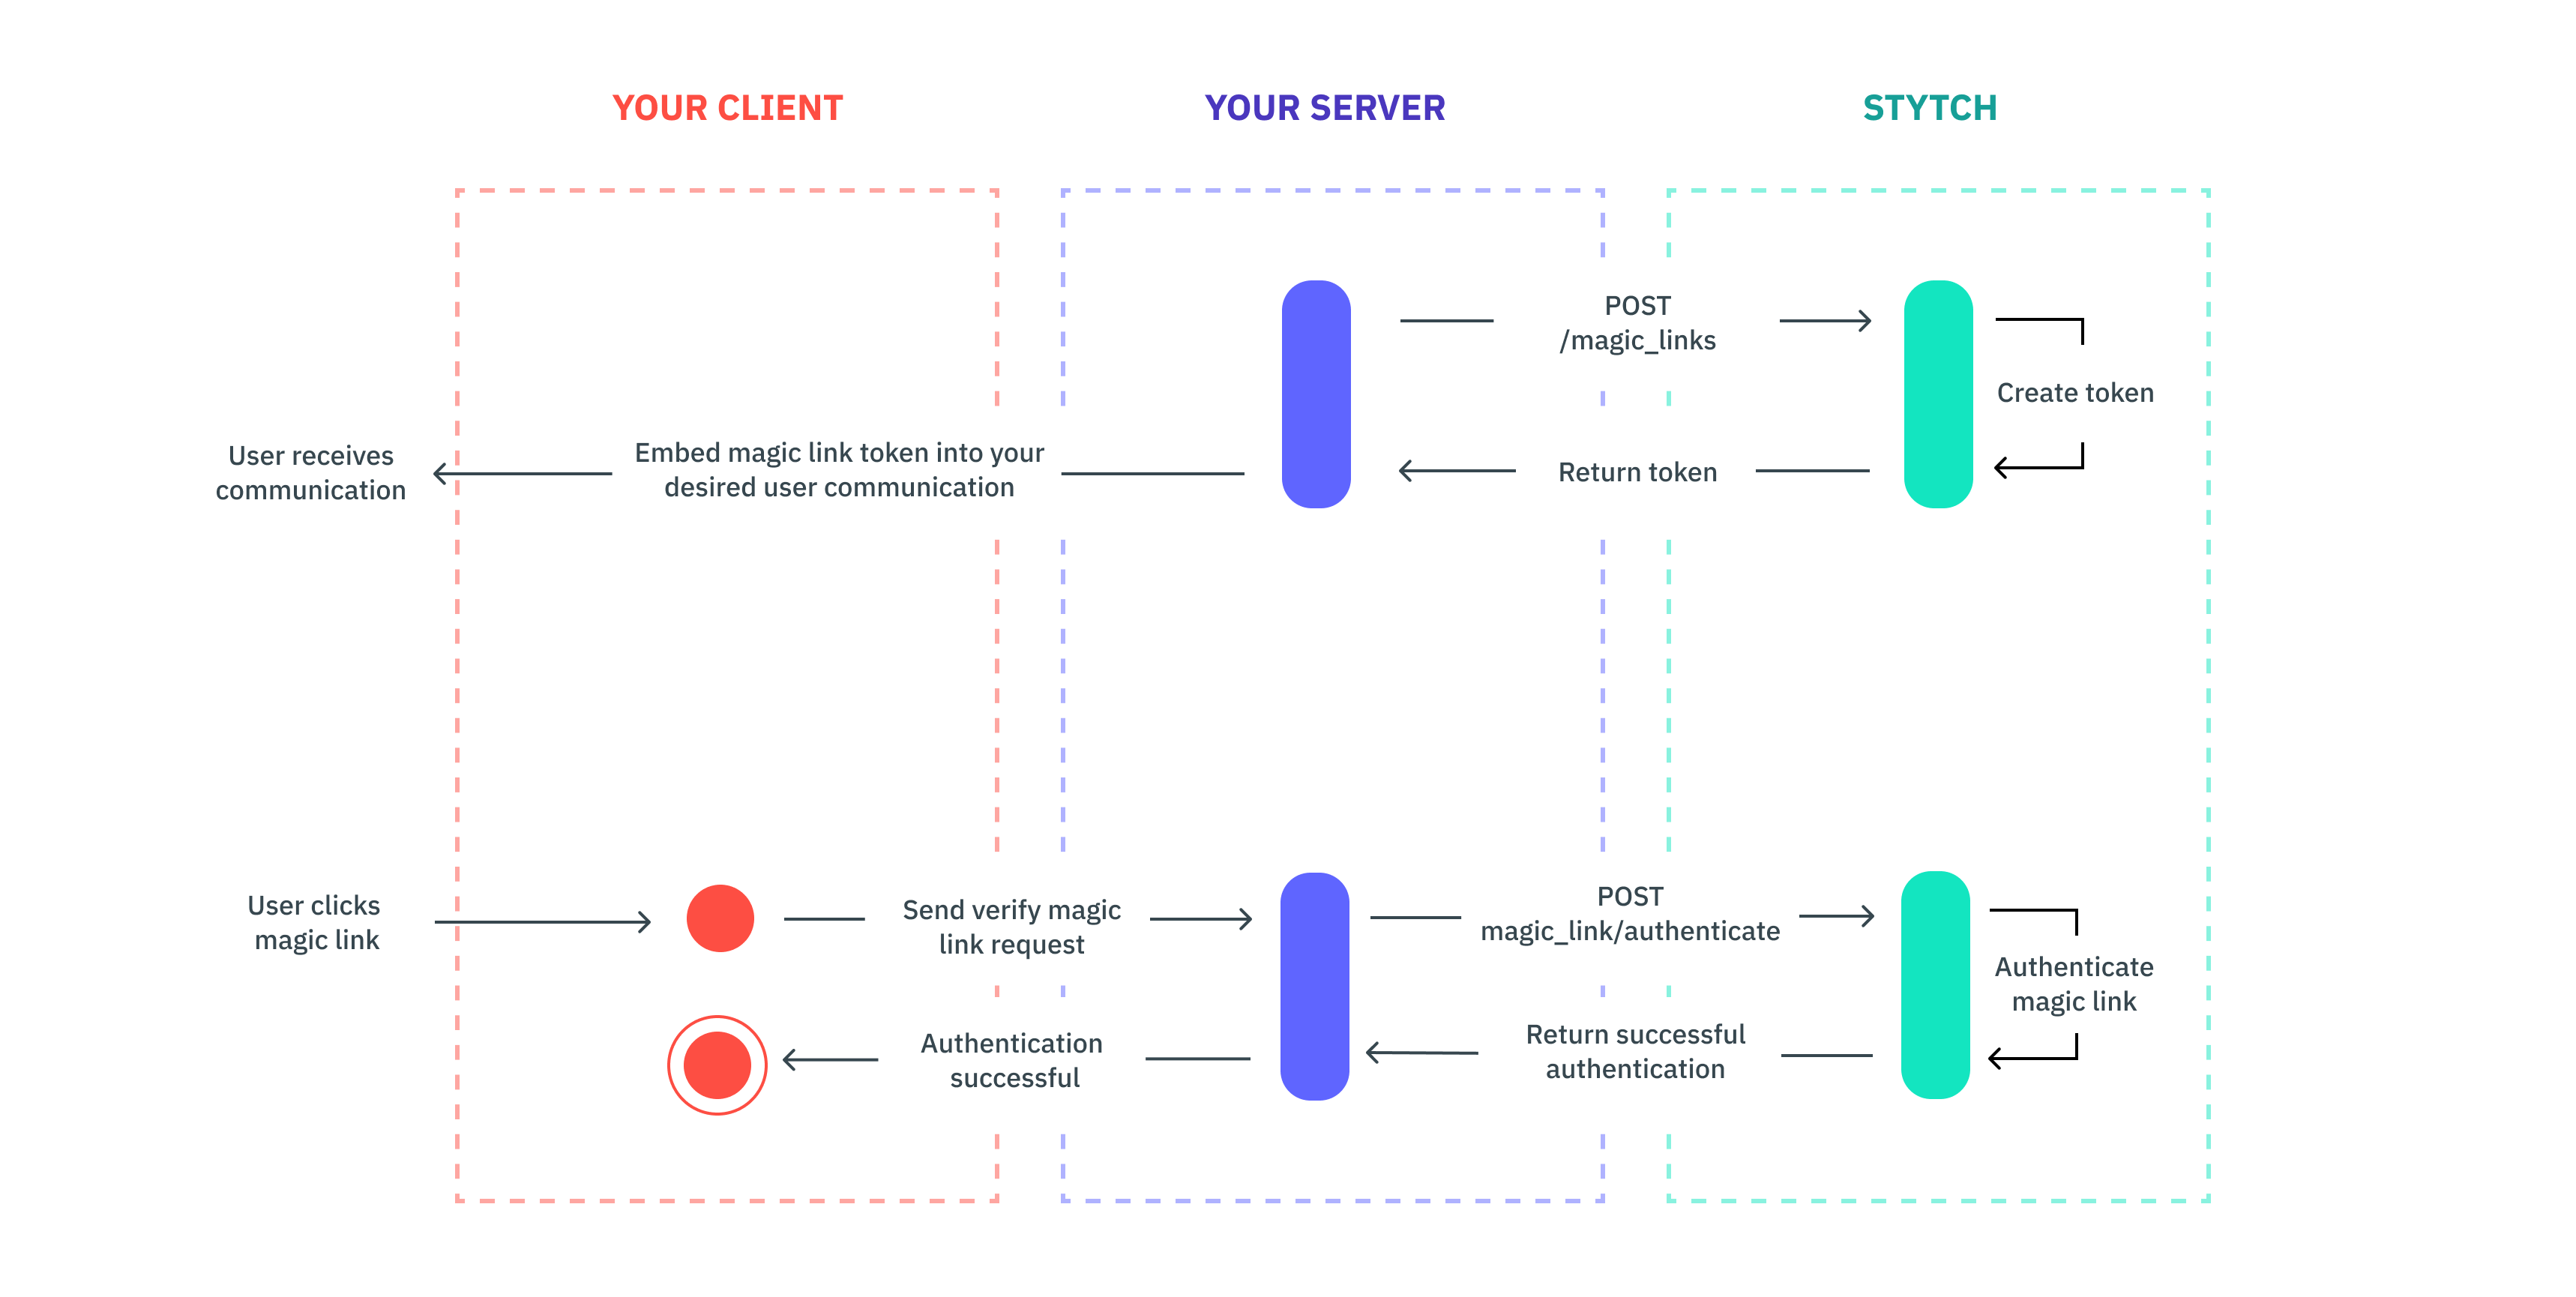
Create magic link token
Use the magicLinkCreate endpoint to generate a token for a user to embed in your chosen communication (e.g. a promotional email).
2
Send token
Send your customer communication with the magic link embedded in your main call-to-action button (you’ll append the magic link token to the destination URL you’re sending the user to).
3
Authenticate token
When the user clicks the link, redirect the user and send a request to Stytch’s authenticate endpoint in order to verify the user. You can optionally set a session for the user by using the session_duration_minutes in the authenticate call.
4
Multi-factor authentication
After this step, it’s up to you on how you want to handle the user interaction. Depending on the use case, you may not need additional authentication. However, if you want to layer on step-up authentication at any point throughout the user’s session for additional assurance, you can always layer on more verification methods (e.g. SMS, etc.).