Stytch and backend development
Our backend API and SDKs integrate tightly with your application's server-side logic for maximum code control and flexibility. Because of its API-first design, Stytch’s backend integration enables you to customize and control auth flows with precision. This guide covers the fundamental aspects and key considerations when implementing Stytch on your backend.
Here’s a list of libraries and options we offer for backend development:
Refer to the backend API reference page, where you can select the language and backend SDK of your preference, for the full documentation. You can also explore the example apps to get hands-on with the code.
Overview

At a high-level, implementing Stytch server-side involves the following steps:
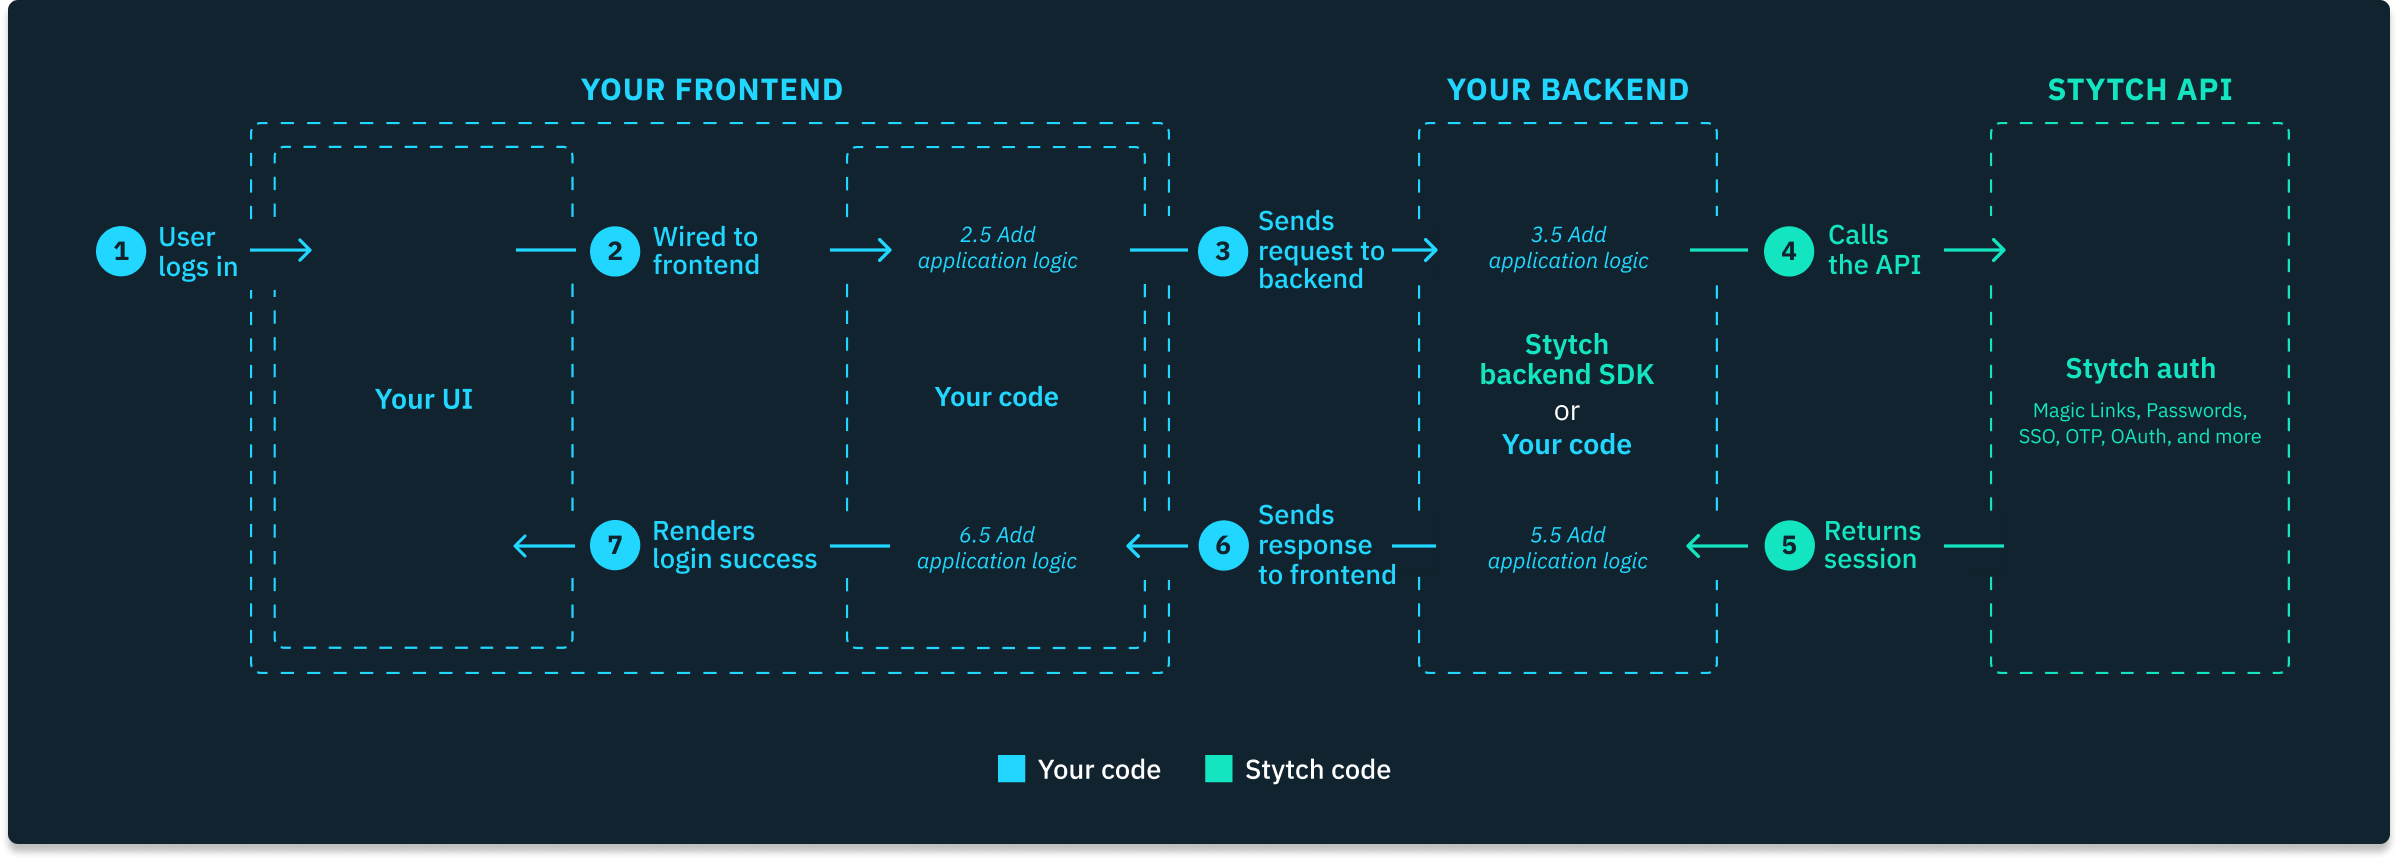
- Your backend collects all necessary authentication data (e.g., IDs, tokens, emails, and metadata) and calls the Stytch API to perform a specific auth-related operation (e.g., initiate an auth flow, retrieve a user record, and refresh a session).
- Stytch API processes the request and returns a response with pertinent data (e.g., minted session, user data, auth metadata, and statuses).
- Your backend handles the response and transforms the data as needed, which may involve calling the Stytch API again, passing the data to a different backend or microservice, or relaying data back to your frontend.
As the most feature-complete and flexible option, our backend API and SDKs enable you to tightly integrate Stytch's auth primitives with your application's logic. However, this level of control and customization generally requires you to write more application code.
Code examples
Here are some example code snippets that demonstrate the general idea of implementing Stytch on the backend.
Authentication flows
const stytch = require('stytch');
const stytchClient = new stytch.Client({
  project_id: "PROJECT_ID"
  secret: "SECRET",
});

// Start the authentication flow
app.post("/login-or-signup", async function (req, res) {
  try {
    const params = { email: req.body.email, create_user_as_pending: true };
    const resp = await stytchClient.magicLinks.email.loginOrCreate(params);
    res.status(200).end();
  } catch (err) {
   console.error(err);
   res.status(400).send('Authentication failed');
 }
});

// Complete the authentication flow which mints the session
app.get("/authenticate", async function (req, res) {
  try {
    const params = { token: req.body.token, session_duration_minutes: 60 };
    const resp = await stytchClient.magicLinks.authenticate(params);
    res.cookie("stytch_session_jwt", resp.session_jwt);
    res.redirect('/dashboard');
  } catch (err) {
   console.error(err);
   res.status(401).send('Authentication failed');
 }
});
...
Session management
// Authenticate the session
async function isAuthenticated(req, res, next) {
  try {
    const sessionJWT = req.cookies.stytch_session_jwt;
    const resp = await stytchClient.sessions.authenticateJWT({session_jwt: sessionJWT});
    req.stytchUser = resp.user;
    next();
  } catch (err) {
   console.error(err);
   res.status(401).send('Authentication failed');
  }
}

// Protect a route
app.get('/dashboard', isAuthenticated, (req, res) => {
  res.send('Welcome to your dashboard');
});

// Revoke a session
app.get('/logout', async (req, res) => {
  try {
    const sessionJWT = req.cookies.stytch_session_jwt;
    const logout = await stytchClient.sessions.revoke({session_jwt: sessionJWT});
    res.clearCookie("stytch_session_jwt");
    res.redirect('/login');
  } catch (err) {
    console.error(err);
    res.status(400).end();
  }
});
...
User management
// Update user record
app.put('/profile', isAuthenticated, async (req, res) => {
  try {
    const params = {
      untrusted_metadata: {
         profile_pic_url: req.body["profile_pic_url"],
         display_name: req.body["display_name"]
      },
      trusted_metadata: {
	      billing_address: req.body["billing_address"]
      }
    };
    const resp = await stytchClient.users.update(req.stytchUser.user_id);
    // Update user record in your database
    res.status(200).end();
  } catch (err) {
    console.error(err);
    res.status(401).end();
  }
});
Considerations when using our backend API and SDKs
Hydrating sessions on the frontend
If you’re authenticating users and minting sessions on the backend with Stytch, you can hydrate sessions on your frontend by setting the cookie server-side with the corresponding session_jwt or session_token.
const resp = await stytchClient.magicLinks.authenticate(params);
// Set cookie with the newly minted Stytch session to pass on to your frontend
res.cookie("stytch_session_jwt", resp.session_jwt);
res.cookie("stytch_session", resp.session_token);
If you’re also using our frontend SDKs for session management, you have two options for passing the server-side session into our frontend SDK:
- You can set the cookies directly in a similar manner to the code above. It's important to correctly set the cookie names as stytch_session_jwt and stytch_session (or whatever you customized their names to be) and call the sessions.authenticate() method. Our frontend SDKs will then use the new values from these cookies, overwriting any session cookies it might’ve generated previously, and proceed to manage the backend-created session as expected.
- We recommend you use the frontend SDK sessions.updateSession method.
stytchClient.session.updateSession({
  session_token: 'a session token from your backend',
  session_jwt: 'a session JWT from your backend',
});
You can read more about session hydration here.
Keeping Stytch and your database in sync
Stytch serves as a datastore for your users' identity records and attributes (e.g. email addresses, phone numbers, metadata, and auth registrations), which you can access via our user management endpoints like the Get User endpoint and the Search Users endpoint. Moreover, Stytch allows you to moderately extend User records with metadata fields that can store custom JSON data specific to your application – which is particularly useful for session authentication and authorization decisions.
However, most applications have their own primary database to store their users' account data. We recommend storing Stytch user_ids in that database in order to associate your internal accounts with their corresponding Stytch User records. Upon receiving a success response from Stytch’s API, your backend should create a new user record or update an existing one in your database when applicable.
What's next
If you have additional questions about our different integration options, please feel free to reach out to us in our community Slack, our developer forum, or at support@stytch.com for further guidance.