Build your UI for SMS login
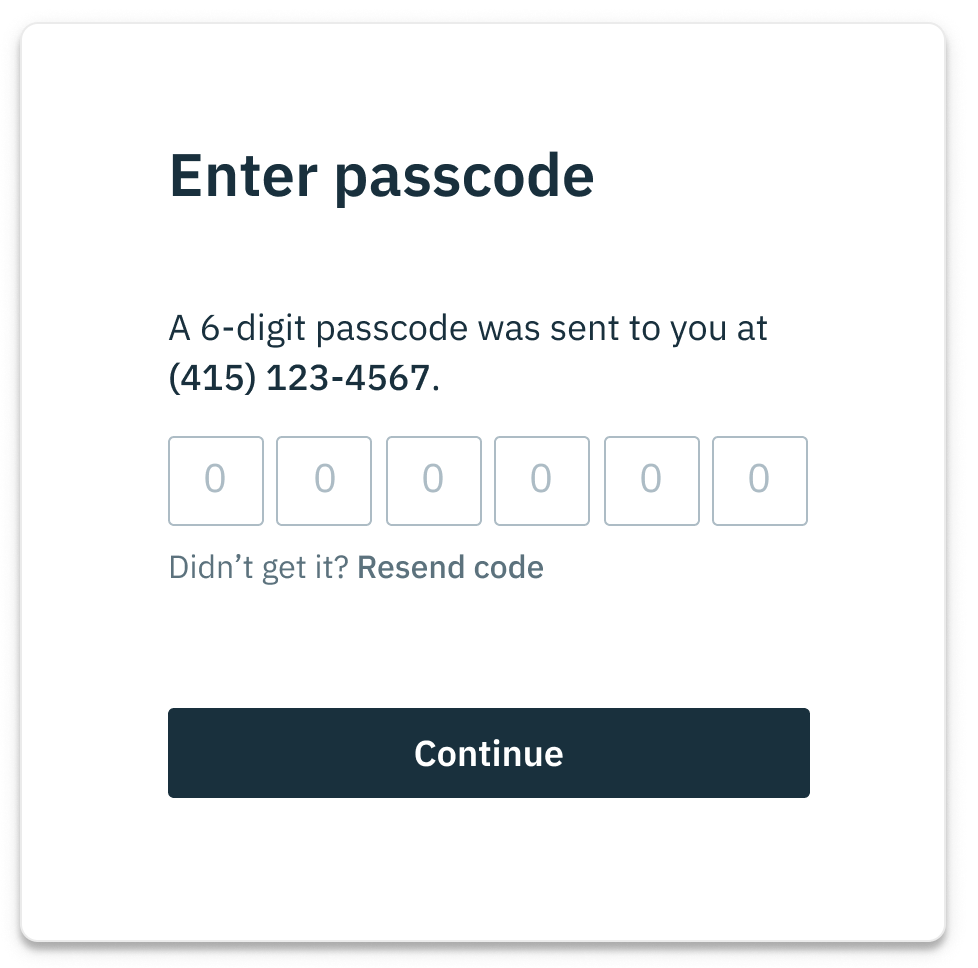
Here’s an example of an authentication flow. One screen accepts the user’s phone number and the other accepts their one-time passcode.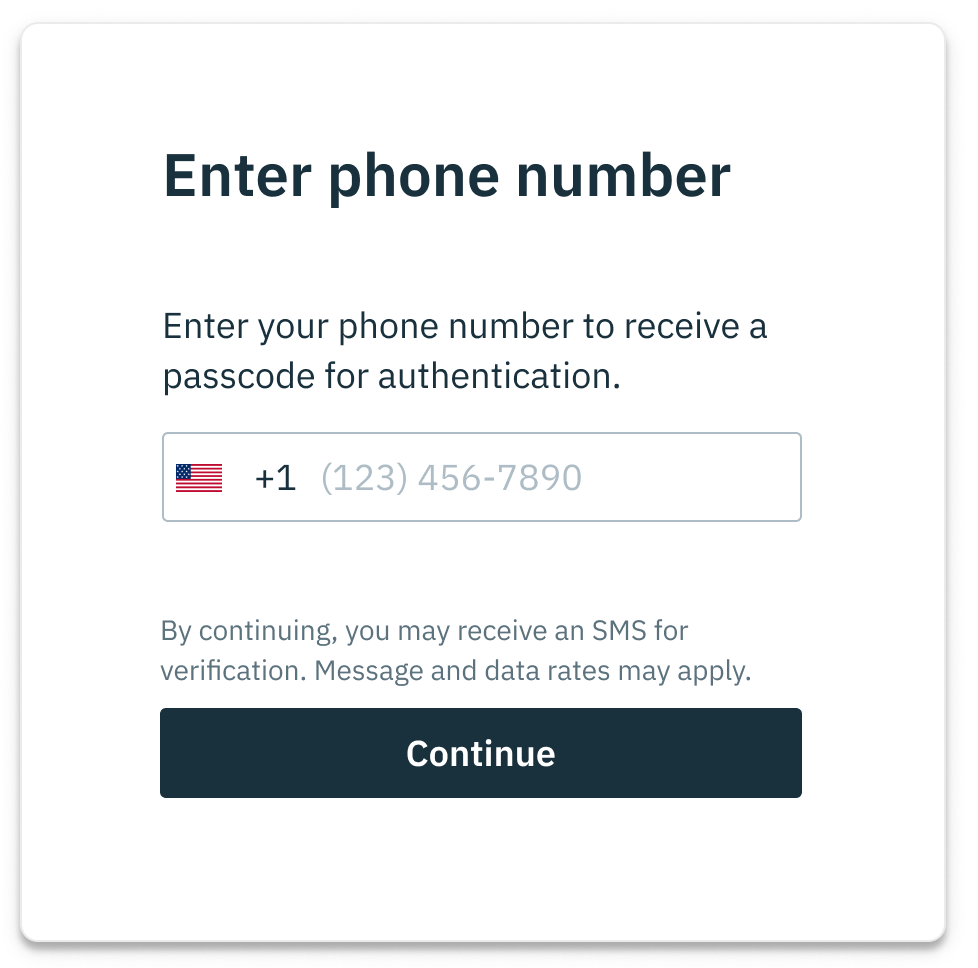
Login or create user
The LoginOrCreateUserBySMS endpoint will be used to log in or sign up a user. This request will send a one-time passcode to the provided phone number. By default, the code will expire in 2 minutes. You can alter the expiration with the ExpirationMinutes request field. If the phone number isn’t associated with a user yet, a user will be created. If the user_created attribute in the response is true, save the user ID and phone ID from the response. We recommend saving these IDs in new columns of your users table or within a new table linking your users with their Stytch IDs.
Authenticate one-time passcode
The AuthenticateOTP endpoint will be used in conjunction with all LoginOrCreateUserBySMS requests. The user should be prompted to enter the one-time passcode sent to them via SMS. After the user enters their code, send an AuthenticateOTP request with the code along with the phone ID used. If the response is a 200, the user is verified and can be logged in. If you’d like to keep this user logged-in for a while, include “session_duration_minutes”: 60 (an hour, for example). Check out the session management guide to learn how to handle the session.