/
Contact usSee pricingStart building
Node
​

    About Stytch

    Introduction
    Integration Approaches
      Full-stack overview
      Frontend (pre-built UI)
      Frontend (headless)
      Backend
    Migrations
      Migration overview
      Migrating users statically
      Migrating users dynamically
      Additional migration considerations
      Zero-downtime deployment
      Defining external IDs for users
      Exporting from Stytch
    Custom Domains
      Overview

    Authentication

    DFP Protected Auth
      Overview
      Setting up DFP Protected Auth
      Handling challenges
    Magic Links
    • Email Magic Links

      • Getting started with the API
        Getting started with the SDK
        Replacing your password reset flow
        Building an invite user flow
        Add magic links to an existing auth flow
        Adding PKCE to a Magic Link flow
        Magic Link redirect routing
    • Embeddable Magic Links

      • Getting started with the API
    MFA
      Overview
      Backend integration
      Frontend integration
    Mobile Biometrics
      Overview
    M2M Authentication
      Authenticate an M2M Client
      Rotate client secrets
      Import M2M Clients from Auth0
    OAuth
    • Identity providers

      • Overview
        Provider setup
      Getting started with the API (Google)
      Add Google One Tap via the SDK
      Email address behavior
      Adding PKCE to an OAuth flow
    Connected AppsBeta
      Setting up Connected Apps
      About Remote MCP Servers
    • Resources

      • Integrate with AI agents
        Integrate with MCP servers
        Integrate with CLI Apps
    Passcodes
      Getting started with the API
      Getting started with the SDK
    • Toll fraud

      • What is SMS toll fraud?
        How you can prevent toll fraud
      Unsupported countries
    Passkeys & WebAuthn
    • Passkeys

      • Passkeys overview
        Set up Passkeys with the frontend SDK
    • WebAuthn

      • Getting started with the API
        Getting started with the SDK
    Passwords
      Getting started with the API
      Getting started with the SDK
      Password strength policy
    • Email verification

      • Overview
        Email verification before password creation
        Email verification after password creation
    Sessions
      How to use sessions
      Backend integrations
      Frontend integrations
      Custom claims
      Custom claim templates
      Session tokens vs JWTs
      How to use Stytch JWTs
    TOTP
      Getting started with the API
      Getting started with the SDK
    Web3
      Getting started with the API
      Getting started with the SDK

    Authorization

    Implement RBAC with metadata

    3rd Party Integrations

    Planetscale
    Supabase
    Feathery
    Unit

    Testing

    E2E testing
    Sandbox values
Get support on SlackVisit our developer forum

Contact us

Consumer Authentication

/

Guides

/

Authentication

/

Connected Apps

/

Resources

/

Integrate with AI agents

Enable AI agents to securely connect to your application

In this guide, you'll learn how to turn your application into an OAuth 2.0/OIDC provider to enable user permissioned access to application via 3rd parties such as AI Agents. To illustrate how to do this, we'll create a custom GPT that connects to your application via OAuth. This works for any 3rd party that allows integrations via OAuth or OIDC.

Before you start

In order to complete this guide, you'll need:

  • A Stytch project. If you don't have one already, in the Dashboard, click on your existing project name in the top left corner of the Dashboard, click Create a new project, and then select Consumer Authentication.
  • A React, Next.js, or other JavaScript based app that uses the Stytch frontend SDKs, this will need to be available via a public URL to connect to ChatGPT. If you need something to get started, check out our Consumer example apps
  • A ChatGPT account with a Plus subscription, so that you can create a custom GPT

Integration steps

1
Implement the Stytch IDP component

In order to turn your app into an identity provider, we have created a component <IdentityProvider /> that takes care of this for you. When mounted on the page located at the Authorization URL, this component will handle the parameters passed in the URL and initiate the flow with Stytch. After the initial step succeeds, Stytch will respond with a redirect to send the user's browser to the redirect_uri with a code for the Connected App to complete the flow on its backend.

For this flow to succeed, the user must already be logged in to your Stytch-powered app and have an active session, so you'll want to check for a valid session prior to rendering the component and if the user is not logged in, redirect to the login page with a return_to parameter.

const { user } = useStytchUser();

if (!user) {
  const loginURL = `/login?returnTo=${window.location.toString()}`
  return <Redirect to={loginURL} />
}

return <IdentityProvider />

2
Set up Connected Apps in the Dashboard

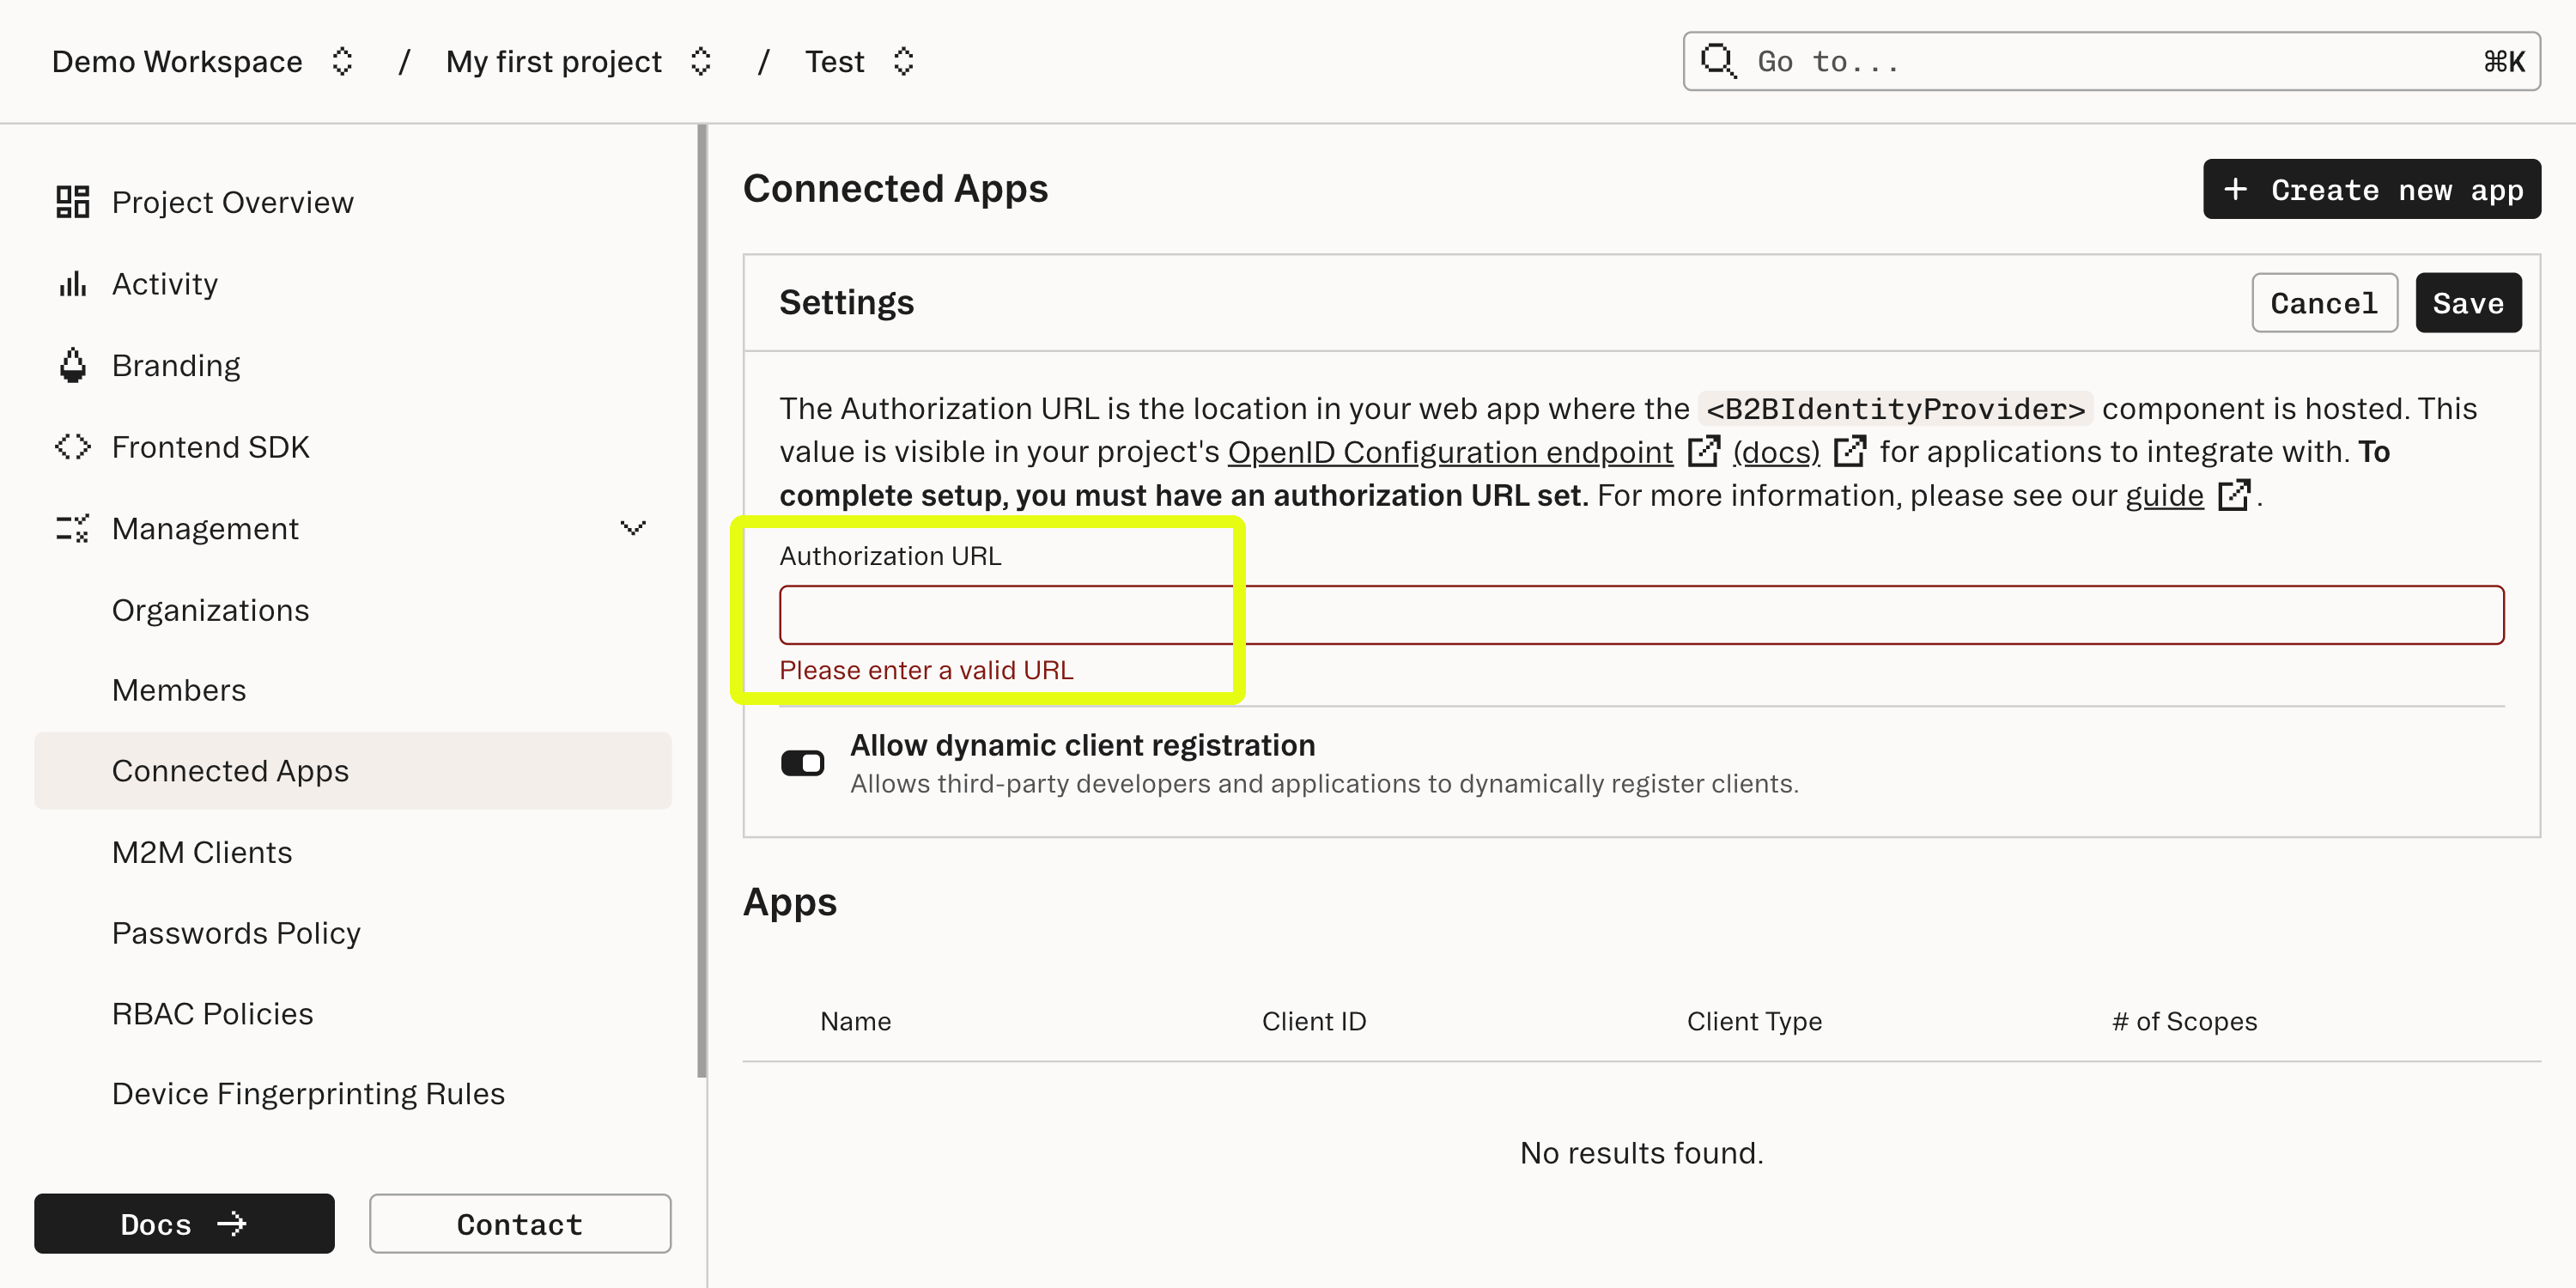
We will configure your Stytch app in the Connected Apps section of the Stytch dashboard. Enter the URL where the component is mounted into the Authorization URL field. For this example, we'll use /idp.

Configure your Connected Apps client

Your app is now an OAuth 2.0/OIDC compliant identity provider! For the next step, you'll need to deploy your updates to a publicly available URL.

3
Configure a Connected App

After Stytch handles verification of the user and the application's ability to access the user's information, Stytch will issue a redirect. This redirect is intended to go to a URL which should be supplied by the Connected App and provides some short-lived credentials that allow the Connected App to complete the authorization flow.

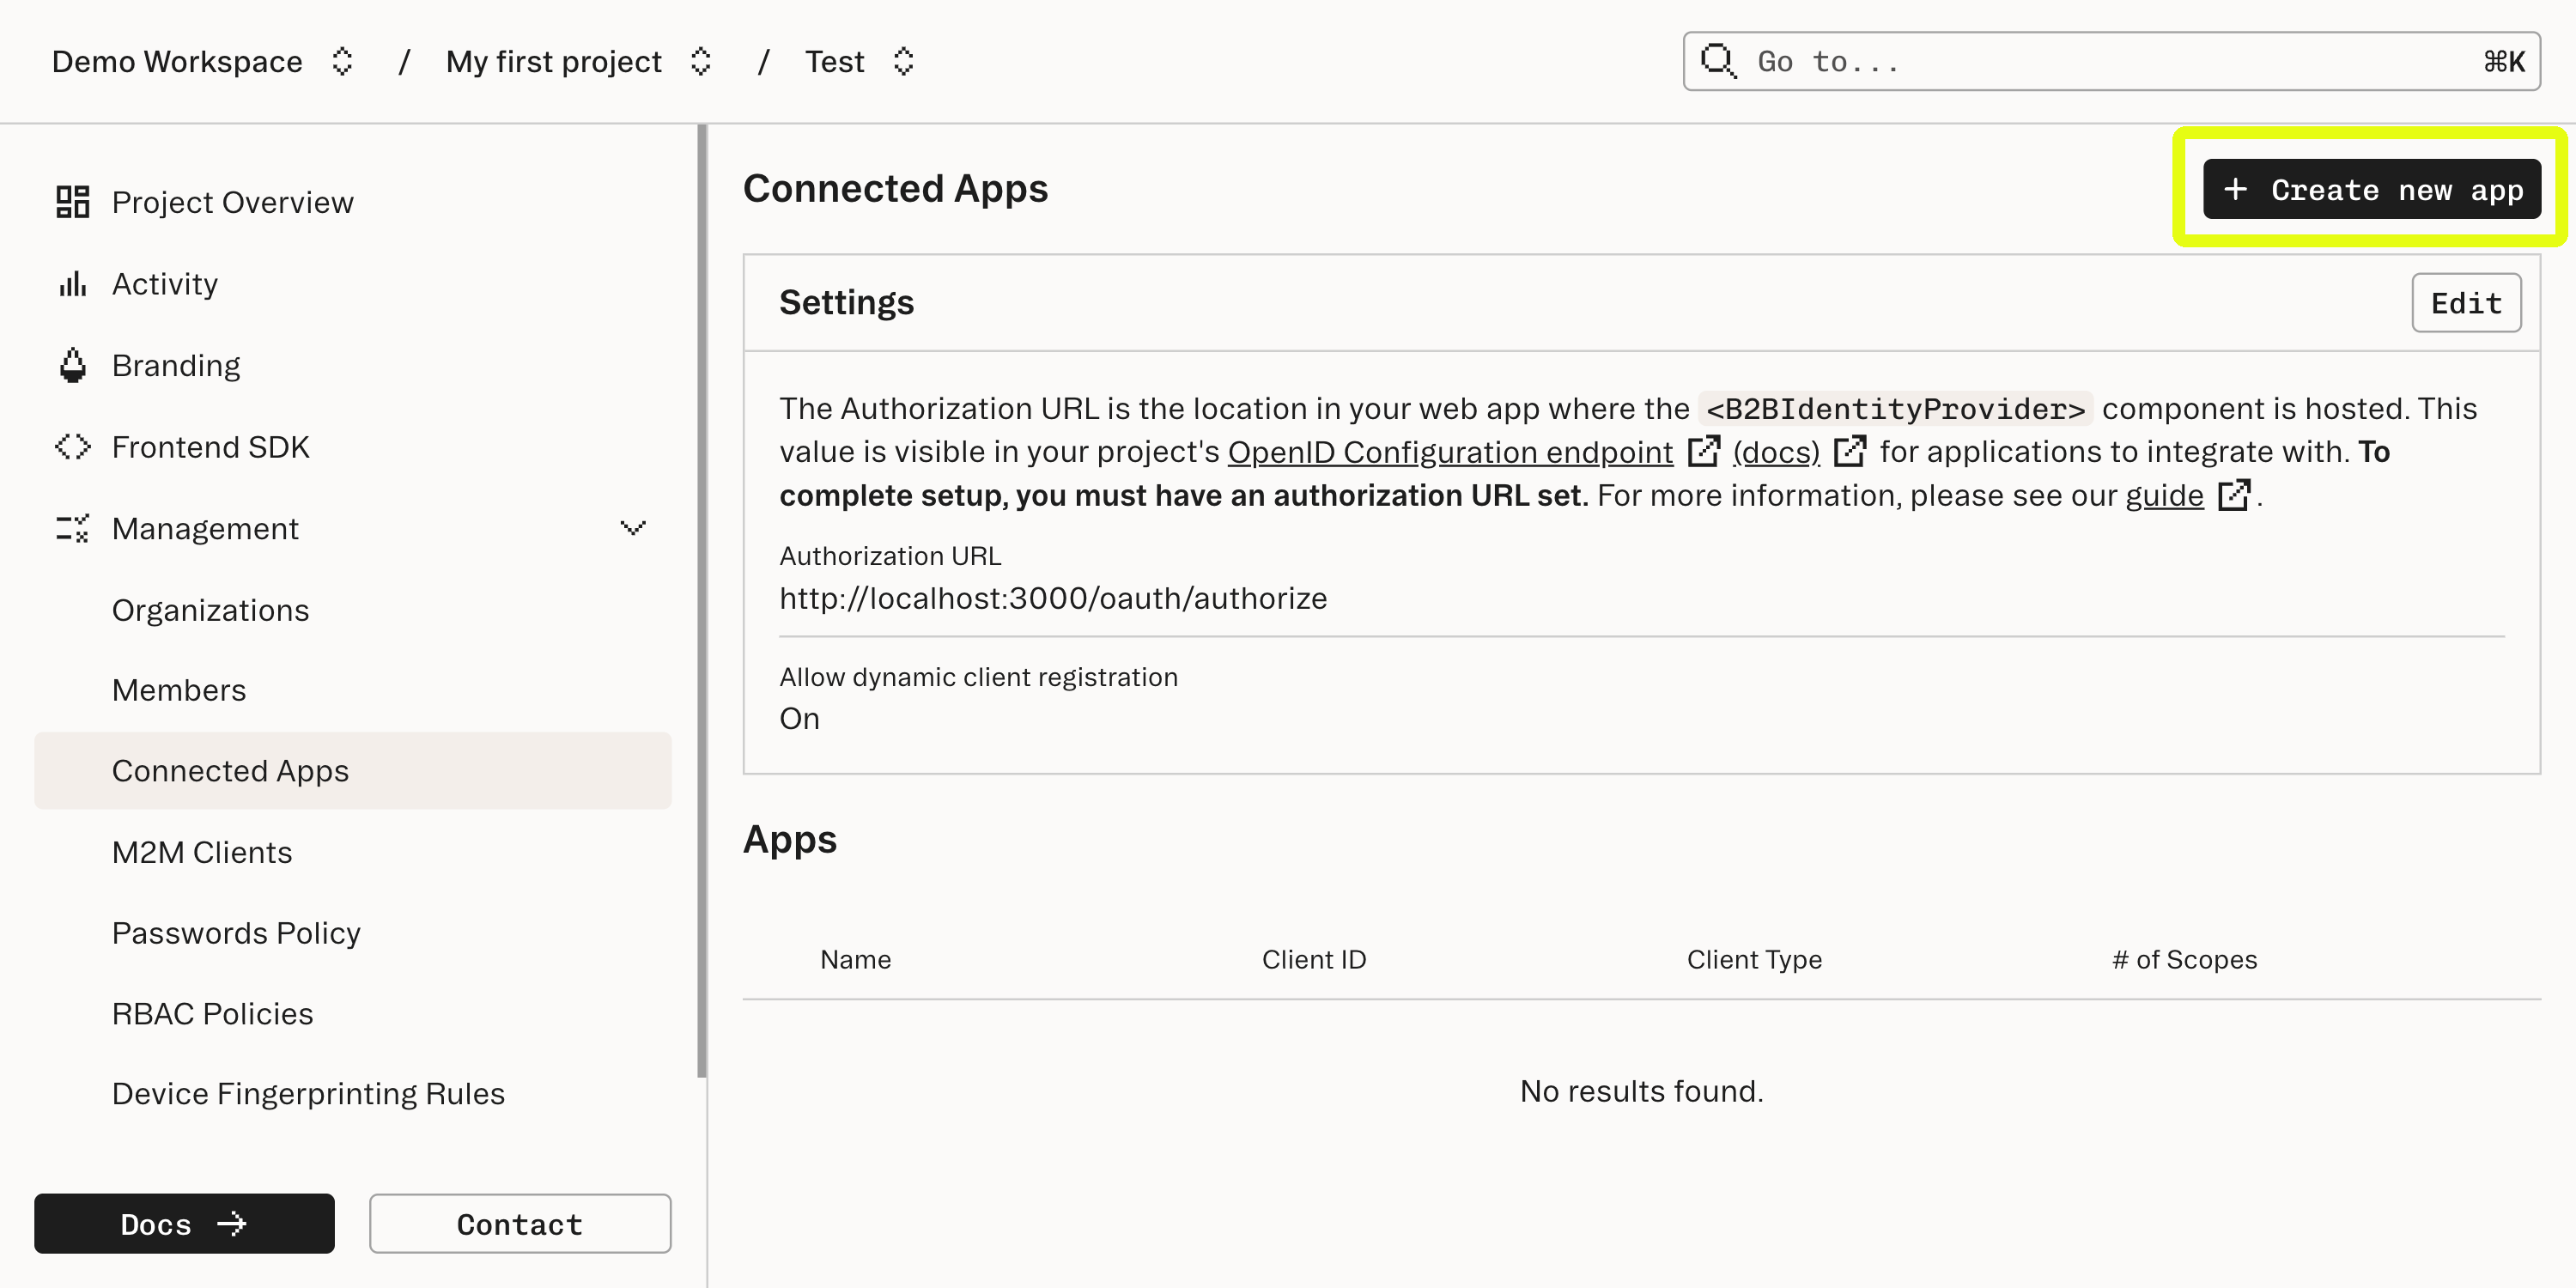
To set this up, each Connected App is also configured in the Connected Apps section of the Dashboard:

Create a new client app

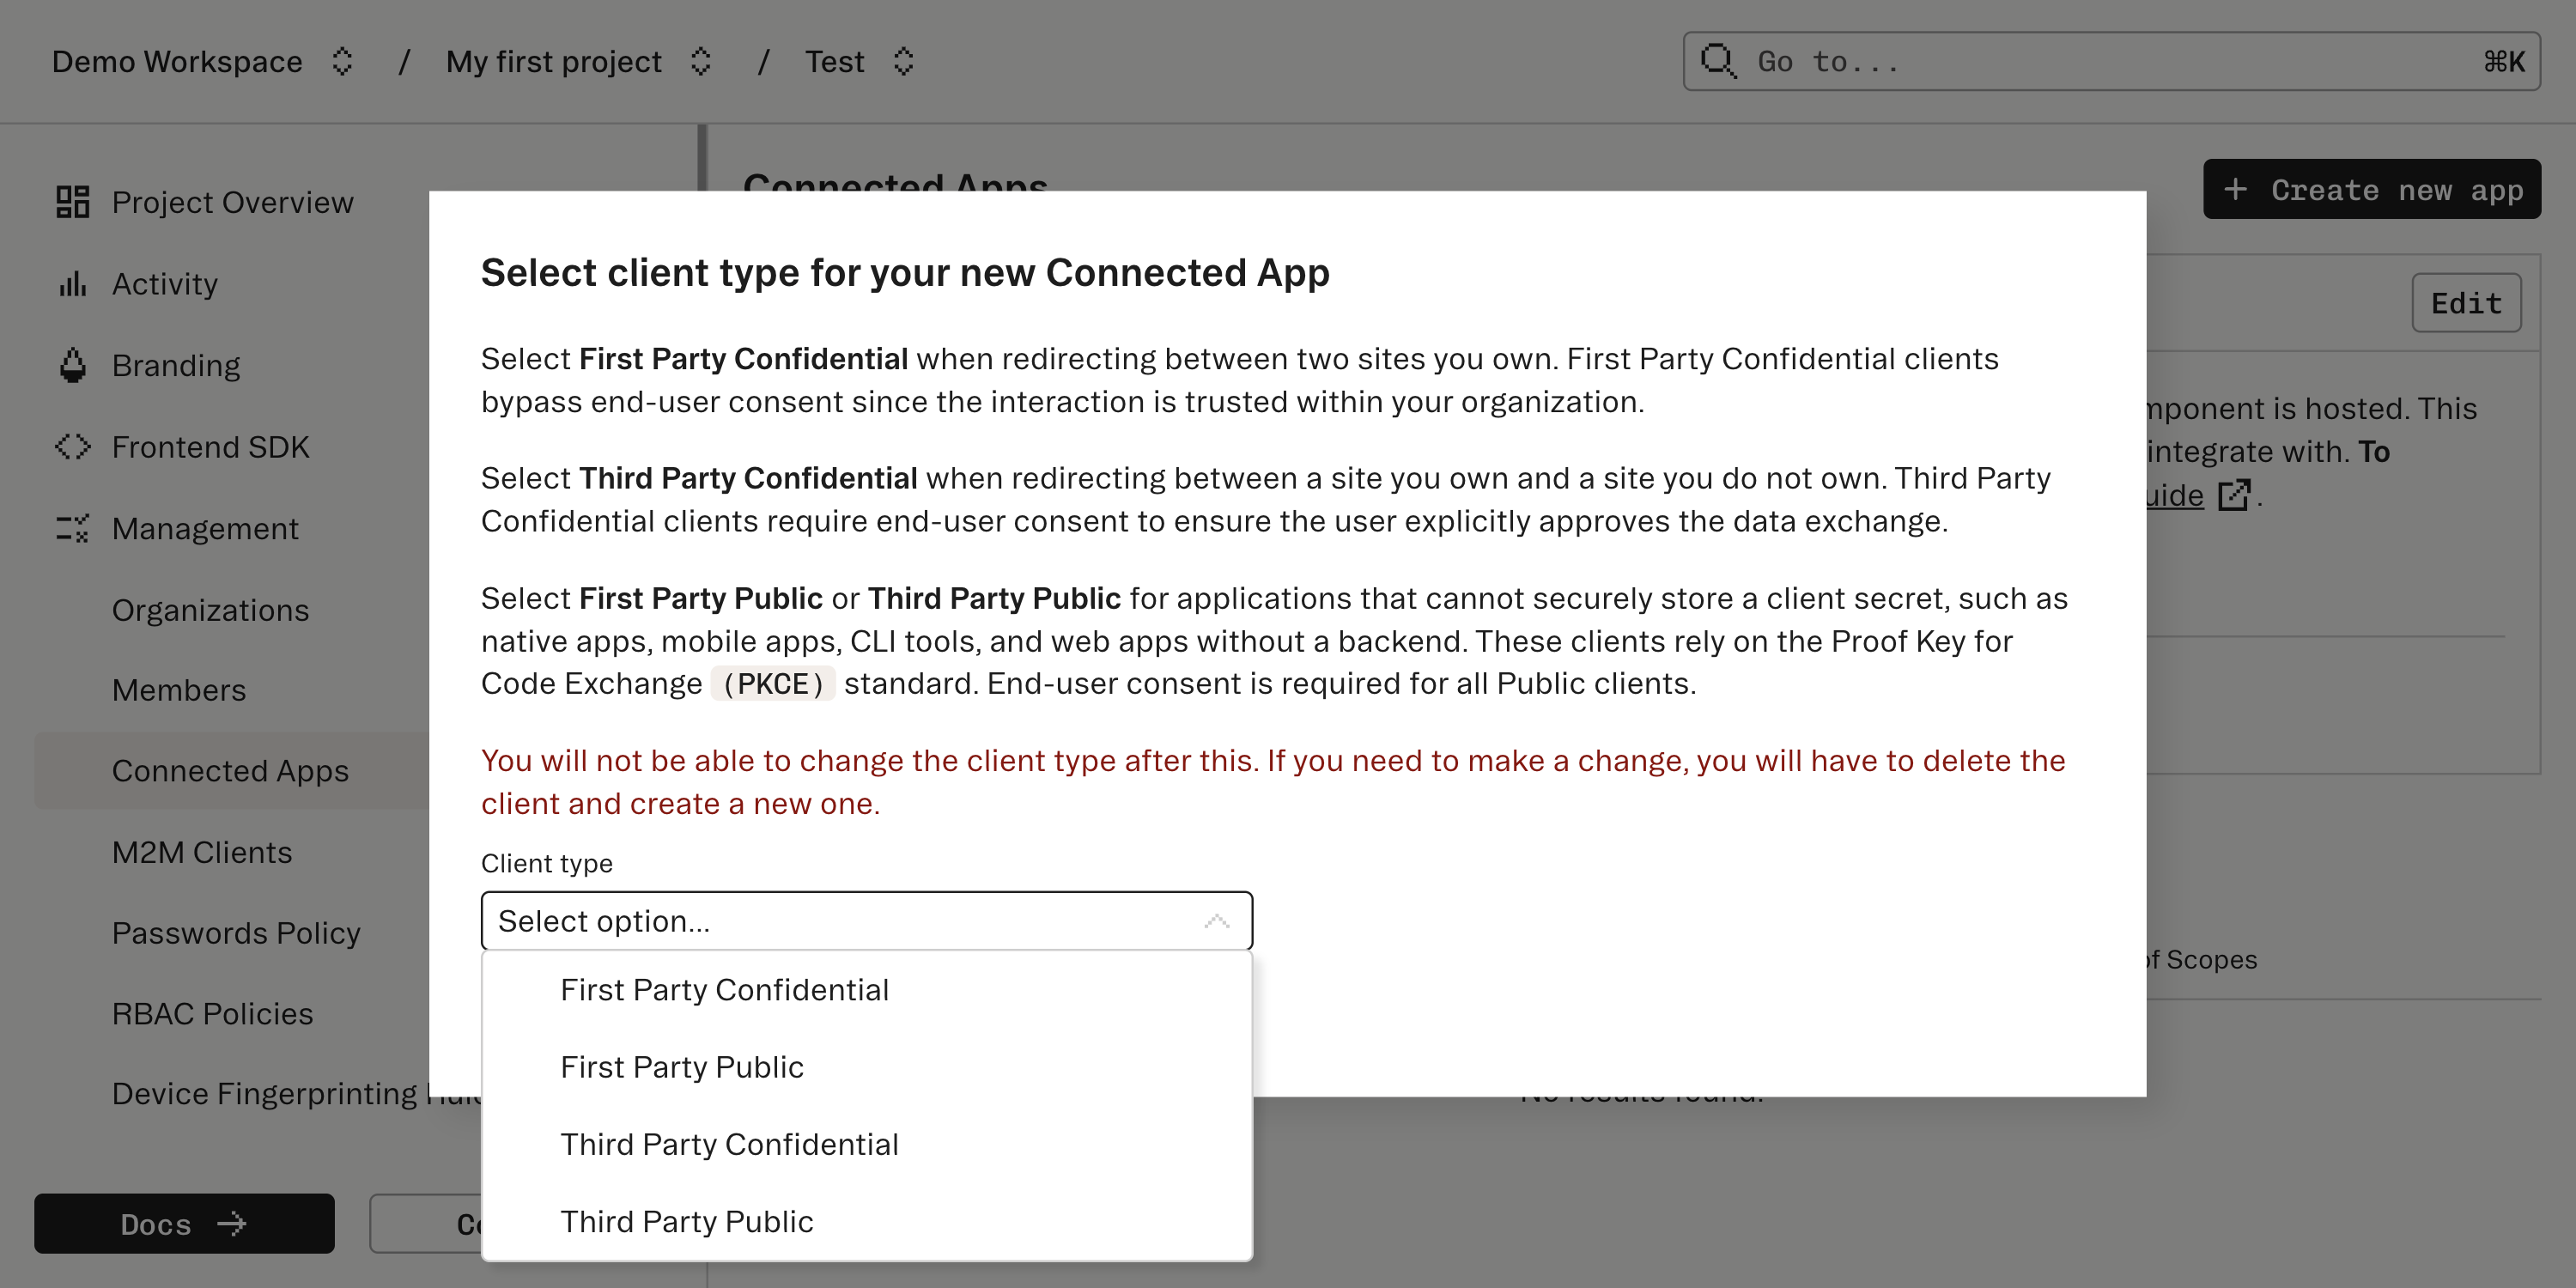
For this use case, we'll create a Third Party Confidential app, so choose that option under Client type.

Specify the type of client app

Continue to configure the Connected App on the next screen. Make sure to take a note of the "Client ID" and the "Client secret"; these will be needed by the Connecting App, in this case ChatGPT, to complete the Authorization Code Flow.

4
Set up your custom GPT

Go to ChatGPT custom GPTs and click create. Scroll to the bottom and under Actions, select create new Action. Then, under authentication configure OAuth. You'll want to specify the following:

  • Client ID: the Client ID you just created
  • Client Secret: the Client Secret you just created
  • Authorization URL: this the URL where the IDP component is mounted, for example example.com/idp
  • Token URL: this is the URL you created in the previous step from the Stytch Dashboard
  • Scope: for this use case, specify: openid profile email
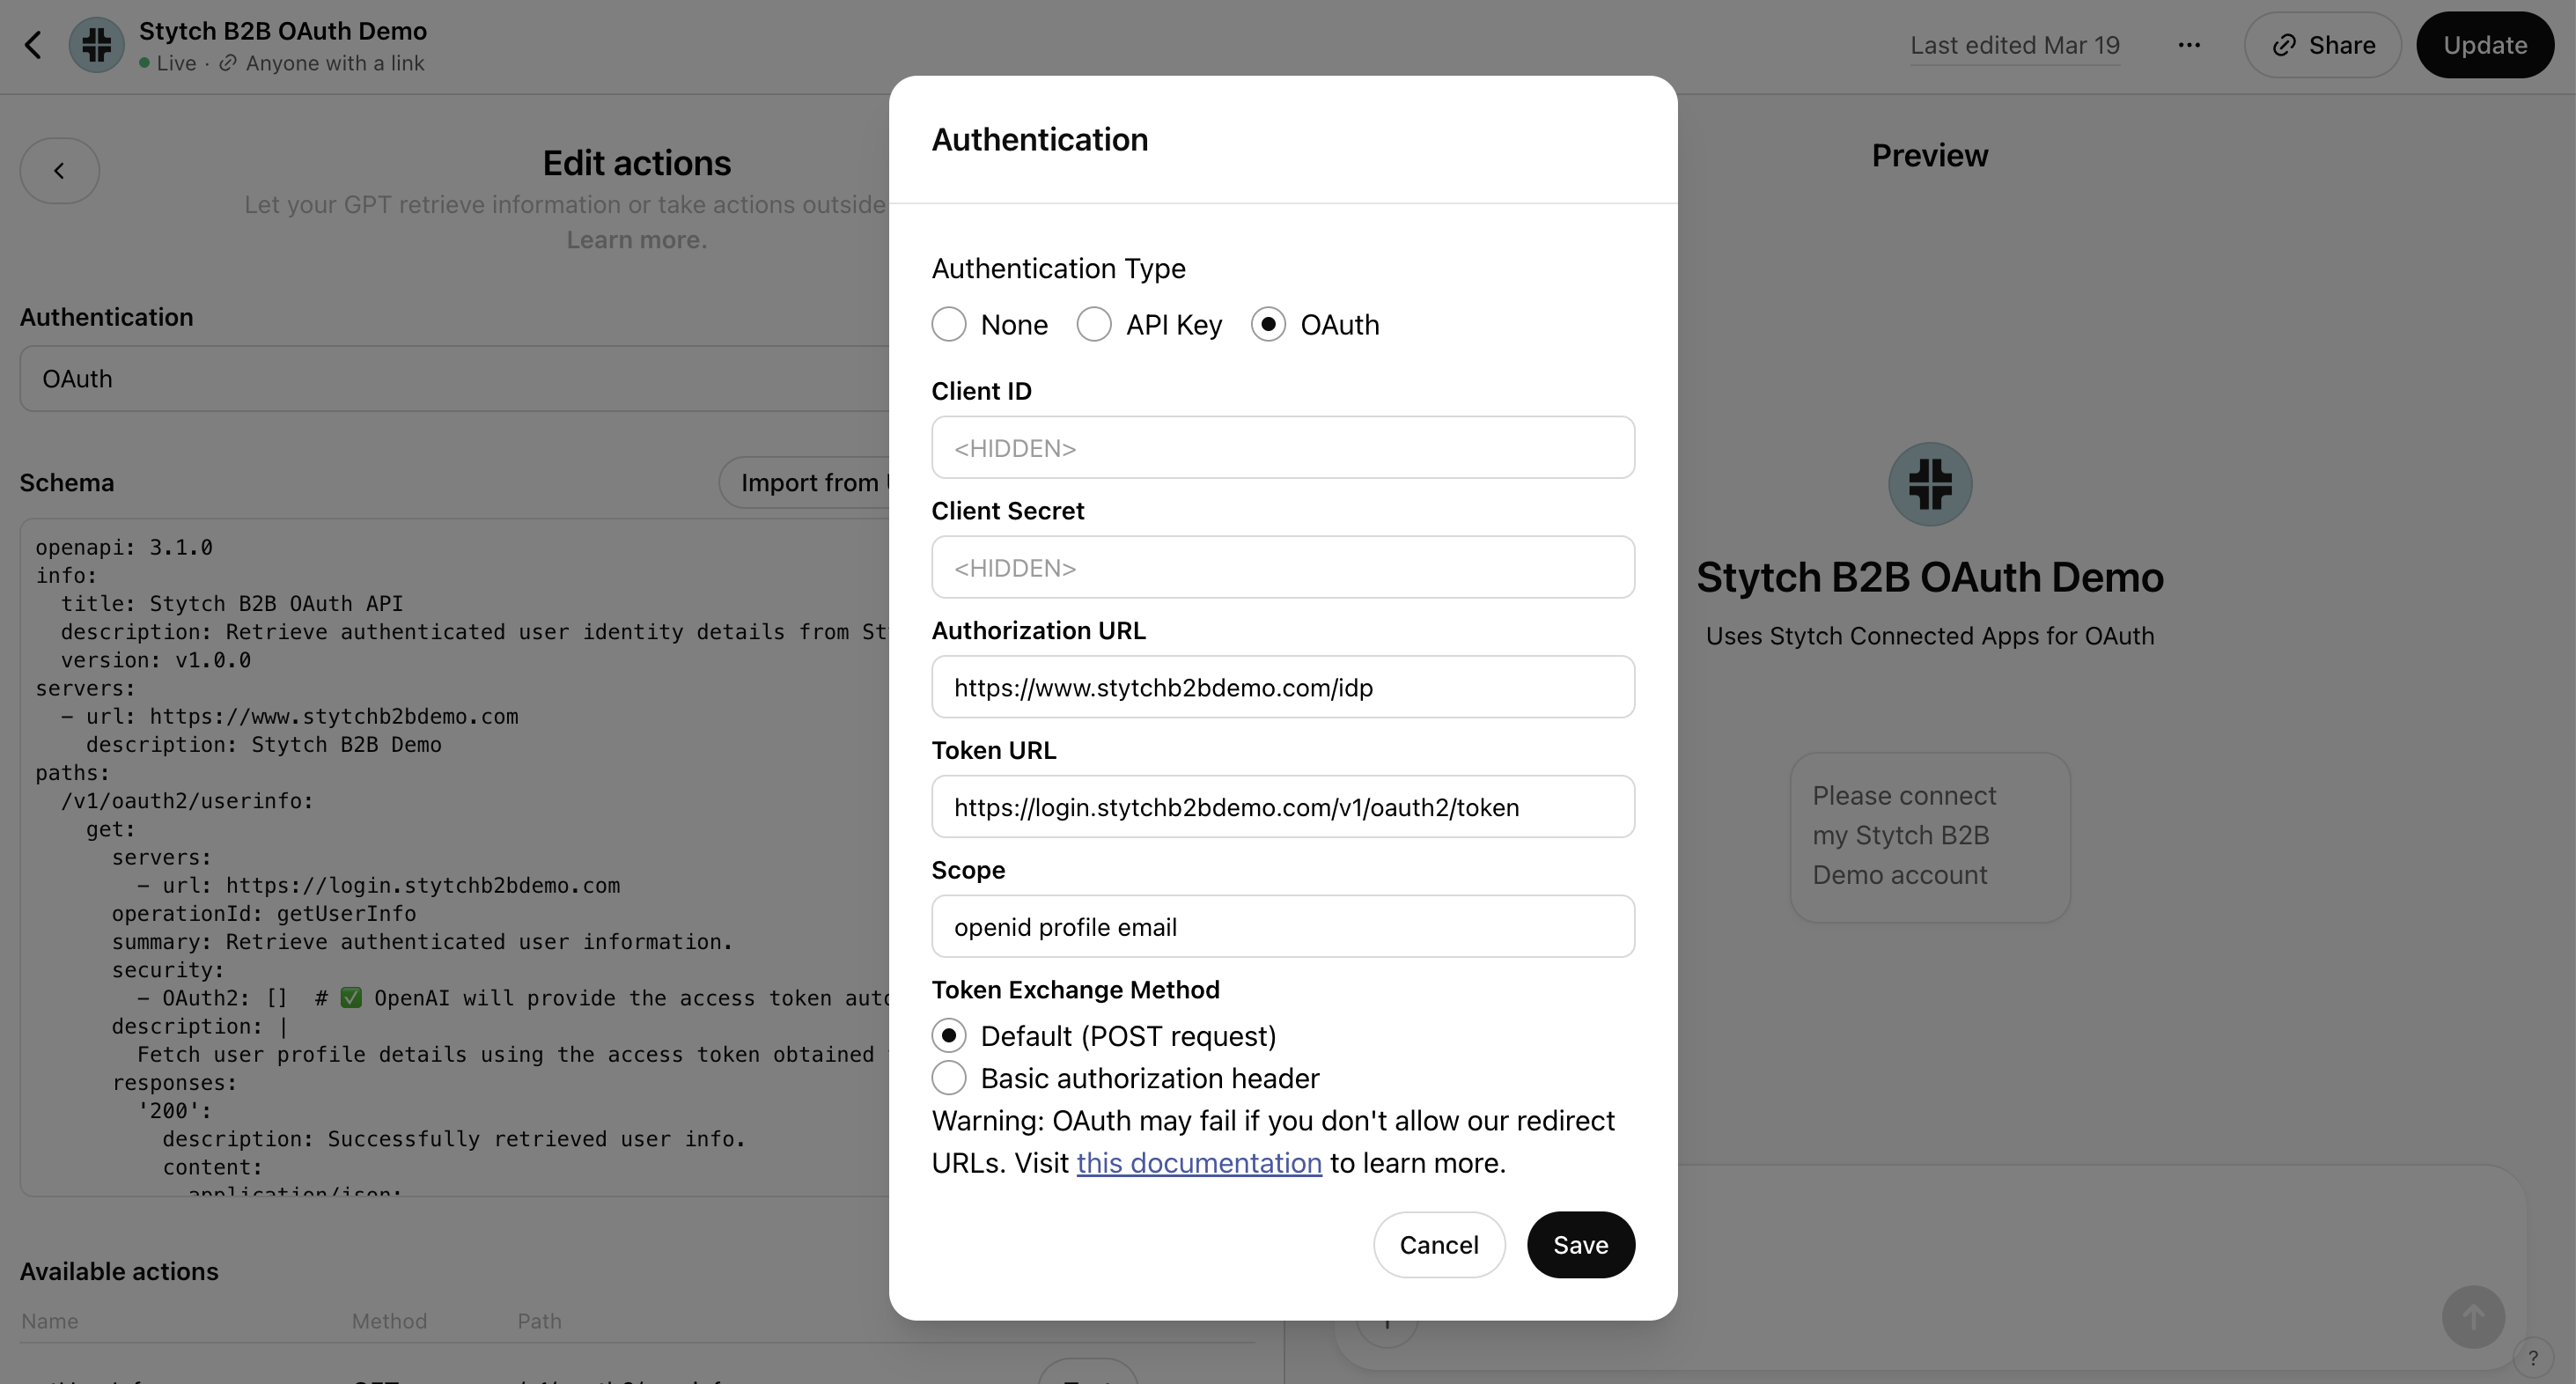
Entering in the Authorization URL

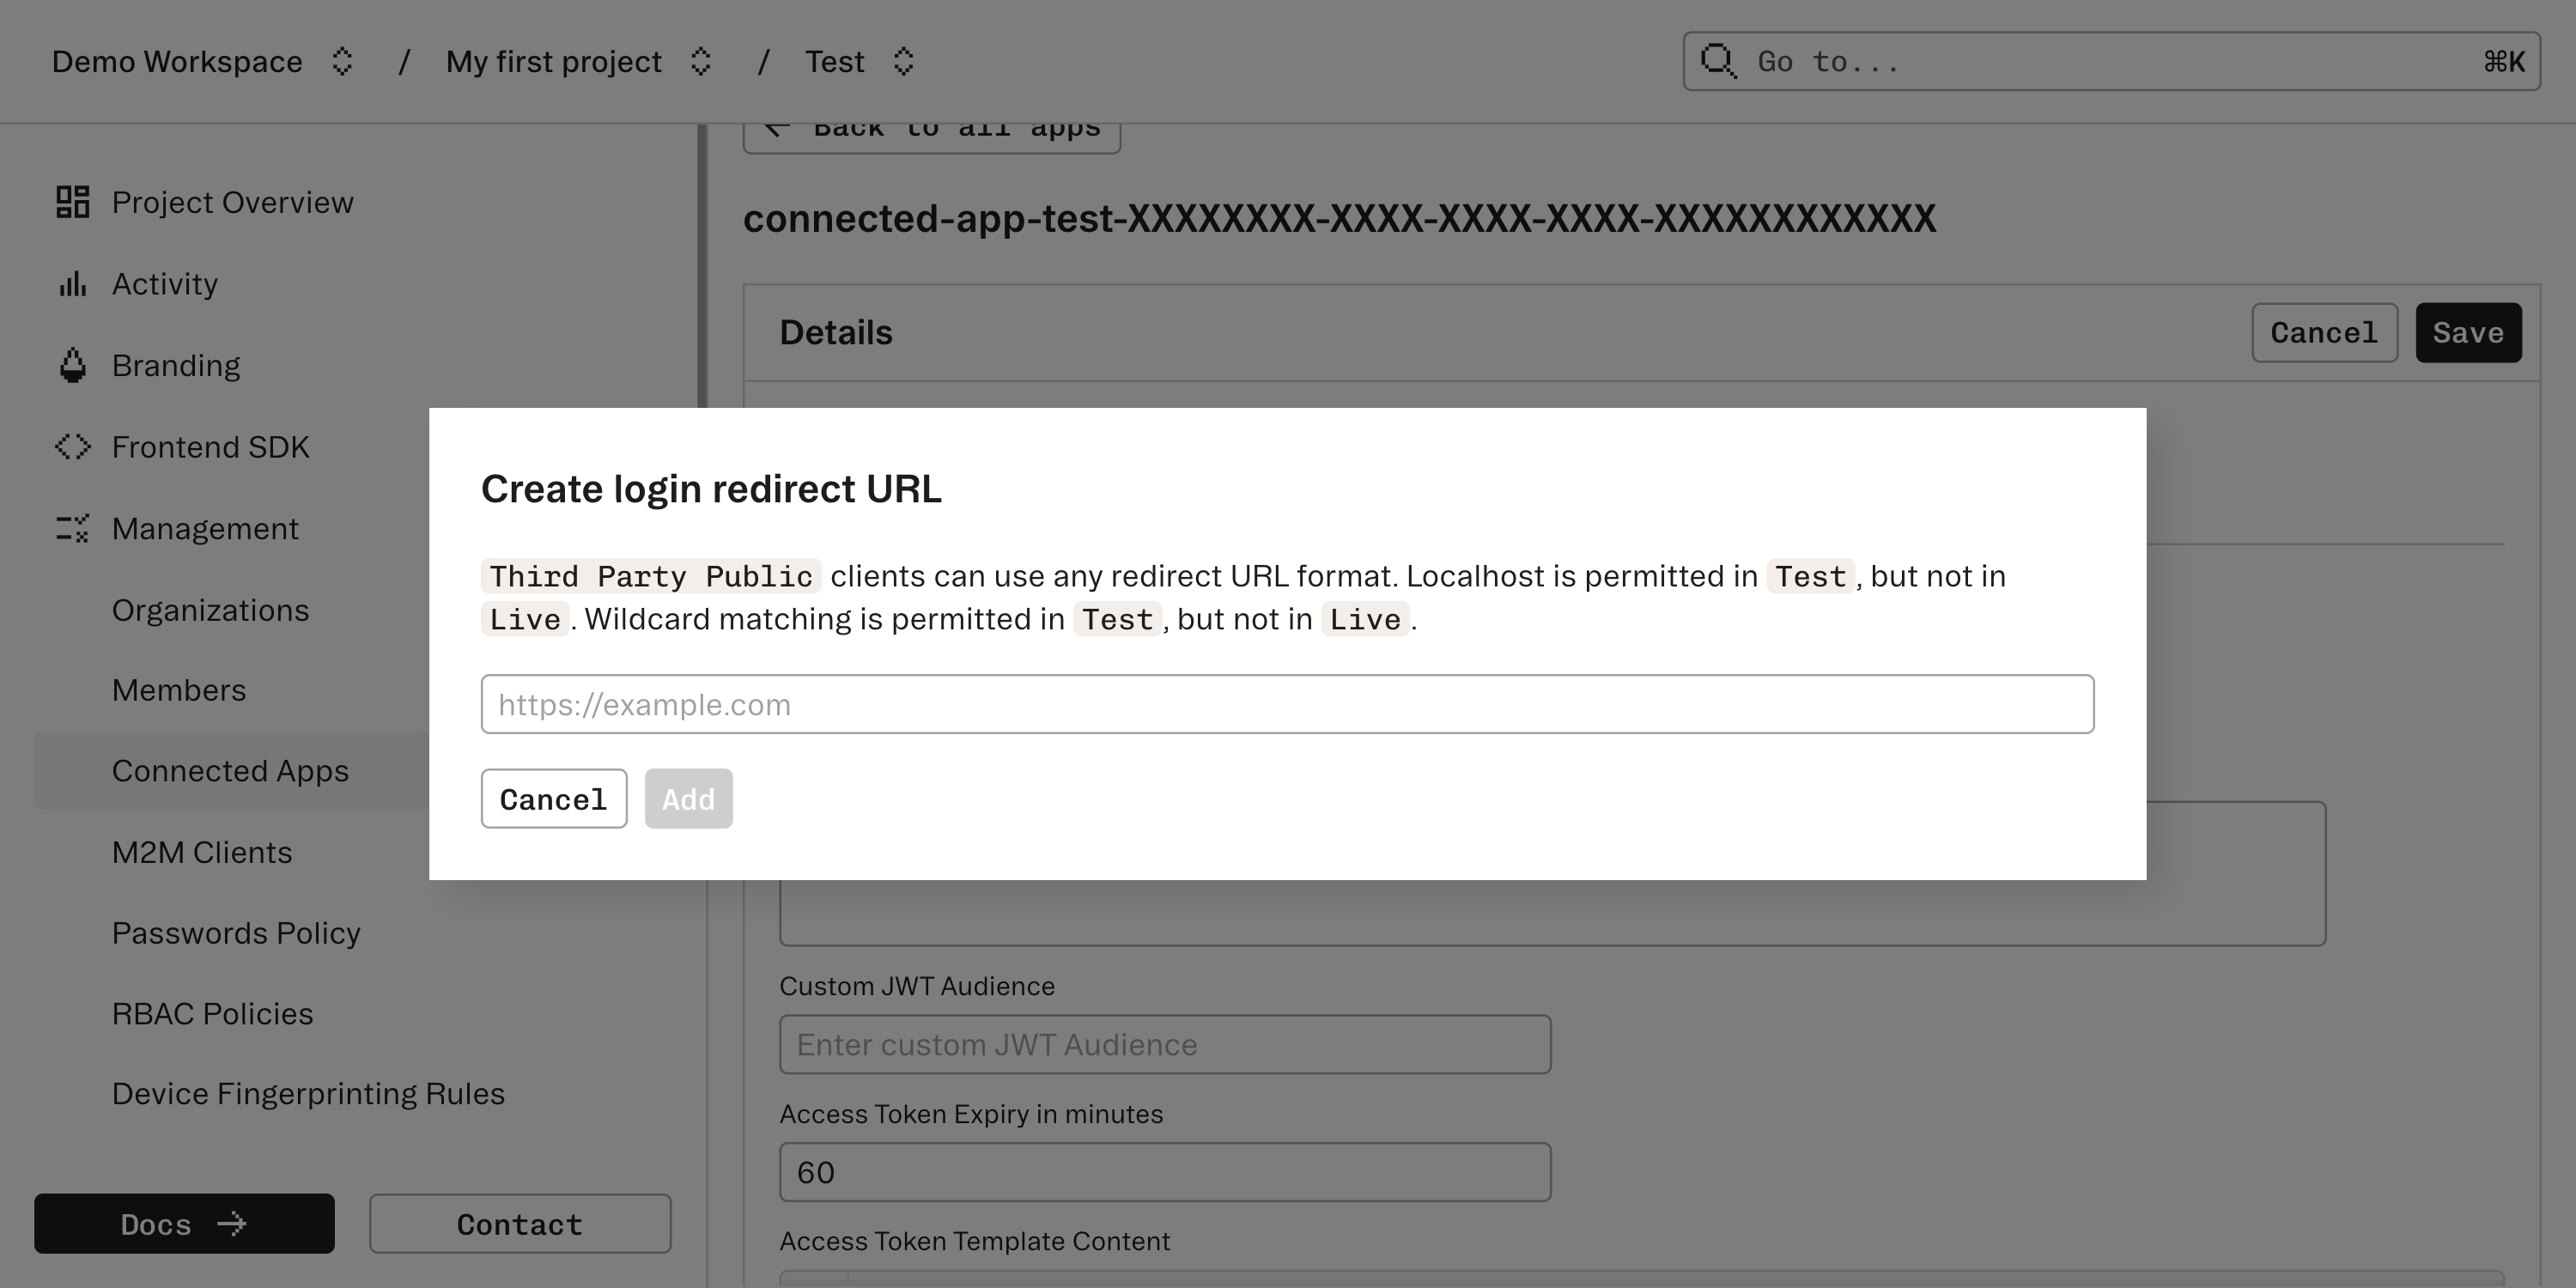
Once you've configured and saved the OAuth credentials, you'll get a Callback URL. Go back to the Stytch Dashboard and enter it under "Redirect URLs" for the configured Connected App.

Create a redirect URL for the client app

You're ready to go with your app connected to ChatGPT!

5
Configure your custom GPT to integrate with your app

Finally, you'll want to add an OpenAPI spec to your custom GPT so that it knows what endpoints it can call using the Access Token from the OAuth connection. You can see an example.

What's next

Learn more:

  • Explore an example app showing this use case
  • Checkout a hosted version of this example and the corresponding custom GPT

Before you start

Integration steps

1.

Implement the Stytch IDP component

2.

Set up Connected Apps in the Dashboard

3.

Configure a Connected App

4.

Set up your custom GPT

5.

Configure your custom GPT to integrate with your app

What's next