- stytch-react-example - used as the base web app that will authorize the CLI app.
- stytch-connected-apps-cli-example - a basic CLI app made with Cobra.
access_token will be minted.
Pre-requisites
In order to complete this guide, you’ll need:- A Stytch project. If you don’t have one already, or would like to create a new one, in the Dashboard, click on your existing project name in the top left corner of the Dashboard, click Create Project, and then select Consumer Authentication.
- A web app that uses Stytch for authentication (this guide will use stytch-react-example).
- A basic CLI app (this guide will use stytch-connected-apps-cli-example).
Create a CLI app
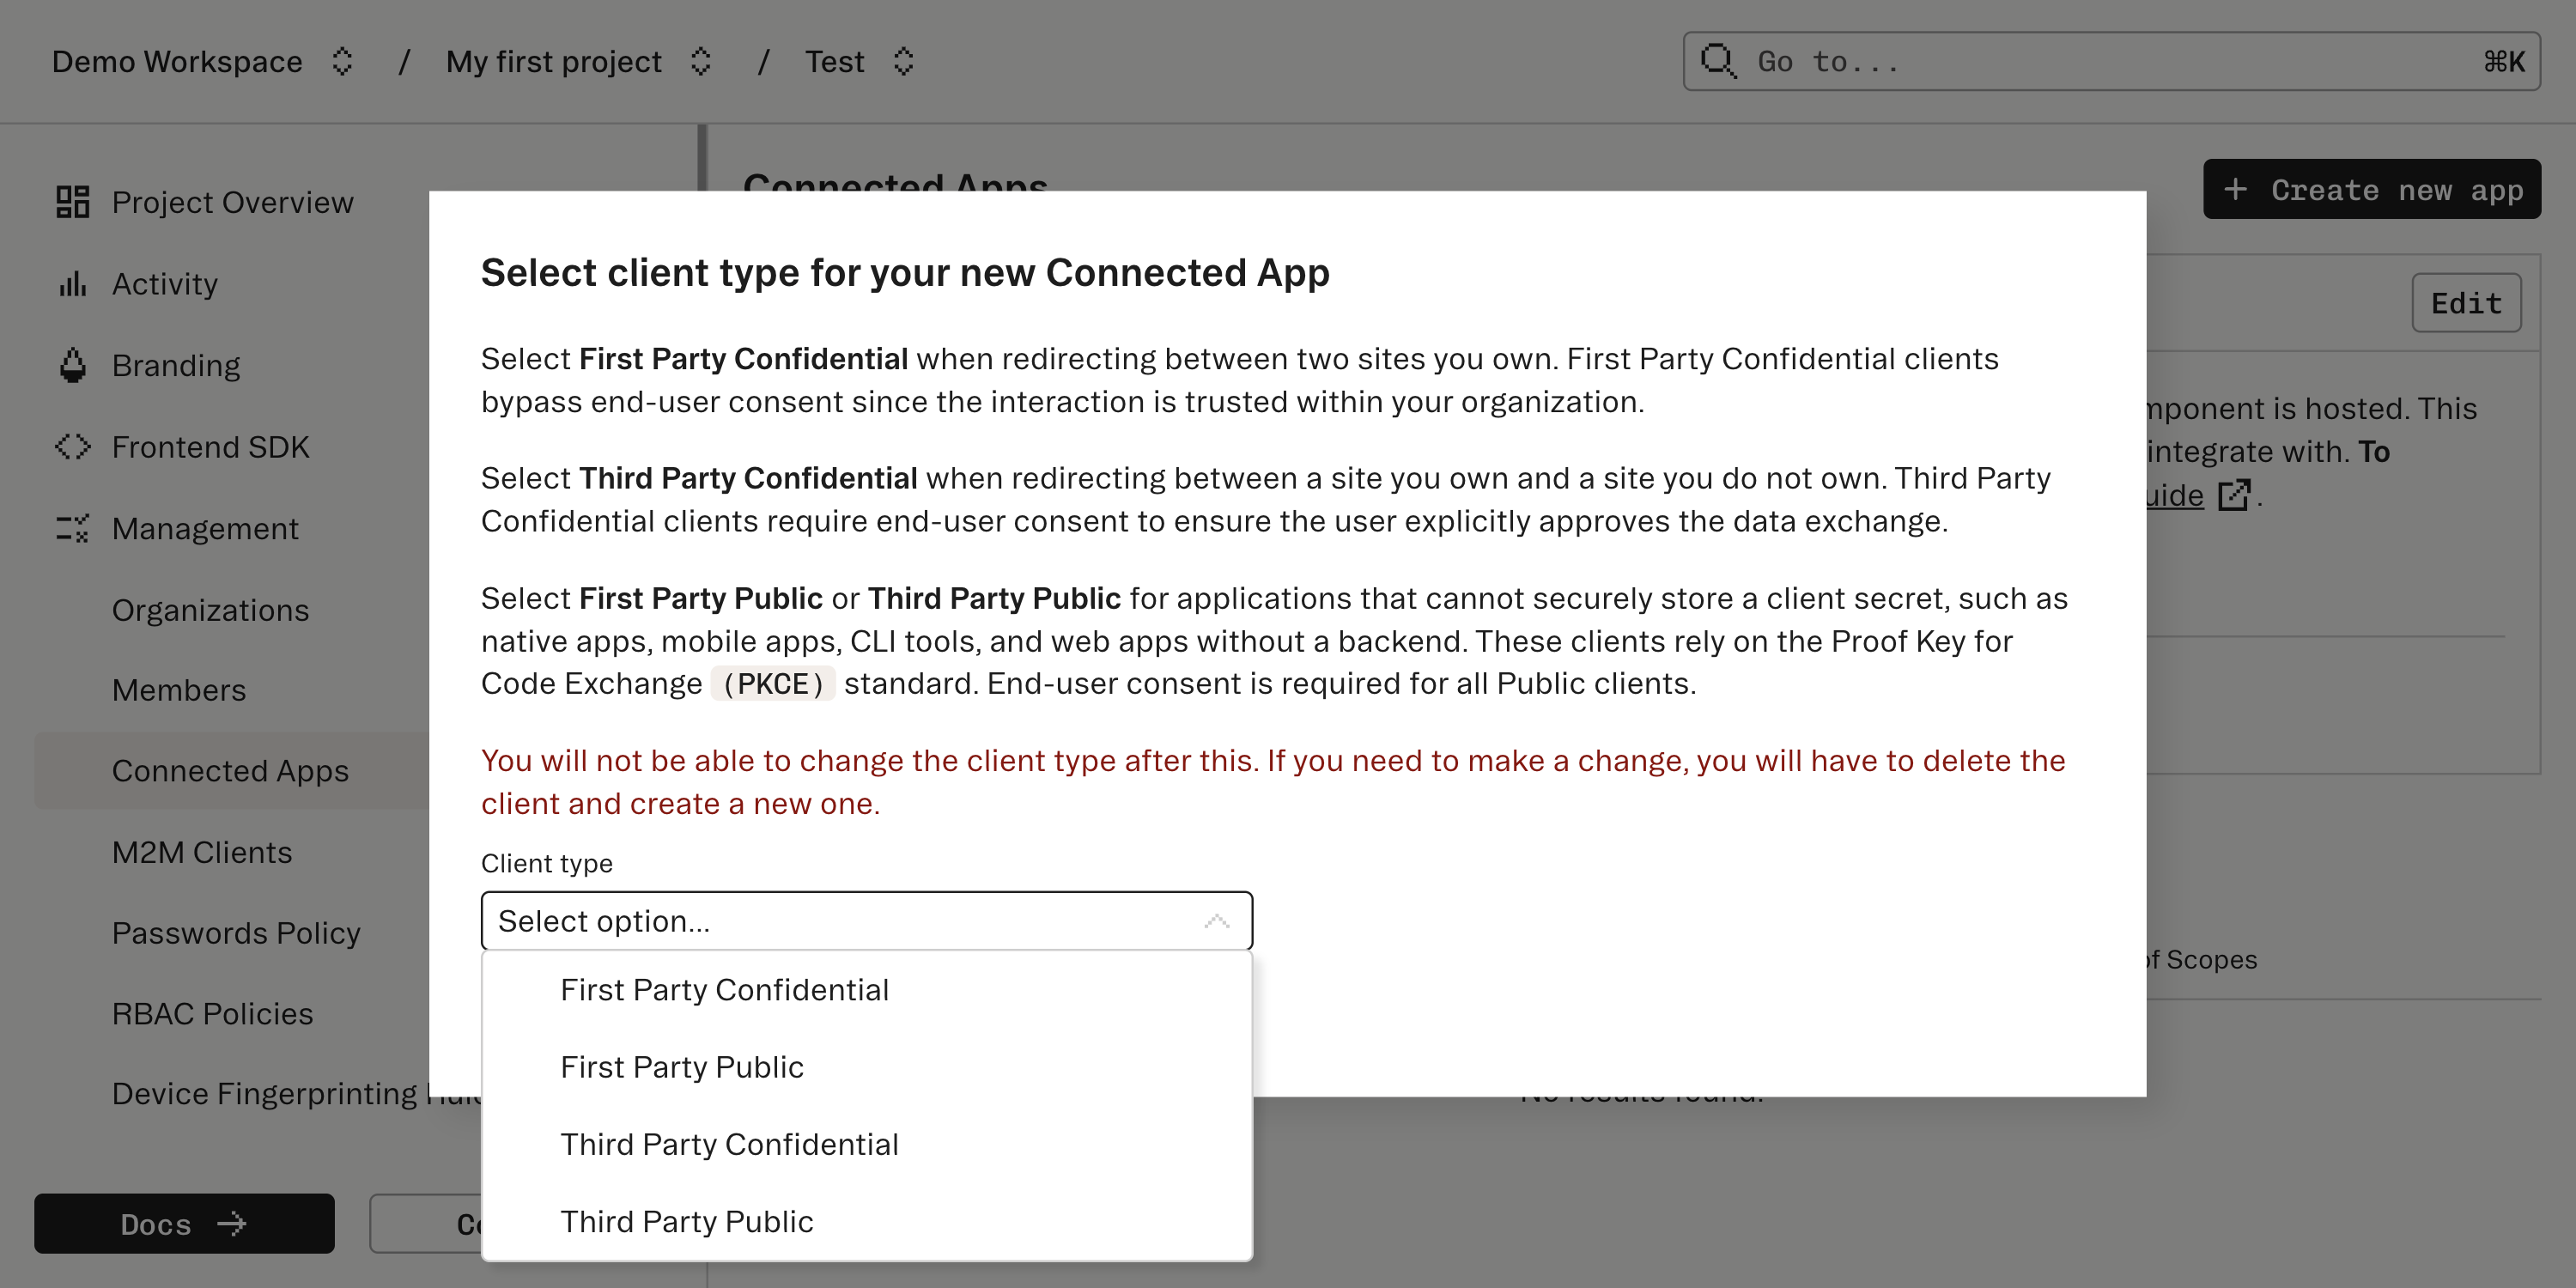
Create a Connected App
Navigate to the Connected Apps section of your Stytch Dashboard, and create a new Connected App.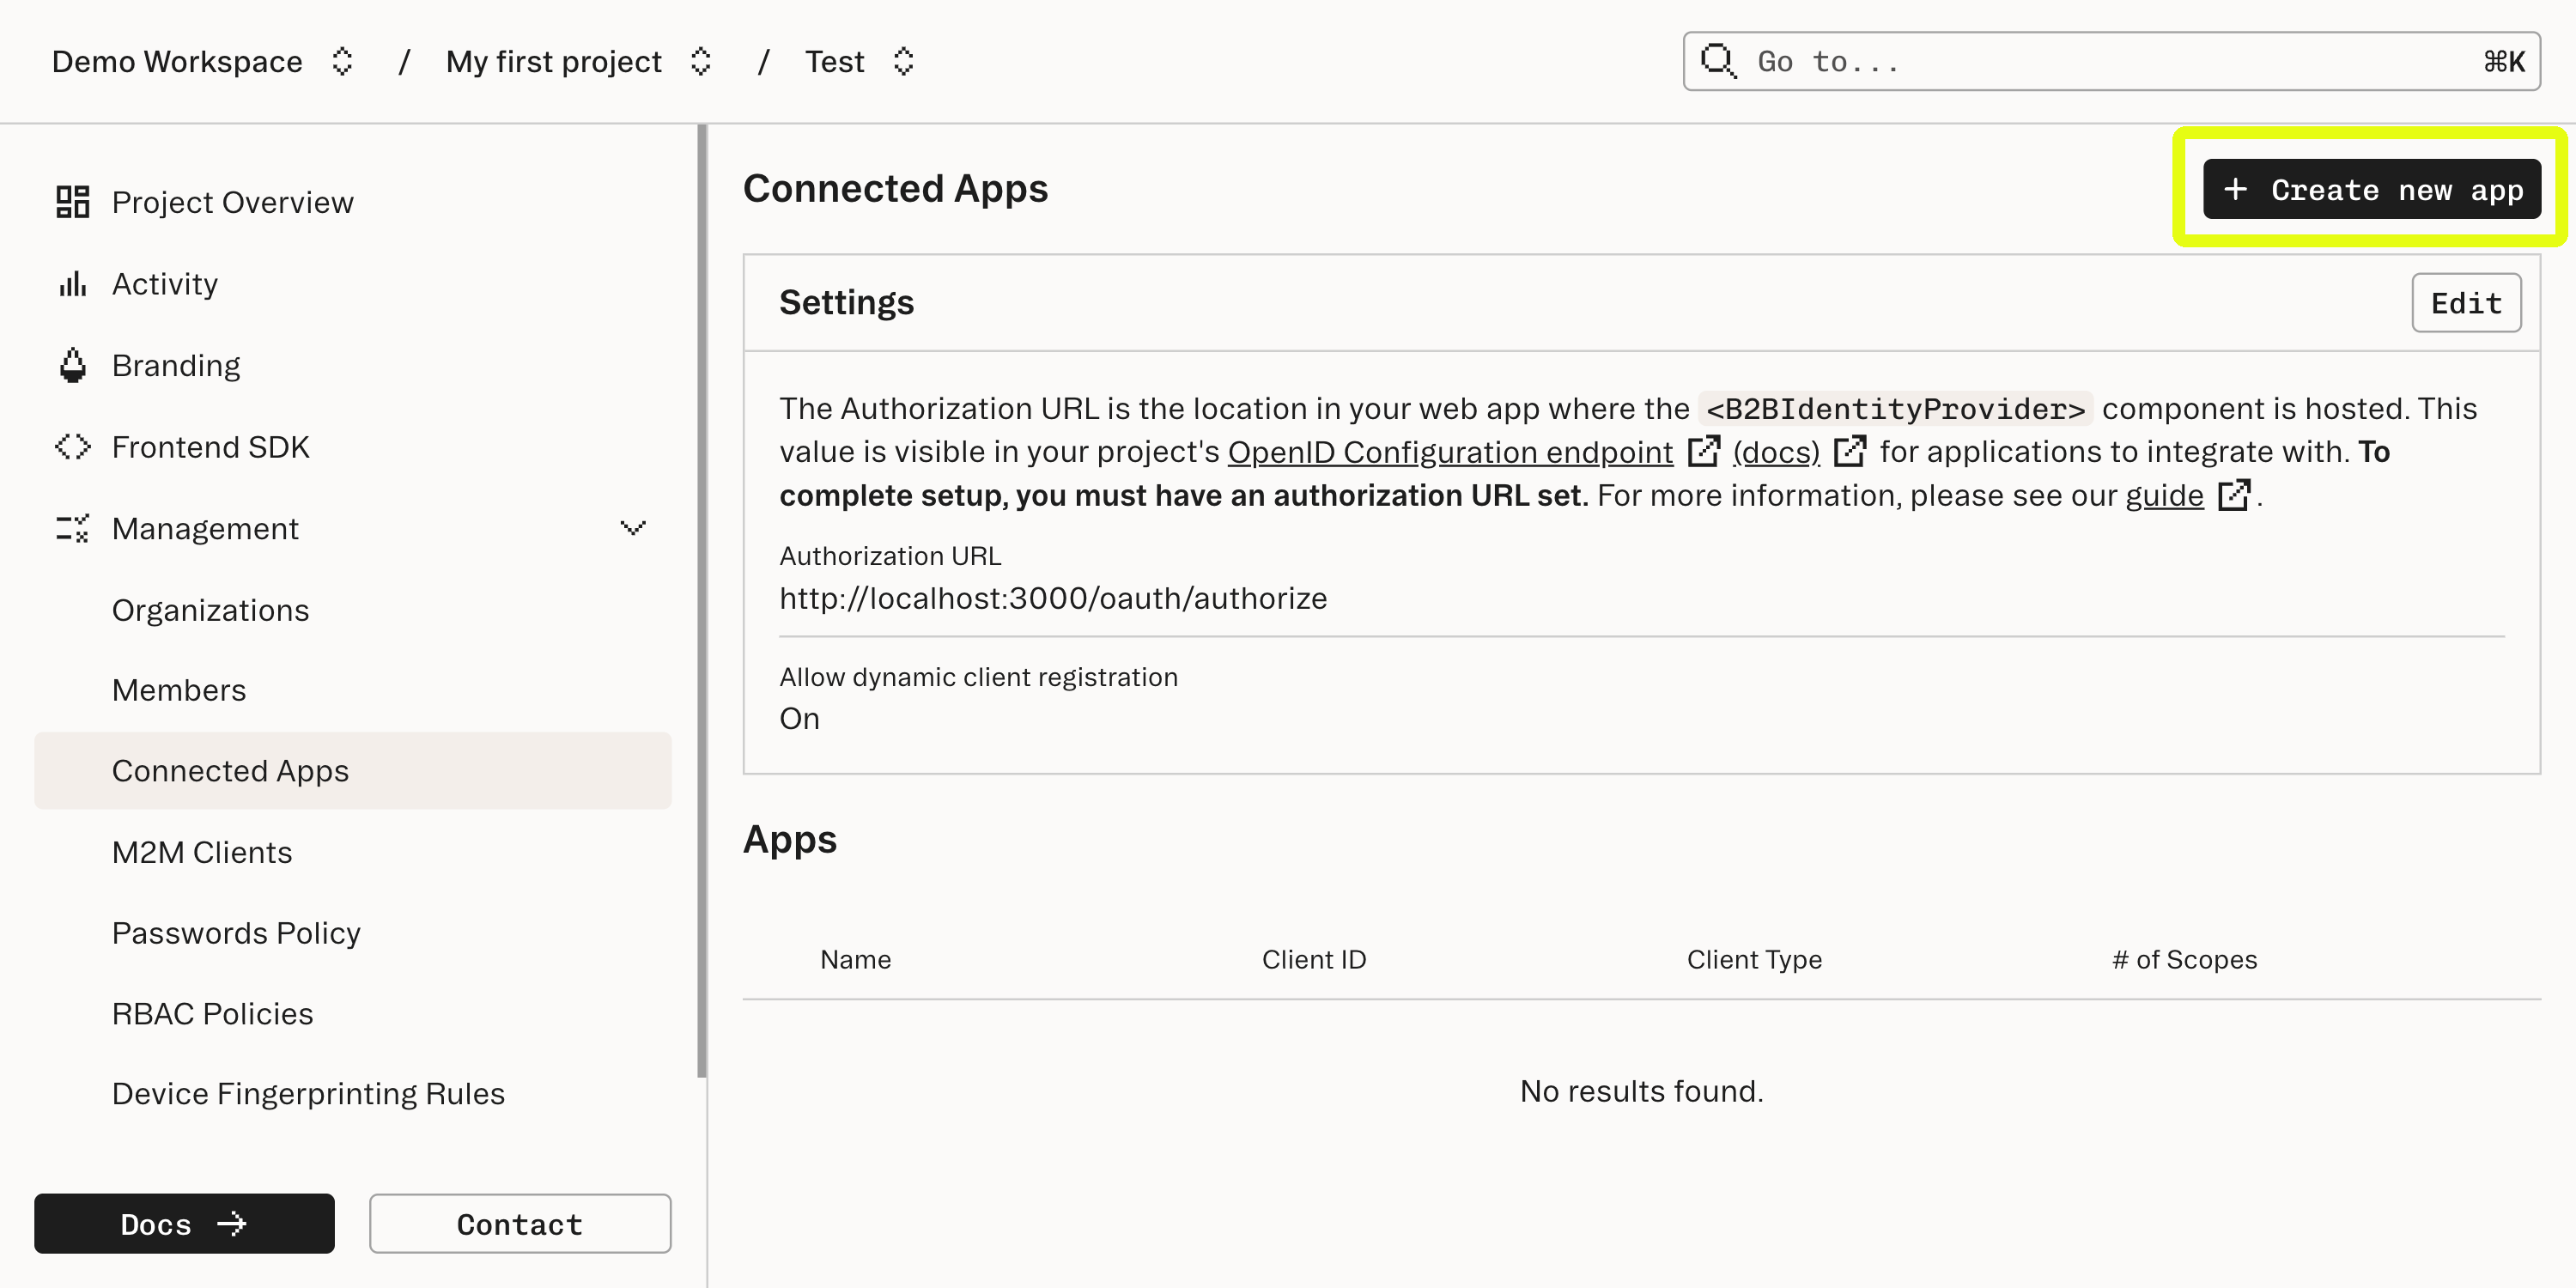
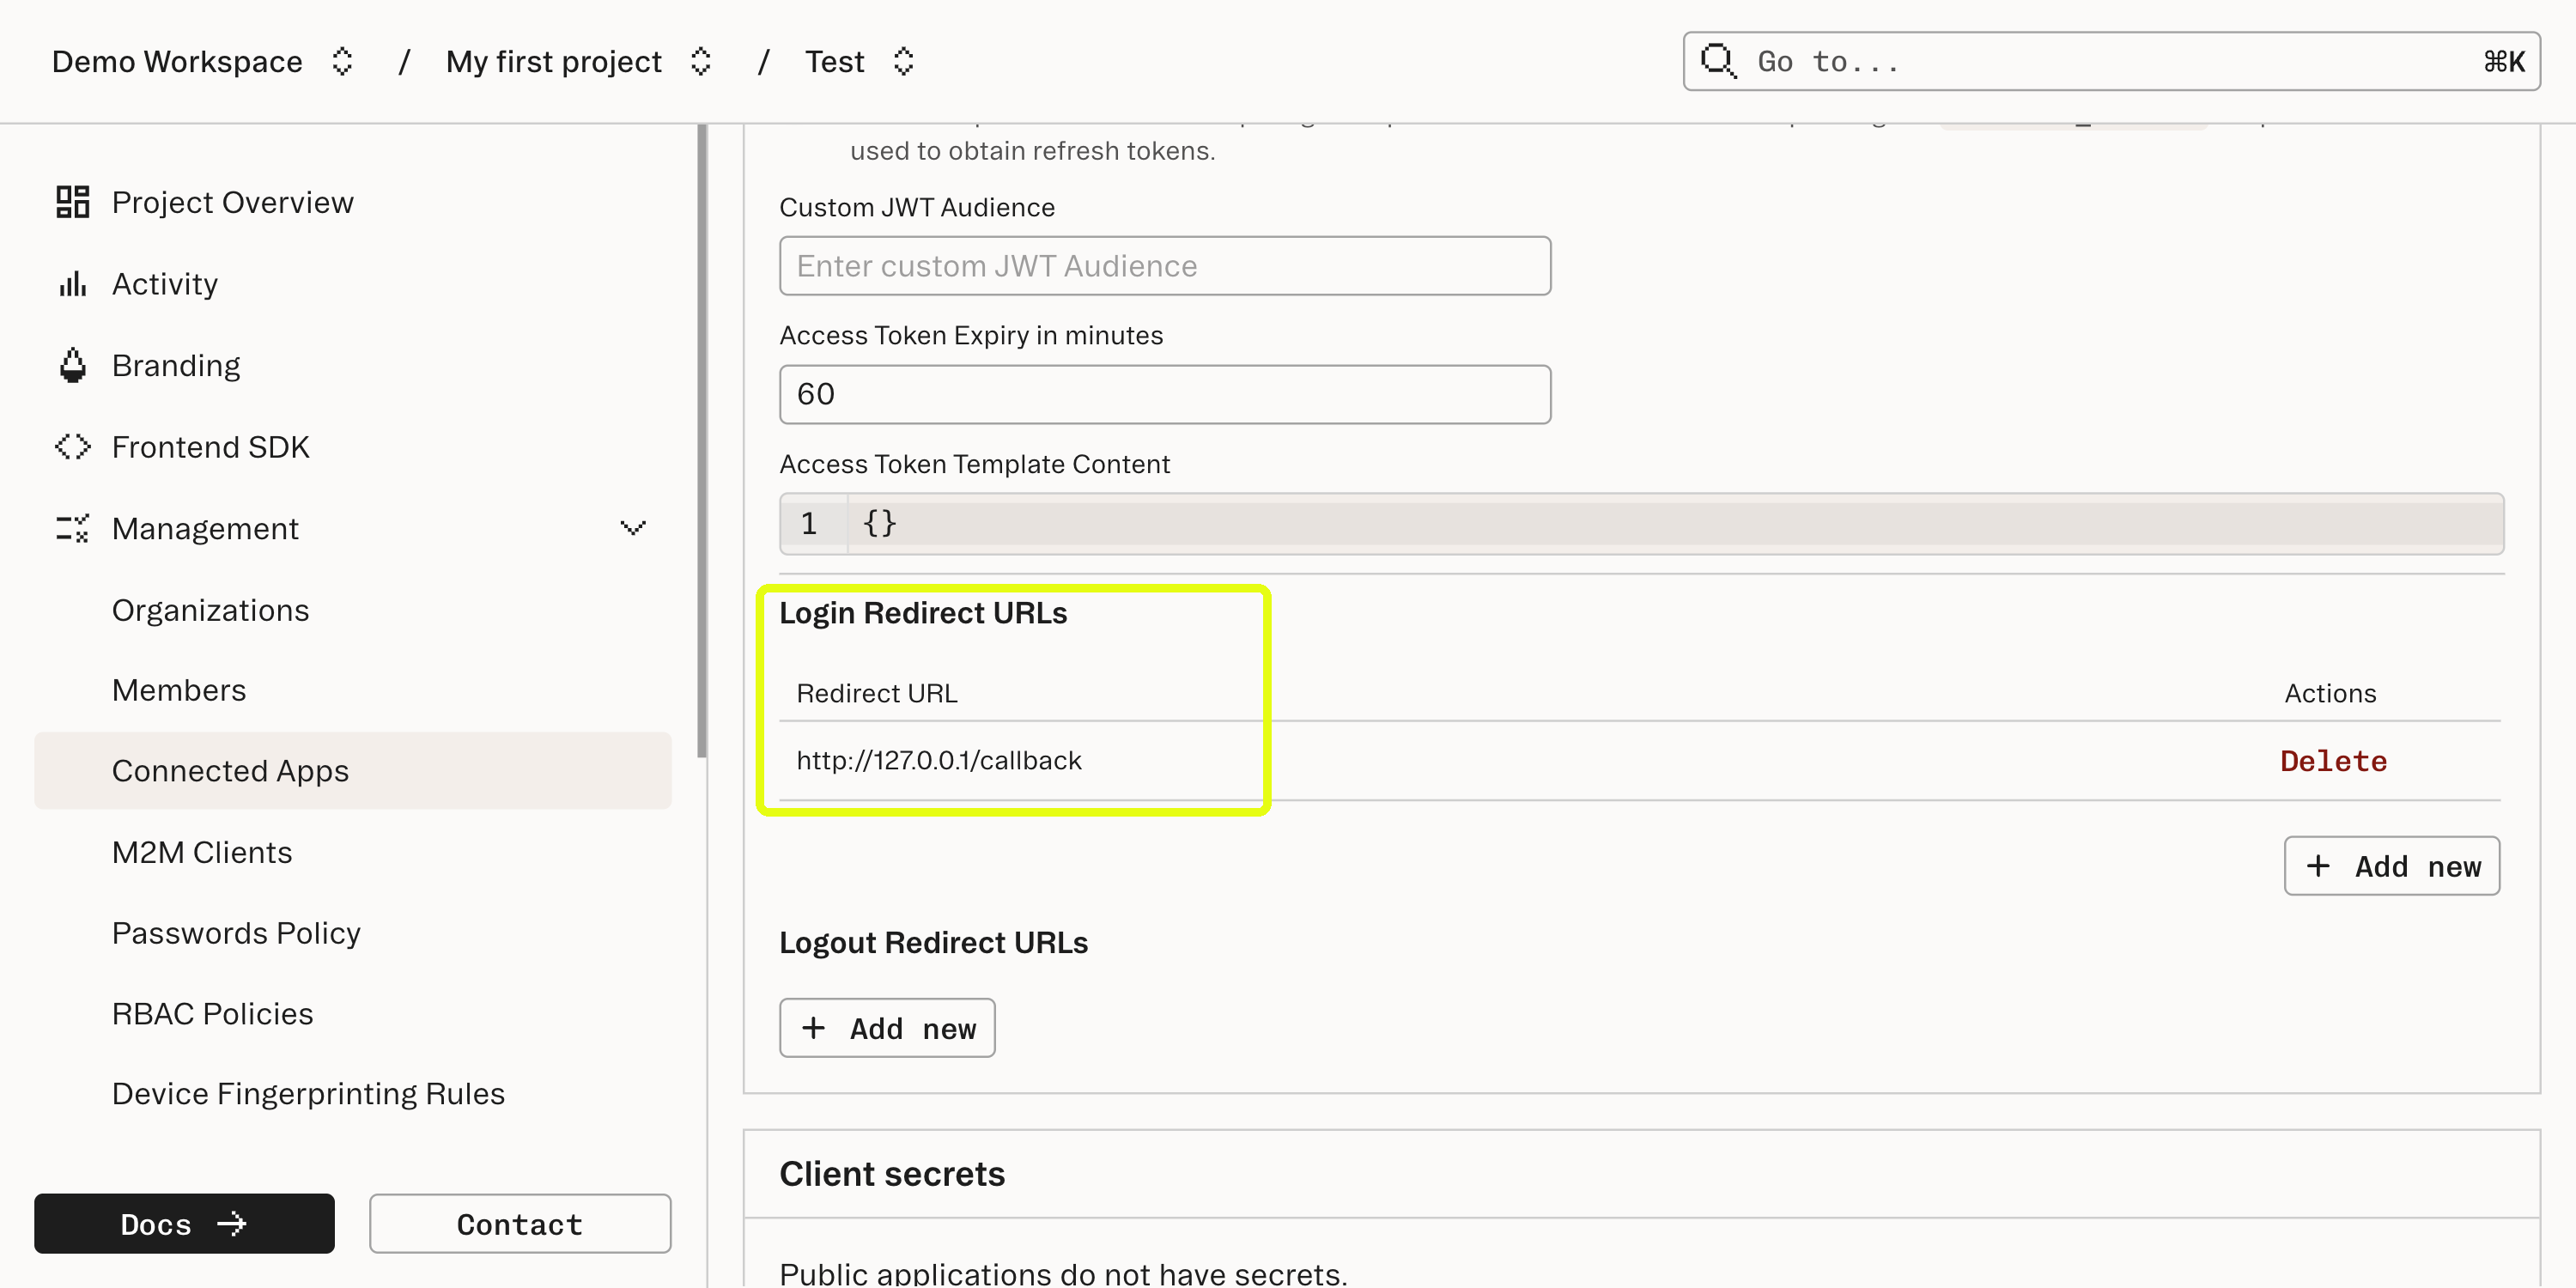
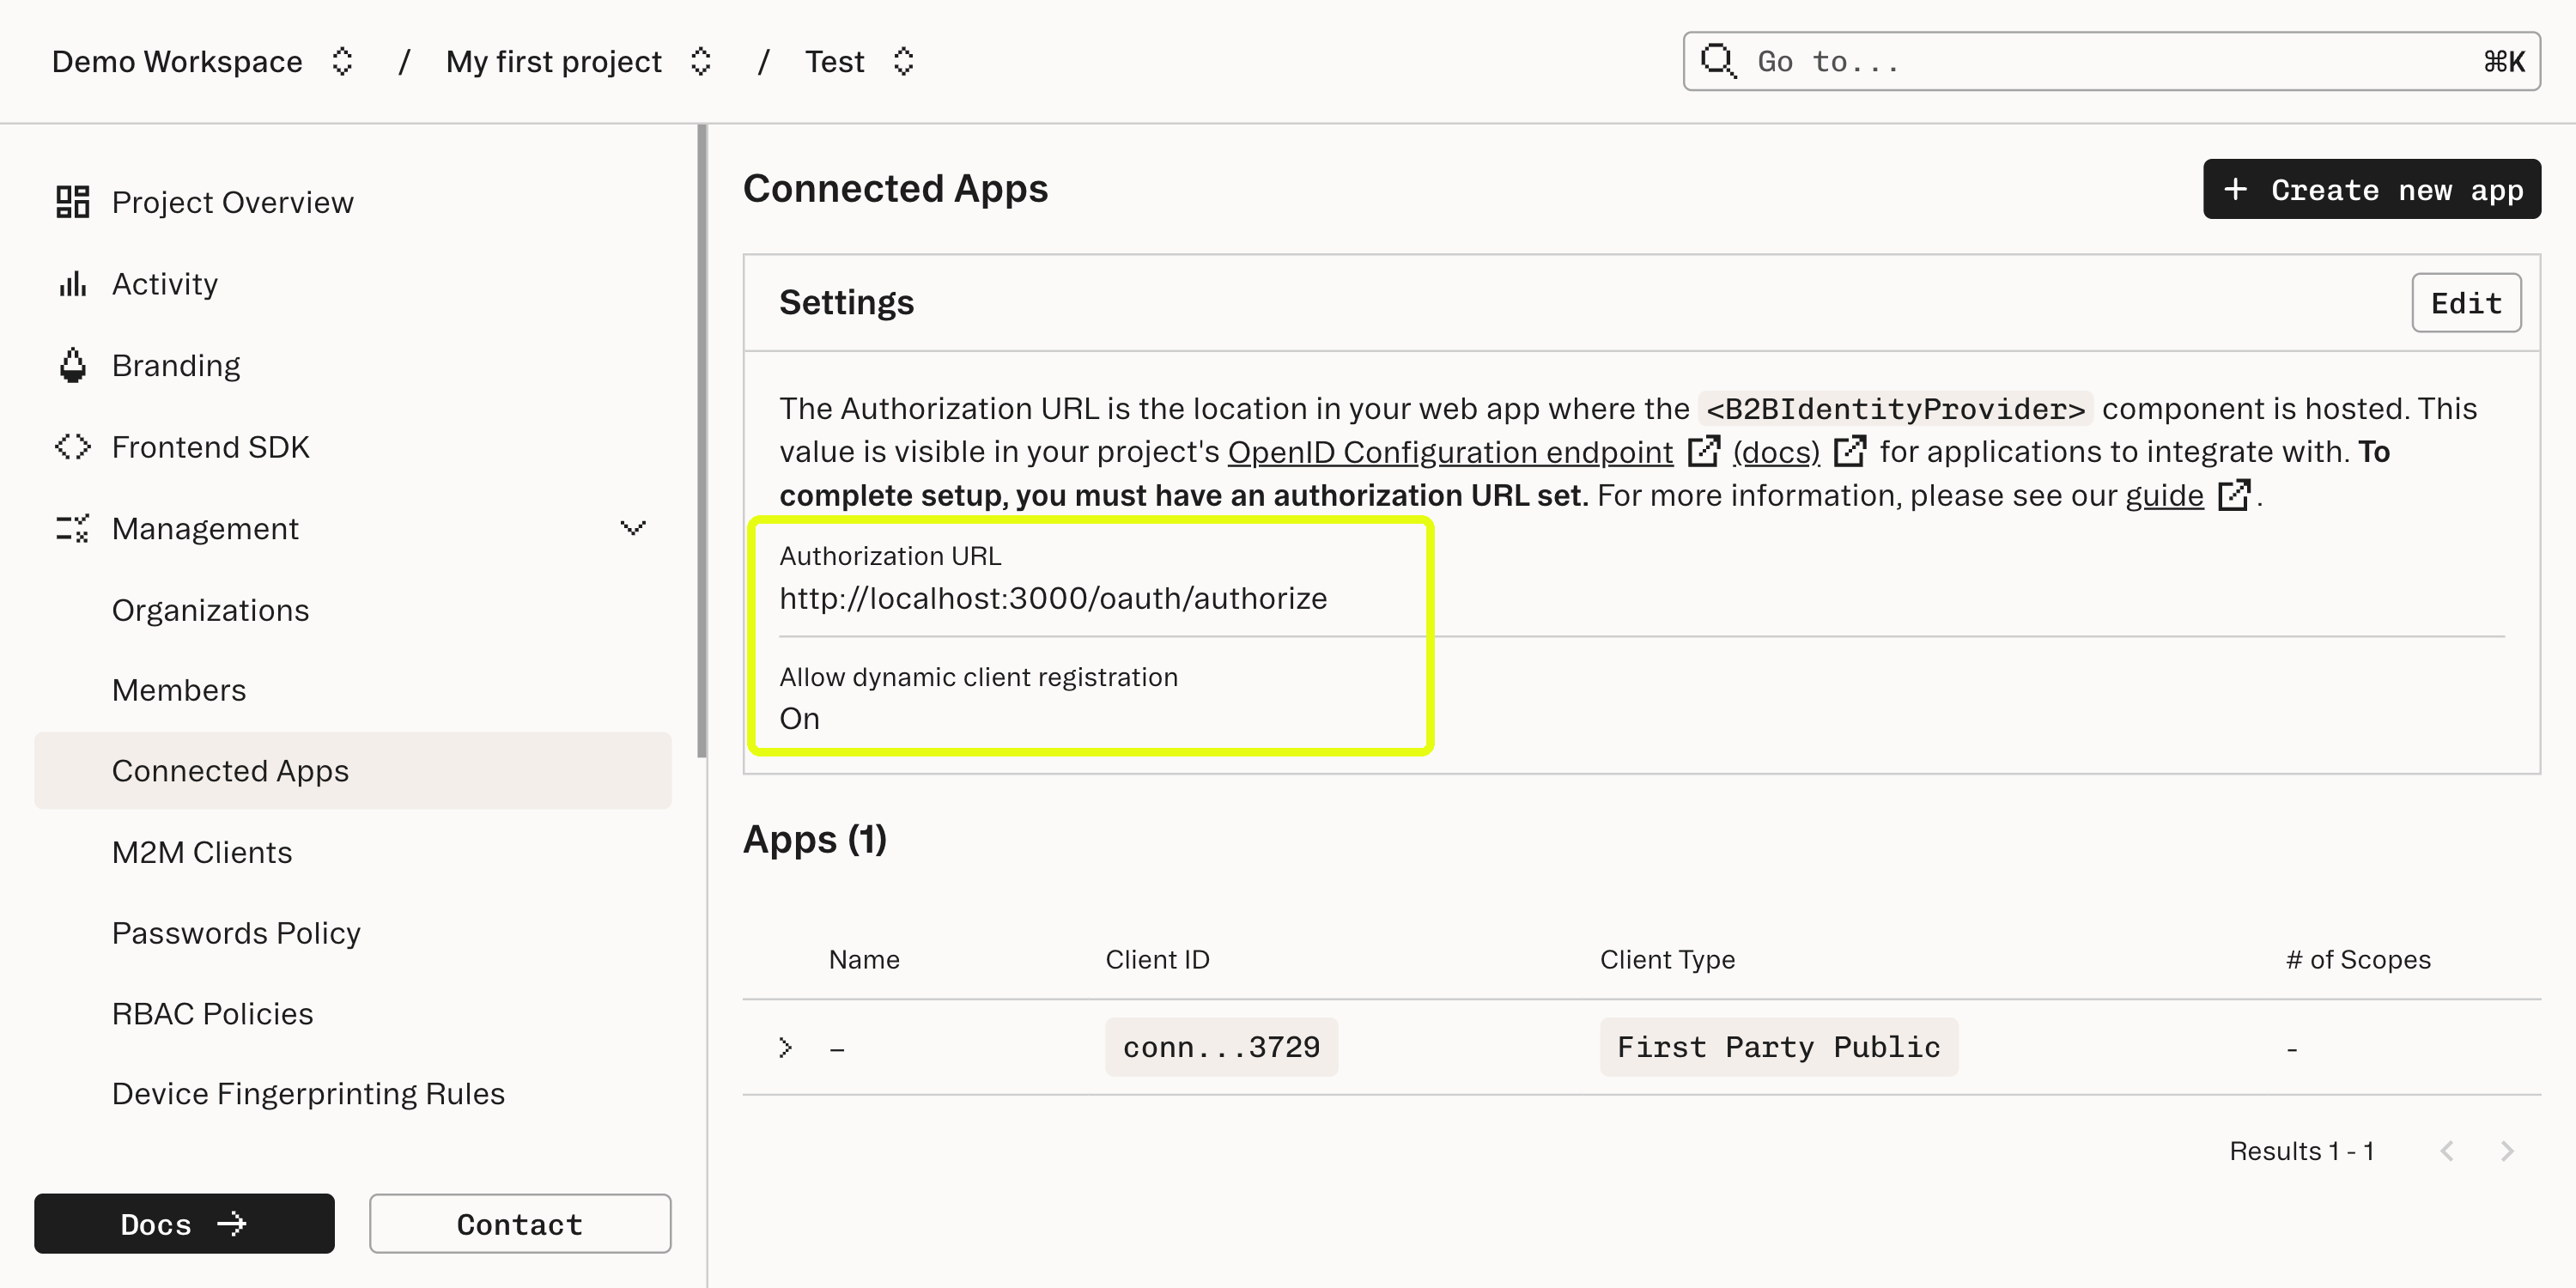
http://127.0.0.1/callback as a login redirect URL in the Connected App configuration - this is the URL our CLI app will use to receive the authorization code.Omitting a port in the redirect URL permits any port to be used, allowing the CLI application to use dynamic port allocation. We want to dynamically allocate a free port, as opposed to picking a static one, as we don’t know what conflicting processes may be running on our end users device.http://localhost:3000/oauth/authorize - this is the URL that our web app will expose to mount the <IdentityProvider /> component for authorization.Add an authorization route to your web app
Add a route in your web app that mounts the
<IdentityProvider /> component.In stytch-react-example, we do this here:Configure CLI app to initiate authorization flow with PKCE
To initiate the authorization flow, configure your CLI app to navigate to your web app’s page that mounts
<IdentityProvider />.The list of URL parameters required for this request can be found here.- If you’d like to receive a
refresh_token, allowing your CLI app to refresh theaccess_tokenwithout the user re-authorizing, make sure your request includesscope=offline_access. - Because this is a public Connected App, we need to use PKCE rather than a
client_secret, as there is nowhere to securely store aclient_secret. The PKCEcode_challengeandcode_challenge_methodwill be sent along as part of the initiating request.
cmd/auth.go.Relevant snippets below:Handle callback and exchange code for access token
Next, set up a callback handler in your CLI app that authenticates the authorization
code received back from <IdentityProvider /> via the Get Access Token endpoint.Note that we need to include code_verifier in this call since this is a Public app.In stytch-connected-apps-cli-example, we do this in cmd/auth.go:exchangeCodeForToken() in the above snippet is implemented here, and calls the Get Access Token endpoint with:- The
coderetrieved by the channel set up, - The
code_verifiergenerated at the start of the authorization flow - The Connected App’s
client_id grant_type: “authorization_code” because this is an initial authorization flow and not a refresh flow.
utils.saveToken, which utilizes go keyring.Testing
To test the flow with the example apps above:
- Set up and run stytch-react-example locally, following the instructions in the README.
- Authenticate into the example app, so that you have an active Session.
- Run stytch-connected-apps-cli-example, following the instructions in the README.
- You should be automatically redirected to the authorization flow in your browser, redirect back to your CLI, and see a Connected Apps
access_token!
Next steps
Now that you’re authenticated with a Connected Apps
access_token in your CLI app, your backend can authenticate API requests by verifying this token.For example, if your CLI app calls GET https://yourapp.com/api/resources to take some action in your app/platform, attaching the access_token as a Bearer token, your backend can perform authentication via something like the following: