/
Contact usSee pricingStart building
Node
​

    About Stytch

    Introduction
    Integration Approaches
      Full-stack overview
      Frontend (pre-built UI)
      Frontend (headless)
      Backend
    Migrations
      Migration overview
      Migrating users statically
      Migrating users dynamically
      Additional migration considerations
      Zero-downtime deployment
      Defining external IDs for users
      Exporting from Stytch
    Custom Domains
      Overview

    Authentication

    DFP Protected Auth
      Overview
      Setting up DFP Protected Auth
      Handling challenges
    Magic Links
    • Email Magic Links

      • Getting started with the API
        Getting started with the SDK
        Replacing your password reset flow
        Building an invite user flow
        Add magic links to an existing auth flow
        Adding PKCE to a Magic Link flow
        Magic Link redirect routing
    • Embeddable Magic Links

      • Getting started with the API
    MFA
      Overview
      Backend integration
      Frontend integration
    Mobile Biometrics
      Overview
    M2M Authentication
      Authenticate an M2M Client
      Rotate client secrets
      Import M2M Clients from Auth0
    OAuth
    • Identity providers

      • Overview
        Provider setup
      Getting started with the API (Google)
      Add Google One Tap via the SDK
      Email address behavior
      Adding PKCE to an OAuth flow
    Connected AppsBeta
      Setting up Connected Apps
      About Remote MCP Servers
    • Resources

      • Integrate with AI agents
        Integrate with MCP servers
        Integrate with CLI Apps
    Passcodes
      Getting started with the API
      Getting started with the SDK
    • Toll fraud

      • What is SMS toll fraud?
        How you can prevent toll fraud
      Unsupported countries
    Passkeys & WebAuthn
    • Passkeys

      • Passkeys overview
        Set up Passkeys with the frontend SDK
    • WebAuthn

      • Getting started with the API
        Getting started with the SDK
    Passwords
      Getting started with the API
      Getting started with the SDK
      Password strength policy
    • Email verification

      • Overview
        Email verification before password creation
        Email verification after password creation
    Sessions
      How to use sessions
      Backend integrations
      Frontend integrations
      Custom claims
      Custom claim templates
      Session tokens vs JWTs
      How to use Stytch JWTs
    TOTP
      Getting started with the API
      Getting started with the SDK
    Web3
      Getting started with the API
      Getting started with the SDK

    Authorization

    Implement RBAC with metadata

    3rd Party Integrations

    Planetscale
    Supabase
    Feathery
    Unit

    Testing

    E2E testing
    Sandbox values
Get support on SlackVisit our developer forum

Contact us

Consumer Authentication

/

Guides

/

Authentication

/

Web3

/

Getting started with the API

Setting up crypto wallets

Choose integration method

Ethereum
​

Our Crypto wallets product unlocks Web3 authentication in your app in four easy steps. For this guide we'll walk through integrating MetaMask, but you may integrate any Ethereum based wallet with Stytch, we'll talk about this more later in the guide.

If you get stuck while working through this guide, feel free to ask questions in our forum, via support@stytch.com, or in our Slack community.

Step 1: Get Ethereum address

To start, we need the user's Ethereum address we want to authenticate with. We can use the following code snippet to fetch the user's MetaMask Ethereum address from the browser. You'll have to check if window.ethereum is defined – if it isn't, the user doesn't have MetaMask installed.

const [address] = await window.ethereum.request({ method: 'eth_requestAccounts' });

Step 2: Start Ethereum authentication

Using the Ethereum address, make a request to /v1/crypto_wallets/authenticate/start. If you want to add this Ethereum address to an existing user, pass in that user's user_id. If the Ethereum address doesn't belong to a user yet, leaving out a user_id will create a new user automatically.

You can optionally use the Sign in With Ethereum (SIWE) protocol by passing in the siwe_params parameter. SIWE is recommended for Ethereum crypto wallet flows because it will automatically warn the end user if the domain passed in the message does not match the domain of the site making the signing request to the crypto wallet.

The only required parameters for SIWE are domain and uri. You can read more about each individual parameter in our docs, and you can also check out the full SIWE spec.

const stytch = require("stytch")

const client = new stytch.Client({
    project_id: "PROJECT_ID",
    secret: "SECRET",
    env: stytch.envs.test,
  }
);

const params = {
    crypto_wallet_address: "0x6df2dB4Fb3DA35d241901Bd53367770BF03123f1",
    crypto_wallet_type: "ethereum",
    user_id: "user-test-16d9ba61-97a1-4ba4-9720-b03761dc50c6", // optional
    siwe_params: { 
      domain: "example.com",
      uri: "https://example.com",
    }, // optional
};
client.cryptoWallets.authenticateStart(params)
    .then(resp => { console.log(resp) })
    .catch(err => { console.log(err) });

Step 3: Signing the message

Using the challenge field from the 
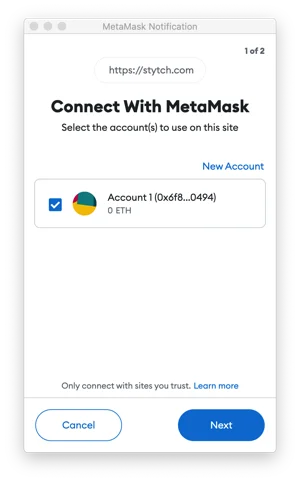
/v1/crypto_wallets/authenticate/start response, request the user to sign the message. The user will see a MetaMask popup asking to sign a message with the content from the challenge. You'll also have to gracefully handle the situation where a user chooses to reject the message.

// get challenge from authenticate/start call
const signature = await window.ethereum.request({"method": "personal_sign", "params": [challenge, address]})
MetaMask popup

Step 4: Finish Ethereum authentication

Using the signature from the signMessage call described in the last step, make a request to /v1/crypto_wallets/authenticate. Optionally, you may provide an existing session_token to reuse an existing session, and/or provide a session_duration_minutes value to set the lifetime of the session.

Stytch will perform validation on the address, challenge, and signature and return a 400 if there are any issues. If the authentication is successful, we'll return a 200.

const stytch = require("stytch")

const client = new stytch.Client({
    project_id: "PROJECT_ID",
    secret: "SECRET",
    env: stytch.envs.test,
  }
);

const params = {
    crypto_wallet_address: "0x6df2dB4Fb3DA35d241901Bd53367770BF03123f1",
    crypto_wallet_type: "ethereum",
    signature: "0x0c4f82edc3c818b6beff4b89e0682994e5878074609903cecdfb843241728be32f75949e2fbae63dcccdef97c0e3789a26441f7e11456cc1f2ef79b3a436010f1b"
};
client.cryptoWallets.authenticate(params)
    .then(resp => { console.log(resp) })
    .catch(err => { console.log(err) });

Step 5: You're Done!

You just finished all the critical components to authenticate your users with a MetaMask wallet! Have any feedback after having integrated Ethereum with your app? Get in touch with us and tell us what you think in our forum, support@stytch.com, or in our Slack community.

Step 1: Get Ethereum address

Step 2: Start Ethereum authentication

Step 3: Signing the message

Step 4: Finish Ethereum authentication

Step 5: You're Done!