Stytch Dashboard
Manually create an SSO connection for an Organization in your Stytch Dashboard.
API
Create an SSO Connection programmatically via API.
Admin Portal
Enable your customers to add their own SSO connections with our pre-built UI.
Generic SAML (most IdPs)
If you’re configuring a SAML connection, you’ll need to perform the following steps:1
Before you begin
- Ensure you have your
organization_idand a SAML connection created in Stytch. - Ensure you have admin access to your IdP.
2
Copy from Stytch
acs_urlandaudience_urifrom your SAML connection.
3
Configure in your IdP
Create an application in your IdP.
- Enter the
acs_urlandaudience_uriin their respective fields. Some IdPs call these SP SSO URL and SP Entity ID. - Set up attribute mapping so the IdP returns at least email and name fields. We recommend passing a unique identifier as well.
4
Copy from your IdP
- Metadata URL, or…
- IdP SSO URL, IdP Entity ID, and X.509 Certificate.
5
Configure in Stytch
Configure your IdP metadata with Stytch using one of two ways.Common pitfalls:
- If your IdP provides a metadata URL, add that via the Stytch Dashboard or the Update SAML Connection by Metadata URL route.
- If your IdP does not provide a metadata URL, add the IdP SSO URL, IdP Entity ID, and X.509 certificate via the Stytch Dashboard or the Update SAML Connection route.
email field to the email, first_name to the first name, last_name to the last name, and full_name to the full name. You only need either full_name or both first_name and last_name. You can do this in the Dashboard or via Update SAML Connection.Example attribute mapping:- NameID format mismatch — if your IdP lets you configure a NameID, set it to the field with the user’s email address.
- Stale IdP metadata in Stytch.
- Certificate paste errors — if your IdP uses multiple certs, ensure the active signing cert is used.
Generic OIDC (most IdPs)
If you’re configuring an OIDC connection, you’ll need to perform the following steps:1
Before you begin
- Ensure you have your
organization_idand an OIDC connection created in Stytch. - Ensure you have admin access to your IdP.
2
Copy from Stytch
redirect_urlfrom your OIDC connection.
3
Configure in your IdP
Create a web application in your IdP.
- Select Authorization Code as the grant type and add the Stytch
redirect_urlas a Sign-in Redirect URI. - Optionally add a Sign-out Redirect URI pointing to your app’s logout handler.
4
Copy from your IdP
- Client ID and Secret, as well as your Issuer URL (generally this is your IdP hostname).
5
Configure in Stytch
Configure your IdP client with Stytch.
- Add your Client ID, Secret, and Issuer URL via the Stytch Dashboard or the Update OIDC Connection route.
- Redirect URI mismatch.
- Using a discovery URL instead of the Issuer base URL.
- Missing client secret.
- Ensure Issuer is the exact issuer value your IdP expects.
Okta SAML
If you don’t already have an Okta admin account, the easiest way to do this is by creating an Okta Workforce Identity Cloud Developer Edition account. Once you’re logged in to the Okta Admin Dashboard click Create App Integration in the Applications tab: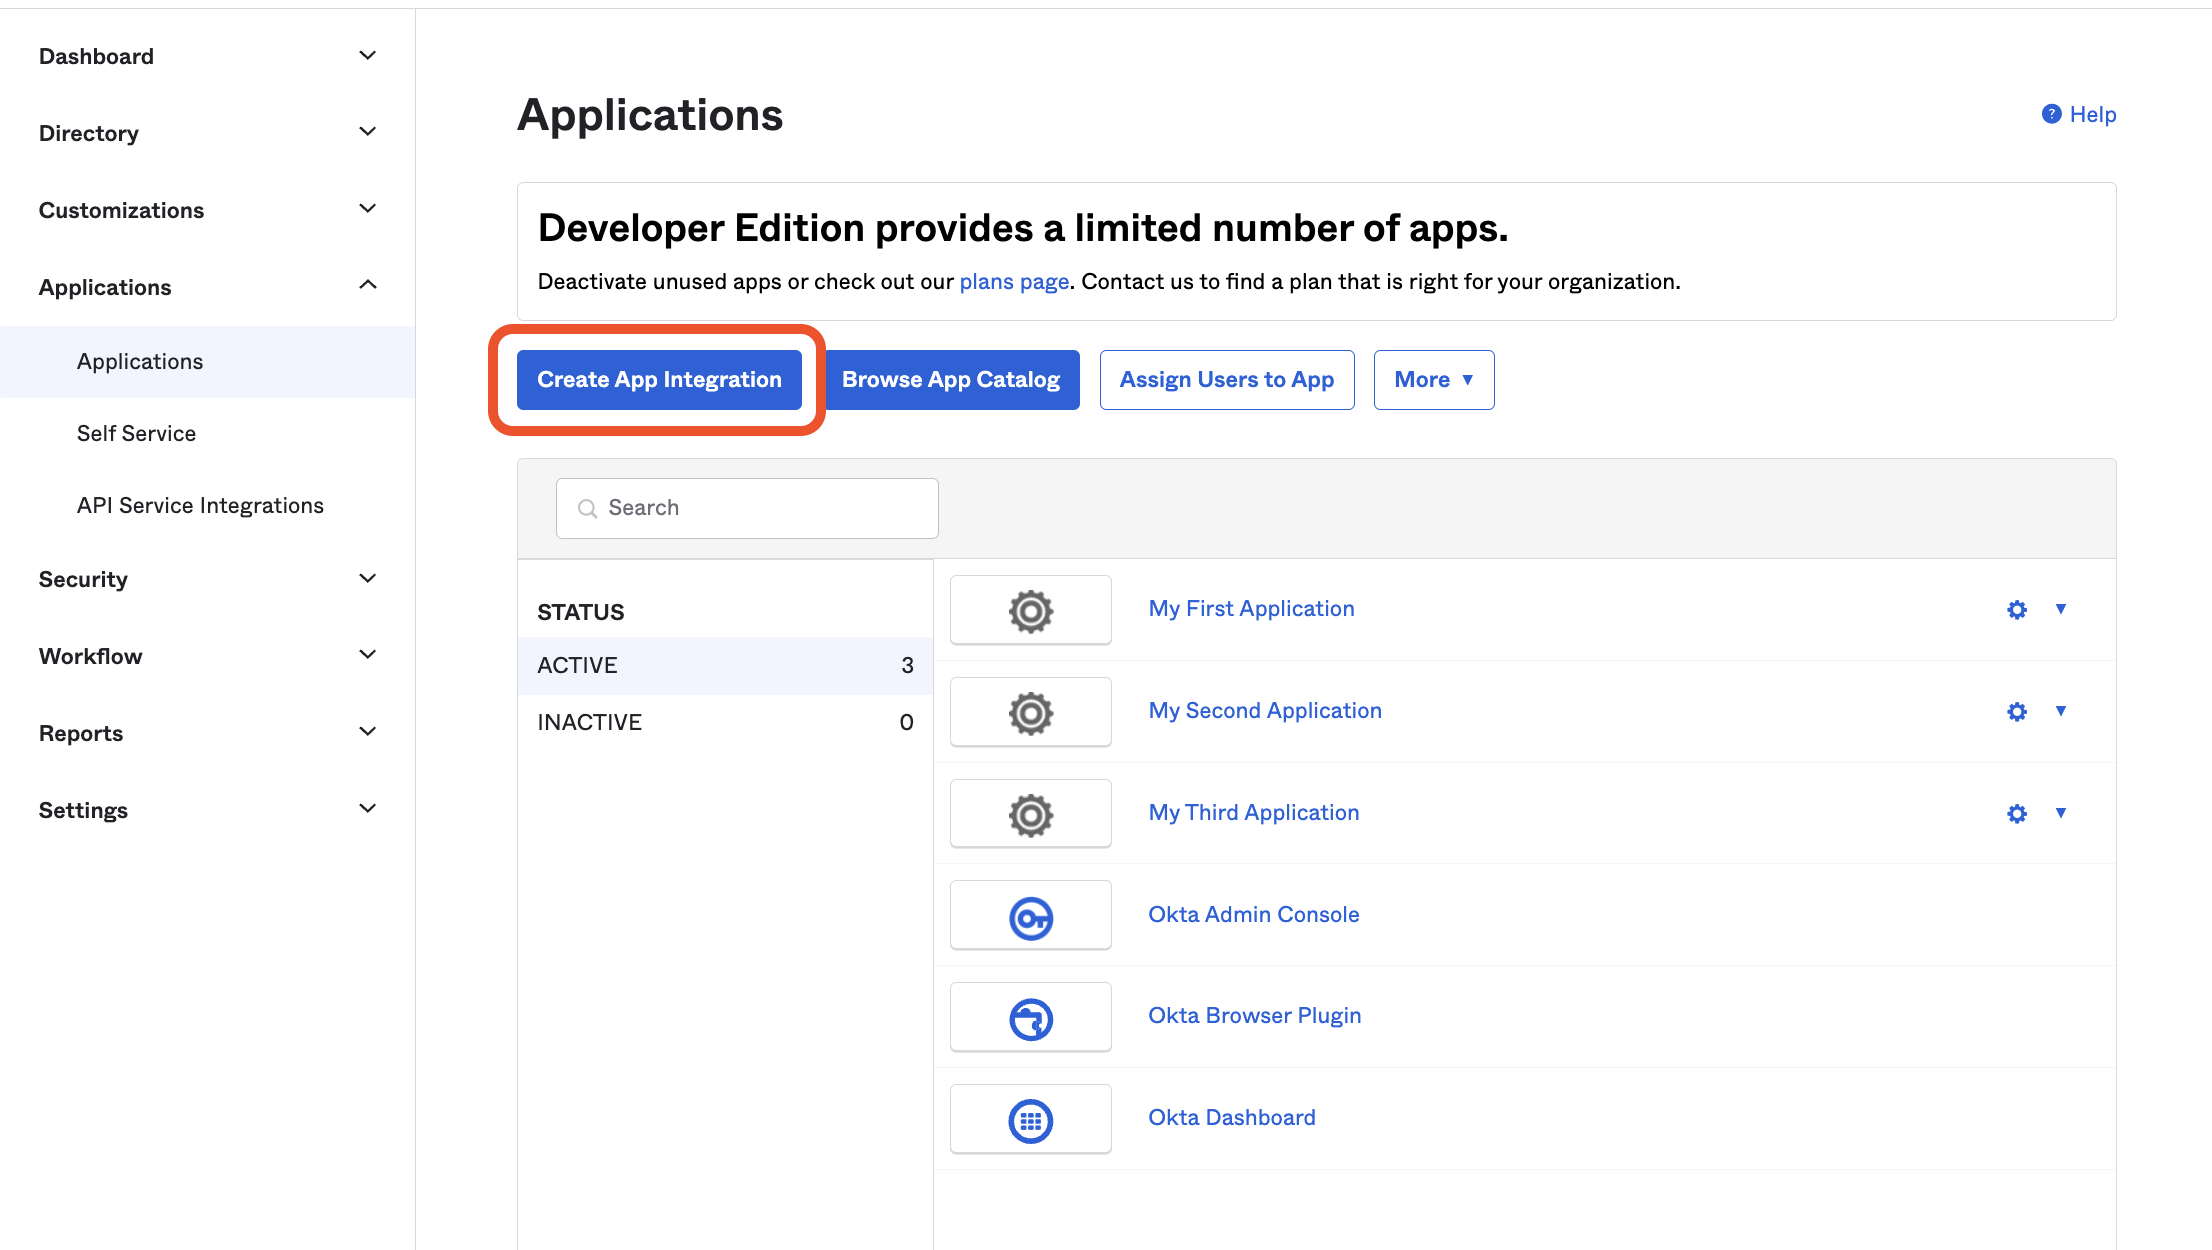
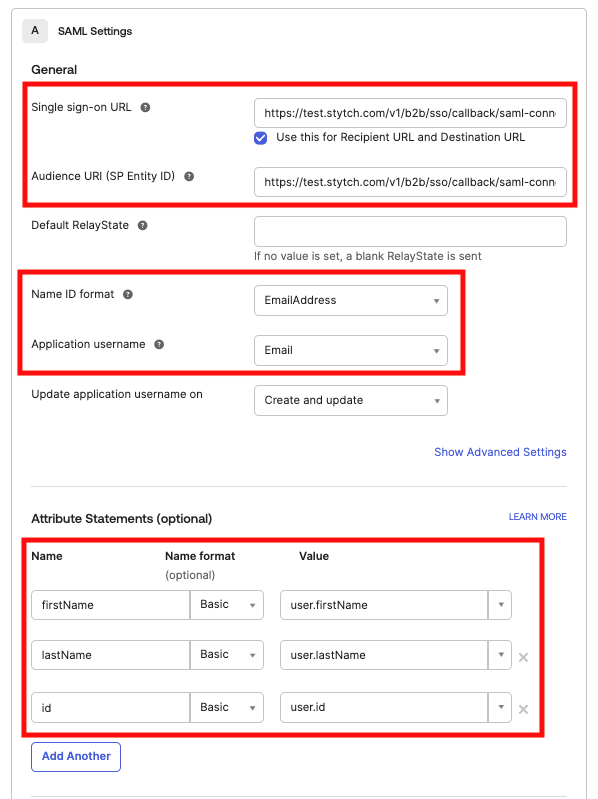
- Input the
acs_urlfrom your Stytch SSO Connection as the Single sign-on URL - Input the
audience_urifrom your Stytch SSO Connection as the Audience URI (SP Entity ID) - For Name ID format select EmailAddress
- For Application username select Email
- In Attribute Statements create three inputs:
- Name:
firstName; Name format:Basic; Value:user.firstName - Name:
lastName; Name format:Basic; Value:user.lastName - Name:
id; Name format:Basic; Value:user.id
- Name:
Okta OIDC
If you don’t already have an Okta admin account, the easiest way to do this is by creating an Okta Workforce Identity Cloud Developer Edition account. Once you’re logged in to the Okta Admin Dashboard and click Create App Integration in the Applications tab: Enter the name of your application and (optionally) your application’s logo.
Under Grant type, select Authorization Code:
Enter the name of your application and (optionally) your application’s logo.
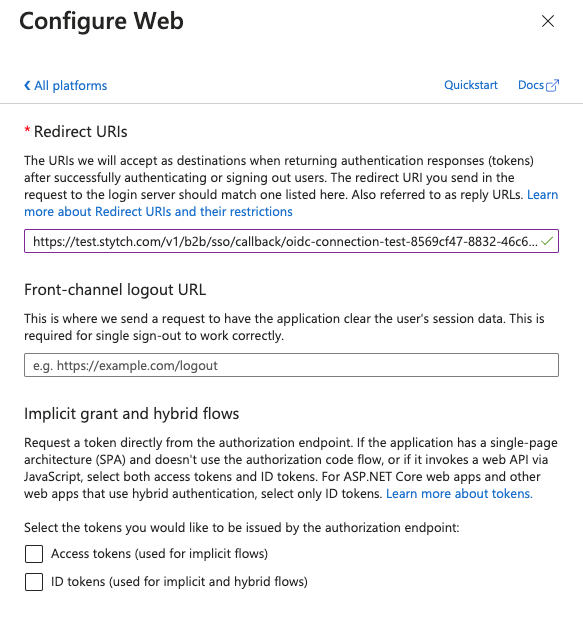
Under Grant type, select Authorization Code:  In the Sign-in redirect URIs section, add the
 redirect_url value from the Stytch connection object.
For the purposes of this guide, you do not need to add any Sign-out redirect URIs. In the future, you can (optionally) add a URI corresponding to a page in your application that logs the user out by revoking their Stytch session.
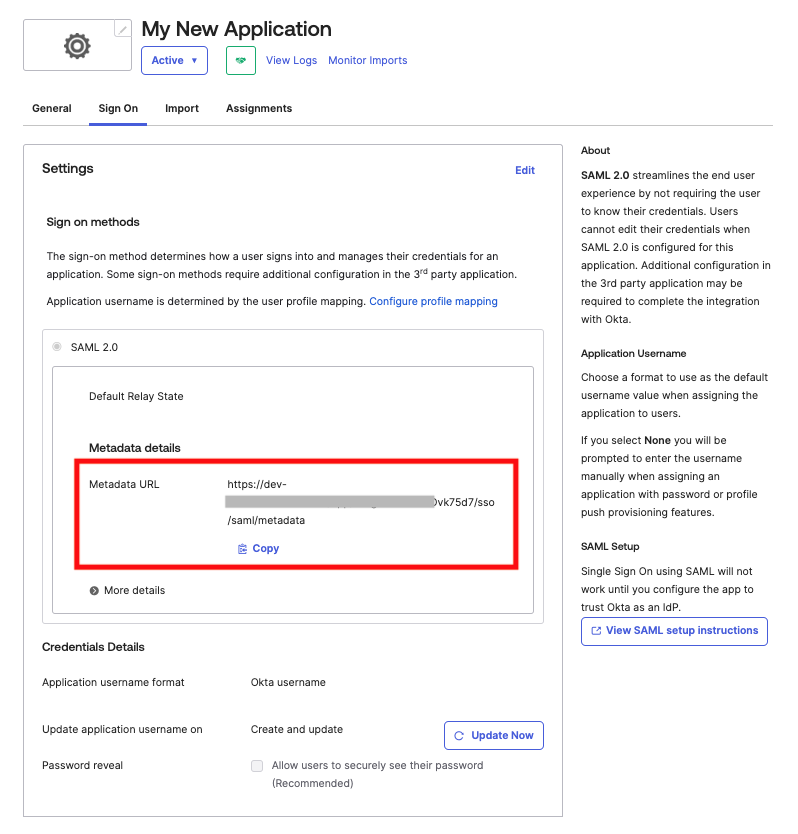
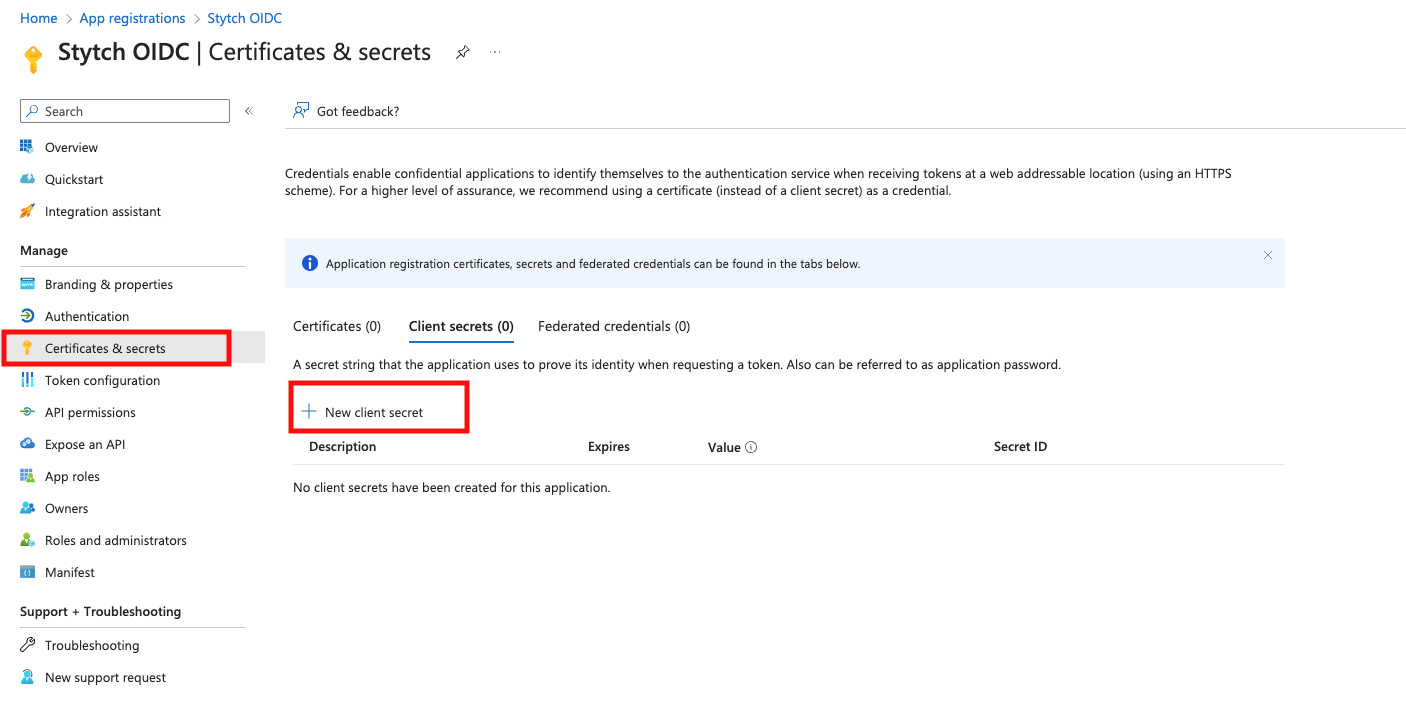
Under Controlled access, select Allow everyone in your organization to access and Enable immediate access with Federation Broker Mode and save. You may change these settings later, if desired.  In the General tab of your newly created Okta application, locate the Client ID in the Client Credentials section and Secret in the Client Secrets section:
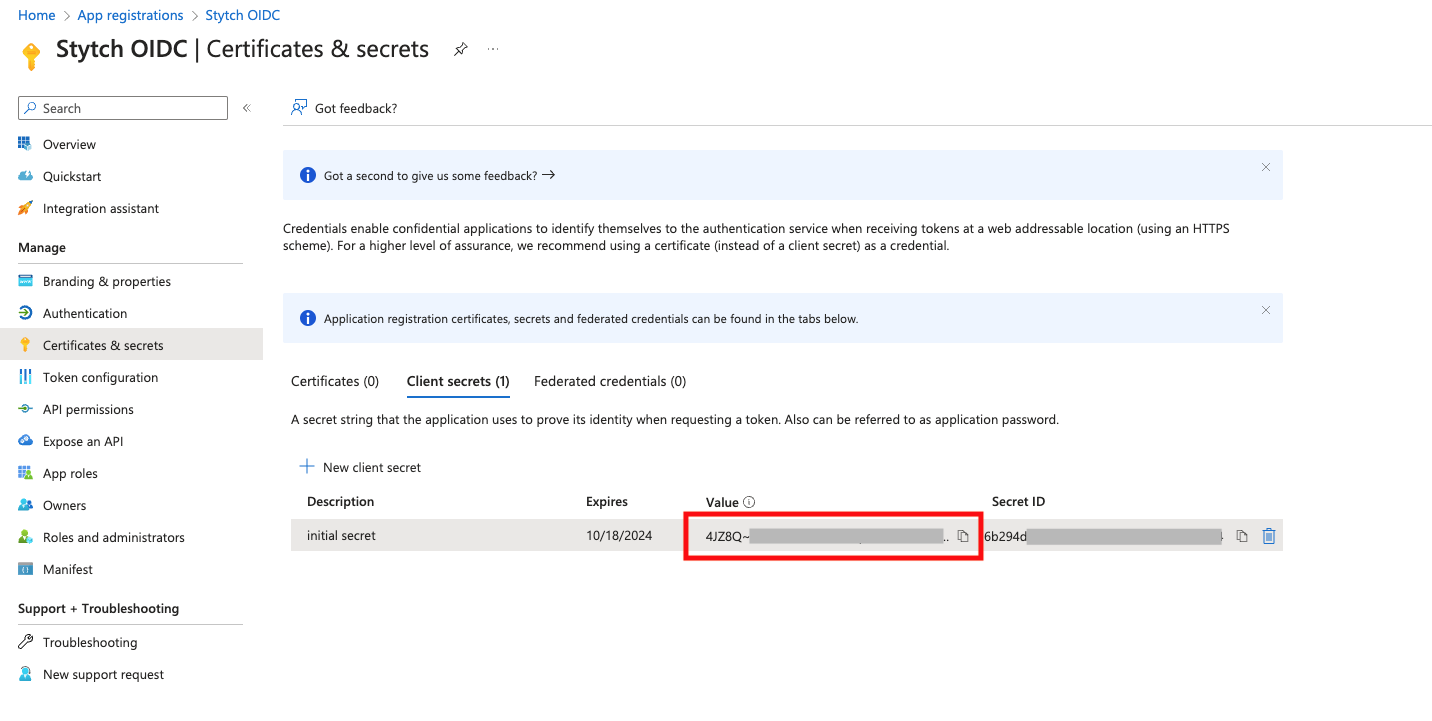
  In the Stytch Dashboard, click “configure” on your SSO Connection and input the Client ID and Secret from above and set the Issuer value to your Okta instance URL. This URL should look like
 https://dev-111111.okta.com and is viewable in the top right hand corner drop down under your email address. You can alternatively call the Update OIDC Connection endpoint with the client_id, client_secret and issuer fields.
Click save. You should now see the SSO Connection as “Active”. In the SSO Connections JIT Provisioning settings section above, select “Anyone” can JIT Provision through SSO Connections and save.
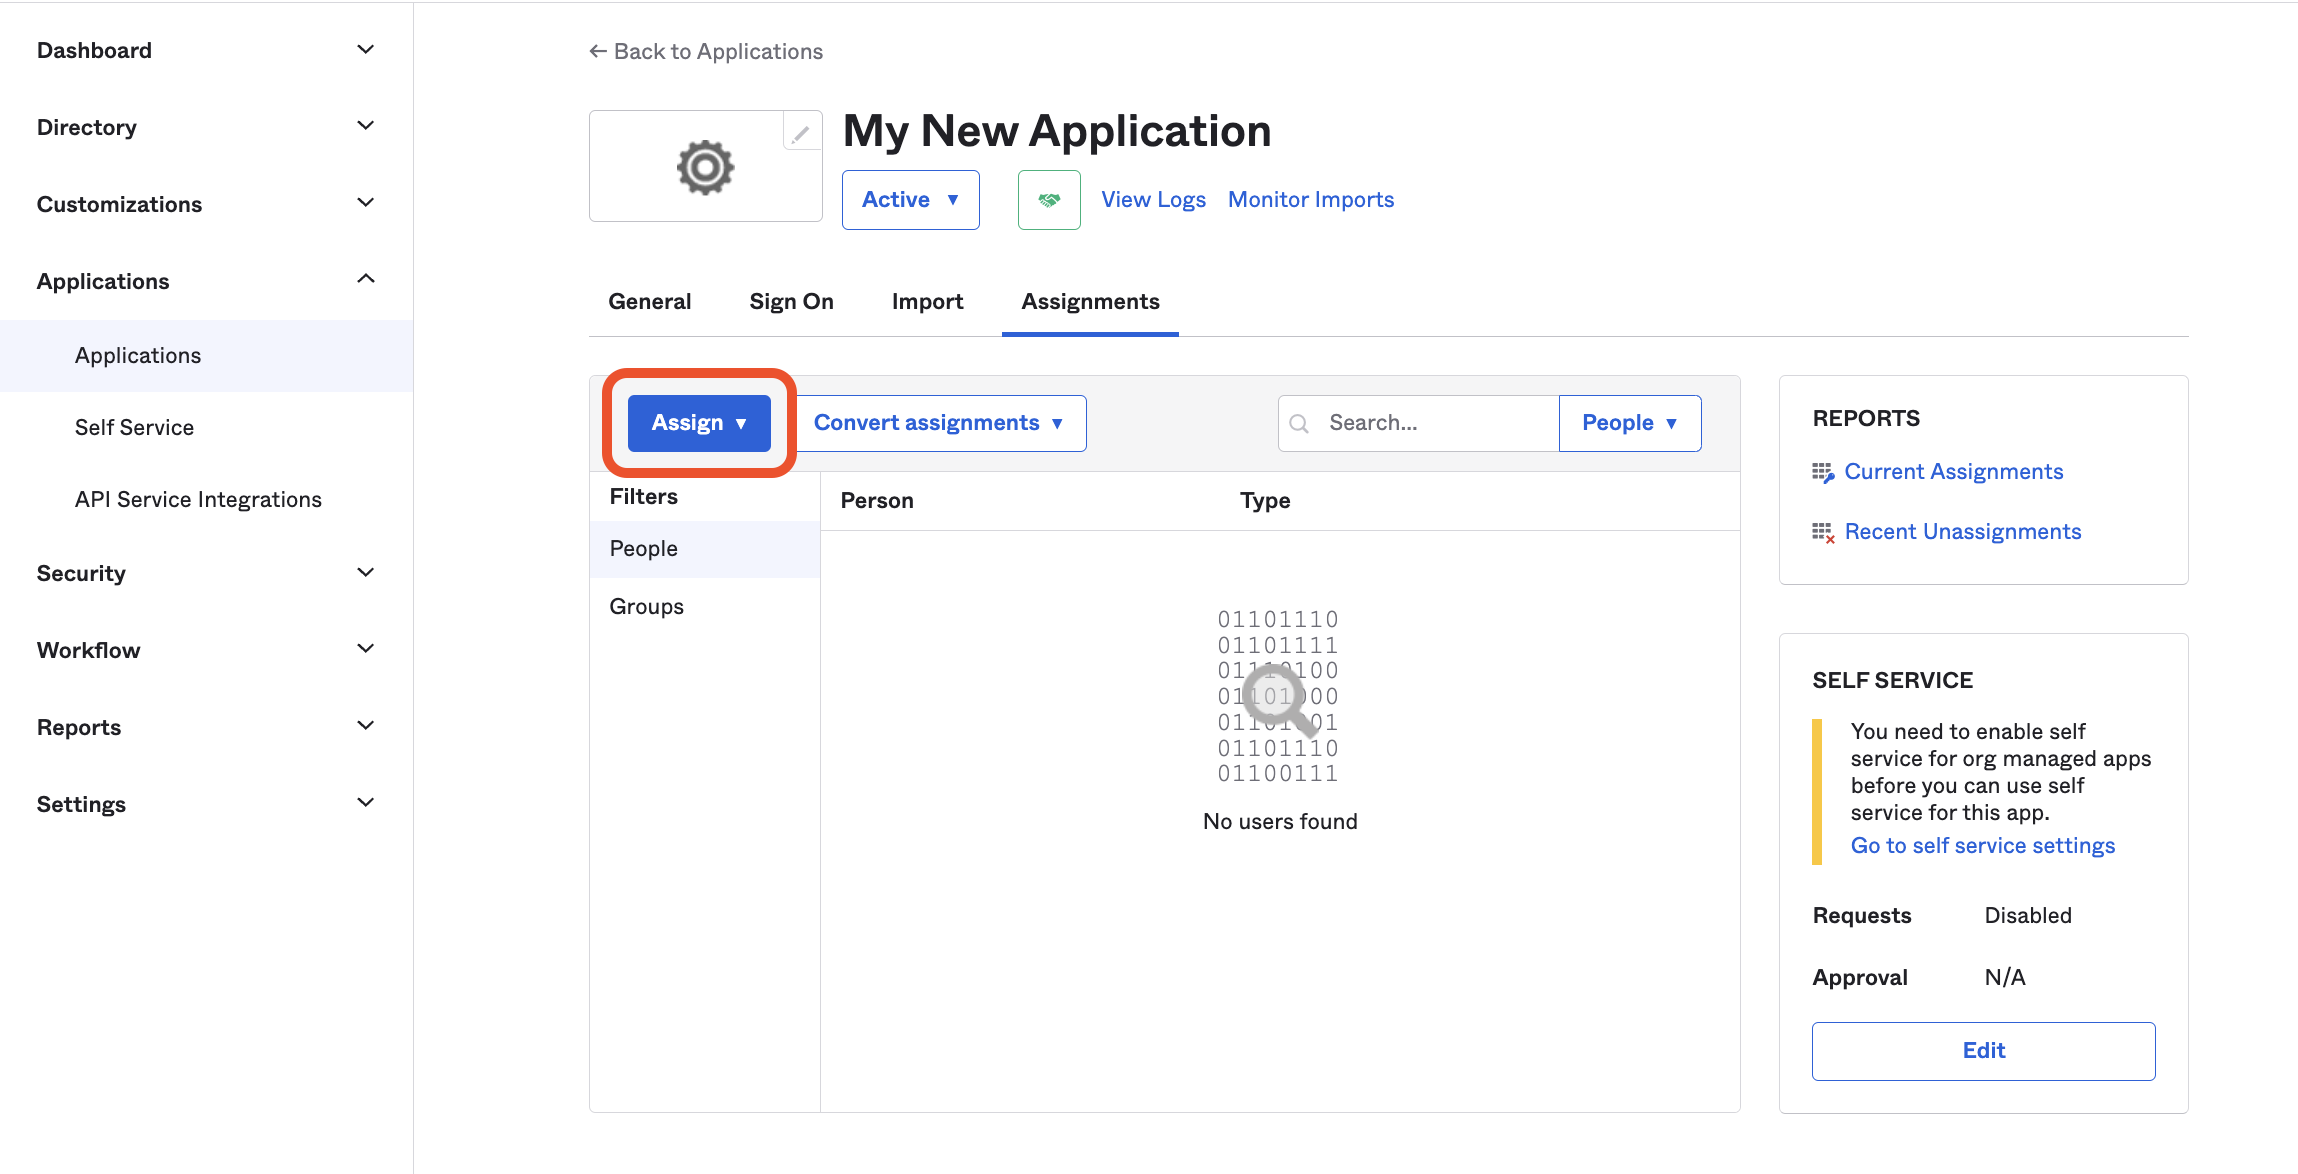
Google Workspace SAML
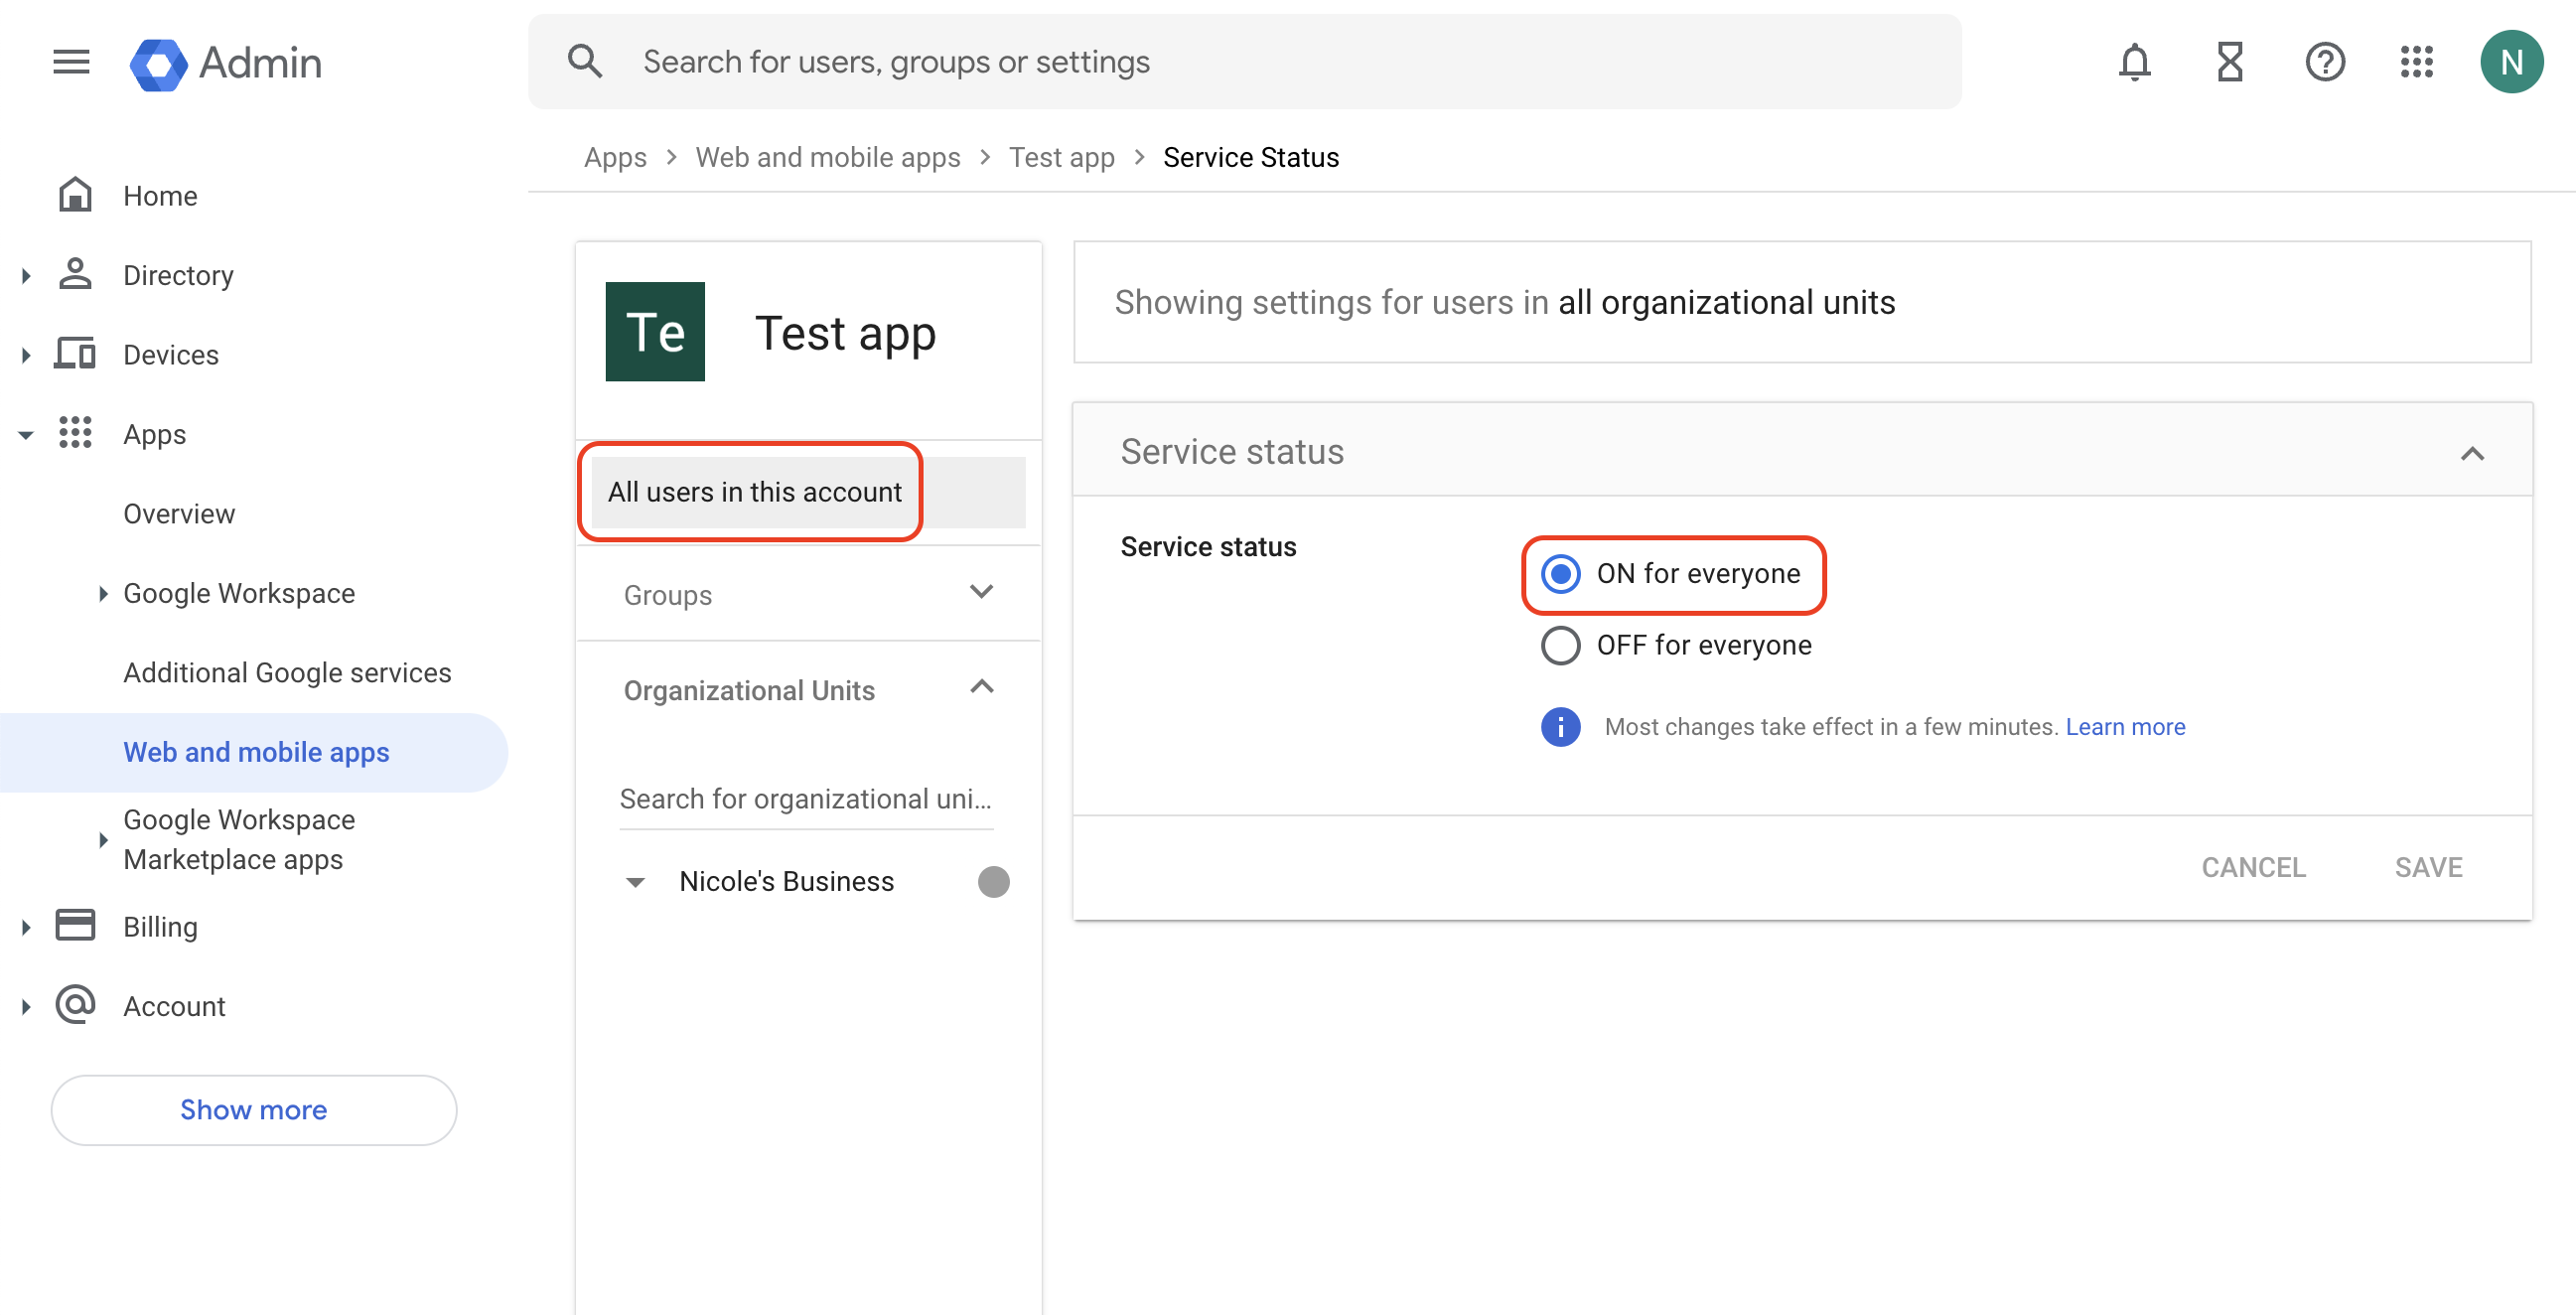
Log into the Google Workspace Admin Console. Navigate to the Web and mobile apps tab under Apps: Select Add custom SAML app from the Add app dropdown:
  Enter the name of your application and (optionally) a description and your application’s logo. Click Continue.
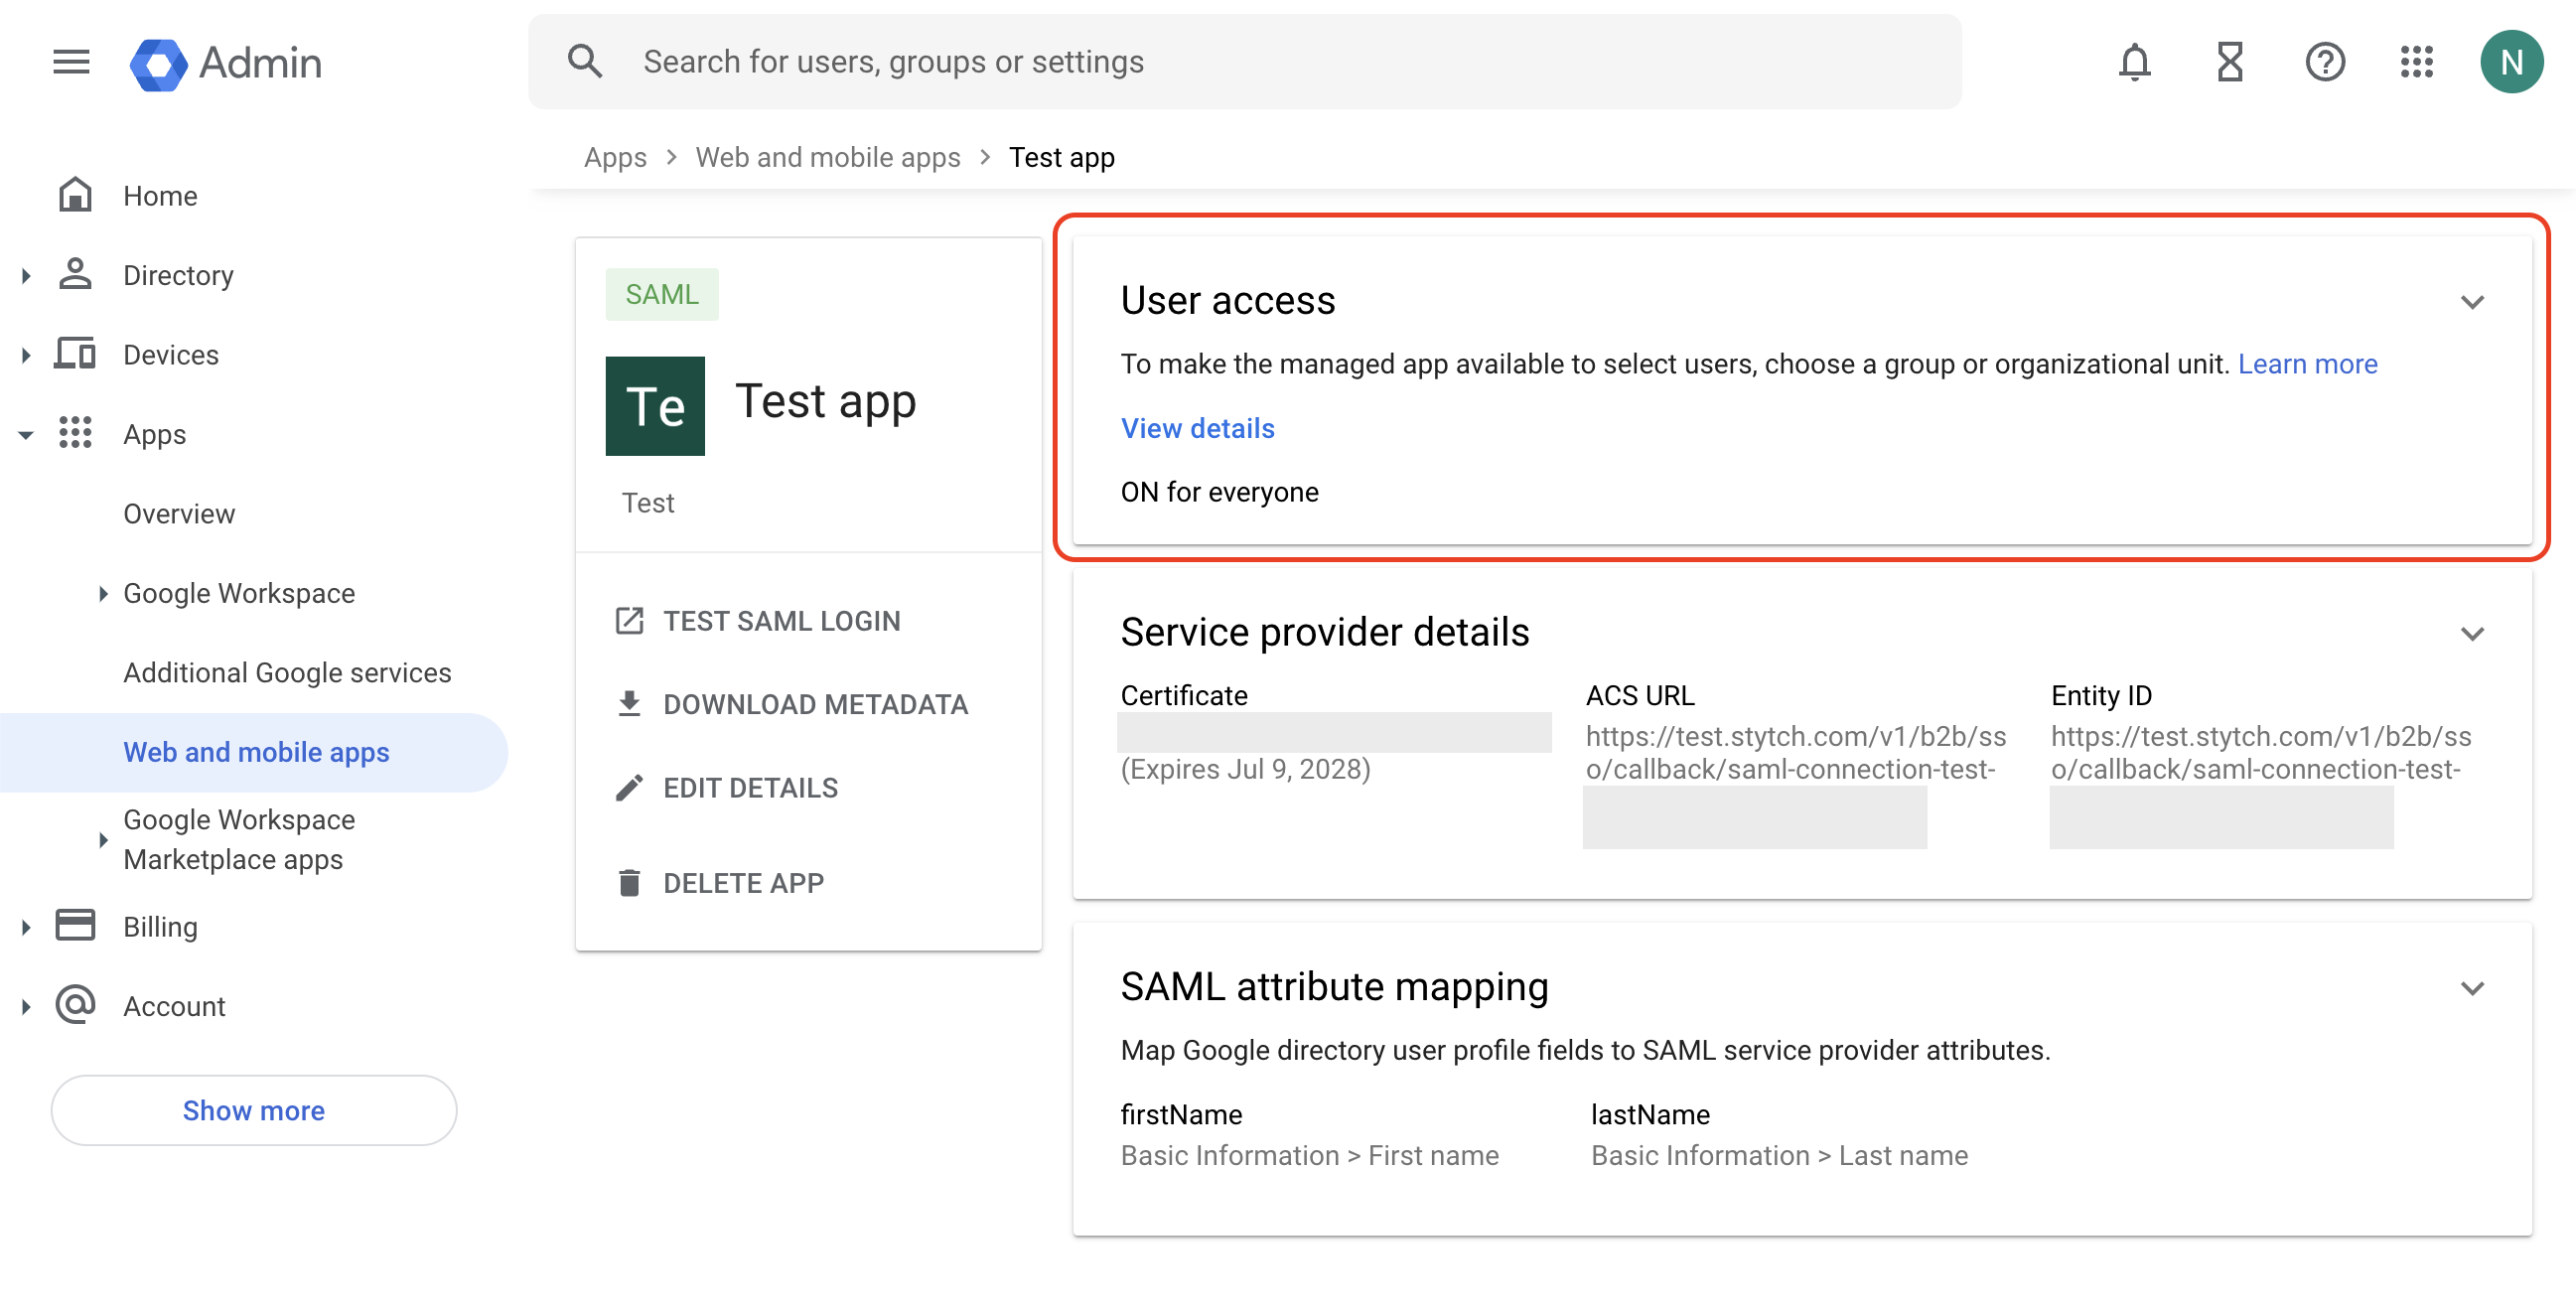
Copy the following information under Option 2 and input into your Stytch SSO Connection by clicking “configure”:
Enter the name of your application and (optionally) a description and your application’s logo. Click Continue.
Copy the following information under Option 2 and input into your Stytch SSO Connection by clicking “configure”:
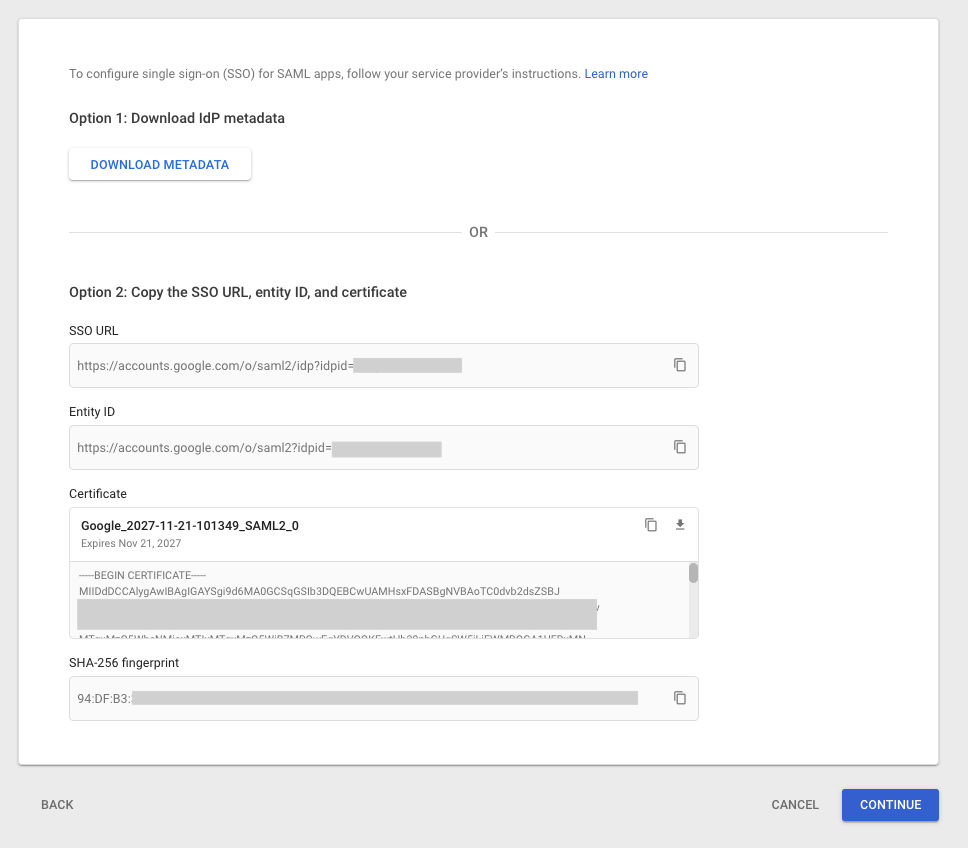
- IdP Entity ID: the Entity ID from Google
- IdP SSO URL: the SSO URL from Google
- X.509 certificate: the Certificate from Google
- Attribute Mapping: input the below JSON:
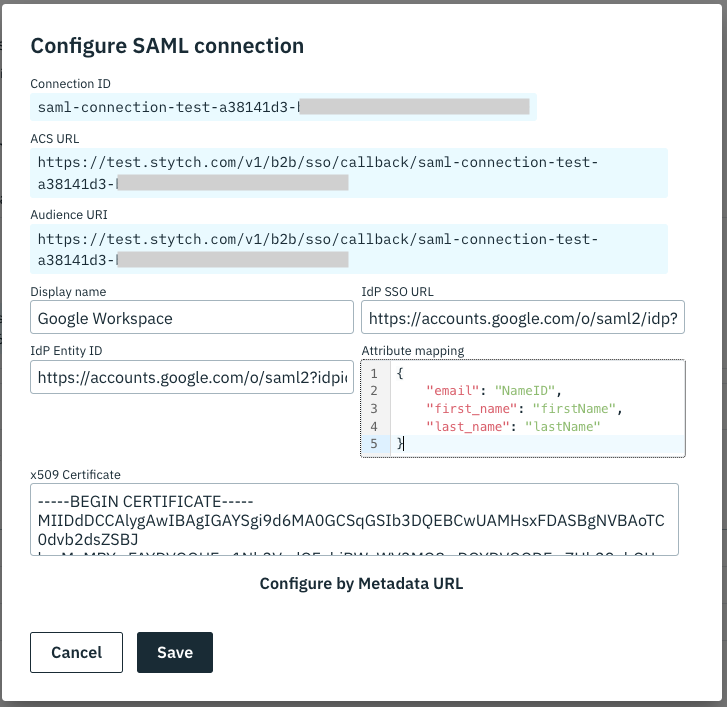
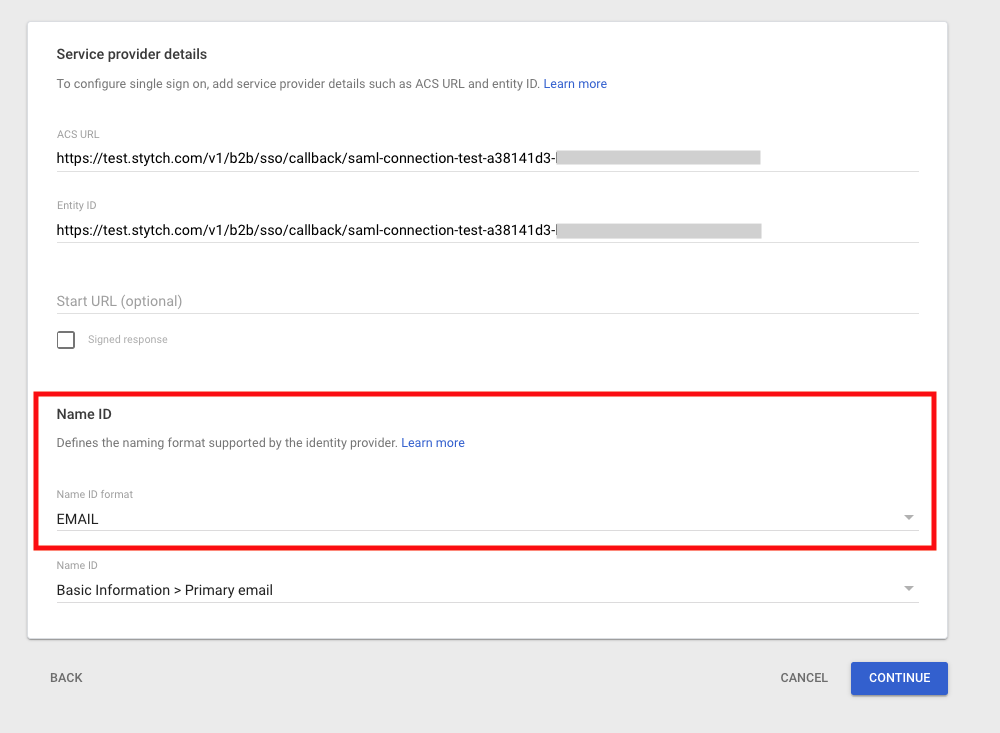
- ACS URL:
acs_urlfrom the Stytch SSO Connection - Entity ID:
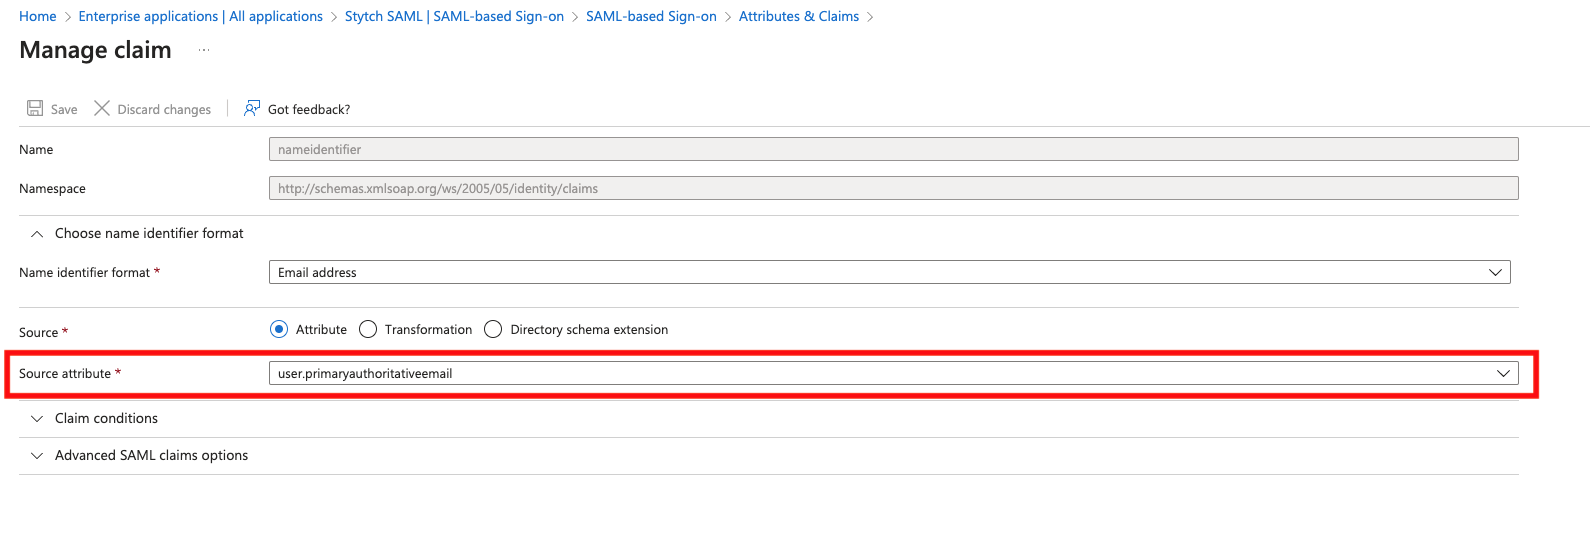
audience_urifrom the Stytch SSO Connection - Name ID format: EMAIL
- Name ID: Basic Information > Primary email
- Google Directory attributes: First name; App attributes:
firstName - Google Directory attributes: Last name; App attributes:
lastName
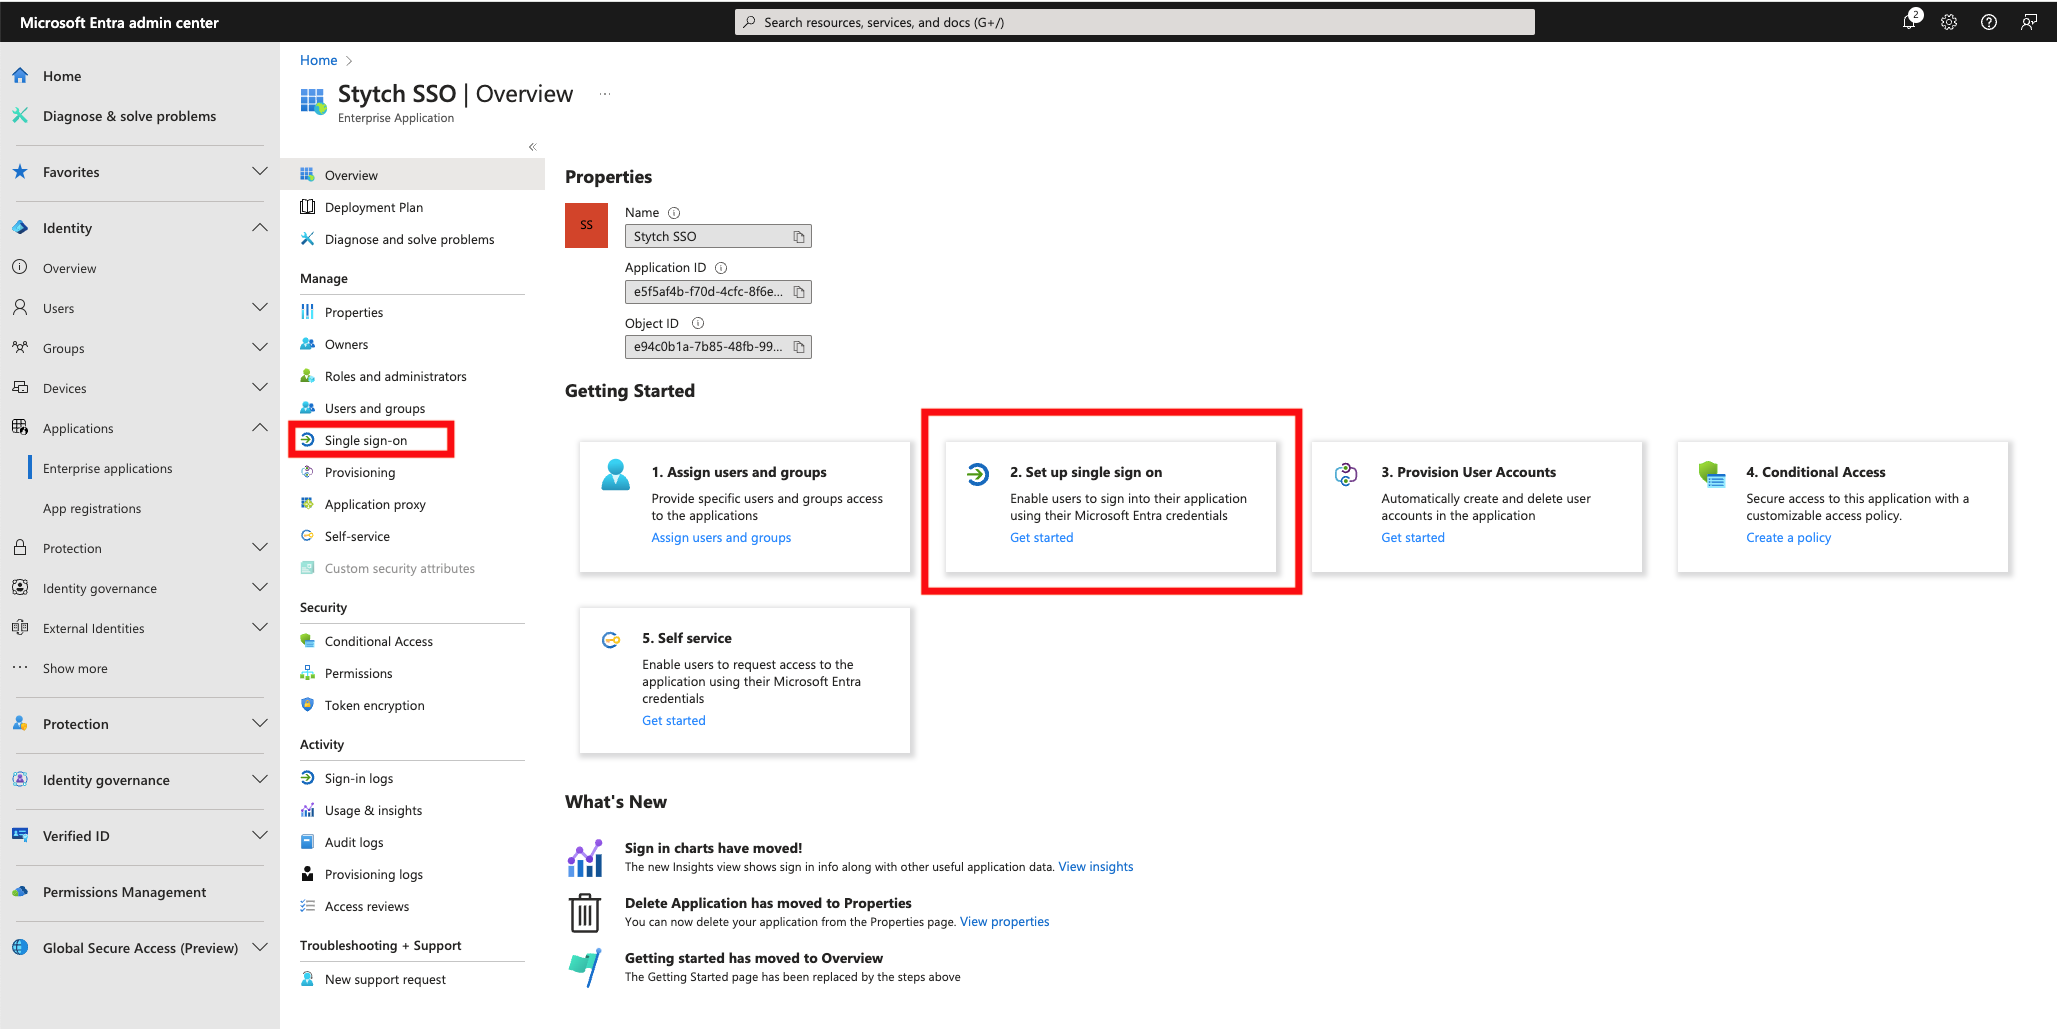
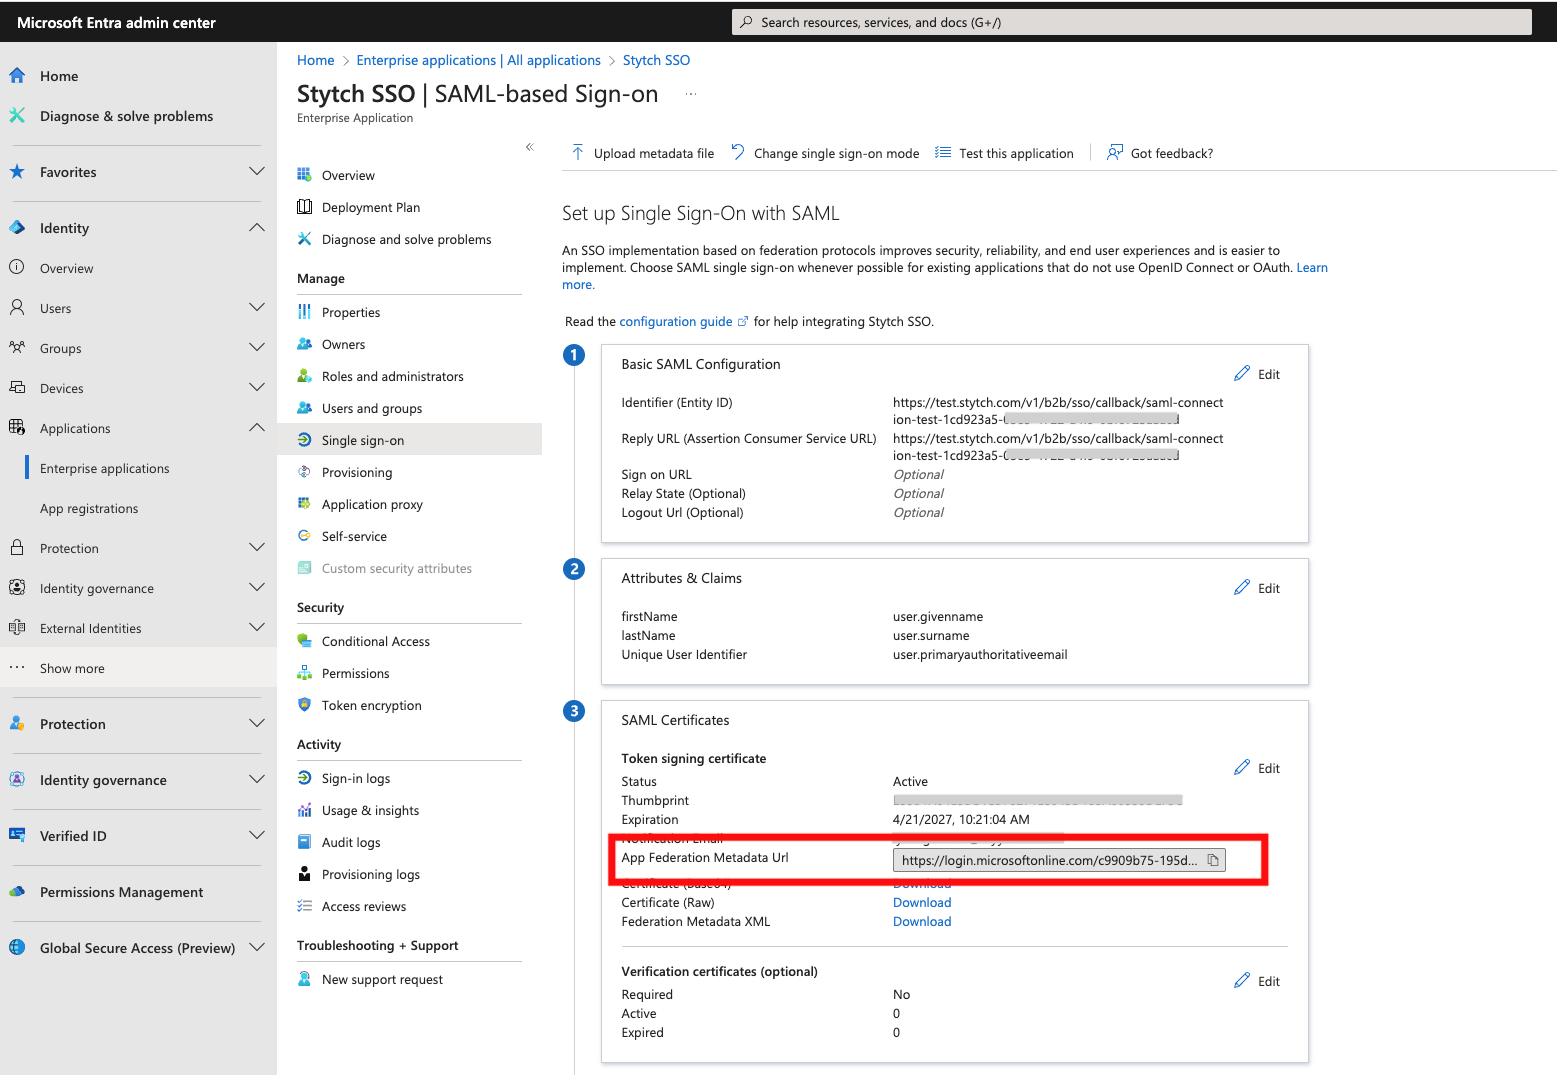
Microsoft Entra SAML
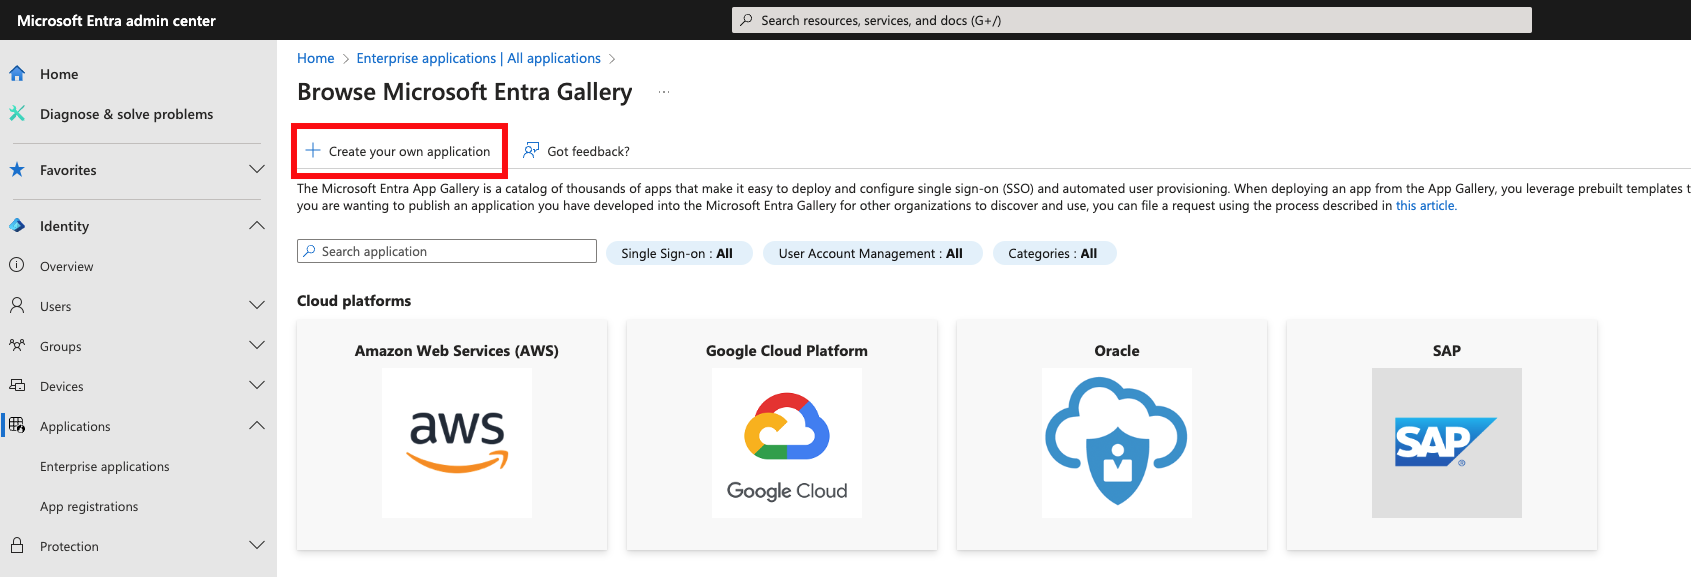
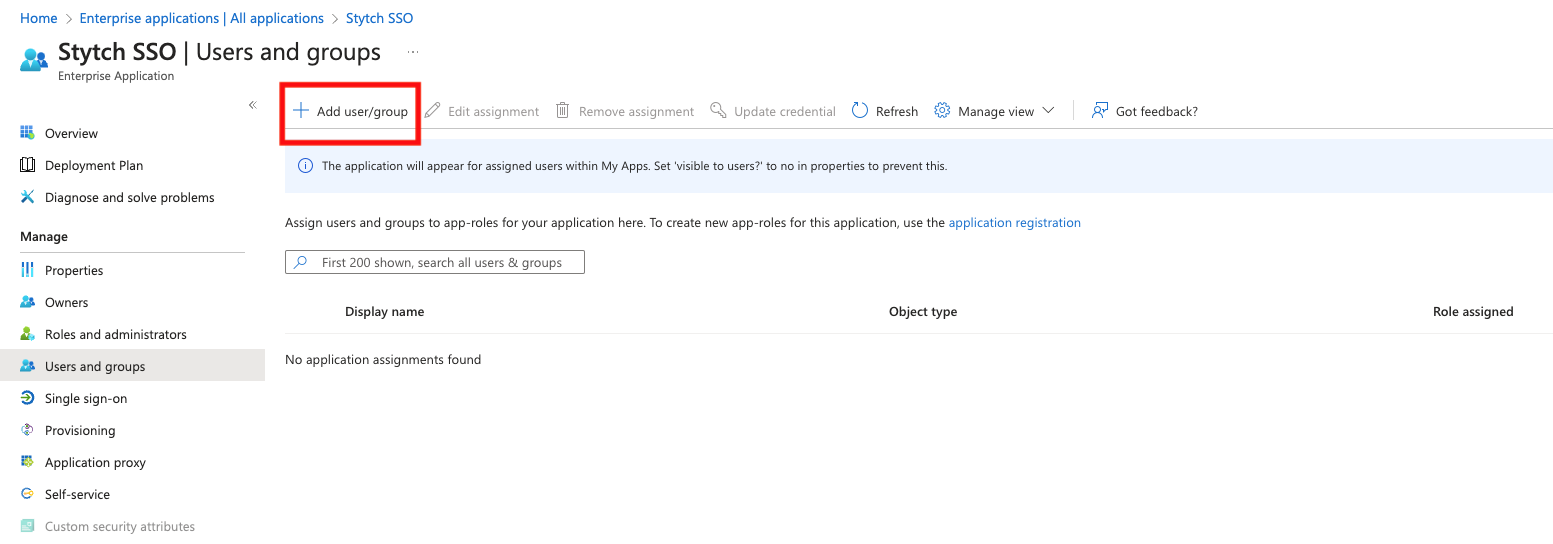
Log into Microsoft Entra Admin Center, navigate to Enterprise applications and select to create a new application.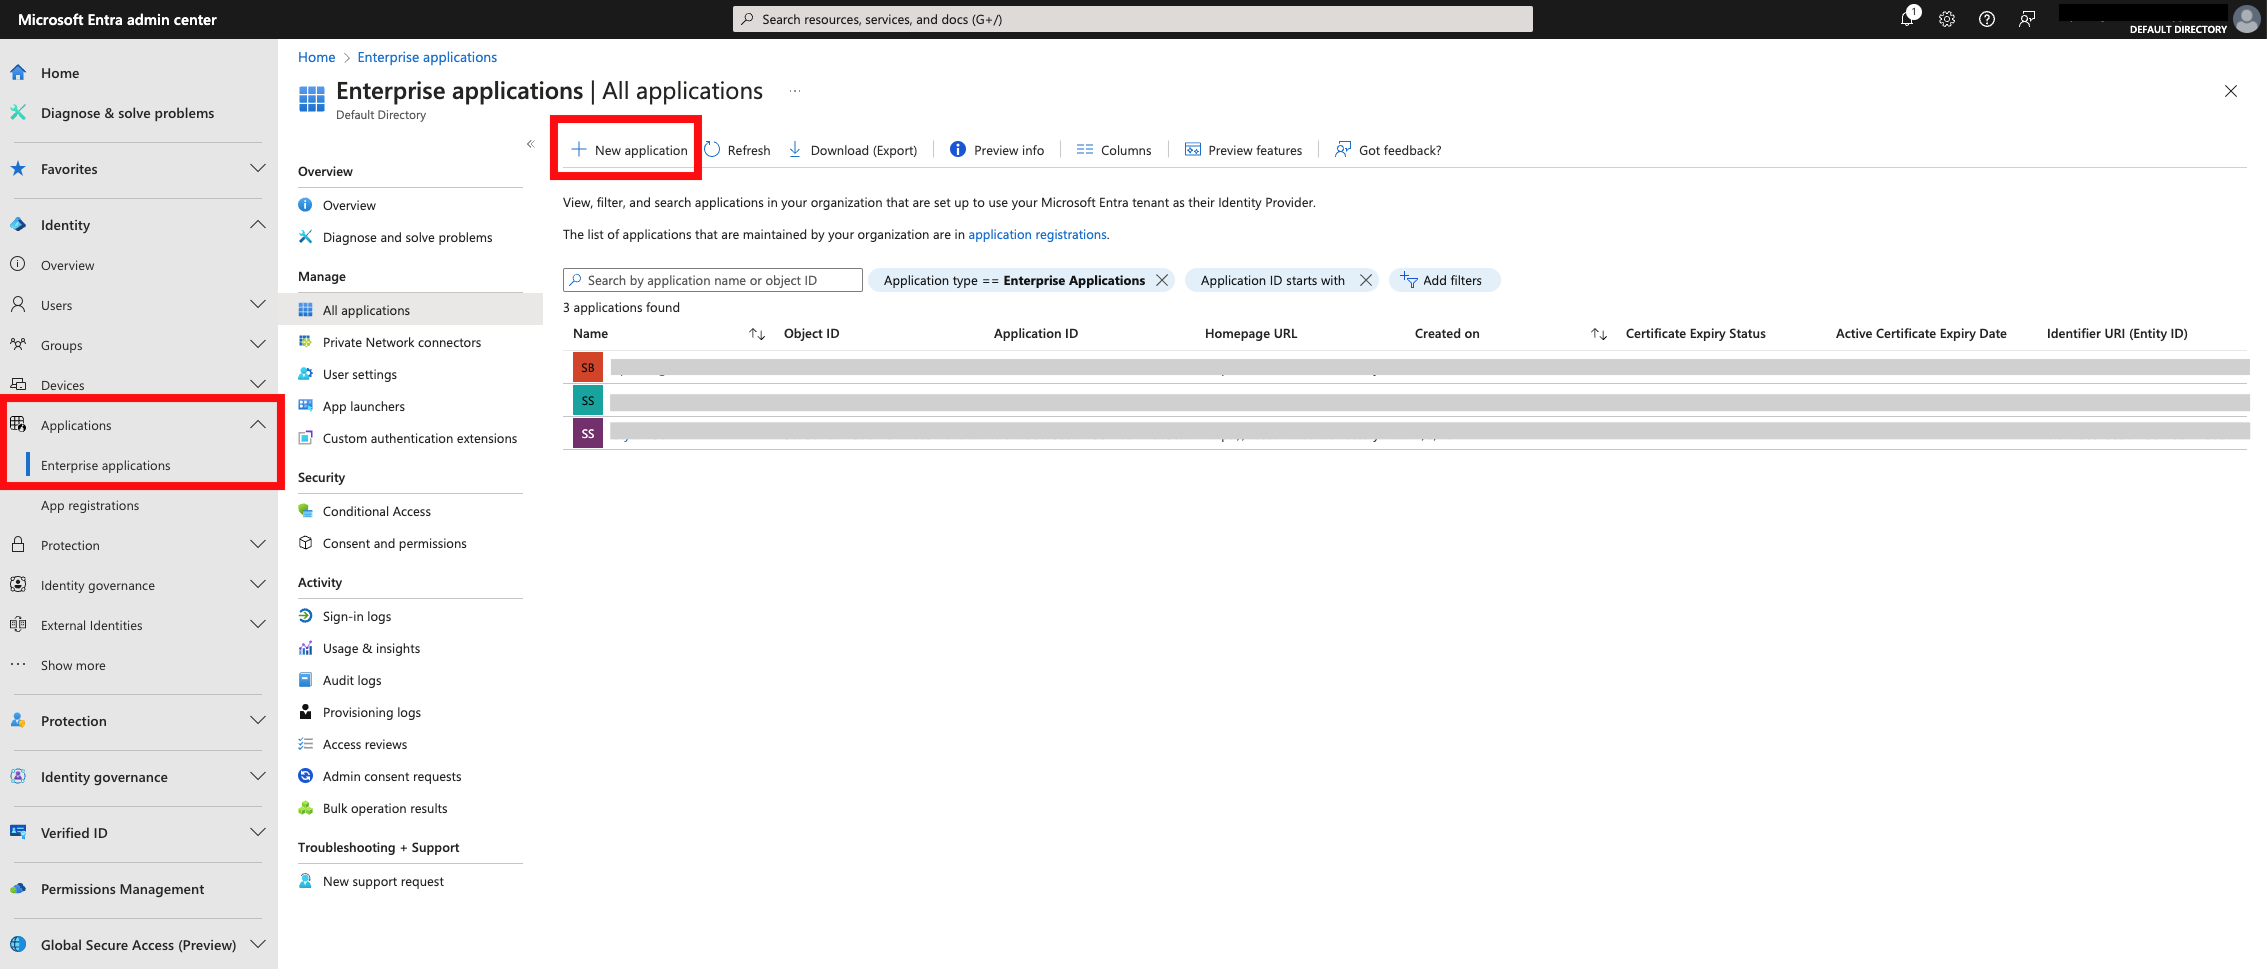
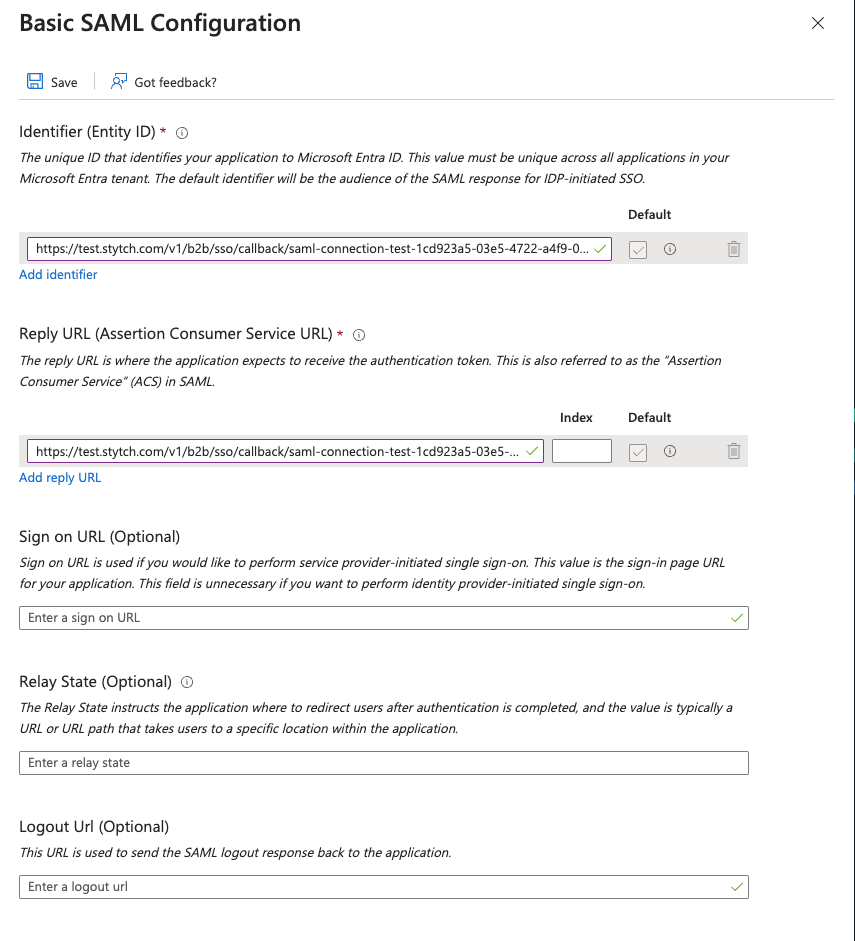
- Identifier (Entity ID): the Audience URI from your Stytch SSO Connection
- Reply URL (Assertion Consumer Service URL): the ACS URL from your Stytch SSO Connection
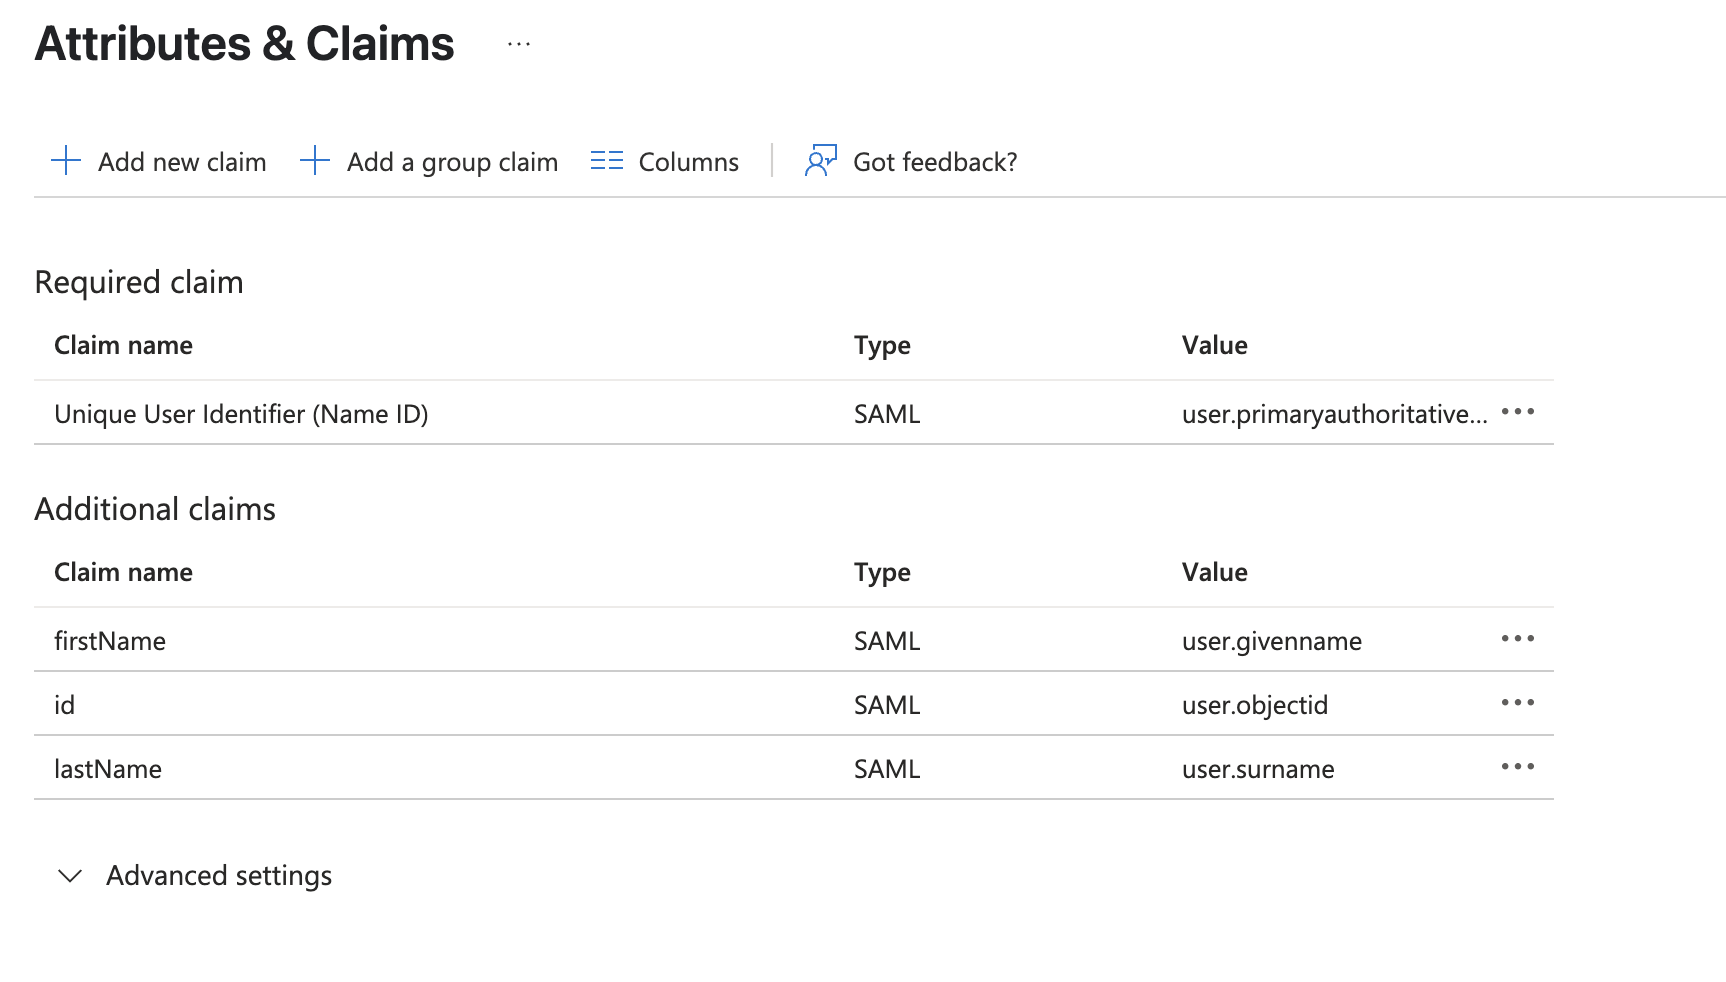
- Claim Name: firstName Value: user.givenname
- Claim Name: lastName Value: user.surname
- Claim Name: id Value: user.objectid
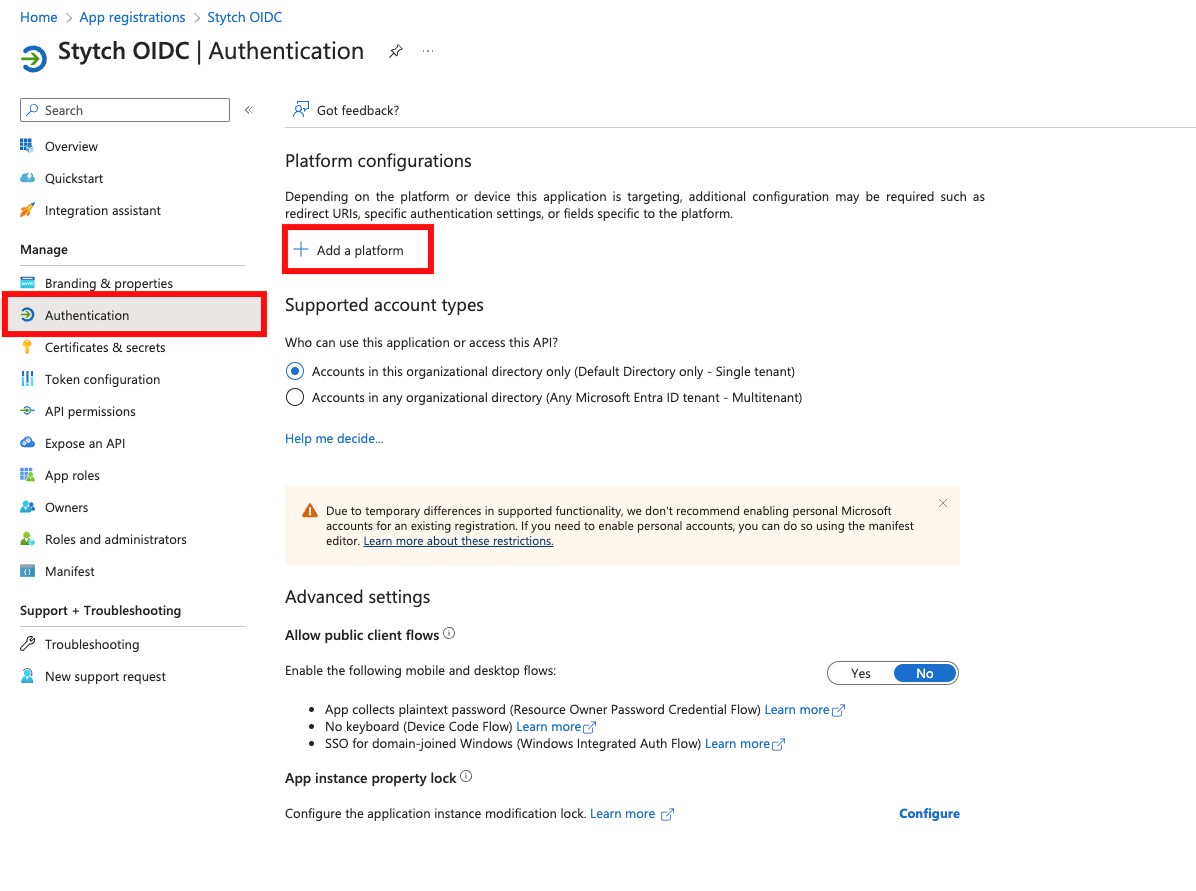
Microsoft Entra OIDC
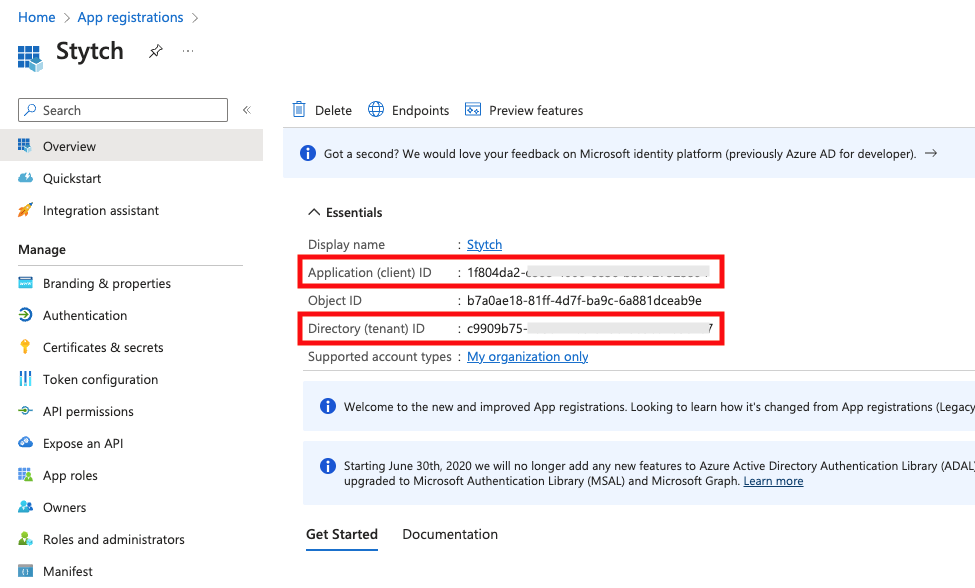
Log into Microsoft Entra Admin Center, navigate to App registrations and select to create a New registration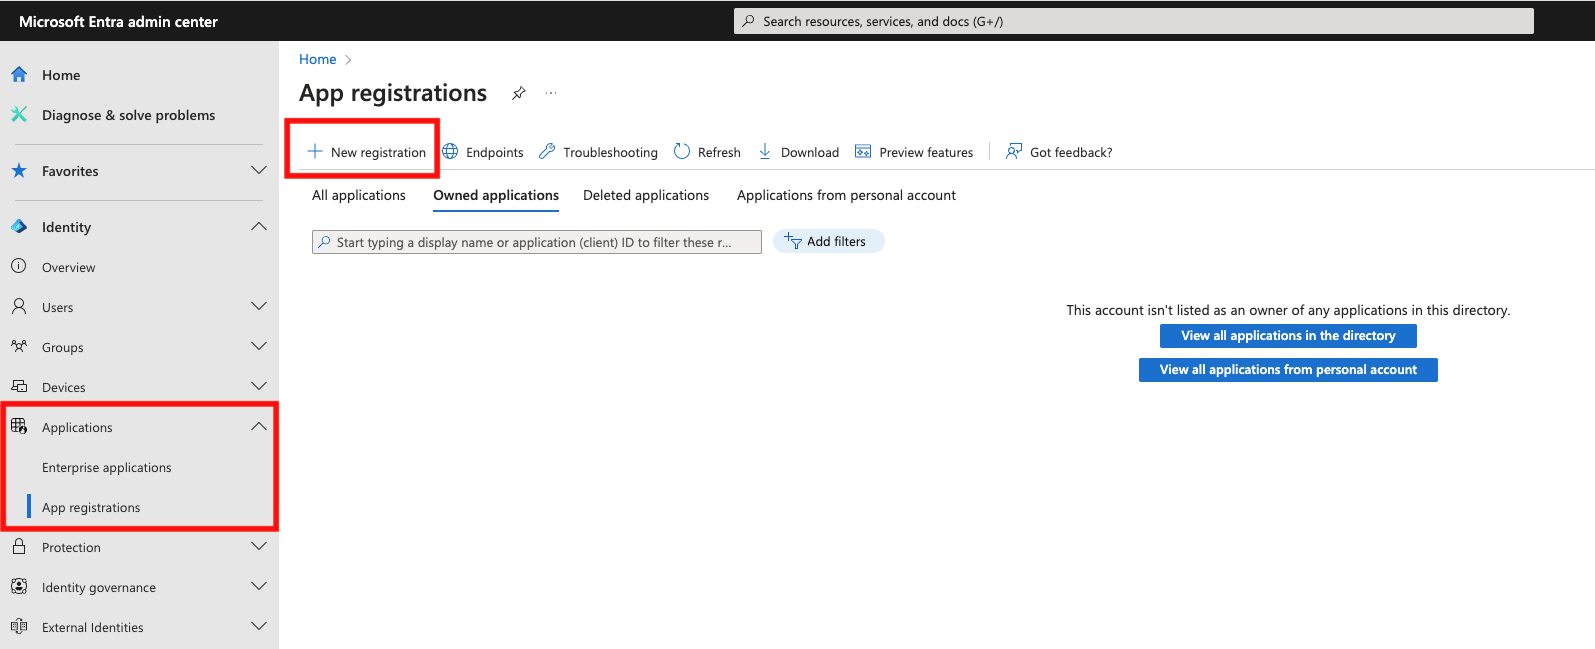
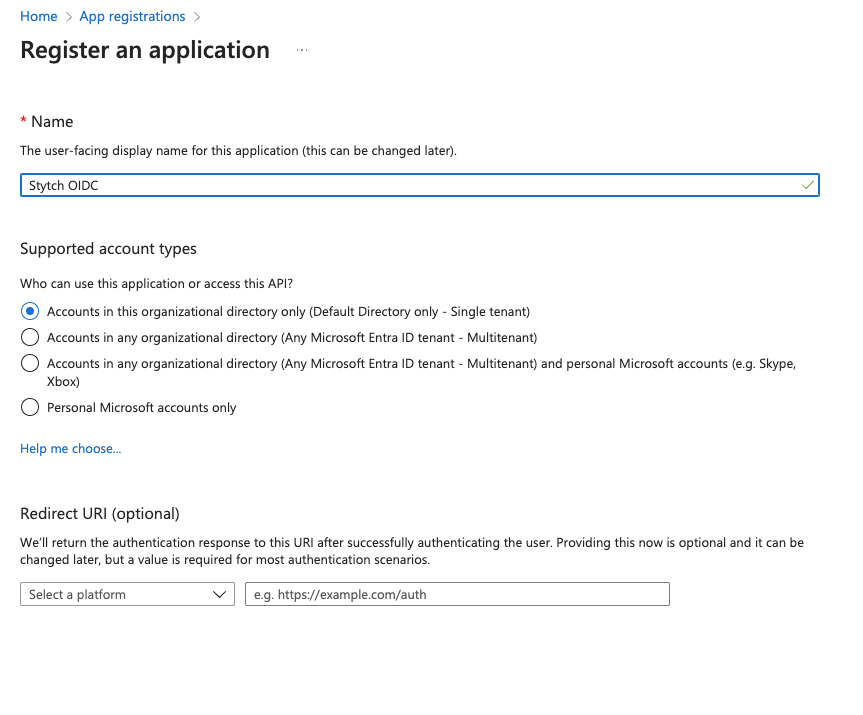
- Client ID in Stytch: set to the Application (client) ID from Entra
- Issuer in Stytch: set to URL format
https://login.microsoftonline.com/<YOUR_DIRECTORY_ID>/v2.0where<YOUR_DIRECTORY_ID>is replaced with the Directory (tenant) ID from the Overview section