/
Contact usSee pricingStart building
Node
​

    About Stytch

    Introduction
    Integration Approaches
      Full-stack overview
      Frontend (pre-built UI)
      Frontend (headless)
      Backend
    Migrations
      Migration overview
      Migrating users statically
      Migrating users dynamically
      Additional migration considerations
      Zero-downtime deployment
      Defining external IDs for users
      Migrating from Stytch Consumer to B2B
      Exporting from Stytch
    Branding
      Custom domains
      Custom email templates

    Authentication

    DFP Protected Auth
      Overview
      Setting up DFP Protected Auth
      Handling challenges
    Magic Links
    • Email Magic Links

      • Getting started with the API
        Getting started with the SDK
        Replacing your password reset flow
        Building an invite user flow
        Add magic links to an existing auth flow
        Adding PKCE to a Magic Link flow
        Magic Link redirect routing
    • Embeddable Magic Links

      • Getting started with the API
    MFA
      Overview
      Backend integration
      Frontend integration
      Remembered device flow
    Mobile Biometrics
      Overview
    M2M Authentication
      Authenticate an M2M Client
      Rotate client secrets
      Import M2M Clients from Auth0
    OAuth
    • Identity providers

      • Overview
        Provider setup
      Getting started with the API (Google)
      Add Google One Tap via the SDK
      Email address behavior
      Adding PKCE to an OAuth flow
    Connected Apps
      Overview
      Getting started with the SDK
      Getting started with the API
      Client types
      OAuth scopes
    • Integration Guides

      • Integrate with an Existing Auth System
        MCP Authorization Overview
        Integrate with MCP servers deployed on Cloudflare
        Integrate with MCP servers on Vercel
        Integrate with CLI Apps
        Integrate with AI agents
    • Resources

      • Consent Management
        Custom Domains
        Testing Integrations
    Passcodes
      Getting started with the API
      Getting started with the SDK
    • Toll fraud

      • What is SMS toll fraud?
        How you can prevent toll fraud
      Unsupported countries
    Passkeys & WebAuthn
    • Passkeys

      • Passkeys overview
        Set up Passkeys with the frontend SDK
    • WebAuthn

      • Getting started with the API
        Getting started with the SDK
    Passwords
      Getting started with the API
      Getting started with the SDK
      Password strength policy
    • Email verification

      • Overview
        Email verification before password creation
        Email verification after password creation
    Sessions
      How to use sessions
      Backend integrations
      Frontend integrations
      Custom claims
      Custom claim templates
      Session tokens vs JWTs
      How to use Stytch JWTs
    TOTP
      Getting started with the API
      Getting started with the SDK
    Web3
      Getting started with the API
      Getting started with the SDK
    Trusted Auth Tokens
      Overview
      Getting Started with External IDPs
      Getting Started with Custom Auth Factors
    Device History
      New device notifications

    RBAC

    Resources
      Overview
      Role assignment
    Integration Guides
      Start here
      Backend integration
      Headless frontend integration
      (Legacy) Implement RBAC with metadata

    3rd Party Integrations

    Planetscale
    Supabase
    Feathery
    Unit

    Testing

    E2E testing
    Sandbox values
Get support on SlackVisit our developer forum

Contact us

Consumer Authentication

/

Guides

/

About Stytch

/

Branding

/

Custom email templates

Custom email templates

As part of Stytch's Full email customization and Stytch brand removal add-on, you can set up your own email templates for any authentication flows that involve sending an email to the user. You can fully customize the subject line, email body HTML, and sender details of the templates.

Setting up custom email templates

Complete the following steps to set up and use a custom email template in your Stytch requests.

1
Enable the Full email customization and Stytch brand removal add-on

Our Full email customization and Stytch brand removal add-on is required in order to use custom email templates. You can enable this add-on in the Optional Add-Ons section of the Billing page in the Stytch Dashboard.

Enable the Stytch branding add-on

2
Set up a custom email domain

Next, you'll need to set up a custom email domain that you can use to send your Stytch emails from. You can set up a custom email domain by following the setup steps in the Custom email domains section of the Custom Domains tab in the Stytch Dashboard.

Make sure that you set up a Custom email domain, rather than a Custom auth domain, which serves a different purpose.

Note that in order to protect our domain reputation, it is not possible to send custom email templates from the default Stytch sender domains. Check out this section of our Custom domains guide for additional information.

3
Create a new custom email template

Now that your custom email domain is set up, you can create a custom email template by navigating to the Branding tab in the Stytch Dashboard and clicking Create new template.

In the Template type dropdown, select Custom HTML template.
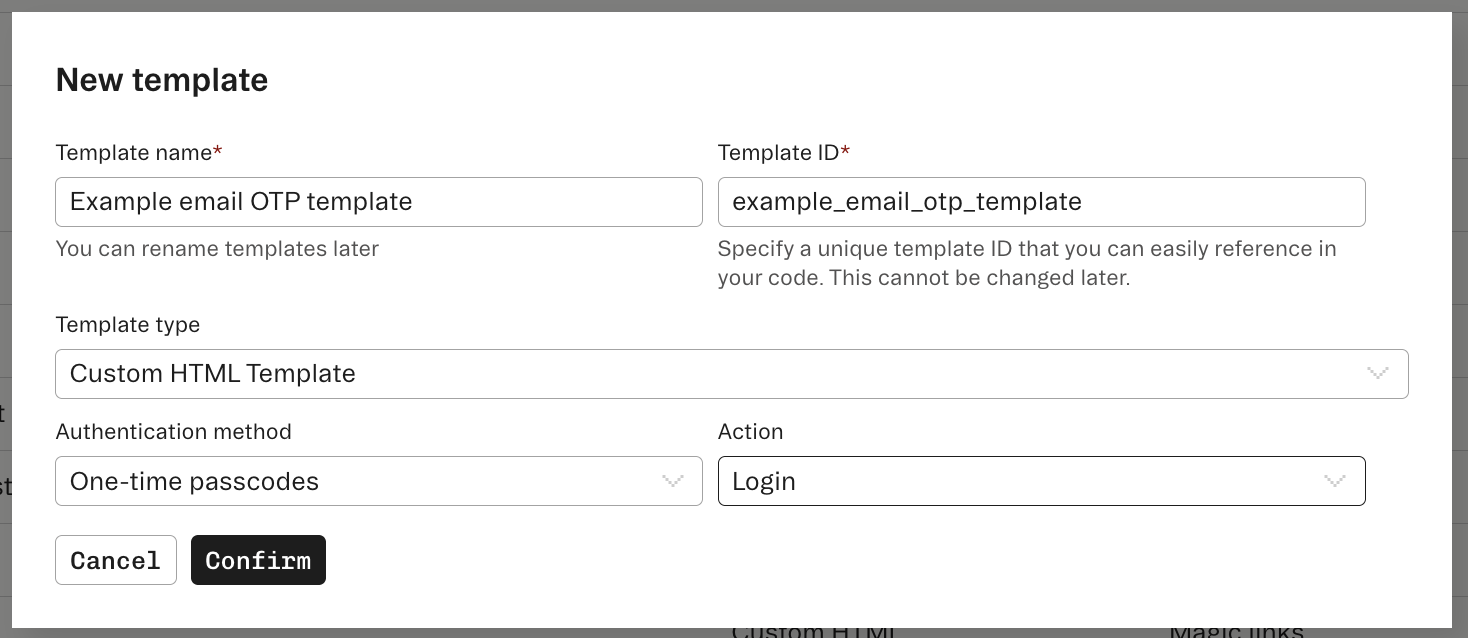
Create a new custom HTML email template

You can now use the email template editor to edit the email subject line, the email body HTML, and the sender information such as the sender address, sender display name, and the reply-to address.

You can also insert variables such as the magic_link_url, otp_code, user_email, etc. into your template. Note that the available variables depend on the email template type and specific authentication flow, and not all variables are available in all contexts.

Alternatively, you can use our Programmatic Workspace Actions endpoints or our Terraform provider to create and manage your custom email templates.

4
Use your custom email template in Stytch requests

Once you've finished creating your custom email template, you can instruct Stytch to use it by specifying its template_id in your authentication requests. Stytch endpoints that trigger an email include parameters like login_template_id, signup_template_id, and reset_password_template_id where you can specify the template_id of your custom email template.

Here's an example Send OTP by email cURL request that specifies a custom email template via the login_template_id parameter:

curl --request POST \
  --url https://test.stytch.com/v1/otps/email/send \
  -u 'PROJECT_ID:SECRET' \
  -H 'Content-Type: application/json' \
  -d '{
    "email": "email@example.com",
    "login_template_id": "yourCustomEmailTemplateId"
  }'

and the equivalent request made with our frontend JavaScript SDK:

stytchClient.otps.email.send('email@example.com', {
  login_template_id: 'yourCustomEmailTemplateId',
});

You can also set a custom email template as the default template for its specific template type. When an email template is set as the default, we'll send that template to the user if you don't specify a template_id in your request.

Setting up custom email templates

1.

Enable the Full email customization and Stytch brand removal add-on

2.

Set up a custom email domain

3.

Create a new custom email template

4.

Use your custom email template in Stytch requests